Your Cart is currently empty!
Product update
Coupon
add
Coupon code invalid! Please re-enter!
AJAX loader
You are here: HomeBlogItems filtered by date: October 2012

Items filtered by date: October 2012

VERSION 1.1 - Released on 24-Oct-2012

# Fixed issue on version 1.0
^ Updated K2 Detail: attach file, social button
^ Optimize CSS, JS

VERSION 1.0
- Released on 20-Aug-2012

View Demo

Read More
VERSION 1.1 - Released on 24-Oct-2012

# Fixed issue on version 1.0
^ Updated K2 Detail: attach file, social button
^ Optimize CSS, JS

VERSION 1.0
- Released on 20-Sep-2012

View Demo

Read More
VERSION 1.1 - Released on 11-Oct-2012

# Fixed issue on version 1.0
^ Updated K2 Detail: attach file, social button
^ Optimize CSS, JS

VERSION 1.0
- Released on 5-Oct-2012

View Demo

Read More
First of all, make sure that you downloaded the newest version of this module. When you buy the module the first time, you will have the latest version.
After the first release, we will update this module regularly, then check lastest version when informed.
Please follow this documentation to use this module, applied for version 2.5 and later.

REQUIREMENTS

- Joomla! v1.7.x or Joomla! 2.5.x latest stable version is highly recommended.

- Zoo component, with Page and Blog application.

INSTALLATION

1. Installation process for this module happens in administrator of Joomla! as following:
  • In your Administrator page, go to Extensions -> Extension Manager
    In this page, click Choose File, select module package (Zip file; please UNZIP first if this is indicated in the file name)
  • Then click Upload & Install

  • Please wait for module being installed, usually within several seconds!
  • Now go to Extensions -> Module Manager, click Select Type boxand choose SJ Zoo Mega Items.
  • Then click one instance of the module listed below (with this module, there is only one instance, but not for other module).
  • You can change parameters as the SETTINGS part hereafter.
2. Please preview module with layout 1 of SJ Zoo Mega Items for example:

  • Category block: Appearance here is affected by Category Options
  • Item block: You set options with Items part.
  • Image and Links can be shown OR not

SETTINGS

Let's examine all the detail settings of SJ Zoo Mega Items on Joomla 2.5.x

The parameters are divided up into the following areas:
  • General Options
  • Category Options
  • Item Options
  • Image Options
  • Advanced Options
GENERAL OPTIONS
  • Module Class Suffix - Please refer here
  • Select a layout - Allow you to choose 1 of 3 themes available
  • # total columns of module - Allow you to set 1 to 6 columns
CATEGORY OPTIONS
  • Zoo Application - Allow you to choose Page or Blog application
  • Zoo Category - Choose the source of content that is used with this module
  • Subcategories - Allow you to choose if sub-categories (of parent categories above) also shownOR not
  • Title Max Length - Allow to set the length of article title
  • Category link target - Set target for links clicked:
    • Sample window
    • New window
    • Popup
  • # total columns of categories - Allow you to set 1 to 6 columns
ITEM OPTIONS
  • Source Filter - Allow to show items that meet some factors:
    • All Items: Show all featured AND not-featured items as well
    • None Featured: Only items that are not featured are shown
    • Only Featured: Only items that are featured are shown
  • Sort Order By - Allow to sort the order of items by:
    • Recently Added
    • Most Viewed
    • Recently Modified
    • Ordering
    • Title
    • Random
  • Limitation - Allow to set number of items visible
  • Title display - Show the title of article OR not
  • Title linkable - Allow you to set links to article from tilte OR not
  • Title max Length - Allow to set the length of article title
  • Description display - Allow you to show article description OR not
  • Description maxlength- Allow to set the length of article description
  • Strip HTML Tags- Strip HTML tags in description or keep them
  • Item readmore link - Show the Readmore OR not
  • Item readmore text - Allow you to set text for Readmore link
  • Show all items - Show the View all link OR not
  • Show all text - Allow you to set text for View all link
  • Item link target - Set target for links clicked:
    • Sample window
    • New window
    • Popup
IMAGE OPTIONS
  • Image Display - Allow you to show image OR not
  • Image linkable - Allow you to set links to article from images OR not
  • Image Width - Allow you to set the width of the main image
  • Image Height - Allow you to set the height of the main image
  • Image Background - Allow to set the color of image background
  • Image function - Allow you to choose the mode of image resizing (see illustrations by hovering this text):
    • None
    • Center
    • Fill
    • Fit
    • Strech
ADVANCE OPTIONS
  • Media Elements - Allow to set which elements of HTML which images can be fetched from
  • Description Elements - Allow to set which elements of HTML which description can be fetched from
  • Custom URL - This param allows you to customize the link of each article. If you do not want to go to the detail page of article, you can change the link to another. In the textarea of Custom HTML, please use the following syntax::
    • ArticleID_1:New_URL_1
    • ArticleID_2:New_URL_2
    • ...
      With:
    • ArticleID_1, ArticleID_2,... are ids of items. You can see the Id column in Article Manager page in VirtueMart Component.
    • New_URL_1, New_URL_2, New_URL_3 are links which you want to replace the orginal links. Format: https://www.smartaddons.com
  • Pre Text - The content to show at the top of module
  • Post Text - The content to show at the end of module
  • Caching
    • Use Global: Turn on caching
    • No Caching: Turn off caching
  • Cache Times - The time to cache


Contents

The guide will help you install SJ Joomla3 and extensions included in this template step by step.
If you want to install the template exactly like our demo (same data), you should install the Quickstart Package.
  • Important Notes
  • 1. Download Template and Extensions
  • 2. SJ Joomla3 Template - Installation and Configuration
  • 3. Imperative Plugins - Installation and Configuration
  • 4. Other Extensions - Installation and Configuration

Important Notes

Requirement:
  • Joomla! 3.0
  • Some SJ Extensions (see part 3-Core Plugins and 4-Other Extensions)

1. Download Template and Extensions

Used for everyone downloading this Free Joomla Template

From SmartAddons homepage, navigate into Free Joomla Template

Click SJ Joomla3 then download packages as you want (guide here we will use template and Yt plugin but Quickstart)

2. SJ Joomla3 -Installation and Configuration

2.1 Installation

  • Log in Administrator of your Joomla! 3, go to Extensions -> Extension Manager
    On this page, click Choose File button, select our template file you have downloaded then click Upload & Install


  • Set SJ Joomla3 as default template

2.2 Configuration

Now, Click sj_joomla3 - Default to access SJ Joomla3 Options tab.
The parameters of SJ Joomla3 Template are divided into the following groups:
  • Global Settings
  • Site Styles
  • Typography
  • Layout Settings
  • Top Menu Settings
  • Content Component
  • Optimize Css, Js
  • Advanced Options
alt

GLOBAL SETTINGS

  • Generator tag - Generate tag for your template
  • Hide Main Content Block - Allow to hide Content Component on Homepage
  • Logo Type - Choose your logo type: image OR text
  • Override logo image - Set logo image of Cpanel by inserting its link/path here
  • Logo Text - Set text for Text type of logo
  • Slogan - Set your Website slogan here
alt

SITE STYLES

  • Default Style - Allow to choose a style from 6 available ones
  • Body Background Color - Allow to choose color for background of page body
  • Link Color - Allow to choose color for all links
  • Text Color - Allow to choose color for all texts
  • Header Background Color - Allow to choose color for background of header
  • Class Header Background Image - Allow to set CSS class used with image of header
  • Footer Background Color - Allow to choose color for background of footer
  • Class Footer Background Image - Allow to set CSS class used with image of footer
alt

TYPOGRAPHY

  • Default Font Size - Allow to choose default font size
  • Default Font-Family - Allow to choose a font-family from 13 available ones. The default one is Arial
  • Google Font-Family - Allow to choose a google font-family used for html tags which are in Affected Selectors parameter below
  • Affected Selectors - Tag names will be applied with google font, comma seperated
alt

LAYOUT SETTINGS

  • Select Layout - Allow to choose XML layout: right-main-left, main-left ....
  • Overwrite Layouts - Used when you want to use another layout for a menu. Syntax:
    • Itemid1:Layout_Name1 | Itemid2:Layout_Name2 | ...
    With:
    • Itemid1, Itemid2...: Id of Menus. You can see these in Menu Item Manager
    • Layout_Name1, Layout_Name2...: The name of layout. You can see these in templates/{this_template_name}/layouts folder. NOTE: remove .xml extension
alt

TOP MENU SETTINGS

  • Default Type Menu - Allow to choose default menu type shown with template, this list is gotten from Menu Manager
  • Default Menu Style - We currently support CSS style for Menus
  • Start Level - Set level of menu to start rendering the menu
  • End Level - Set level of menu to stop rendering the menu
alt

CONTENT COMPONENT

  • Apply for Blog View - Allow to show the Content block at blog pages OR not
  • Apply for Frontpage view - Allow to show at Frontpage view OR not
  • Leading Images Width - Set width of images of Leading Articles
  • Leading Images Height - Set height of images of Leading Articles
  • Intro Images Width - Set width of images of Intro Articles
  • Intro Images Height - Set height of images of Intro Articles
  • Thumbnail Background Color - Set color background for thumbnail images
  • Thumbnail Mode - Set thumbnail mode:
    • Fill
    • Fit
    • Stretch
    • Center
alt

OPTIMIZE CSS, JS

  • Optimize Merge File - Choose Yes to optimize all CSS and JS Files which are used in your website
  • Optimize CSS - Choose Yes to optimize only CSS files
  • Optimize CSS Exclude - CSS files which are not optimized, comma separated
  • Optimize JS - Choose Yes to optimize only JS files
  • Optimize JS Exclude - JS files which are not optimized, comma separated
  • Optimize Folder - A specific folder with Css/Js files need to be optimized
alt

ADVANCED OPTIONS

  • Show Back to Top - Allow you to show Back to Top button OR not
  • Show Cpanel - Allow you to show YT Framework Control panel OR not
  • Include LazyLoad plugin - Enable/disable LazyLoad
  • Enable jquery - Enable/disable jquery
  • Enable Google Analytics - Enable/disable Google Analytics
  • Enter your Google Analytics tracking ID - Copy and paste your Google Analytics tracking ID here

3. Imperative Plugins-Installation and Configuration

You need to install Yt Plugin to supports Yt Framework for compressing CSS/JS/HTML when optimizing code.

3.1 Installation

  • STEP 1: In Administrator on your Joomla! 3, go to Extensions -> Extension Manager
    On this page, click Choose File button, choose YT plugin file then click Upload & Install


  • STEP 2:Now, go to Enable Yt Plugin (for Yt Framework) in Extension/Plug-in Manager

3.2 Configuration of Yt Plugin (for Yt Framework)

  • Yt Plugin supports Optimizing CSS/ JS (part 6 of Configuration above)
  • After installing Yt Plugin, go to Extension -> Plug-in Manager and choose to configureYt Plugin:
  • TO YT PLUGIN
  • Configure Yt Pluginto show SJ Help with Report Bugs, Template Tutorials and Framework Tutorials
  • SHOWING SJ HELP

    4. Other Extensions - Installation and Configuration

    4.1 Install

    4.1.1 List of extensions used in SJ Joomla3 demo

    List of modules/plugins/components which are used in SJ Joomla3 here:

    4.2 Configuration

    Navigate into Extensions -> Module (or Plug-in) Manager then choose the module or plug-in you want to configure. The following example is choosing a module from Module Manager:

    By this screenshot, you will see how module is placed in the default layout:

    This guide will help you place essential menus, modules (one example each type) and other blocks as homepage of demo Website:

    4.2.1 Menu - Features

  • Menu Item Type
  • Menu Item Type: Single Article
  • Frontend - Backend
  • FRONTEND
    BACKEND - TREE OF MENUS

    4.2.2 Menu - Blog

  • Menu Item Type
  • Menu Item Type: Category Blog

    4.2.3 Menu - Joomla! Pages

  • Menu Item Type
  • Menu Item Type: Single Article
  • Frontend - Backend
  • FRONTEND
    BACKEND - TREE OF MENUS

    4.2.4 Menu - Contact

  • Menu Item Type
  • Menu Item Type: Single Contact

    4.2.5 Search Bar

  • Module Position - Module Suffix
  • Position: position-0
    Suffix: Not Used
  • Frontend (position-0 of demo layout above) - Backend
  • 4.2.6 Slideshow - SJ Carousel

  • Module Position - Module Suffix
  • Position: slideshow
    Suffix: blank
  • Frontend (slideshow of demo layout above) - Backend
  • 4.2.7 Custom HTML

    There are some positions that used Custom HTML Module. Here we will configure an example. Let take the "Web Design", other will be the same.

  • Module Position - Module Suffix
  • Position: position-a
    Suffix: border1
  • Frontend (position-a of demo layout above) - Backend
  • 4.2.8 Main Menu

    There are some positions that used Menu Module. Here we will configure an example. Let take the Main menu, other will be the same.

  • Module Position - Module Suffix
  • Position: position-6 (first)
    Suffix: Not Used
  • Frontend (position-6 of demo layout above) - Backend
  • 4.2.9 Statistics Module

  • Module Position - Module Suffix
  • Position: position-6 (third)
    Suffix: _menu
  • Frontend (position-6 of demo layout above) - Backend
  • 4.2.10 Banners Module

  • Module Position - Module Suffix
  • Position: position-6 (forth)
    Suffix: clear hidden-max676
  • Frontend (position-6 of demo layout above) - Backend
  • 4.2.11 Who's online Module

  • Module Position - Module Suffix
  • Position: position-6 (fifth)
    Suffix: style-icon mouse
  • Frontend (position-6 of demo layout above) - Backend
  • 4.2.12 Latest News - SJ Basic News

    There are some positions that used SJ Basic News Module. Here we will configure an example. Let take the Main menu, other will be the same only minor different in configuration.

  • Module Position - Module Suffix
  • Position: position-7 (first)
    Suffix: bg1 latestnews
  • Frontend - Backend
  • 4.2.13 Login Module

  • Module Position - Module Suffix
  • Position: position-7 (third)
    Suffix: Not Used
  • Frontend - Backend
  • 4.2.14 Footer

    Now there are not modules placed in this position. You can try some ones.


    That's homepage. For other advanced and customized configurations, please submit ticket OR purchase our installation services.

    Contents

    The guide will help you install SJ FashionStore and extensions included in this template step by step.
    If you want to install the template exactly like our demo (same data), you should purchase and install the Quickstart Package.
    • Important Notes
    • 1. Download Template and Extensions
    • 2. SJ FashionStore Template - Installation and Configuration
    • 3. Imperative Plugins - Installation and Configuration
    • 4. Other Extensions - Installation and Configuration

    Important Notes

    Requirement:
    • Joomla! 2.5
    • VM component (customized and included in Quickstart)
    • Some premium SJ Extensions (see part 3-Core Plugins and 4-Other Extensions)

    1. Download Template and Extensions

    1.1 Used for members of JTC - Joomla Template Club

    STEP 1: Login at SmartAddons.com

    STEP 2: Go to Download -> Joomla Templates Club (JTC)

    STEP 3: Under Premium Joomla Templates, click SJ Fashion Store Responsive to download

    STEP 4: Under SJ FashionStore Responsive -> Download packages as you want

    1.2 Used for single product purchased via e-cart

    Receive Donwload-Info email -> Download packages as you want

    2. SJ FashionStore -Installation and Configuration

    2.1 Installation

    • Log in Administrator of Joomla! v2.5.x, go to Extensions -> Extension Manager
      On this page, click Choose File button, select our template file you have downloaded then click Upload & Install


    • Set SJ FashionStore as default template

    2.2 Configuration

    The parameters of SJ FashionStore Template are divided into the following groups:
    • Global Settings
    • Layout Settings
    • Site Styles
    • Typography
    • Top Menu Settings
    • Content Component
    • Optimize CSS,JS
    • Advanced Options
    alt

    GLOBAL SETTINGS

    • Generator tag - Generate tag for your template
    • Hide Main Content Block - Allow to hide Content Component on Homepage
    • Direction - Choose direction of language: RTL/LTR
    • Logo Type - Choose your logo type: image OR text
    • Logo Text - Set text for Text type of logo
    • Slogan - Set your Website slogan here
    alt

    LAYOUT SETTINGS

    • Select Layout - Allow to set default layout xml file
    • Overwrite Layouts Windows - Used with window mode, when you want to use another layout for a menu. Syntax:
      • Itemid1:Layout_Name1 | Itemid2:Layout_Name2 | ...
      With:
      • Itemid1, Itemid2...: Id of Menus. You can see these in Menu Item Manager
      • Layout_Name1, Layout_Name2...: The name of layout. You can see these in templates/{this_template_name}/layouts folder. NOTE: remove .xml extension
    alt

    SITE STYLES

    • Default Style - Allow to choose a style from 6 available ones
    • Link color - Set color for link
    • Text color - Set color for text
    • Footer background color - Set color for background of footer
    • Class footer background image - Set CSS class using for image background of footer
    alt

    TYPOGRAPHY

    • Default Font Size - Allow to choose default font size
    • Default Font-Family - Allow to choose a font-family from 13 available ones. The default one is Arial
    • Google Font-Family - Allow to choose a google font-family used for html tags which are in Affected Selectors parameter below
    • Affected Selectors - Tag names will be applied with google font, comma seperated
    alt

    TOP MENU SETTINGS

    • Default Type Menu - Allow to choose default menu type shown with template, this list is gotten from Menu Manager
    • Default Menu Style - We support 4 styles for Menus
      • CSS Menu
      • Moo Menu
      • Mega Menu
      • Dropline Menu
    • Use JS for Dropline Menu - Allow to use JS effect for Dropline Menu OR not
    • Javascript Effect - Allow to select which JS Effect used with Moo Menu and Mega Menu
    • Duration Effect - Set time before showing any submenus
    • Start Level - Set level of menu to start rendering the menu
    • End Level - Set level of menu to stop rendering the menu
    alt

    CONTENT COMPONENT

    • Apply for Blog View - Allow to show the Content block at blog pages OR not
    • Apply for Frontpage view - Allow to show at Frontpage view OR not
    • Leading Images Width - Set width of images of Leading Articles
    • Leading Images Height - Set height of images of Leading Articles
    • Intro Images Width - Set width of images of Intro Articles
    • Intro Images Height - Set height of images of Intro Articles
    • Thumbnail Background Color - Set color background for thumbnail images
    • Thumbnail Mode - Set thumbnail mode:
      • Fill
      • Fit
      • Stretch
      • Center
    alt

    OPTIMIZE CSS, JS

    • Optimize Merge File - Choose Yes to optimize all CSS and JS Files which are used in your website
    • Optimize CSS - Choose Yes to optimize only CSS files
    • Optimize CSS Exclude - CSS files which are not optimized, comma separated
    • Optimize JS - Choose Yes to optimize only JS files
    • Optimize JS Exclude - JS files which are not optimized, comma separated
    • Optimize Folder - A specific folder with Css/Js files need to be optimized
    • Optimize HTML - Allow to use Optimize HTML feature
    alt

    ADVANCED OPTIONS

    • Show Back to Top - Allow you to show Back to Top button OR not
    • Show Cpanel - Allow you to show YT Framework Control panel OR not
    • Include LazyLoad plugin - Enable/disable LazyLoad
    • Enable jquery - Enable/disable jquery
    • Enable Google Analytics - Enable/disable Google Analytics
    • Enter your Google Analytics tracking ID - Copy and paste your Google Analytics tracking ID here

    3. Imperative Plugins-Installation and Configuration

    You need to install: Yt Plugin, SJ Core and Sj Content Related News plugin.
    - Yt Plugin supports Yt Framework for adding extra parameters used with Mega Menu and to compress CSS/JS/HTML when optimizing code.
    - While that, SJ Core is used for resizing images in Content Component and other extensions by us.
    - Lastly, SJ Content Related News is used for showing other related articles in the same category.

    3.1 Installation

    • Yt Plugin and SJ Core has been integrated in template file. Now you install SJ Content Related News
    • STEP 1: In Administrator on Joomla! v2.5.x, go to Extensions -> Extension Manager
      On this page, click Choose File button, choose plugin file plg_content_sj_relatednews.zip (extracted from sj_fashion_extensions_j25_v1.0.zip) from then click Upload & Install


    • STEP 2:Now, go to Enable SJ Core, Yt Plugin (for Yt Framework) and SJ Content Related News in Extension/Plug-in Manager

    3.2 Configuration of YT Plugin (for Yt Framework)

  • Yt Plugin supports Optimizing CSS/ JS/ HTML and support showing Mega Menus nicely. You can see how to optimize CSS/JS/HTML in Configuration part above and how to use YT Menu Params for styling any Menu Items by remarking an example:
  • SUPPORT OPTIMIZING CSS/JS/HTML AND STYLING MEGA MENUS
  • After installing Yt Plugin, go to Extension -> Plug-in Manager and choose to configureYt Plugin:
  • TO YT PLUGIN
  • Configure Yt Pluginto show SJ Help with Report Bugs, Template Tutorials and YT Framework Tutorials
  • SHOWING SJ HELP

    4. Other Extensions - Installation and Configuration

    After creating data, you can install and configure extensions to have a Website as like as our pre-made demo.

    4.1 Install

    4.1.1 List of extensions used in SJ FashionStore demo

    You can find a list of modules/plugins/components which are used in SJ FashionStore by clicking menu Features -> Extensions of demo Website

    4.1.2 Installation

    • In Administrator on Joomla! v2.5.x, go to Extensions -> Extension Manager
      On this page, click Choose File button, choose an extension file then click Upload & Install


    • Install the rest of extensions as step above

    4.2 Configuration

    After installing extensions which are included in the SJ FashionStore template, navigate into Extensions -> Module (or Plug-in) Manager then choose the module or plug-in you want to configure. The following example is choosing a module from Module Manager:

    By this screenshot, you will see how module is placed in the default layout
    :

    This guide will help you place essential menus (Mega Menu), modules (one example each type) and other blocks as homepage of demo Website:

    4.2.1 Mega Menu - Features

  • Menu Item Type
  • Menu Item Type: Text Separator
  • Frontend - Backend
  • FRONTEND
    BACKEND - YT MENU PARAMS
    BACKEND - TREE OF MENUS

    4.2.2 Mega Menu - Joomla!

  • Menu Item Type
  • Menu Item Type: Text Separator
  • Frontend - Backend
  • FRONTEND
    BACKEND - YT MENU PARAMS
    BACKEND - TREE OF MENUS

    4.2.3 Mega Menu - VirtueMart

  • Menu Item Type
  • Menu Item Type: Text Separator
  • Frontend - Backend
  • FRONTEND
    BACKEND - YT MENU PARAMS
    BACKEND - TREE OF MENUS

    4.2.4 Social buttons - Custom HTML

    There are several positions that use Custom HTML module. Here we will configure an example. Let take "Social" at nav2 position, others will be the same.

  • Module Position - Module Suffix
  • Position: nav2
    Suffix: socials
  • Frontend (demo layout above) - Backend
  • BACKEND

    4.2.5 Slideshow - Sj Vm Slideshow Responsive Module

  • Module Position - Module Suffix
  • Position: slide_show
    Suffix: Not Used
  • Frontend (demo layout above) - Backend
  • BACKEND

    4.2.6 SJ Accordion Menu

  • Module Position - Module Suffix
  • Position: left (first)
    Suffix: Not used
  • Frontend (demo layout above) - Backend
  • BACKEND

    4.2.7 Banners

    There are several positions that use Banner module. Here we will configure an example. Let take "Banner 1" at left position (second order), others will be the same.

  • Module Position - Module Suffix
  • Position: left (second)
    Suffix: hidden-mobi
  • Frontend (demo layout above) - Backend
  • BACKEND

    4.2.8 Who's online Module

  • Module Position - Module Suffix
  • Position: left (forth)
    Suffix: corner white
  • Frontend (demo layout above) - Backend
  • BACKEND

    4.2.9 Lastest News - SJ Basic News Module

  • Module Position - Module Suffix
  • Position: right (second)
    Suffix: title1
  • Frontend (demo layout above) - Backend
  • BACKEND

    4.2.10 Featured products - SJ Vm Slider Responsive

  • Module Position - Module Suffix
  • Position: position-1 (first)
    Suffix: title2 feature
  • Frontend (demo layout above) - Backend
  • BACKEND

    4.2.11 Sj Vm Ajax Tabs Responsive Module

  • Module Position - Module Suffix
  • Position: position-1 (second)
    Suffix: title2
  • Frontend (demo layout above) - Backend
  • BACKEND

    4.2.12 This Site - Menu Module

    There are several positions that use Menu module. Here we will configure an example. Let take "This Site" at footnav position, others will be the same.

  • Module Position - Module Suffix
  • Position: footnav
    Suffix: menu_footer
  • Frontend (demo layout above) - Backend
  • BACKEND

    4.2.13 Sj Article Slider Responsive

  • Module Position - Module Suffix
  • Position: userc
    Suffix: blank article-slider
  • Frontend (demo layout above) - Backend
  • BACKEND

    4.2.14 Footer

    Now there are not modules placed in this position. You can try some ones.


    That's homepage. For other advanced and customized configurations, please submit ticket OR purchase our installation services.

    Contents

    The guide will help you install SJ EPhoto Responsive and extensions included in this template step by step.
    If you want to install the template exactly like our demo (same data), you should purchase and install the Quickstart Package.
    • Important Notes
    • 1. Download Template and Extensions
    • 2. SJ EPhoto Responsive Template - Installation and Configuration
    • 3. Imperative Plugins - Installation and Configuration
    • 4. Other Extensions - Installation and Configuration

    Important Notes

    Requirement:
    • Joomla! 1.7 or 2.5, prefer latest
    • K2 component (customized and included in Quickstart)
    • Premium SJ Extensions (included, see part 3-Core Plugins and 4-Other Extensions)

    1. Download Template and Extensions

    1.1 Used for members of JTC - Joomla Template Club

    STEP 1: Login at SmartAddons.com

    STEP 2: Go to Download -> Joomla Template Club

    STEP 3: Click SJ EPhoto Responsive

    STEP 4: Under SJ EPhoto Responsive, download packages as you want

    1.2 Used for single product purchased via e-cart

    Receive Donwload-Info email -> Download packages as you want

    2. SJ EPhoto Responsive -Installation and Configuration

    2.1 Installation

    • Log in Administrator of Joomla! v2.5.x, go to Extensions -> Extension Manager
      On this page, click Choose File button, select our template file you have downloaded then click Upload & Install


    • Set SJ EPhoto Responsive as default template

    2.2 Configuration

    The parameters of SJ EPhoto Responsive Template are divided into the following groups:
    • Global Settings
    • Layout Settings
    • Style Settings
    • Top Menu Settings
    • Content Component
    • Advanced Options
    alt

    GLOBAL SETTINGS

    • Generator tag - Generate tag for your template
    • Hide Main Content Block - Allow to hide Content Component on Homepage
    • Direction - Choose direction of language: RTL/LTR
    • Logo Type - Choose your logo type: image OR text
    • Logo Text - Set text for Text type of logo
    • Slogan - Set your Website slogan here
    alt

    LAYOUT SETTINGS

    • Window layout - Layout used when visitors are from PC
    • Overwrite Layouts Windows - Used with window mode, when you want to use another layout for a menu. Syntax:
      • Itemid1:Layout_Name1 | Itemid2:Layout_Name2 | ...
      With:
      • Itemid1, Itemid2...: Id of Menus. You can see these in Menu Item Manager
      • Layout_Name1, Layout_Name2...: The name of layout. You can see these in templates/{this_template_name}/layouts folder. NOTE: remove .xml extension
    alt

    STYLE SETTINGS

    • Default Style - Allow to choose a style from 6 available ones
    • Default Font Size - Allow to choose default font size
    • Default Font-Family - Allow to choose a font-family from 13 available ones. The default one is Arial
    • Google Font-Family - Allow to choose a google font-family used for html tags which are in Affected Selectors parameter below
    • Affected Selectors - Tag names will be applied with google font, comma seperated
    alt

    TOP MENU SETTINGS

    • Default Type Menu - Allow to choose default menu type shown with template, this list is gotten from Menu Manager
    • Default Menu Style - We support 4 styles for Menus
      • CSS Menu
      • Moo Menu
      • Mega Menu
      • Dropline Menu
    • Use JS for Dropline Menu - Allow to use JS effect for Dropline Menu OR not
    • Javascript Effect - Allow to select which JS Effect used with Moo Menu and Mega Menu
    • Duration Effect - Set time before showing any submenus
    • Start Level - Set level of menu to start rendering the menu
    • End Level - Set level of menu to stop rendering the menu
    alt

    CONTENT COMPONENT

    • Apply for Blog view - Allow to show the Content block at blog pages OR not
    • Apply for Frontpage view - Allow to show at Frontpage view OR not
    • Leading Images Width - Set width of images of Leading Articles
    • Leading Images Height - Set height of images of Leading Articles
    • Intro Images Width - Set width of images of Intro Articles
    • Intro Images Height - Set height of images of Intro Articles
    • Thumbnail Background Color - Set color background for thumbnail images
    • Thumbnail Mode - Set thumbnail mode:
      • Fill
      • Fit
      • Stretch
      • Center
    alt

    ADVANCED OPTIONS

    • Show Back to Top - Allow you to show Back to Top button OR not
    • Show Cpanel - Allow you to show YT Framework Control panel OR not
    • Override logo image - Set logo image of Cpanel by inserting its link/path here
    • Include LazyLoad plugin - Enable/disable LazyLoad
    • Enable jquery - Enable/disable jquery
    • Optimize Merge File - Choose Yes to optimize all CSS and JS Files which are used in your website
    • Optimize CSS - Choose Yes to optimize only CSS files
    • Optimize CSS Exclude - CSS files which are not optimized, comma separated
    • Optimize JS - Choose Yes to optimize only JS files
    • Optimize JS Exclude - JS files which are not optimized, comma separated
    • Optimize Folder - A specific folder with Css/Js files need to be optimized
    • Optimize HTML - Allow to use Optimize HTML feature
    • Enable Google Analytics - Enable/disable Google Analytics
    • Enter your Google Analytics tracking ID - Copy and paste your Google Analytics tracking ID here

    3. Imperative Plugins-Installation and Configuration

    You need to install Yt Plugin and SJ Core plugin.
    - Yt Plugin supports Yt Framework for adding extra parameters used with Mega Menu and to compress CSS/JS/HTML when optimizing code.
    - While that, SJ Core is used for resizing images in Content Component and other extensions by us.

    3.1 Installation

    • STEP 1: In Administrator on Joomla! v2.5.x, go to Extensions -> Extension Manager
      On this page, click Choose File button, choose those two plugin files then click Upload & Install


    • STEP 2:Now, go to Enable SJ Core and Yt Plugin (for Yt Framework) in Extension/Plug-in Manager

    3.2 Configuration of YT Plugin (for Yt Framework)

  • Yt Plugin supports Optimizing CSS/ JS/ HTML and support showing Mega Menus nicely. You can see how to optimize CSS/JS/HTML in Configuration part above and how to use YT Menu Params for styling any Menu Items by remarking an example:
  • SUPPORT OPTIMIZING CSS/JS/HTML AND STYLING MEGA MENUS
  • After installing Yt Plugin, go to Extension -> Plug-in Manager and choose to configureYt Plugin:
  • TO YT PLUGIN
  • Configure Yt Pluginto show SJ Help with Report Bugs, Template Tutorials and YT Framework Tutorials
  • SHOWING SJ HELP

    4. Other Extensions - Installation and Configuration

    After creating data, you can install and configure extensions to have a Website as like as our pre-made demo.

    4.1 Install

    4.1.1 List of extensions used in SJ EPhoto Responsive demo

    You can find a list of modules/plugins/components which are used in SJ EPhoto Responsive by clicking menu Features -> Extensions of demo Website

    4.1.2 Installation

    • In Administrator on Joomla! v2.5.x, go to Extensions -> Extension Manager
      On this page, click Choose File button, choose an extension file then click Upload & Install


    • Install the rest of extensions as above step

    4.2 Configuration

    After installing extensions which are included in the SJ EPhoto Responsive template, navigate into Extensions -> Module (or Plug-in) Manager then choose the module or plug-in you want to configure. The following example is choosing a module from Module Manager:

    By this screenshot, you will see how module is placed in the default layout:

    This guide will help you place essential menus (Mega Menu), modules (one example each type) and other blocks as homepage of demo Website:

    4.2.1 Mega Menu - Features

  • Menu Item Type
  • Menu Item Type: Text Separator
  • Frontend - Backend
  • BACKEND
    BACKEND - YT MENU PARAMS
    BACKEND - TREE OF MENUS

    4.2.2 Mega Menu - Joomla!

  • Menu Item Type
  • Menu Item Type: Text Separator
  • Frontend - Backend
  • BACKEND
    BACKEND - YT MENU PARAMS
    BACKEND - TREE OF MENUS

    4.2.3 Mega Menu - K2

  • Menu Item Type
  • Menu Item Type: K2 - Categories
  • Frontend - Backend
  • BACKEND
    BACKEND - YT MENU PARAMS
    BACKEND - TREE OF MENUS

    4.2.4 Custom HTML Modules

    There are some positions that used Custom HTML modules, in quite same way: user1, usera, userb, userc, userd, userf. Here we will configure an example for custom HTML modules. Let take "Royalty Free Stock Photos and Vectors", other will be the same.

  • Module Position - Module Suffix
  • Position: user1
    Suffix: blank title4 hidden-mobi
  • Frontend (please check default layout above) - Backend
  • BACKEND

    4.2.5 Smart Search

  • Module Position - Module Suffix
  • Position: user2
    Suffix: Not used
  • Frontend (please check default layout above) - Backend
  • BACKEND

    4.2.6 Sj K2 Slider Module

  • Module Position - Module Suffix
  • Position: main_top
    Suffix: grid-3 title1
  • Frontend (please check default layout above) - Backend
  • BACKEND

    4.2.7 SJ K2 Accordion Module

  • Module Position - Module Suffix
  • Position: sidebar-1 (first)
    Suffix: grid-1 hidden-mobi
  • Frontend (please check default layout above) - Backend
  • BACKEND

    4.2.8 Popular Photos - K2 Content Module

  • Module Position - Module Suffix
  • Position: sidebar-1 (second)
    Suffix: blank grid-1
  • Frontend (please check default layout above) - Backend
  • BACKEND

    4.2.9 Who's online Module

  • Module Position - Module Suffix
  • Position: sidebar-1 (third)
    Suffix: grid-1 border2 style-icon icon-smileys
  • Frontend (please check default layout above) - Backend
  • BACKEND

    4.2.10 Main Menu - K2 Tools Module

  • Module Position - Module Suffix
  • Position: sidebar-2 (first)
    Suffix: _menu grid-1
  • Frontend (please check default layout above) - Backend
  • BACKEND

    4.2.11 Login Module

  • Module Position - Module Suffix
  • Position: sidebar-2 (second)
    Suffix: grid-1 style-bg bg1 style-icon icon-login
  • Frontend (please check default layout above) - Backend
  • BACKEND

    4.2.12 SJ Facebook

  • Module Position - Module Suffix
  • Position: usere
    Suffix: blank like-fb
  • Frontend (please check default layout above) - Backend
  • BACKEND

    4.2.13 Menu Modules

    There are some positions that used Menu modules, in quite same way: user10, user11, user12. Here we will configure an example. Let take "Joomla Templates", other will be the same.

  • Module Position - Module Suffix
  • Position: usere
    Suffix: style-bg bg2 corner-bg2
  • Frontend (please check default layout above) - Backend
  • BACKEND

    4.2.14 Footer

    Now there are not modules placed in this position. You can try some ones.


    That's homepage. For other advanced and customized configurations, please submit ticket OR purchase our installation services.

    Hi Friends,

    For helping you to manage the account on SmartAddons more easily, we would like to make a clear instruction on how to manage your Account Panel effectively.

    We will release this Joomla! template within next week. Comments that help improve it are welcomed.

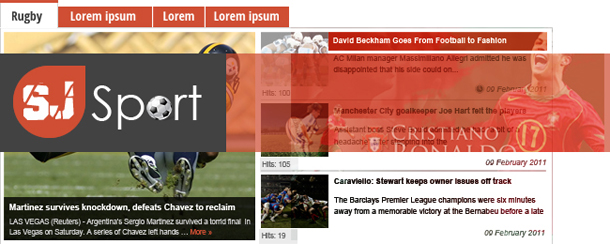
    Name: SJ ESport - Joomla! Template
    Made for Joomla 2.5 with support for K2 component
    Other extensions: Extensions developed in-house will be included freely
    This template is made for Joomla websites focusing on sport news and shows. When making this template, we kept in mind 3 things:
    - Updated news
    - Exciting photos and videos
    - Generous and customizable layout


    Made for news portal, this template also offer ability of photo and video repository, here are some more images for previewing:

    Updated to Joomla 5

    We're happy to announce that the new module for Responsive Joomla has been released - SJ Content Responsive Listing. With dividing 3 clear and special parts of layout - top, content and bottom - will bring to you many options for showing categories of articles.


    Page 1 of 2

    Love all our templates?

    Join our membership clubs starting at $49 only for access to all of our templates

    Join Now
    Home Pricing
    Your Cart is currently empty!
    Product update
    Coupon
    add
    Coupon code invalid! Please re-enter!
    AJAX loader
    SearchSupport
    Magento Themes Magento Extensions Free Magento Extensions Prestashop Themes Prestashop Modules Magento 2 Themes Smartcarex - Phụ Kiện Ô TÔ Bạt phủ ô tô cao cấp Bơm lốp ô tô Máy hút bụi ô tô