

Sarah
This guide will help you install SJ Decou and extensions included in the template step by step. This provides for only membeships in SmartAddons Joomla Template Clubs.
Table of content as following:
1. REQUIREMENT - Back to top
At the basic level, this template will require the following conditions:
- Compatible with version Joomla: Joomla! 2.5.x, Joomla 3.x
- Compatible with version K2: 2.6.x
- Installation Packages include:
- Quickstart Package
- Template package only
- Extensions package from our store
- Extensions packge from 3rd Parties (if have)
2. HOW TO DOWNLOAD - Back to top
2.1 Download Packages from our store:
Step 1 Login your account

Step 2 Go to Joomla > Download > Joomla Templates Club

Step 3 Under Premium Joomla Templates --> click to download template as you want

Step 4 Under name of template --> Download packages as you want

2.2 Download packages from 3rd Parties:
This is the component from 3rd party which is used in this template:;
3. HOW TO INSTALLATION - Back to top
There are two ways to install a Joomla Template:
- Install quickstart: By using this package, you will set the template exactly as our Demo with sample data. This is applied when you need a fresh Joomla with our template. For understanding more information about Quickstart, you should read this article: Quickstart package for Joomla templates - what is this and how to install it?
- Install Template and Extensions: This is applied when you have already installed a Joomla instance on your server. You will need only be using the zipped files in "Extensions" and "Template" folders mentioned above.
3.1 Installation with Quickstart Package
Before installing the Quickstart package, we recommend you back up your site first. You click to learn how to back up a Joomla site. The following steps will guide to install a quickstart package of SmartAddons Joomla Template
Step 1 Upload folder quickstart:
If you are using SSH, simply upload your zip file (via FTP) and then 'unzip' the file. If you are using FTP, unzip the file on your computer and then upload those files as bellow. Though some webhosts have a different structure, in MOST cases, the folder that is used for uploading will be called "public_html." This will take a while to upload all those files and folders. Please keep your patience.

Step 2 Start installation procedure:
After uploading is completed, open the browser and type your URL in the address bar. The first screen will appear as follow
Sellect Language

Main Configuration:
Enter the required information of your site: sitename, email, admin username and password

Step 3 Configure Database:
Create Database: Following guide is used for creating database on the localhost. Go to your phpmyadmin (http://localhost/phpmyadmin/) then type of desired database name. You should refer document for creating database on Cpanel.

Database Installation: After the step 2, Click Next and go to this step. You will need to fillup database name, username and password in here.

Step 4: Install Sample Data
If you install sample data, you will have a site like our demo. If you select default sample data, you will get a fresh Joomla site.

Step 5: Remove or Rename the Installation folder:
The final step is removing or renaming the Installation folder

In the end of 3.1 Installation with Quickstart Package, you will be got a new website as our demo.
3.2 Installation without Quickstart Package
Log in your Administrator, go to Extensions > Extension Manager

Then install Template and Extensions as bellow.
3.2.1. Install Template:
Step 1: Click Choose File/Browse button, select our template file you have downloaded > Upload & Install. Do as this for getting Template package.
Step 2: Go to Extensions > Template Manager and set SJ Decou to become the default template as bellow

3.2.2. Install Extensions:
Here is list of extensions that are used in the template.

Step 1: Install Extensions that are developed by SmartAddons. Please Unzip First the Extension package for getting SmartAddons extensions then install each of them as install template above. Do as this for getting SmartAddons packages.
Step 2: Install K2 Component as extensions above. Do as this for getting package of K2 Component.
Step 3: Enable/Public plugins. Note: all plugins listed are imperative.
- Yt Framework Plugin supports to add extra parameters used with Mega Menu and to compress CSS/JS/HTML when optimizing code. Besides, configure Yt Framework to show SJ Help with Report Bugs, Template Tutorials and YT Framework Tutorials or include jQuery into template. You can go here for getting more information of this plugin.
- YT Shortcodes supports users to make content for web pages. In Joomla administrator, YT Shortcodes button will be appeared below the text-area, you can choose shortcodes for the text-area to make content. Click here for viewing the screenshot of backend
- SJ Content Related News is used for showing other related articles in the same category. For more info about this module, please go here. Click here for viewing the screenshot of backend.
You need to install and activate them when using this template. Let's start from 1 - 2 - 3 to active plugins as bellow:

After install template/extensions, please go to next step - Configuration of template as 4. Part bellow
4. HOW TO CONFIGURATION - Back to top
The following part we will guide how to configure the template becomes the same with our home page - Demo
4.1 Modules Positions

4.2 Template Configuration
Go to Extensions > Template Manager > SJ Decou. All of parameters of this template are divided into the following groups, in which they are explained themselves:


4.3 Menu Configuration
4.3.1. Megamenu Configuration
To configure Mega Menu, go to: Extensions --> Template manager --> open SJ Decou template, in the Menu setting, you can configure Mega Menu. Do as this for setting Menu.
4.3.2. Menu Item Backend Settings
- Frontend - Backend
FRONTEND
 HOME MENU: TREE OF MENU - MENU PARAMSERVICES MENU: TREE OF MENU - MENU PARAMBLOG MENU: TREE OF MENU - MENU PARAMPHOTO MENU: TREE OF MENU - MENU PARAM
4.4 Extension Configuration
4.4.1. Program - Custom HTML Module
- Module Position - Module Suffix
Position: postition-0
Suffix: blank block_program - Frontend - Backend

4.4.2. Flight Schedules - Custom HTML Module
- Module Position - Module Suffix
Position: position-1
Suffix: blank block_schedules - Frontend - Backend

4.4.3. Place of the Month - SJ K2 Extra Slider Module
- Module Position - Module Suffix
Position: position-2
Suffix: blank extra-theme2 - Frontend - Backend

4.4.4. Video- SJ Video Box Module
- Module Position - Module Suffix
Position: position-3
Suffix: blank sj-video-theme1 - Frontend - Backend

4.4.5. Decou Stories - SJ K2 Extra Slider Module
- Module Position - Module Suffix
Position: position-4
Suffix: @photo extra-theme1 - Frontend - Backend

4.4.6. Decou Blog - SJ K2 Extra Slider Module
- Module Position - Module Suffix
Position: position-4
Suffix: - Frontend - Backend

4.4.7. Search - SJ Smart Search Module
- Module Position - Module Suffix
Position: postition-8
Suffix: blank - Frontend - Backend

4.4.8. Contact us - Custom HTML Module
- Module Position - Module Suffix
Position: position-1
Suffix: contact-us blank - Frontend - Backend

4.4.9. Connect with us - Custom HTML Module
- Module Position - Module Suffix
Position: position-1
Suffix: connect-with-us blank - Frontend - Backend

4.4.10. About us - Custom HTML Module
- Module Position - Module Suffix
Position: position-1
Suffix: block-about blank - Frontend - Backend

4.4.11. Easy Access - Custom HTML Module
- Module Position - Module Suffix
Position: position-12
Suffix: easy-access blank - Frontend - Backend

4.4.12. Book Menu - Menu Module
There are several positions that use Menu module. There are: position-13, position-14, position-15, position-16, position-17, position-18 Here we will configure an example. Let take "Book" at position position-13, others will be the same.
- Module Position - Module Suffix
Position: position-13
Suffix: _menufooter blank - Frontend - Backend

4.4.13. Connect - Custom HTML Module
- Module Position - Module Suffix
Position: position-19
Suffix: connect blank - Frontend - Backend

That's homepage. For other advanced and customized configurations, please submit ticket OR purchase our installation services.
|
If you want to install the template exactly like our demo (same data), you should purchase and install the Quickstart Package.
- Important Notes
- 1. Download Template and Extensions
- 2. SJ Sport Store Template - Installation and Configuration
- 3. Imperative Plugins - Installation and Configuration
- 4. Other Extensions - Installation and Configuration
Important Notes
- Joomla! 2.5, Joomla 3.x
- Content component (customized and included in Quickstart)
- Some premium SJ Extensions (see part 3-Core Plugins and 4-Other Extensions)
1. Download Template and Extensions
1.1 Used for members of JTC - Joomla Template Club
STEP 1: Login at SmartAddons.com
STEP 2: Go to Download -> Joomla Templates Club (JTC)
STEP 3: Under Premium Joomla Templates, click SJ Sport Store to download

STEP 4: Under SJ Sport Store --> Download packages as you want

1.2 Download 3rd Party Extensions
This is the list of 3rd party extensions which are used in this template:
- JoomShopping 4.33: Download here
- Jshopping Bestseller Products - Module Bestseller 4.0.1: Download here
- Jshopping Cart - Module Cart 4.0.1: Download here
- Jshopping Category - Module Category 4.0.1: Download here
2. SJ Sport Store -Installation and Configuration
2.1 Installation
- Log in your Administrator, go to Extensions -> Extension Manager
On this page, click Choose File button, select our template file you have downloaded then click Upload & Install
- Set SJ Sport Store as default template

- After installing this template, please install JoomShopping Component 3.14.3.
2.2 Configuration
All of parameters of SJ Sport Store Template are divided into the following groups, in which they are explained themselves:


- Yt Framework Plugin supports to add extra parameters used with Mega Menu and to compress CSS/JS/HTML when optimizing code. For more info, please go here
- While that, YT shortcodes supports users to make content for web pages. In Joomla administrator, Yt Shortcodes button will be appeared below the text-area, you can choose shortcodes for the text-area to make content.
- SJ Responsive Listing Ajax is used for loading more product. This plugin is supported for SJ Responsive Listing for JoomShopping module that is in the home page.
- Lastly, SJ Content Related News is used for showing other related articles in the same category. For more info, please go here
3.1 Installation
- Now you install Yt Framework Plugin, SJ Content Related News, Yt Shortcode and SJ Responsive Listing Ajax for JoomShopping in turn
- STEP 1: In Administrator on Joomla! v2.5.x, go to Extensions -> Extension Manager
On this page, click Choose File button, choose plugin file (extracted from extensions zip file) from then click Upload & Install

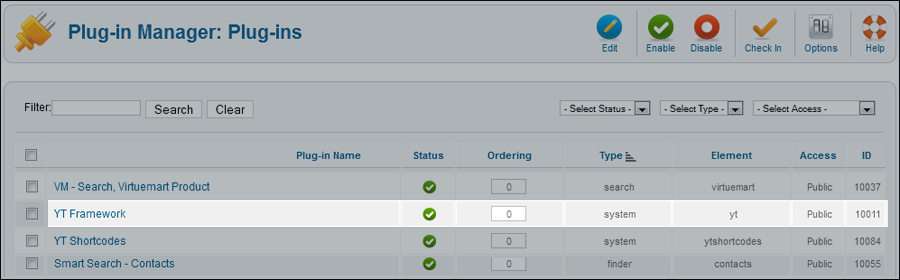
- STEP 2: Now, go to Enable Yt Framework Plugin,Yt Shortcode, SJ Responsive Listing Ajax for JoomShopping and SJ Content Related News in Extension/Plug-in Manager
3.2 Configuration of Yt Framework Plugin
- After installing Yt Framework, go to Extension -> Plug-in Manager and choose to configure Yt Framework:
- Configure Yt Framework to show SJ Help with Report Bugs, Template Tutorials and YT Framework Tutorials or include jQuery into template

3.3 Yt Shortcodes
- In Administrator of Joomla!, go to Plugin Manager -> Make sure Yt Shortcodes is enabled. This is list of Shortcodes that you can use to style content:
- After that, whenever there is text area then click Shortcodes button, Shortcodes are available for you to be used!
SHORTCODES

3.4. SJ Content Related News
- In Administrator of Joomla!, go to Plugin Manager -> Make sure SJ Content Related News is enabled. This is SJ Content Related News configuration below:
SJ Content Related News

4. Other Extensions - Installation and Configuration
After creating data, you can install and configure extensions to have a Website as like as our pre-made demo.
4.1 Install
4.1.1 List of extensions used in SJ Sport Store demo
You can find a list of modules/plugins/components which are used in SJ Sport Store by clicking menu Features -> Extensions of demo Website
4.1.2 Installation
- In Administrator on Joomla!, go to Extensions -> Extension Manager
On this page, click Choose File button, choose an extension file then click Upload & Install

- Install the rest of extensions as step above
4.2 Configuration

By this screenshot, you will see how module is placed in the default layout:

4.2.1 Mega Menu - Home

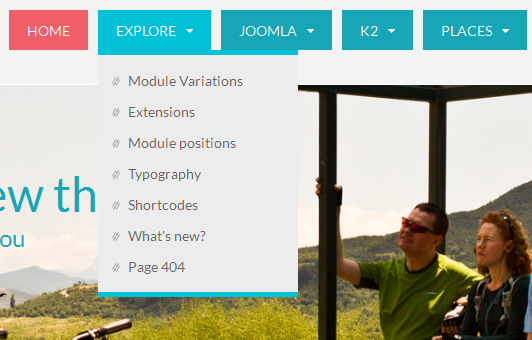
4.2.2 Mega Menu - Explore

4.2.3 Custom HTLM
There are several positions that use Custom HTML module. Here we will configure an example. Let take "Top menu" at position top 1, others will be the same.
Suffix: blank
BACK END

4.2.4 Smart Search Module
Suffix: Not used
BACK END

4.2.5 Jshopping Cart
Suffix: Not used
BACK END

4.2.6 SJ Dynamic Slideshow
Suffix: dynamic-slideshow
BACK END

NOTE: Please go HERE to view more SJ Dynamic Slideshow User-guide
4.2.7 SJ Product for JoomShopping
Suffix: title4 latest-product
BACK END

4.2.8 SJ News Fontpage
Suffix: title4-sj-fontpage
BACK END

4.2.9 SJ Responsive Listing for JoomShopping
There are several positions that use SJ Responsive Listing for JoomShopping module. Here we will configure an example. Let take "Bike" at Position 15, others will be the same.
Suffix: blank responsive-listing
BACK END

4.2.10 Banner Module
Suffix: banne-health blank
BACK END

4.2.11 SJ Slider
Suffix: blank sj-content-slider
BACK END

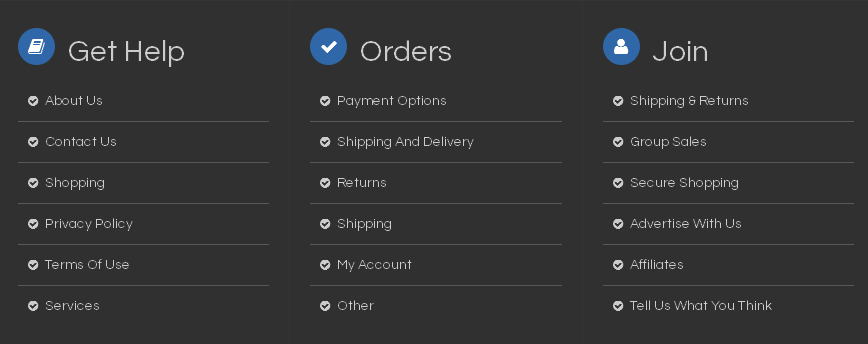
4.2.12 Menu Module
There are several positions that use Menu module. Here we will configure an example. Let take "Get Help" at Position 11, others will be the same.
Suffix: _menufoot@book
BACK END

4.2.13. Other Extensions
4.2.13.1. Jshopping Bestseller Products
Suffix: best-seller
BACK END

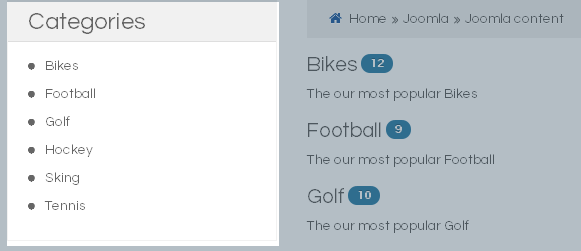
4.2.13.2. Jshopping Categories
Suffix: _menu
BACK END

|
If you want to install the template exactly like our demo (same data), you should purchase and install the Quickstart Package.
- Important Notes
- 1. Download Template and Extensions
- 2. SJ Finacial Template - Installation and Configuration
- 3. Imperative Plugins - Installation and Configuration
- 4. Other Extensions - Installation and Configuration
Important Notes
- Joomla!, latest version is recommended.
- K2, Kunena Component, if using Quickstart, it is included
- Premium SJ Extensions (see part 3-Core Plugins and 4-Other Extensions)
1. Download Template and Extensions
1.1 Used for members of JTC - Joomla Template Club
STEP 1: Login at SmartAddons.com
STEP 2: Go to Download -> Joomla Templates Club (JTC)
STEP 3: Under Premium Joomla Templates, click SJ Financial to download

STEP 4: Under SJ Financial -> Download packages as you want

2. SJ Financial -Installation and Configuration
2.1 Installation
- Log in Administrator of Joomla!, go to Extensions -> Extension Manager
On this page, click Choose File button, select our template file you have downloaded then click Upload & Install
INSTALL - Set SJ Financial as default template
SET DEFAULT
2.2 Configuration
All of parameters of SJ Financial Template are divided into the following groups, in which they are explained themselves:


2.3 Yt Shortcodes
- In Administrator of Joomla!, go to Plugin Manager -> Make sure Yt Shortcodes is enabled. This is list of shortcodes that you can use to style content:
LIST of SHORTCODES
- After that, whenever there is text area then click Shortcodes button, Shortcodes are available for you to be used!
SHORTCODES
3. Imperative Plugins-Installation and Configuration
You need to install: Yt Framework, Yt Shortcodes and Yt Core.- Yt Framework supports templates in adding extra parameters for Mega Menu and compress CSS/JS/HTML when optimizing code. This guide is about installing Yt Framework, other plugins are the same
3.1 Installation
- Now you install this plugin
- STEP 1: In Administrator on Joomla!, go to Extensions -> Extension Manager
On this page, click Choose File button, choose plugin file (extracted from extensions zip file) from then click Upload & Install
INSTALL
- STEP 2: Now, go to Enable Yt Framework in Extension/Plug-in Manager
3.2 Configuration of Yt Framework
- After installing Yt Framework, go to Extension -> Plug-in Manager and choose to configureYt Framework:
- Configure Yt Framework to show SJ Help with Report Bugs, Template Tutorials and YT Framework Tutorials or include jQuery into template


4. Other Extensions - Installation and Configuration
After creating articles and data..., you have to install and configure extensions.4.1 Install
4.1.1 List of extensions used in SJ Financial demo
You can find a list of modules/plugins/components which are used in SJ Financial by clicking menu Features -> Extensions of demo Website
4.1.2 Installation
- In Administrator on Joomla!, go to Extensions -> Extension Manager
On this page, click Choose File button, choose an extension file then click Upload & Install
- Install the rest of extensions as step above
4.2 Configuration
By this screenshot, you will see how module is placed in the default layout:
Back

4.2.1 Menu - Explore

4.2.2 Menu - Joomla Pages

4.2.3 Menu - K2

4.2.4 Mega Menu - Companies

4.2.5 Login Module
Suffix: blank
BACK END

4.2.6 Menu Module
There are several positions that use Menu module. Here we will configure an example. Let take "Top Menu" at topmenu, others will be the same.
Suffix: blank
BACK END

4.2.7 Smart Search Module
Suffix: blank
BACK END

4.2.8 Custom HTML Module
Suffix: blank
BACK END

4.2.9 Custom HTML Module
Suffix: clear
BACK END

4.2.10 Custom HTML Module
Suffix: "bgcolor1"
BACK END

Note: The position "top2; top3; top4" configure the same.
4.2.11 SJ News Scroller Module
Suffix: clear
BACK END

4.2.12 Sj News Extra Slider Module
There are several positions that use SJ News Extra Slider module. Here we will configure an example. Let take "Top News" at top6, others will be the same.
Suffix: nox7 topNews
BACK END

4.2.13 Stock Data - Custom HTML Module
Suffix: blank
BACK END

4.2.14 SJ News Extraslider Module
Suffix: "clear"
BACK END

4.2.15 SJ Mega News Module
Suffix: clear
BACK END

4.2.16 SJ Module Tabs
Suffix: blank
BACK END

4.2.17 SJ Video Box Module
Suffix: box8
BACK END

4.2.18 Custom HTML Module
Suffix: "boxSolid marginBottom60"
BACK END

4.2.19 Custom HTML Module
Suffix: "@bar-chart"
BACK END

Note: The position "bottom3; bottom4" configure the same.
4.2.20 Menu Module
Class Suffix: "clear titleinline "
BACK END

4.2.21 Smart Search Module
Class Suffix: "clear"
BACK END

4.2.22 SJ Gallery Pro Module
Suffix: title-blank ico-camera
BACK END

4.2.23 Menu Module
Class Suffix: "clear titleinline "
BACK END

4.2.24 Custom HTML Module
Class Suffix:
BACK END

Note: The position "bottom9" configure the same.
4.2.25 SJ Basic News Module
Suffix: clear
BACK END

4.2.26 SJ Twitter Module
Suffix: box-opacity
BACK END

4.2.27 Custom HTML Module
Class Suffix:
BACK END

Thank you so much for purchasing this template. If you have any questions that are beyond the scope of this help file, please send us via: Submit a Ticket
Thanks so much!
|
If you want to install the template exactly like our demo (same data), you should purchase and install the Quickstart Package.
- Important Notes
- 1. Download Template and Extensions
- 2. SJ Tech Template - Installation and Configuration
- 3. Imperative Plugins - Installation and Configuration
- 4. Other Extensions - Installation and Configuration
Important Notes
- Joomla!, latest version is recommended.
- K2 Component, if using Quickstart, it is included
- Premium SJ Extensions (see part 3-Core Plugins and 4-Other Extensions)
1. Download Template and Extensions
STEP 1: Login at SmartAddons.com
STEP 2: Go to Download -> Joomla Templates Club (JTC)
STEP 3: Under Premium Joomla Templates, click SJ Tech to download

STEP 4: Under SJ Tech -> Download packages as you want

2. SJ Tech -Installation and Configuration
2.1 Installation
- Log in Administrator of Joomla!, go to Extensions -> Extension Manager
On this page, click Choose File button, select our template file you have downloaded then click Upload & Install
INSTALL - Set SJ Tech as default template
SET DEFAULT
2.2 Configuration
All of parameters of SJ Tech Template are divided into the following groups, in which they are explained themselves:


2.3 Yt Shortcodes
- In Administrator of Joomla!, go to Plugin Manager -> Make sure Yt Shortcodes is enabled. This is list of shortcodes that you can use to style content:
LIST of SHORTCODES
- After that, whenever there is text area then click Shortcodes button, Shortcodes are available for you to be used!
SHORTCODES
3. Imperative Plugins-Installation and Configuration
You need to install: Yt Framework, Yt Shortcodes, Yt Core and SJ Content Related News Plugin.- Yt Framework supports templates in adding extra parameters for Mega Menu and compress CSS/JS/HTML when optimizing code. This guide is about installing Yt Framework, other plugins are the same
3.1 Installation
- Now you install this plugin
- STEP 1: In Administrator on Joomla!, go to Extensions -> Extension Manager
On this page, click Choose File button, choose plugin file (extracted from extensions zip file) from then click Upload & Install
INSTALL
- STEP 2:Now, go to Enable Yt Framework in Extension/Plug-in Manager
3.2 Configuration of Yt Framework
- After installing Yt Framework, go to Extension -> Plug-in Manager and choose to configureYt Framework:
- Configure Yt Framework to show SJ Help with Report Bugs, Template Tutorials and YT Framework Tutorials or include jQuery into template
4. Other Extensions - Installation and Configuration
After creating articles and data..., you have to install and configure extensions.4.1 Install
4.1.1 List of extensions used in SJ Tech demo
You can find a list of modules/plugins/components which are used in SJ Tech by clicking menu Features -> Extensions of demo Website
4.1.2 Installation
- In Administrator on Joomla!, go to Extensions -> Extension Manager
On this page, click Choose File button, choose an extension file then click Upload & Install
- Install the rest of extensions as step above
4.2 Configuration
By this screenshot, you will see how module is placed in the default layout:
Back

4.2.1 Menu - Explore

4.2.2 Menu - Joomla

4.2.3 Menu - K2

4.2.4 Mega Menu - Tech News

4.2.5 Login Module
Suffix: blank

4.2.6 Smart Search Module
Suffix: blank

4.2.7 Custom HTML Module
There are several positions that use HTML module. Here we will configure an example. Let take "Banner 1" at position-0, others will be the same.
Suffix: blank

4.2.8 SJ K2 Scroller Module
Suffix: blank

4.2.9 SJ K2 Content Module
There are several positions that use SJ K2 Content module. Here we will configure an example. Let take "Latest News" at position-6, others will be the same.
Suffix: latest-news

4.2.10 Sj K2 Mega News Module
Suffix: blank

4.2.11 SJ Video Box Module
Suffix: blank

4.2.12 SJ K2 Accordion Module
Suffix: title1 yt-accordion

4.2.13 Menu Module
There are several positions that use Menu module. Here we will configure an example. Let take "Section" at position-11, others will be the same.
Suffix: blank

Footer
Now there are some HTML and Menu module as our demo. You can try some other ones.
|
If you want to install the template exactly like our demo (same data), you should purchase and install the Quickstart Package.
I. Requirement
II. Download Template and Extensions
III. Quickstart Installation
IV. Manual Installation
V. Template setting
VI. Upgrade
VII. Template Structure
Important Notes
I. REQUIREMENT
Your systems meet the following requirements before proceeding the installation
- Compatible with Joomla! 2.5 and Joomla! 3.3
- YT Framwork v2.0, if using Quickstart, it is included
- Premium SJ Extensions (see part 3-Core Plugins and 4-Other Extensions)
II. DOWNLOAD
II. DOWNLOAD
1. Download Template and Extensions
STEP 1: Login at SmartAddons.com

STEP 2: Go to Download -> Free Joomla Templates

STEP 3: Under Free Templates, click SJ Plus to download

STEP 4: Under SJ Plus -> Download packages as you want

III. QUICKSTART INSTALLATION
III. QUICKSTART INSTALLATION
3.1 Configuration
- Select language:

- Main Configuration:
Enter the required information of your site: sitename, email, admin username and password...

3.2. Database Configuration

3.3. Install Sample Data
If you install sample data, you will have a site like our demo. If you select default sample data, you will a fresh site site

3.4. Remove or Rename the Installation folder
The final step is removing or renaming the Installation folder

IV. MANUAL INSTALLATION
4.1. SJ Plus -Installation and Configuration
- Log in Administrator of Joomla!, go to Extensions -> Extension Manager
On this page, click Choose File button, select our template file you have downloaded then click Upload & Install
INSTALL - Set SJ Plus as default template
SET DEFAULT
4.2. Imperative Plugins-Installation and Configuration
You need to install: Yt Framework, Yt Shortcodes and SJ Content Related News Plugin.- Yt Framework supports templates in adding extra parameters for Mega Menu and compress CSS/JS/HTML when optimizing code. This guide is about installing Yt Framework, other plugins are the same
4.2.1 Installation
- Now you install this plugin
- STEP 1: In Administrator on Joomla!, go to Extensions -> Extension Manager
On this page, click Choose File button, choose plugin file (extracted from extensions zip file) from then click Upload & Install
INSTALL
- STEP 2: Now, go to Enable Yt Framework in Extension/Plug-in Manager
4.2.2 Configuration of Yt Framework
- After installing Yt Framework, go to Extension -> Plug-in Manager and choose to configureYt Framework:
- Configure Yt Framework to show SJ Help with Report Bugs, Template Tutorials and YT Framework Tutorials or include jQuery into template
4.3 Other Extensions - Installation and Configuration
After creating articles and data..., you have to install and configure extensions
4.3.1 Install
4.3.1.1 List of extensions used in SJ Plus demo
You can find a list of modules/plugins/components which are used in SJ Plus by clicking menu Features -> Extensions of demo Website

4.3.1.2 Installation
- In Administrator on Joomla!, go to Extensions -> Extension Manager
On this page, click Choose File button, choose an extension file then click Upload & Install
- Install the rest of extensions as step above
4.3.2. Configuration
By this screenshot, you will see how module is placed in the default layout:
Back

4.3.2.1 Menu - Explore

4.3.2.2 Menu - Joomla Pages

4.3.2.3 Menu - K2

4.3.2.4. Custom HTML Module
Suffix: balnk
BACK END

4.3.2.5 Smart Search Module
Suffix: blank
BACK END

4.3.2.6. SJ Carousel Module
Suffix: blank
BACK END

4.3.2.7. SJ Module Tabs
Suffix: blank
BACK END

4.3.2.8. SJ Content Accordion Module
Suffix: blank
BACK END

4.3.2.9. Sj Basic News Module
Suffix: title1
BACK END

4.3.2.10 Latest News Module
Suffix: blank

4.3.2.11. Login Form Module
Suffix: blank
BACK END

4.3.2.12 Who's Online Module
Suffix: bg-content1
BACK END

Footer
Now there are some HTML and Menu module as our demo. You can try some other ones.
V. SETTINGS
5.1 Configuration


5.2 Yt Shortcodes
- In Administrator of Joomla!, go to Plugin Manager -> Make sure Yt Shortcodes is enabled. This is list of shortcodes that you can use to style content:
LIST of SHORTCODES
- After that, whenever there is text area then click Shortcodes button, Shortcodes are available for you to be used!
SHORTCODES
VI. UPGRADE
YT Framework v2 is upgradeable. When we release new versions of YT Framework, older templates that are built from YT Framework v2 will be able to take advantage of all the new features and changes. Just by one click, you will be owned the newest version of YT Framework.
|
If you want to install the template exactly like our demo (same data), you should purchase and install the Quickstart Package.
- Important Notes
- 1. Download Template and Extensions
- 2. YT News Template - Installation and Configuration
- 3. Imperative Plugins - Installation and Configuration
- 4. Other Extensions - Installation and Configuration
Important Notes
- Joomla! 2.5
- Some premium SJ Extensions (see part 3-Core Plugins and 4-Other Extensions)
1. Download Template and Extensions
STEP 1: Login at SmartAddons.com
STEP 2: Go to Download -> Free Joomla Templates

STEP 3: Under Free Templates, click YT News to download

STEP 4: Under YT News -> Download packages as you want

2. YT News -Installation and Configuration
2.1 Installation
- Log in Administrator of Joomla! v2.5.x, go to Extensions -> Extension Manager
On this page, click Choose File button, select our template file you have downloaded then click Upload & Install
- Set YT News as default template

2.2 Configuration
The parameters of YT News Template are divided into the following groups:- Global Settings
- Main Body Column Settings
- Layout Settings
- Styles Settings
- Top Menu Settings
- Content Component
- Advanced Options


3. Imperative Plugins-Installation and Configuration
You need to install: Yt Plugin, SJ Core and YT Extra Params plugin.- Yt Plugin supports Yt Framework for adding extra parameters used with Mega Menu and to compress CSS/JS/HTML when optimizing code.
- While that, SJ Core is used for resizing images in Content Component and other extensions by us.
- Lastly, YT Extra Param help to set up Mega Menu.
3.1 Installation
- Now you install YT Extra Params, Yt Plugin and SJ Core in turn
- STEP 1: In Administrator on Joomla! v2.5.x, go to Extensions -> Extension Manager
On this page, click Choose File button, choose plugin file (extracted from extensions zip file) from then click Upload & Install
- STEP 2: Now, go to Enable Yt Plugin (for Yt Framework) and YT Extra Param in Extension/Plug-in Manager
3.2 Configuration of YT Plugin (for Yt Framework)


4. Other Extensions - Installation and Configuration
After creating data, you can install and configure extensions to have a Website as like as our pre-made demo.4.1 Install
4.1.1 List of extensions used in YT News demo
You can find a list of modules/plugins/components which are used in YT News4.1.2 Installation
- In Administrator on Joomla! v2.5.x, go to Extensions -> Extension Manager
On this page, click Choose File button, choose an extension file then click Upload & Install
- Install the rest of extensions as step above
4.2 Configuration
By this screenshot, you will see how module is placed in the default layout:

4.2.1 Mega Menu - Home


4.2.4 SJ News Splash
Suffix: blank

4.2.5 Login Module
Suffix: blank

4.2.6 Banners Moudule
Suffix: clear

4.2.7 Smart Search
Suffix: blank

4.2.8 Breadcrumb
Suffix: balnk

4.2.9 Sj News Frontpage
Suffix: blank

4.2.10 SJ Multi Video
Suffix: _video

4.2.11 SJ News Content
Suffix: blank

4.2.12 SJ Module Tabs
Suffix: blank

4.2.13 SJ Basic News Module
Suffix: blank

4.2.14 Menu Module
There are several positions that use Menu module. Here we will configure an example. Let take "Main Menu" at left position, others will be the same.
Suffix: blank

4.2.15 SJ Hot Topic Module
Suffix: blank

4.2.16 Who's Online Module
Suffix: blank

4.2.17 Sponsored Ads - Custom HTML
Suffix: _blank

|
If you want to install the template exactly like our demo (same data), you should purchase and install the Quickstart Package.
- Important Notes
- 1. Download Template and Extensions
- 2. SJ Real Estate Template - Installation and Configuration
- 3. Imperative Plugins - Installation and Configuration
- 4. Other Extensions - Installation and Configuration
Important Notes
- Joomla! 2.5
- Content component (customized and included in Quickstart)
- Some premium SJ Extensions (see part 3-Core Plugins and 4-Other Extensions)
1. Download Template and Extensions
1.1 Used for members of JTC - Joomla Template Club
STEP 1: Login at SmartAddons.com
STEP 2: Go to Download -> Joomla Templates Club (JTC)
STEP 3: Under Premium Joomla Templates, click SJ Real Estate to download

STEP 4: Under SJ Real Estate --> Download packages as you want

1.2 Used for single product purchased via e-cart
Receive Donwload-Info email -> Download packages as you want

2. SJ Real Estate -Installation and Configuration
2.1 Installation
- Log in Administrator of Joomla! v2.5.x, go to Extensions -> Extension Manager
On this page, click Choose File button, select our template file you have downloaded then click Upload & Install
- Set SJ Real Estate as default template

2.2 Configuration
The parameters of SJ Real Estate Template are divided into the following groups:- Global Settings
- Main Body Column Settings
- Layout Settings
- Styles Settings
- Top Menu Settings
- Content Component
- Advanced Options


3. Imperative Plugins-Installation and Configuration
You need to install: Yt Plugin, SJ Core and YT Mega Popup plugin.- Yt Plugin supports Yt Framework for adding extra parameters used with Mega Menu and to compress CSS/JS/HTML when optimizing code.
- While that, SJ Core is used for resizing images in Content Component and other extensions by us.
- Lastly, YT Mega Popup support to show popup for Images, Slideshow, Iframes, YouTubes, Ajaxs.
3.1 Installation
- Now you install YT Mega Popup, Yt Plugin and SJ Core in turn
- STEP 1: In Administrator on Joomla! v2.5.x, go to Extensions -> Extension Manager
On this page, click Choose File button, choose plugin file (extracted from extensions zip file) from then click Upload & Install
- STEP 2: Now, go to Enable SJ Core, Yt Plugin (for Yt Framework) and YT Mega Popup in Extension/Plug-in Manager
3.2 Configuration of YT Plugin (for Yt Framework)
4. Other Extensions - Installation and Configuration
After creating data, you can install and configure extensions to have a Website as like as our pre-made demo.4.1 Install
4.1.1 List of extensions used in SJ Real Estate demo
You can find a list of modules/plugins/components which are used in SJ Real Estate by clicking menu Features -> Extensions of demo Website
4.1.2 Installation
- In Administrator on Joomla! v2.5.x, go to Extensions -> Extension Manager
On this page, click Choose File button, choose an extension file then click Upload & Install
- Install the rest of extensions as step above
4.2 Configuration
By this screenshot, you will see how module is placed in the default layout:

4.2.1 Mega Menu - Features


4.2.4 SJ Content Mega Slider
Suffix: blank
BACK END

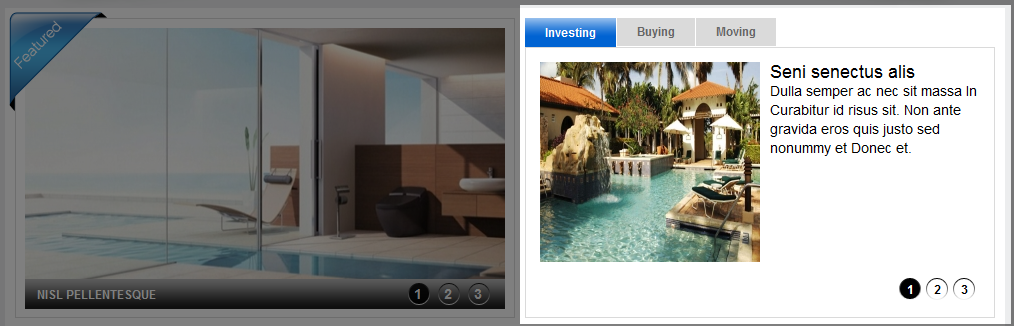
4.2.5 SJ Content Slideshow
Suffix: badge-featured
BACK END

4.2.6 SJ News Ajax Tabs
Suffix: blank
BACK END

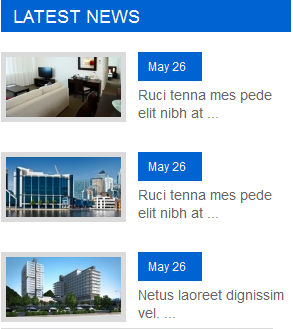
4.2.7 Latest news - SJ Basic News
There are several positions that use SJ Basic News module. Here we will configure an example. Let take "Latest News" at right position, others will be the same.
Suffix: bg_color
BACK END

4.2.8 Banners Module
Suffix: clear
BACK END

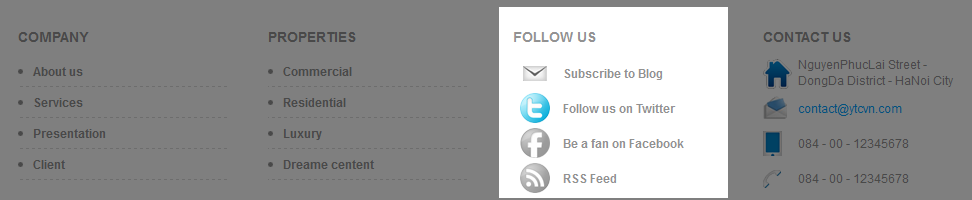
4.2.9 Company - Menu Module
There are several positions that use Menu module. Here we will configure an example. Let take "Company" at right position, others will be the same.
Suffix: blank
BACK END

4.2.10 Follow us - Custom HTML
There are several positions that use Custom HTML module. Here we will configure an example. Let take "Follow us" at user12 position, others will be the same.
Suffix: blank
BACK END

4.2.11 Footer Module
Suffix: blank
BACK END


