1SYSTEM REQUIREMENTS – Back to top
SJ University II is compatible with Joomla v2.5 and Joomla v3.x. Please make sure your system meets the following requirements:
1.1 System Requirements – Joomla version 2.5
Software
- Software: PHP 5.2.4+ (5.4+ recommended)
- MySQL: 5.0.4+
Web Sever
- Apache: 2.x+
- Microsoft: IIS 7
- Nginx: 1.0 (1.1 recommended)
1.2 System Requirements – Joomla version 3.x
Software
- Software: PHP 5.3.1+ (5.4+ recommended)
Databases
- MySQL(InnoDB support required): 5.1+
- MSSQL 10.50.1600.1+
- PostgreSQL 8.3.18+
Web Severs
- Apache 2.x+
- Microsoft IIS 7
- Nginx 1.0 (1.1 recommended)
1.3 Browser Requirements
The requirements are the same with both Joomla 2.5 and Joomla 3.x
- Firefox 4+
- IE (Internet Explorer) 9+
- Google Chrome 10+
- Opera 10+
- Safari 5+
1.4 Development Environment
The requirements are the same with both Joomla 2.5 and Joomla 3.x
During the development process, Localhost is preferred. You can use the following servers on your PC to develop your site.
Windows
- WAMPSEVER
- XAMPP for Windows
Linux
- LAMP Bubdle
- XAMPP for Linux
Mac OS
- MAMP & MAMP Pro
- XAMPP for Mac OS
1.5 Component Requirements
K2 component – V2.6.x
Kunena component – V3.0.x
Acymailing component
2DOWNLOAD – Back to top
Download Packages from our store:
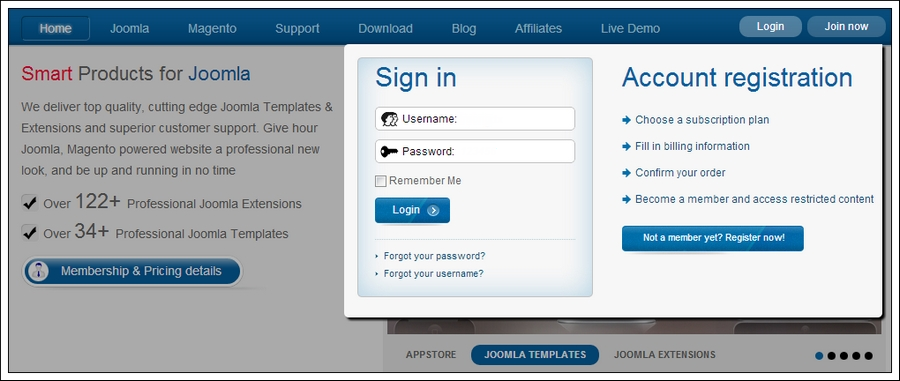
Step 1: Login your account
Step 2: Go to Joomla > Download > Joomla Templates Club
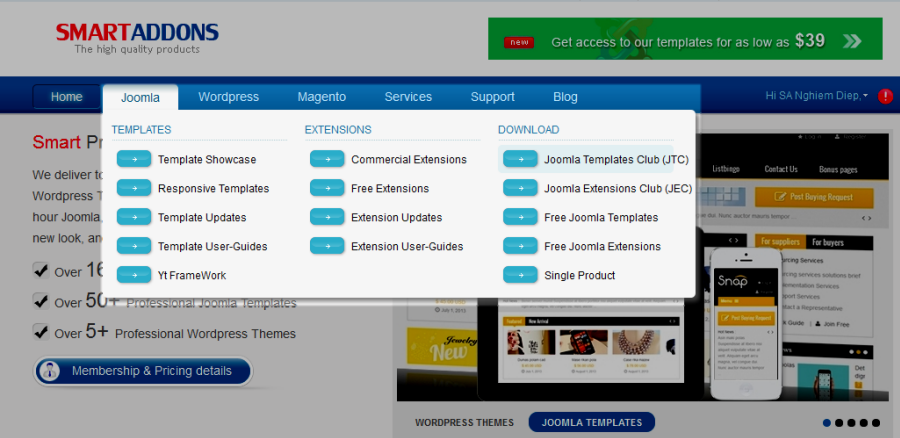
Step 3: Under Premium Joomla Templates –> Find and Download Template as you want

3INSTALLATION – Back to top
There are two ways to install a Joomla Template:
- Install Quickstart: By using this package, you will set the template exactly as our Demo with sample data. This is applied when you need a fresh Joomla with our template.
- Install Template and Extensions: This is applied when you have already installed a Joomla instance on your server. You will need only be using the zipped files in “Extensions” and “Template” folders mentioned above.
3.1 Install with Quickstart Package:
The following steps will guide to install a quickstart package of SmartAddons Joomla Template: Click here
3.2 Install with Template and Extensions:
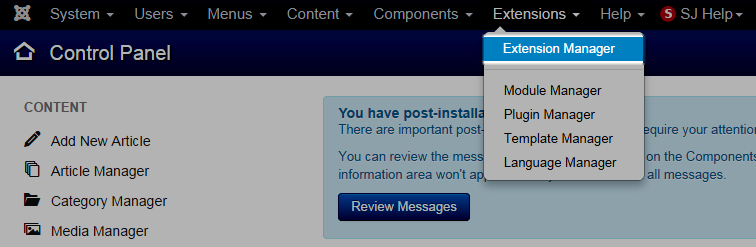
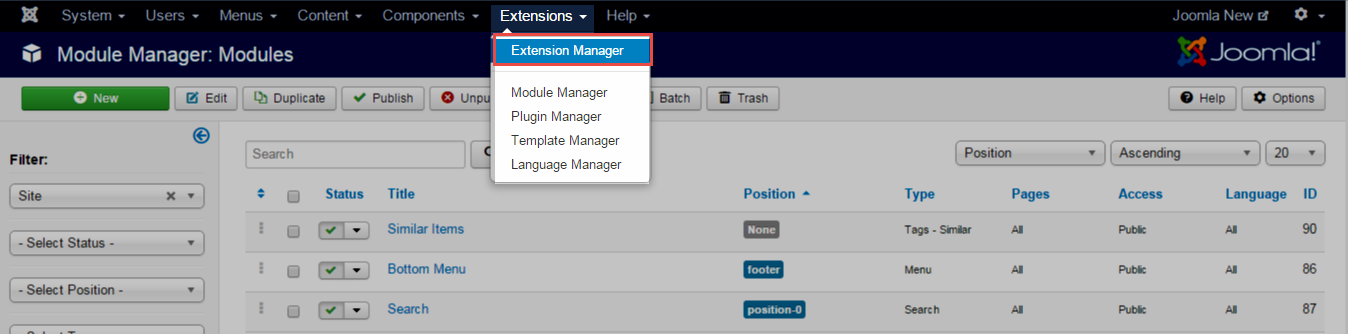
Step 1: Access the installation panel
Navigate to Extensions >> Extension Manager.
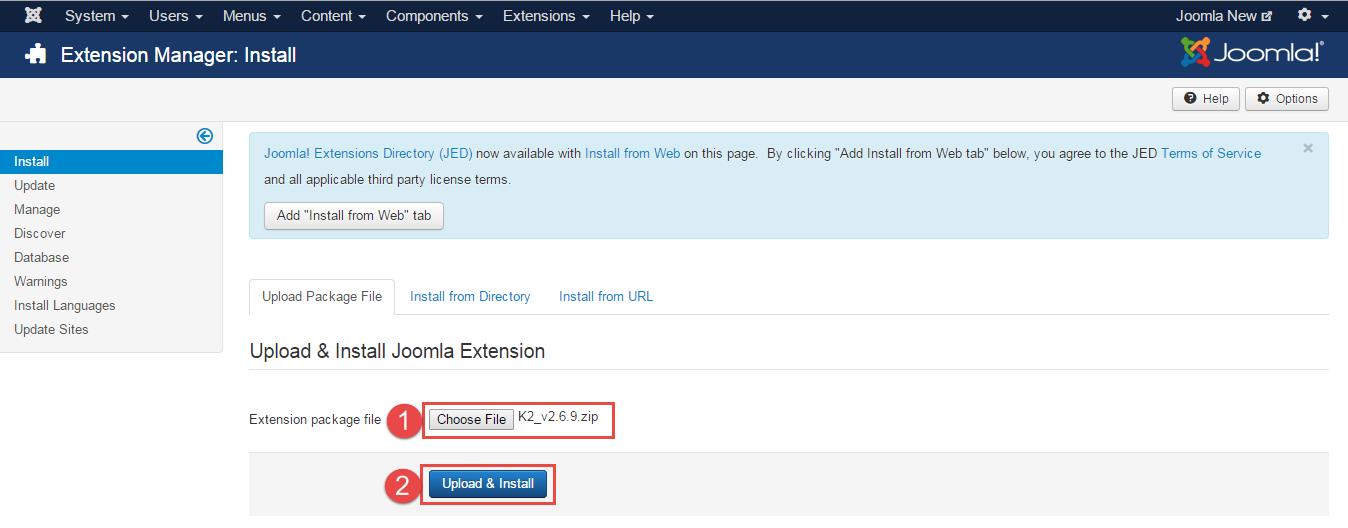
Step 2: Install Template
- Install with option: Upload Package File
Firstly, you choose file template.zip then click on the button Upload & Install to install the uploaded package.

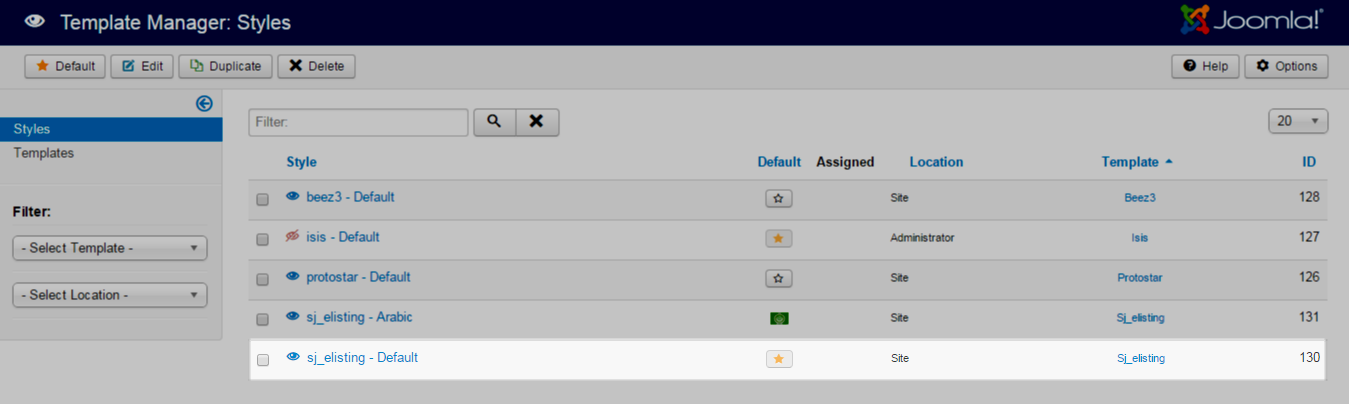
Step 3: Set New Installed Template As Default Template
- Go to Extensions >> Template Manager.
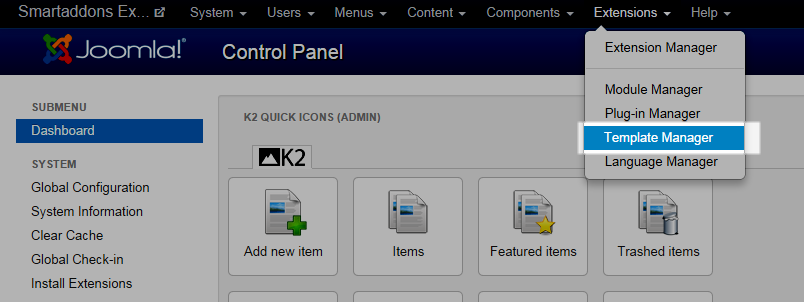
- In order to display your site with the new installed template, you have to set the template as default template
The extensions package include of (Modules/Components and Plugins).
Note: Extensions installation is the same with Template installation as above
Here is list of extensions that are used in the template.
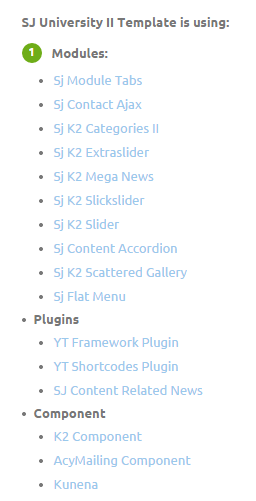
ENABLE MODULES
- Go to Extensions >> Module Manager.
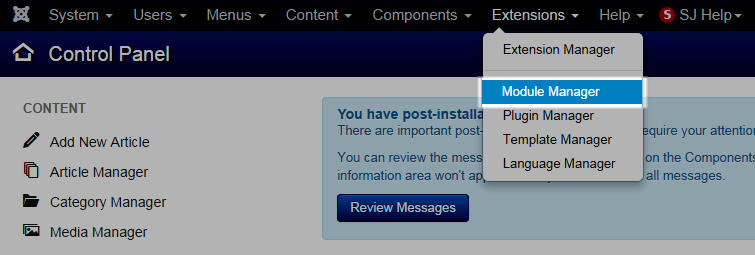
- Find the new installed module. For example: with “SJ Contact Ajax “ module.
You can use the search or filter option to find the new installed module easier and enable module.
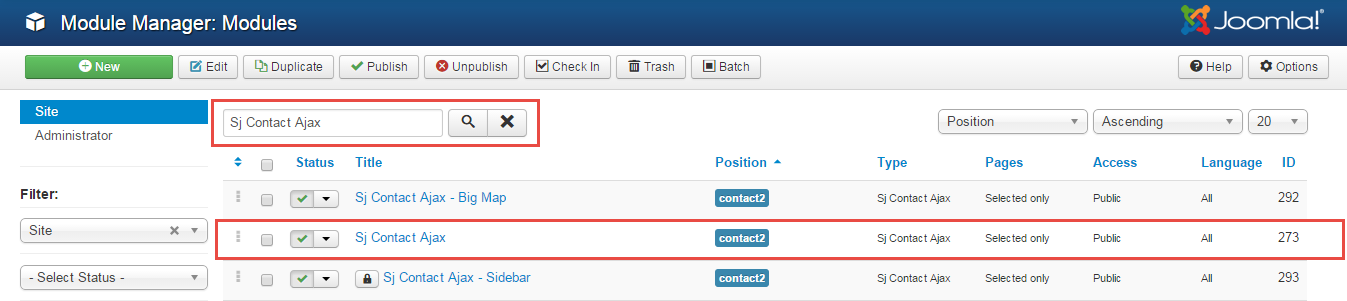
- Enable and set position for the module
When you find the new installed module, please open its configuration panel.

To display the module in front-page, you must publish it and set right position for the module.
Please note that not all module positions can be active in front-page, so please make sure the module is assigned to an active module position.
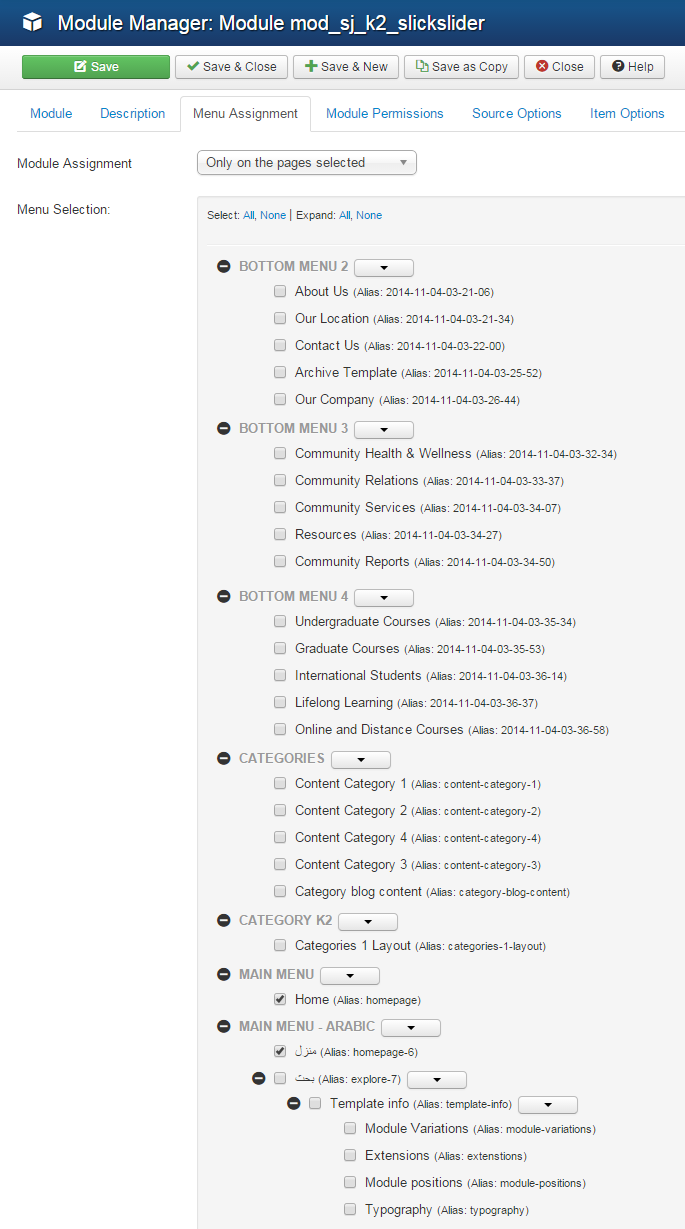
- Assign the modules to specific menus
You have to assign the modules to specific menus so that the module will be displayed in the assigned menus. There are 4 options : “On all pages, No pages, Only on the pages selected, On all pages except those selected”
- Configure the new installed module
Normally, each module has its own settings, the settings allow you to customize the module so that you can have it displayed in front-page as you wish.

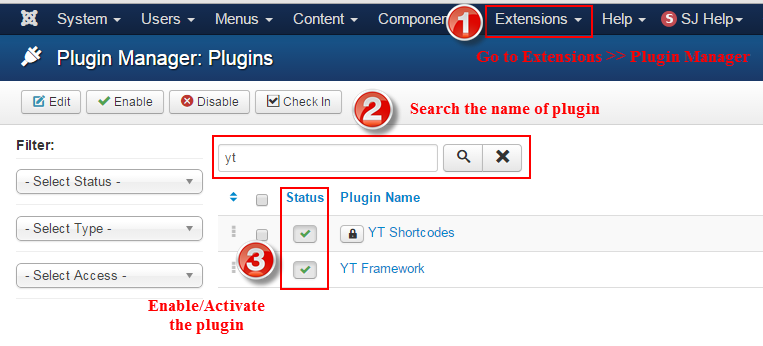
ENABLE PLUGIN
Note: all plug-ins listed are imperative.
- YT Framework Plug-in supports to add extra parameters used with Mega Menu and to compress CSS/JS/HTML when optimizing code. Besides, configure Yt Framework to show SJ Help with Report Bugs, Template Tutorials and YT Framework Tutorials or include jQuery into template. You can go here for getting more information of this plugin.
- YT Shortcode offer you an amazing tool to create advanced custom content with minimal effort or even without any knowledge how to code HTML. Please go here for getting more information of this plugin.
- SJ Content Related News is a simple plugin for content component. It helps you to show other articles in the same category. Please go here for getting more information of this plugin.
You need to install and activate them when using this template. Let’s start from 1 – 2 – 3 to active plug-ins as below:
Install Component
-
To Install K2 Component, you can follow these steps:
Step 1: Please go to Extensions >> Extension Manager
Step 2: Choose file K2 component.zip that you have downloaded and then Click on the button Upload & Install to install the uploaded package.
To install Kunena Component, Acymailing Component you do the same as the installation K2 Component.
3.3 Install multilingual site in SJ Template
To help you about language problem when you work with SJ Template, please read this post: how to set up a multilingual site in SJ Template.
4CONFIGURATION – Back to top
To view the Module Positions you can follow these steps:
Step 1: Go to Extensions >> Template Manager >> click the “Options” button in the toolbar.
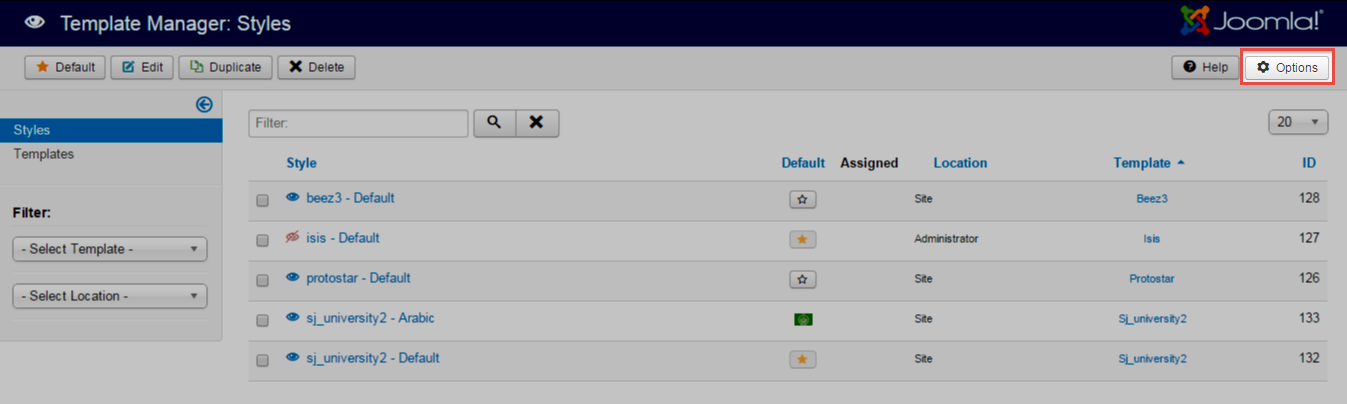
Step 2: In the “Preview Module Positions” parameter >> click“Enable” and click the “Save” button
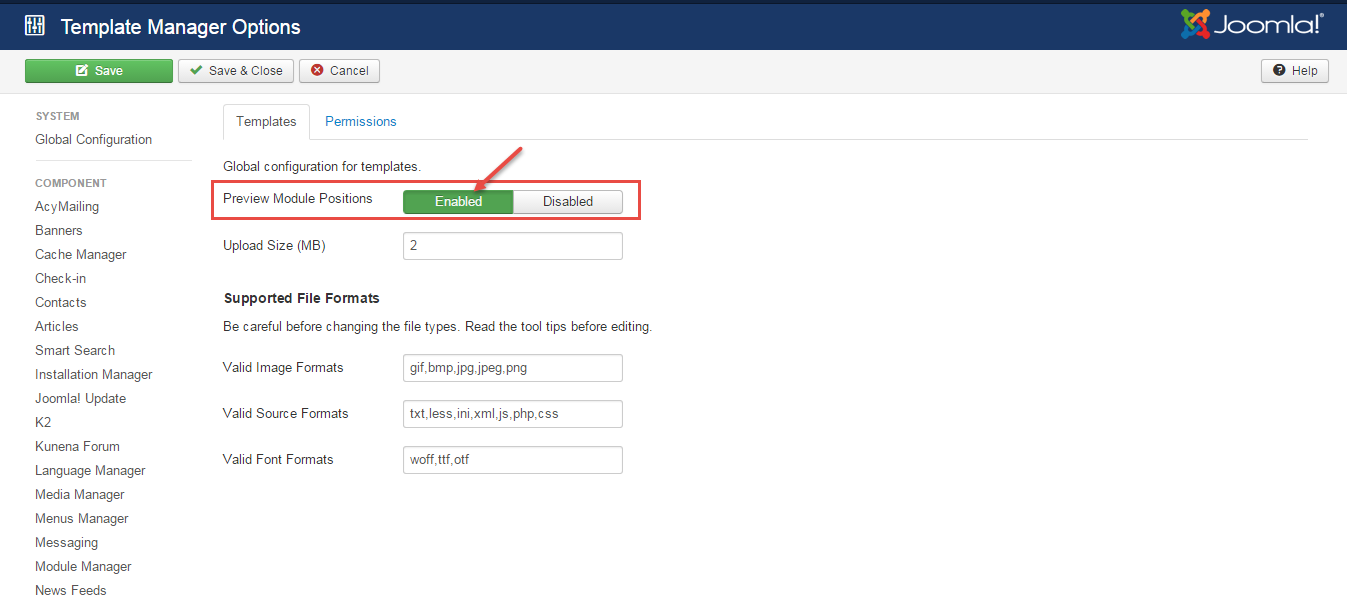
Step 3: Joomla 2.5 and Joomla 3.x will show the Template positions with ?tp=1 or &tp=1

Step 4:The image below shows Module Positions
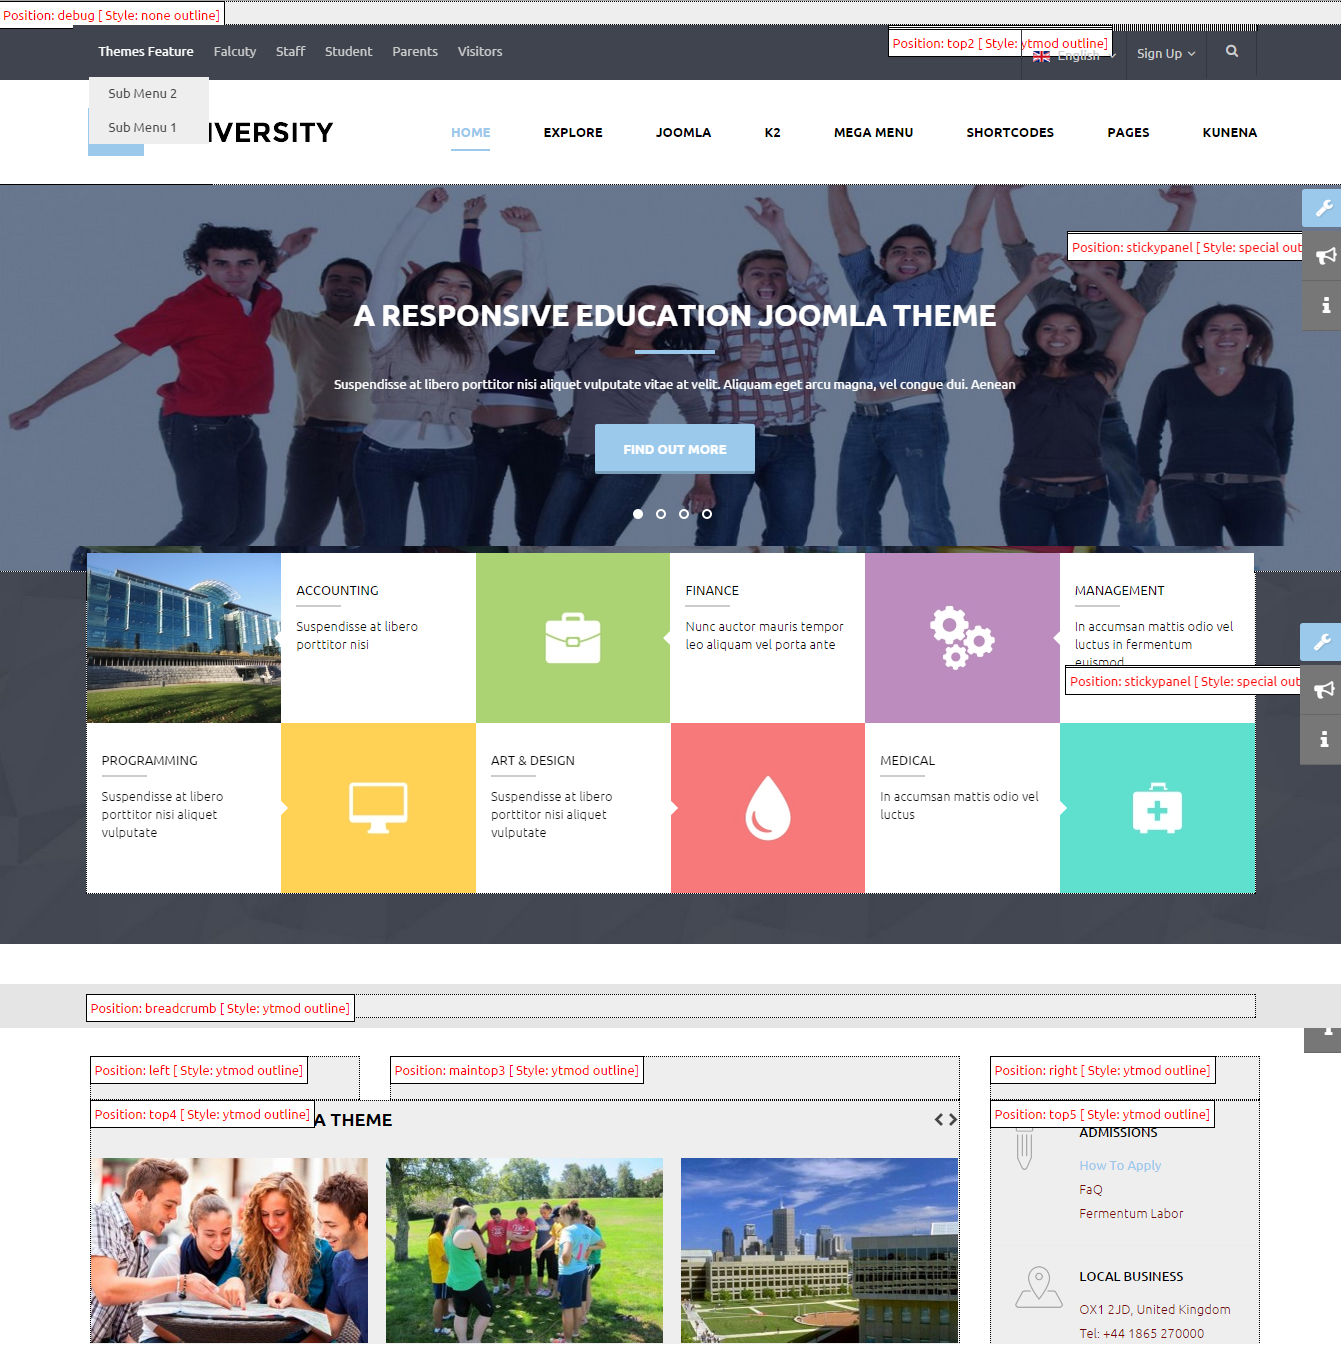
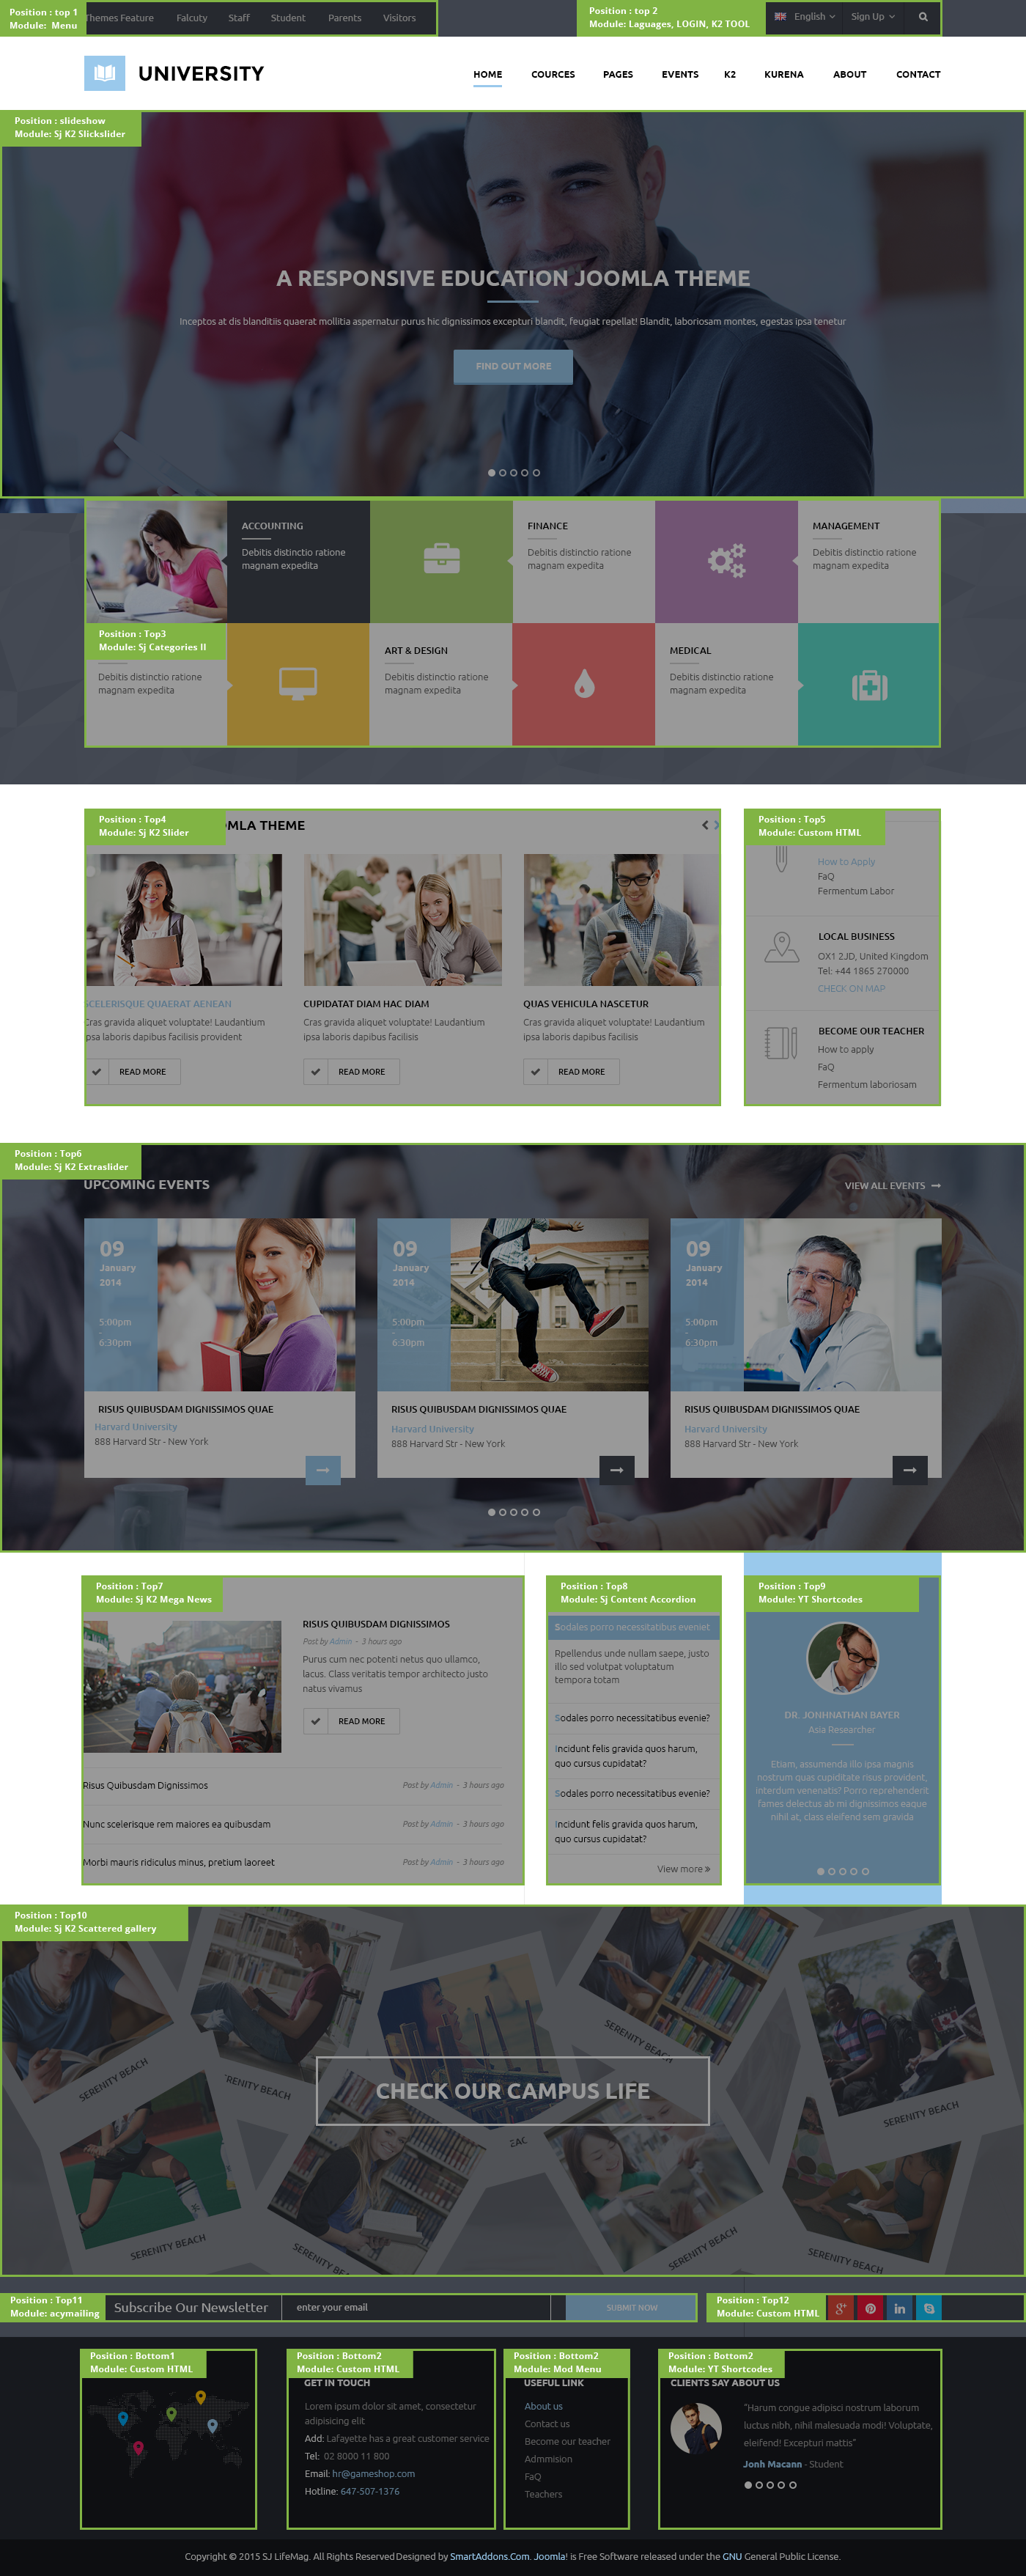
4.1 Layout Position
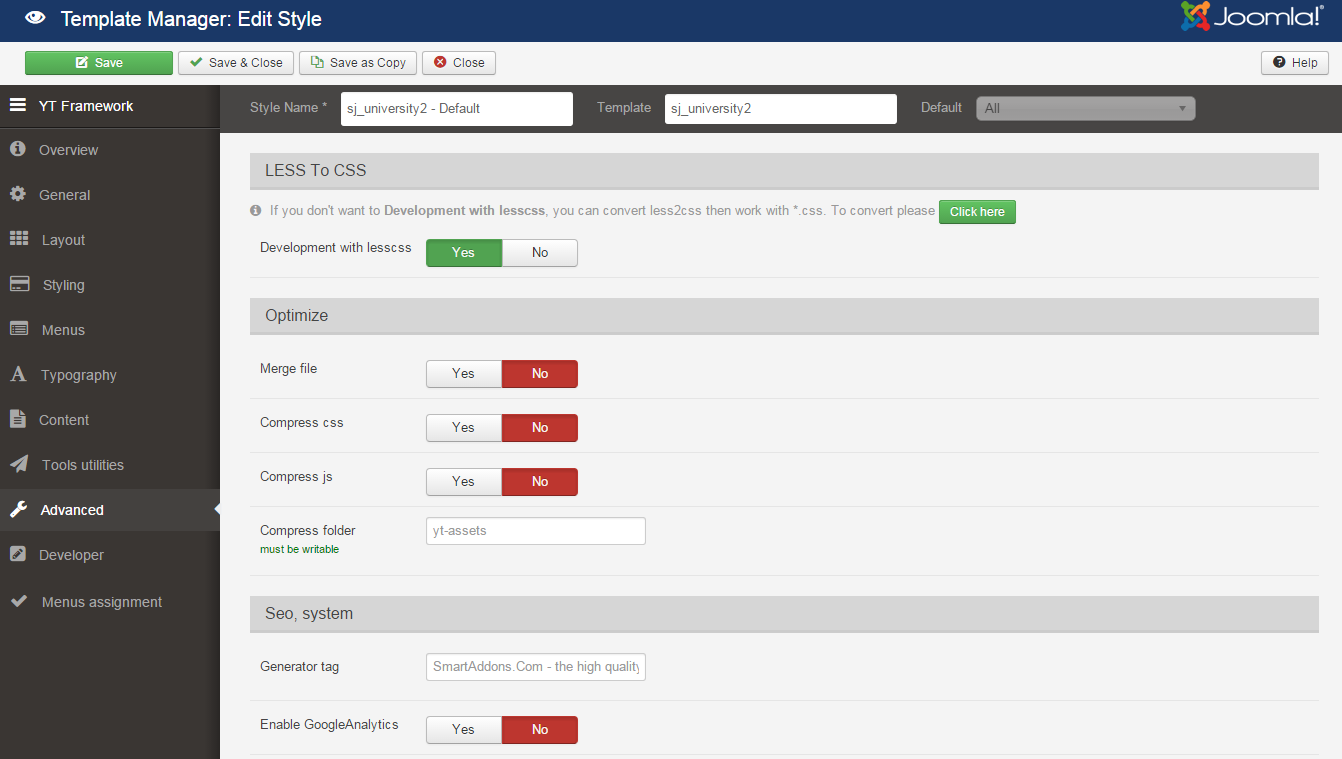
4.2 Template Configuration
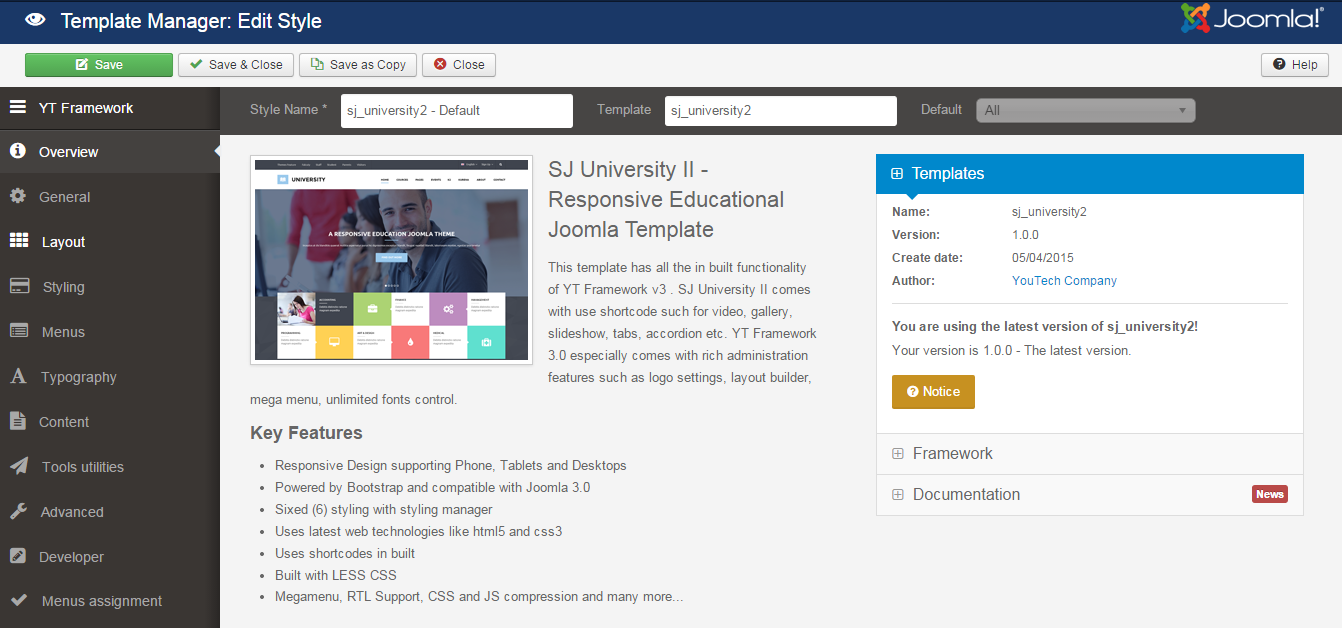
Go to Extensions > Template Manager > SJ University II. All of parameters of this template are divided into the following groups, in which they are explained themselves:
OVERVIEW
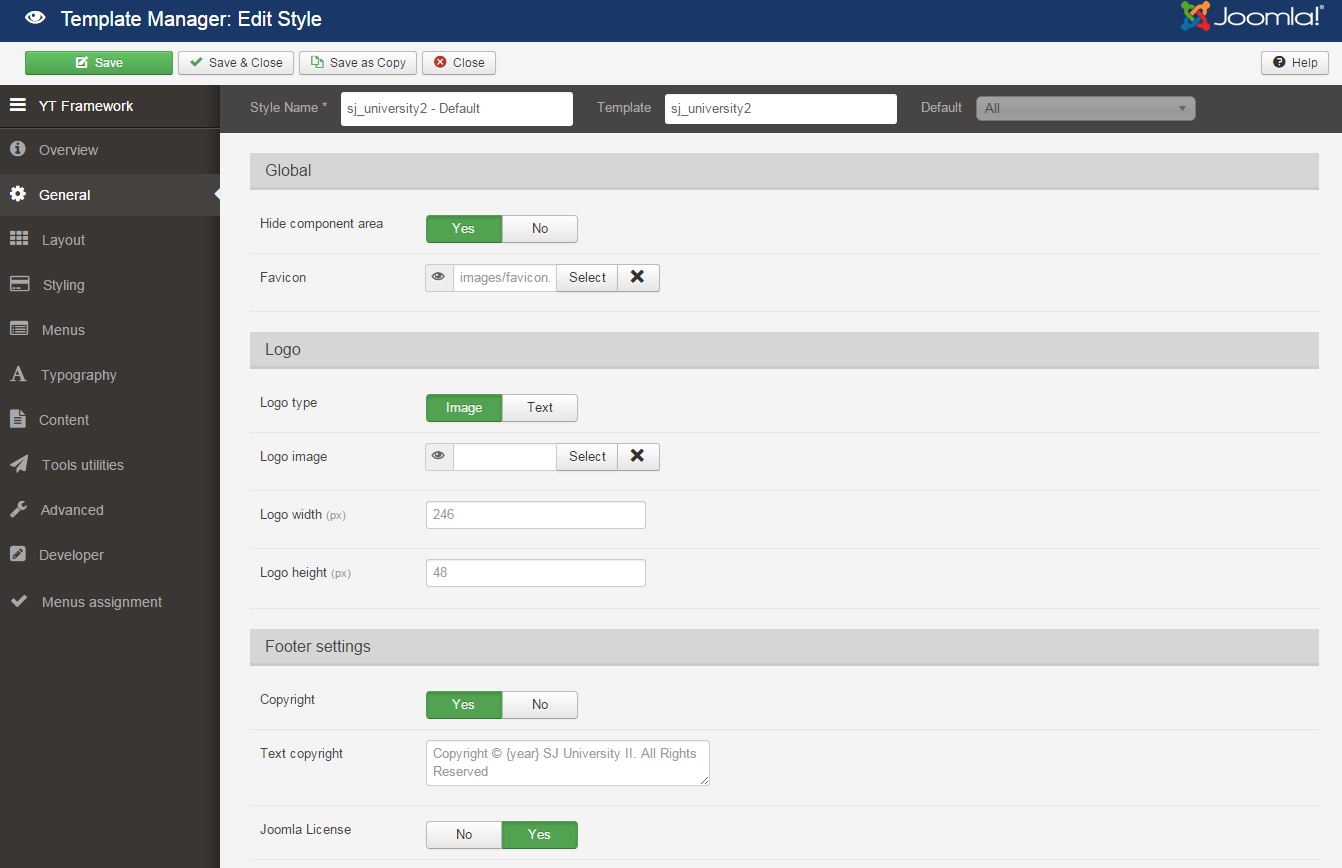
GENERAL
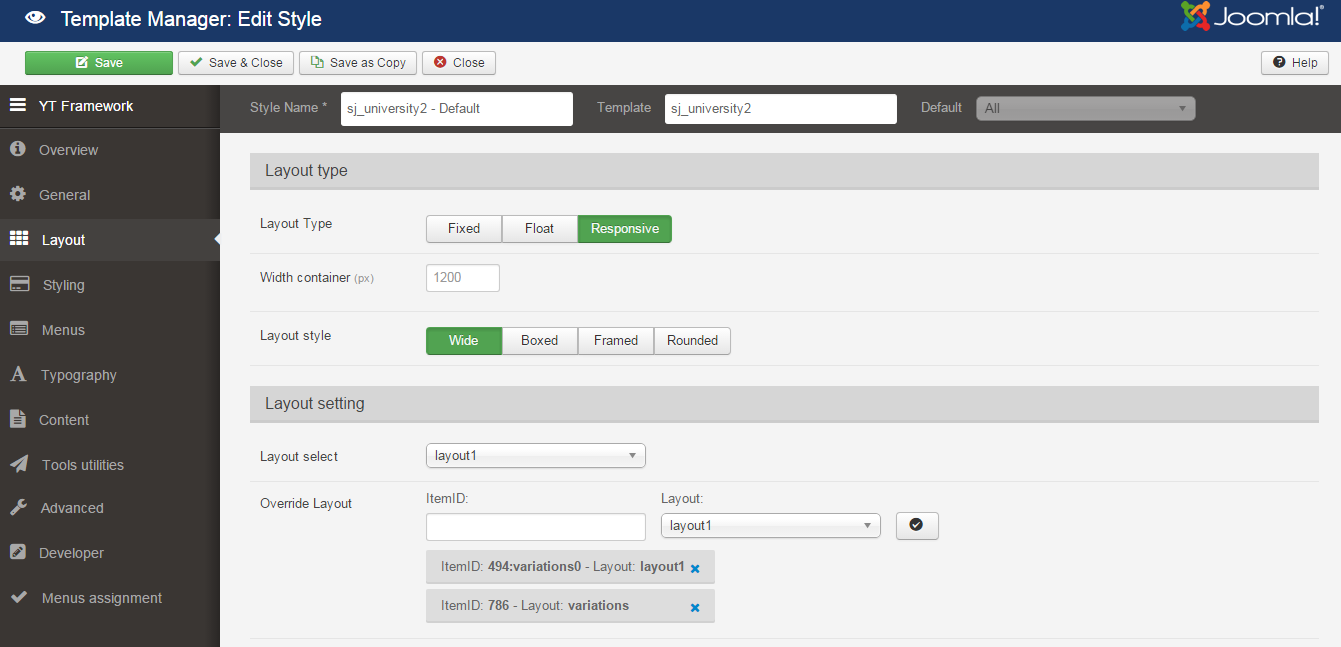
LAYOUT
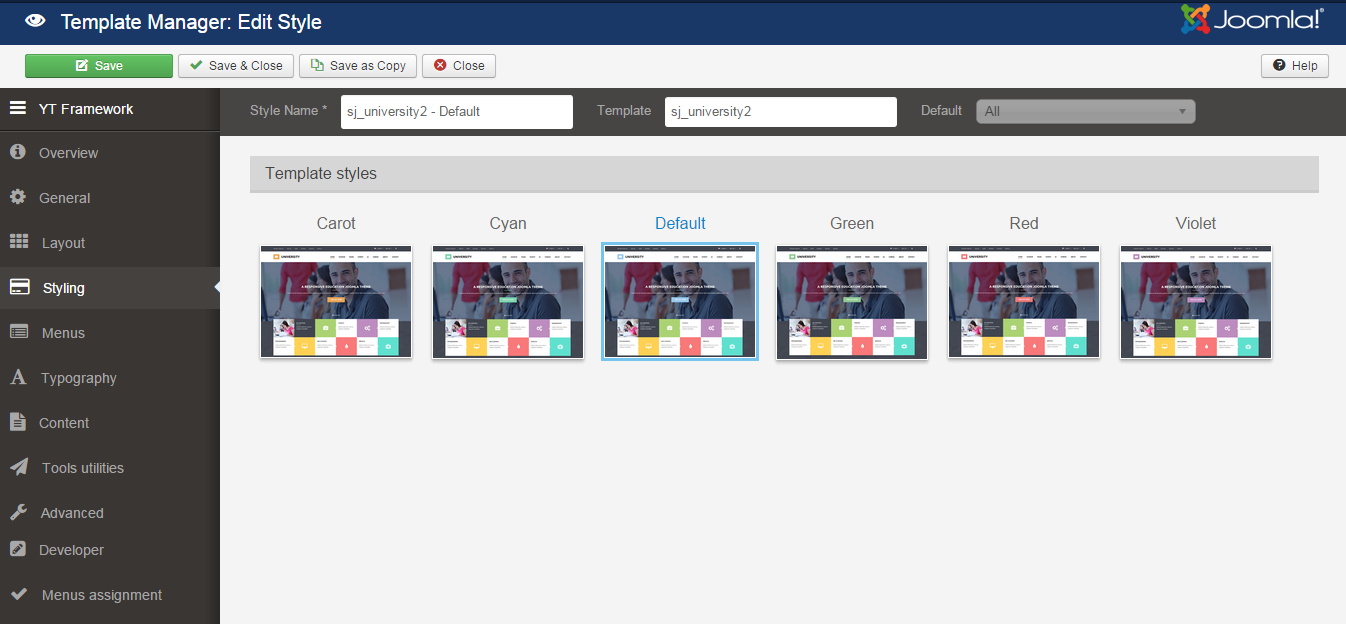
STYLING
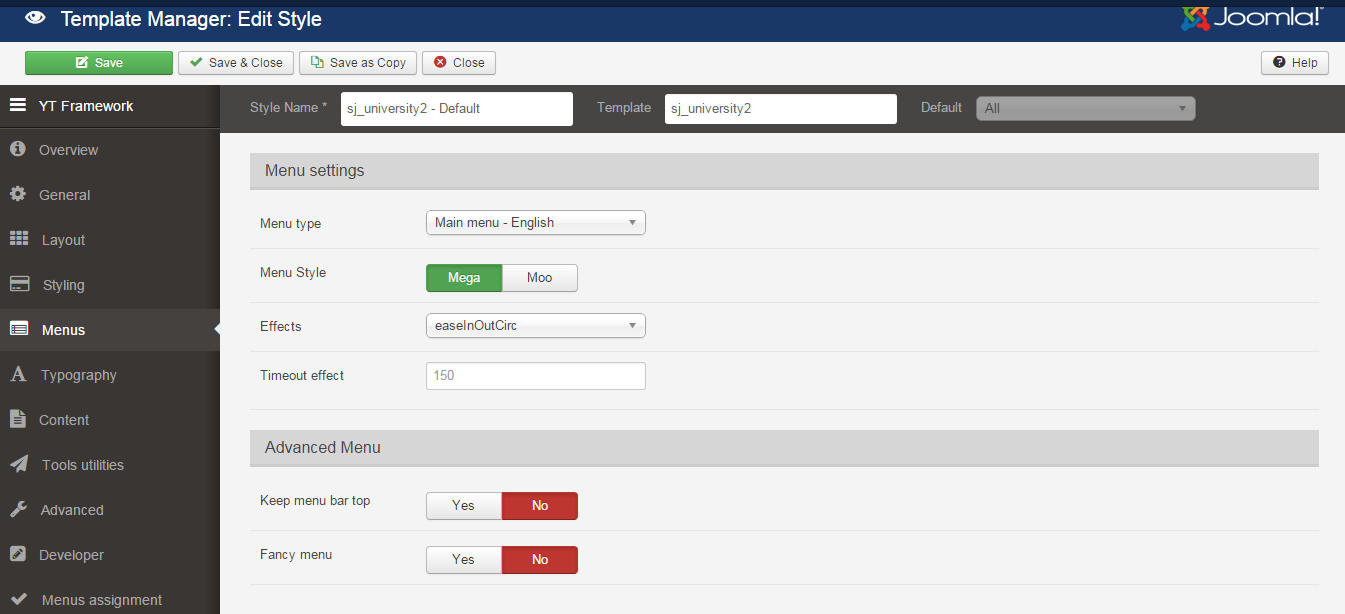
MENUS
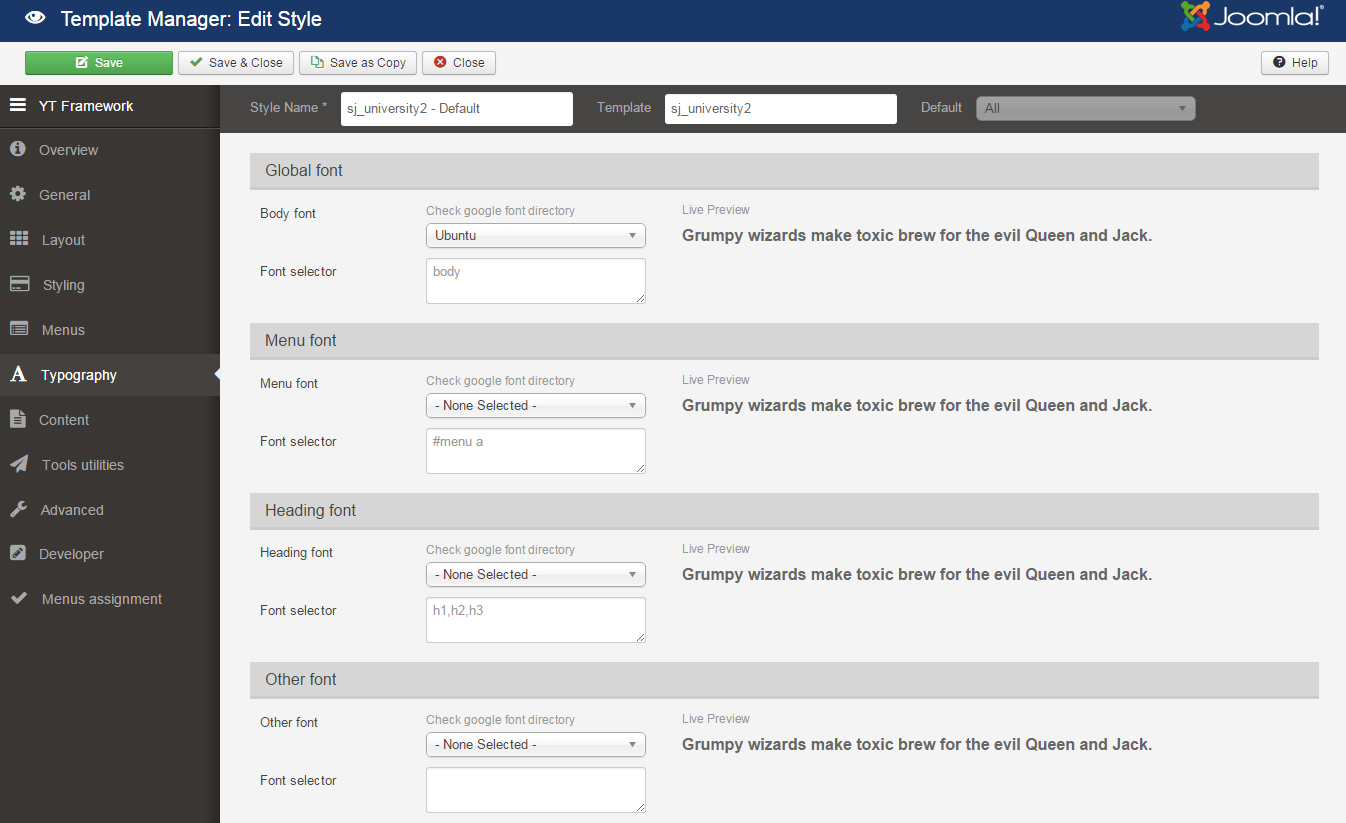
TYPOGRAPHY
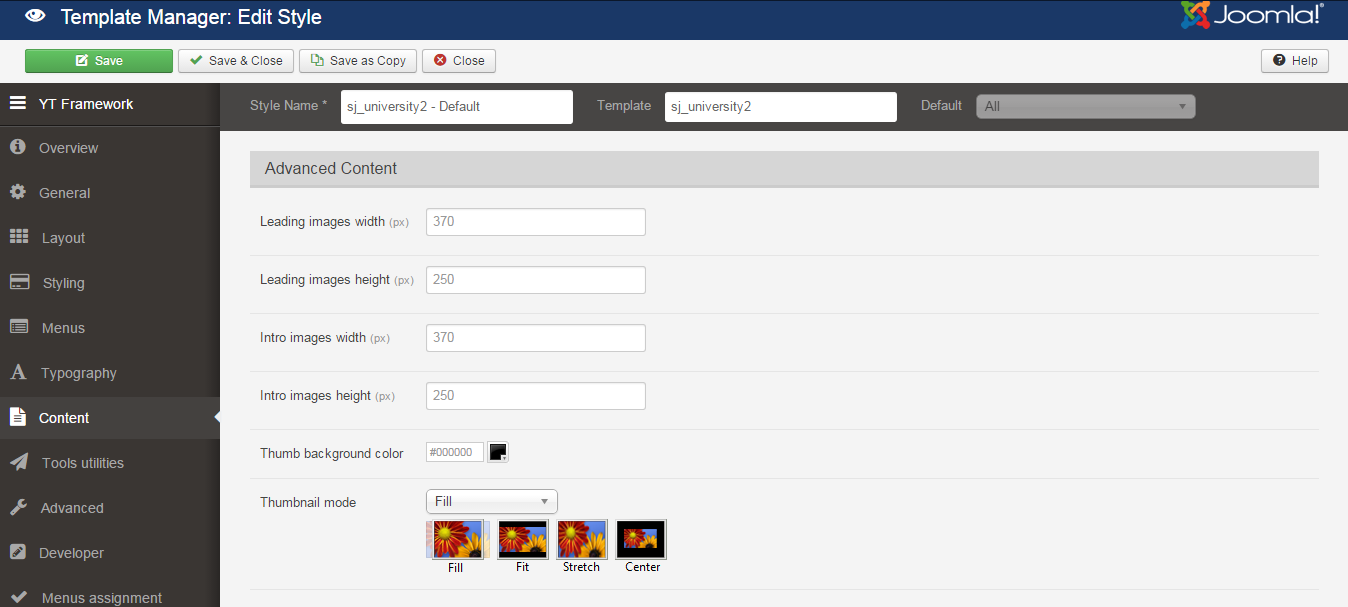
CONTENT
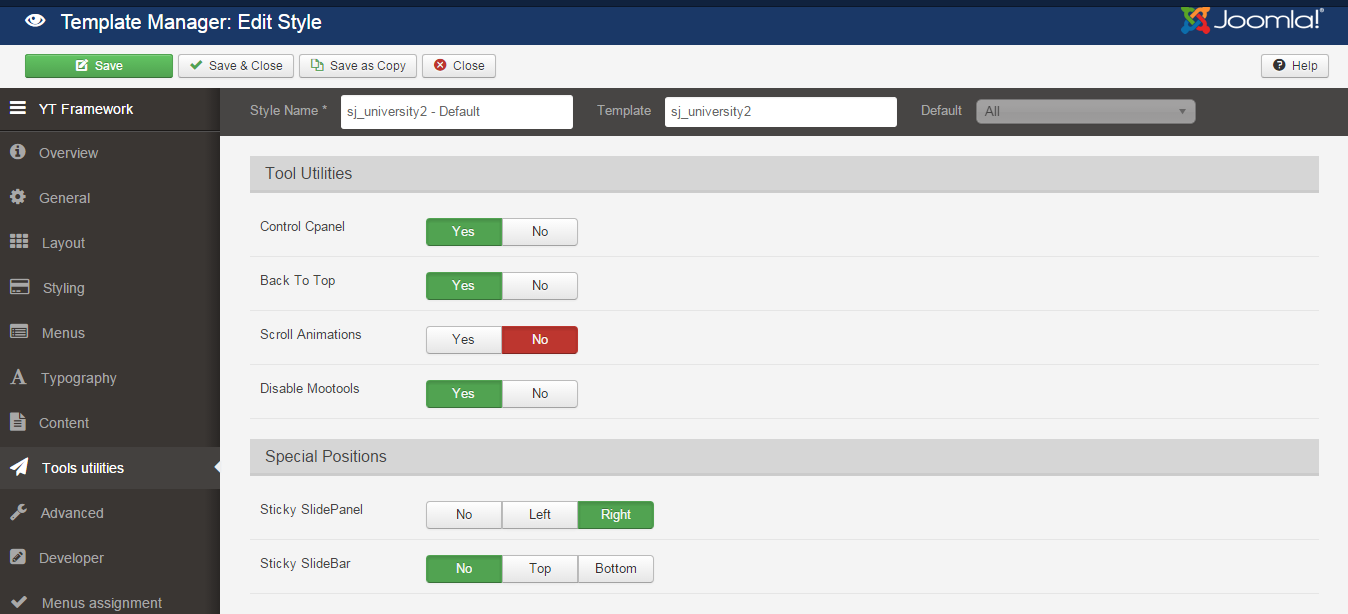
TOOLS UTILITIES
ADVANCED
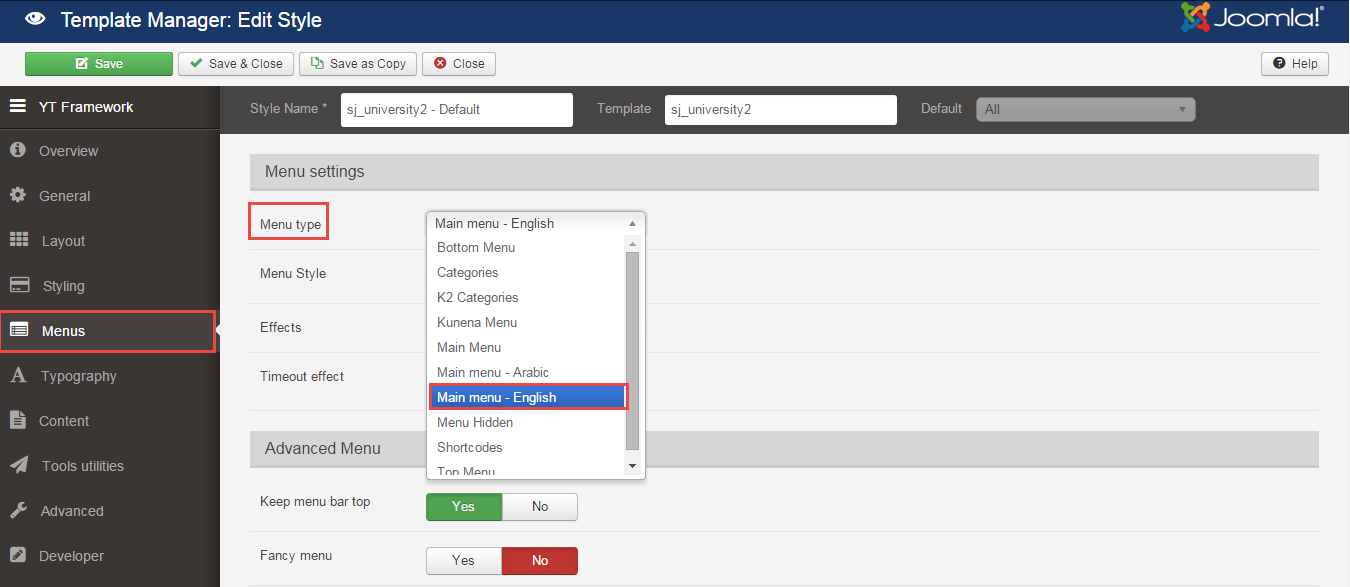
4.3 Menu Configuration
If you want to make your site same as SJ University II demo site, this would be helpful. We will only show the important, customized settings.
To display the Menu in SJ University II, please go to Extensions >> Template Manager >> Click “Menus” parameters >> Find “Menu Type” >> choose Menu you want and click the “Save” button.
To change logo image in SJ University II, please go to here
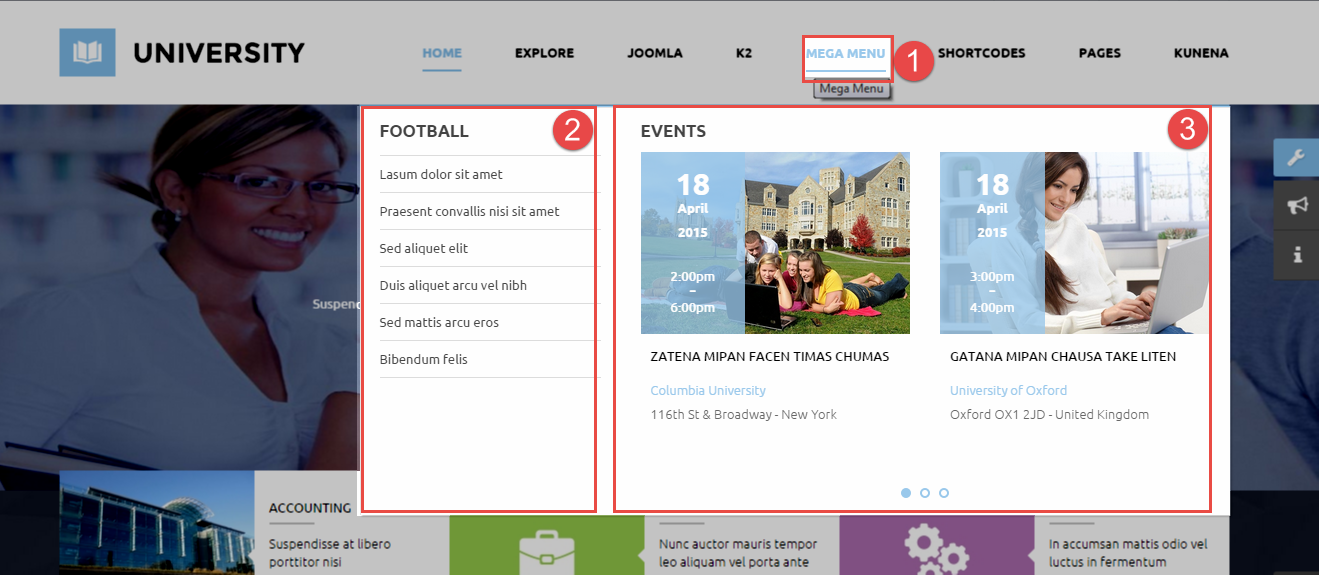
4.3.1. Mega Menu Configuration
Frontend Appearance
Backend Settings
1. Mega Menu
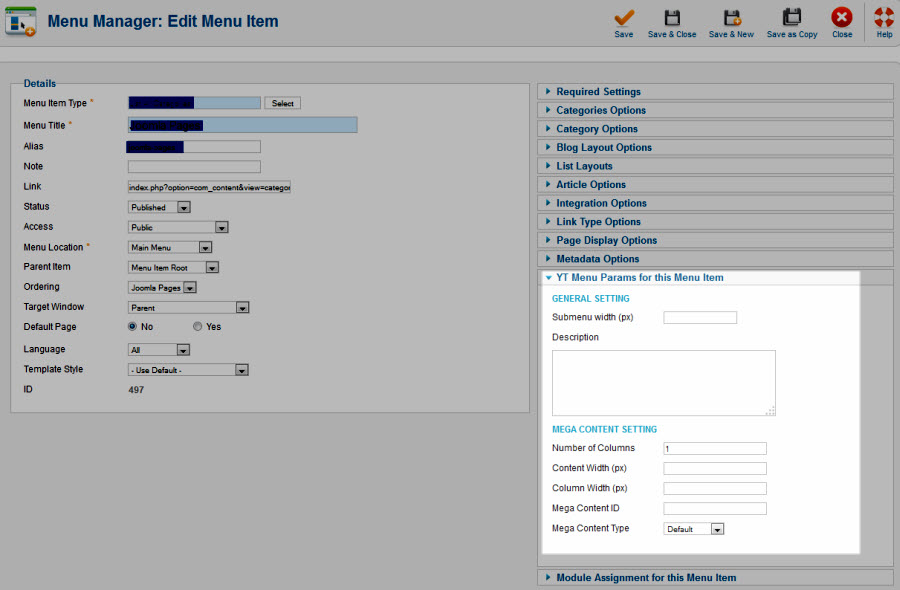
To configure “Mega Menu”, please go to Menus >> Main menu – English >> Find “Mega Menu” (you can create new menu if this menu is not exist).
Menu Item Type: External URL
Template Style: Use default
Menu Location: Main menu – English
- Menu Detail Settings: Click Here
- YT Menu Params Settings: Click Here
2. Football Menu
Module Class Suffix: Not Use
Position: Mega2
Menu Type: Custom HTML
To configure Football Menu, please go to Extensions >> Module Manager >> Click “New” button to create a new module >> Select “Custom HTML” module.
Backend Settings
- Module: Click Here
- Options: Click Here
- Advanced: Click Here
Copy and paste the Code into editor:
|
1 2 3 4 5 6 7 8 |
<ul class="list_mega"> <li><a href="#">Lasum dolor sit amet</a></li> <li><a href="#">Praesent convallis nisi sit amet</a></li> <li><a href="#">Sed aliquet elit </a></li> <li><a href="#">Duis aliquet arcu vel nibh</a></li> <li><a href="#">Sed mattis arcu eros</a></li> <li><a href="#" rel="alternate">Bibendum felis</a></li> </ul> |
3. Events Menu
Module Class Suffix: extra-upcoming-slider
Position: Mega2
Module Type: Sj K2 Extra Slider
To configure Events Menu, please go to Extensions >> Module Manager >> Click “New” button to create a new module >> Select “Sj K2 Extra Slider” module.
Backend Settings
- Module: Click Here
- Source Options: Click Here
- Item Options: Click Here
- Image Options: Click Here
- Effect Options: Click Here
- Advanced: Click Here
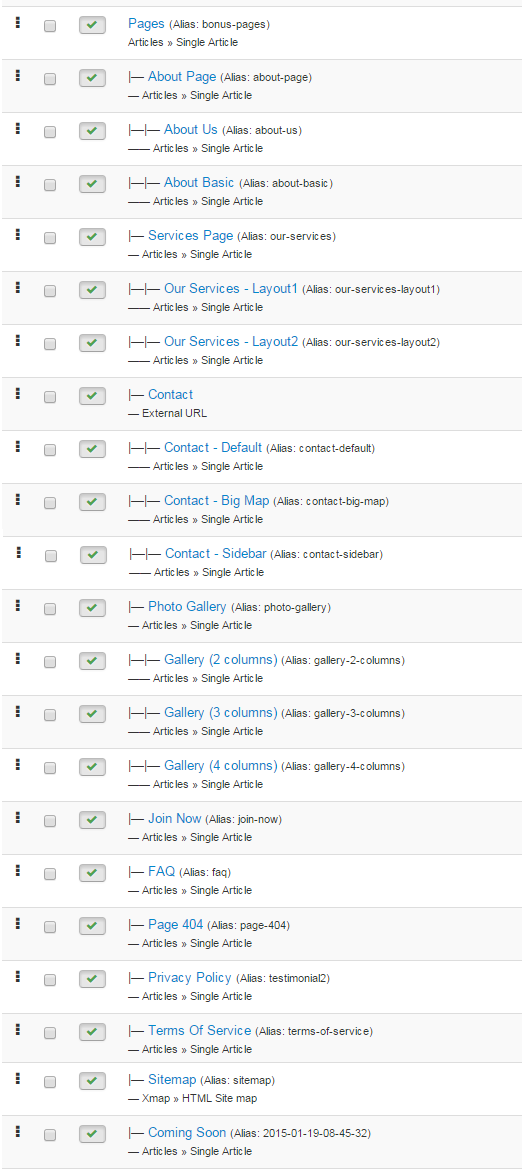
4.3.2 Pages Menu Configuration
To configure Pages Menu, please go to Menus >> Main menu – English >> Find “Pages Menu”
Frontend Appearance
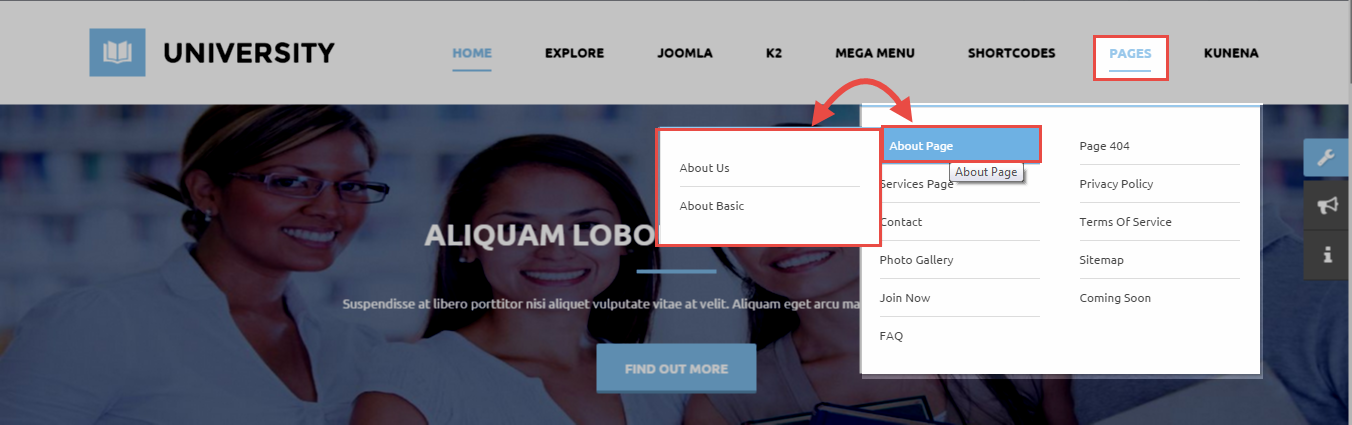
Tree of Pages Menu
Backend Settings
Pages Menu
Menu Item Type: Single Article
Template Style: Use default
Menu Location: Main menu – English
- Details: backend settings
- Yt Menu Params for this Menu Item: backend settings
About Page Menu
Menu Item Type: Single Article
Template Style: Use default
Menu Location: Main menu – English
- Details: backend settings
- Yt Menu Params for this Menu Item: backend settings
About Us Menu
Menu Item Type: Single Article
Template Style: Use default
Menu Location: Main menu – English
- Details: backend settings
- Yt Menu Params for this Menu Item: backend settings
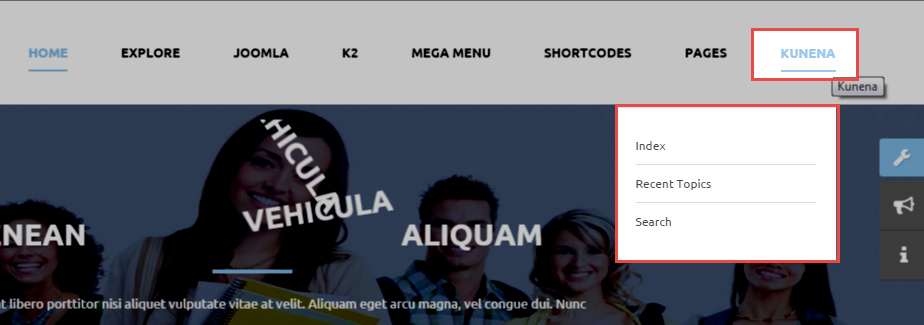
4.3.3 Kunena Menu Configuration
To configure Kunena Menu, please go to Menus >> Main menu – English >> Find “Kunena Menu”
Frontend Appearance
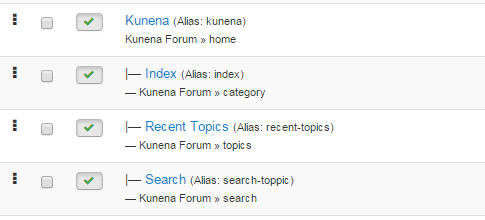
Tree of Kunena Menu
Backend Settings
Kunena Menu
Menu Item Type: Home Page
Template Style: Use default
Menu Location: Main menu – English
- Details: backend settings
- Yt Menu Params for this Menu Item: backend settings
Index Menu
Menu Item Type: Category List
Template Style: Use default
Menu Location: Main menu – English
- Details: backend settings
- Yt Menu Params for this Menu Item: backend settings
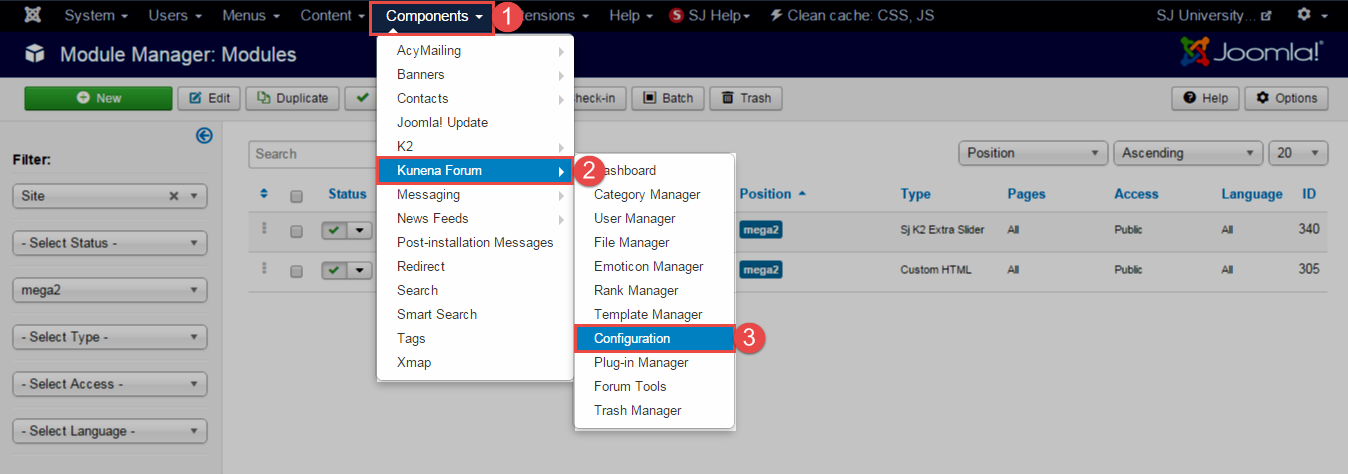
NOTE: Kunena Configuration
STEP1: Please go to Component >> Kunena Forum >> Configuration
Backend Settings
- General: backend settings
- Frontend: backend settings
4.4 Extension Configuration
4.4.1 Module Menu Top – Top1 Position
Module Class Suffix: Not Use
Module Type: Menu
Frontend Appearance

Backend Settings
To configure this module, please go to Extensions >> Module Manager >> Click “New” button to create a new module >> Select “Menu” module.
- Module: backend settings
- Advanced: backend settings
4.4.2 Top2 – Position
Frontend Appearance

4.4.2.1 Language Switcher – Top2 Position
Module Position – Module Suffix
Module Class Suffix: me-language
Module Type: Language Switcher
Frontend Appearance

Backend Settings
To configure this module, please go to Extensions >> Module Manager >> Click “New” button to create a new module >> Select “Language Switcher” module.
- Module: backend settings
- Advanced: backend settings
4.4.2.2 Login Form – Top2 Position
Module Position – Module Suffix
Module Class Suffix: me-login
Module Type: Login
Frontend Appearance

Backend Settings
To configure this module, please go to Extensions >> Module Manager >> Click “New” button to create a new module >> Select “Login” module.
- Module: backend settings
- Advanced: backend settings
4.4.2.3 Search K2 – Top2 Position
Module Position – Module Suffix
Module Class Suffix: me_search
Module Type: K2 Tools
Frontend Appearance

Backend Settings
To configure this module, please go to Extensions >> Module Manager >> Click “New” button to create a new module >> Select “K2 Tools” module.
- Module: backend settings
- Advanced: backend settings
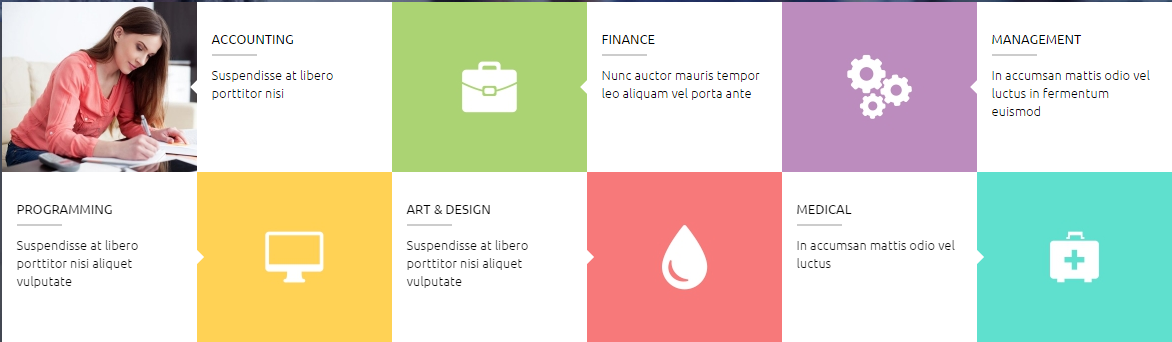
4.4.3 SJ Categories II for K2 – Top3 Position
Module Position – Module Suffix
Module Class Suffix: categories-ii
Module Type: SJ Categories II for K2
Frontend Appearance
Backend Settings
To configure this module, please go to Extensions >> Module Manager >> Click “New” button to create a new module >> Select “SJ Categories II for K2” module.
- Module: backend settings
- General Options: backend settings
- Source Options: backend settings
- Image Options: backend settings
- Advanced: backend settings
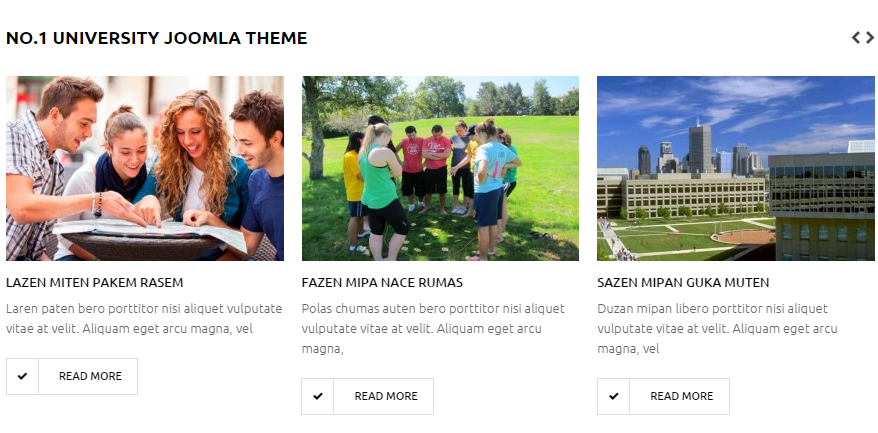
4.4.4 No.1 University Joomla Theme – Top4 Position
Module Position – Module Suffix
Module Class Suffix: k2-slider-style-one
Module Type: Sj K2 Slider
Frontend Appearance
Backend Settings
To configure this module, please go to Extensions >> Module Manager >> Click “New” button to create a new module >> Select “Sj K2 Slider” module.
- Module: backend settings
- Source Options: backend settings
- Item Options: backend settings
- Image Options: backend settings
- Effect Options: backend settings
- Advanced: backend settings
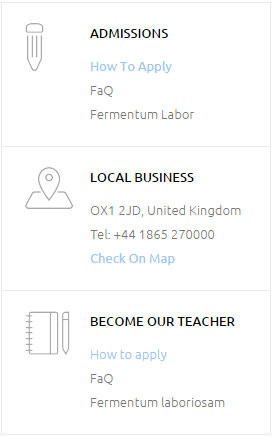
4.4.5 Custom Module Admissions – Top5 Position
Module Position – Module Suffix
Module Class Suffix: cus-admissions
Module Type: Custom HTML
Frontend Appearance
Backend Settings
To configure this module, please go to Extensions >> Module Manager >> Click “New” button to create a new module >> Select “Custom HTML” module.
- Module: backend settings
- Options: backend settings
- Advanced: backend settings
Copy and paste the Code into editor:
|
1 2 3 4 5 6 7 8 9 10 11 12 13 14 15 16 17 18 19 20 21 22 23 24 25 26 27 28 |
<ul> <li> <div class="icon"> <img src="images/demo/icon/icon-pen.png" alt="" /></div> <div class="content"> <h3 class="title"><a title="" href="#">Admissions</a></h3> <a href="#">How To Apply</a> <p>FaQ</p> <p>Fermentum Labor</p> </div> </li> <li> <div class="icon"> <img src="images/demo/icon/icon-map.png" alt="" /></div> <div class="content"> <h3 class="title"><a title="" href="#">Local Business</a></h3> <p>OX1 2JD, United Kingdom</p> <p>Tel: +44 1865 270000</p> <a href="#">Check On Map</a></div> </li> <li> <div class="icon"> <img src="images/demo/icon/icon-book.png" alt="" /></div> <div class="content"> <h3 class="title"><a title="" href="#">become our teacher</a></h3> <p><a href="#" rel="alternate">How to apply</a></p> <p>FaQ</p> <p>Fermentum laboriosam</p> </div> </li> </ul> |
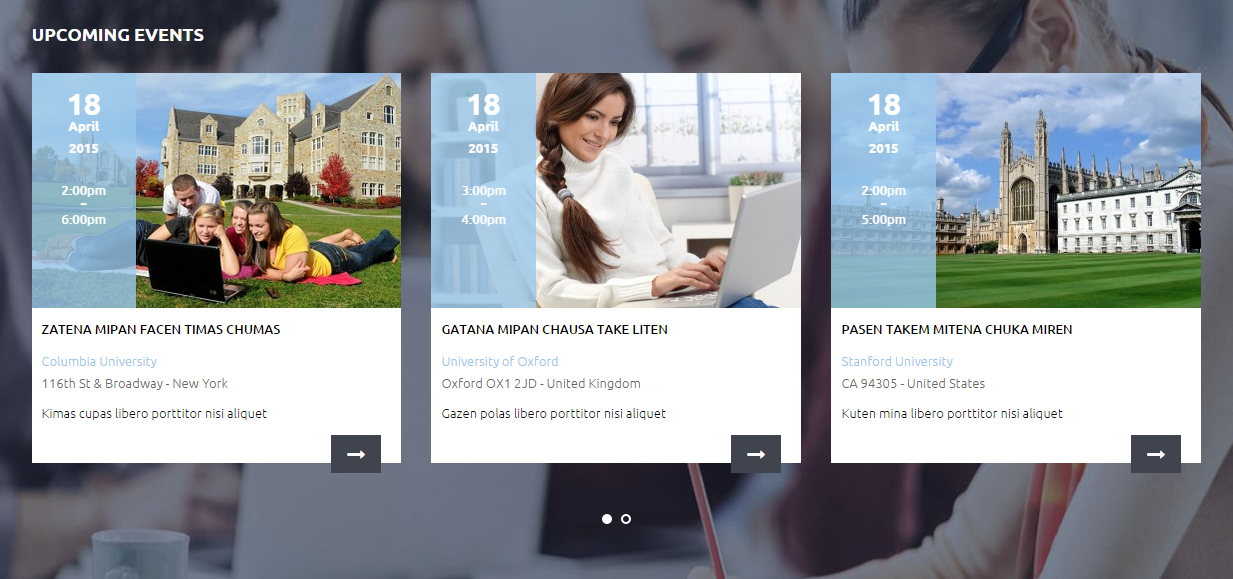
4.4.6 Upcoming Events – Top6 Position
Module Position – Module Suffix
Module Class Suffix: extra-upcoming-slider
Module Type: Sj K2 Extra Slider
Frontend Appearance
Backend Settings
To configure this module, please go to Extensions >> Module Manager >> Click “New” button to create a new module >> Select “Sj K2 Extra Slider” module.
- Module: backend settings
- Source Options: backend settings
- Item Options: backend settings
- Image Options: backend settings
- Effect Options: backend settings
- Advanced: backend settings
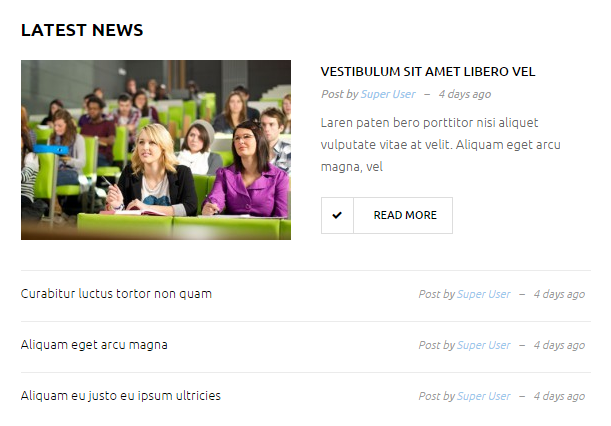
4.4.7 Latest News – Top7 Position
Module Position – Module Suffix
Module Class Suffix: k2-mega-new-main
Module Type: Sj Mega News for K2
Frontend Appearance
Backend Settings
To configure this module, please go to Extensions >> Module Manager >> Click “New” button to create a new module >> Select “Sj Mega News for K2” module.
- Module: backend settings
- General Options: backend settings
- Source Options: backend settings
- Item Options: backend settings
- Image Options: backend settings
- Advanced: backend settings
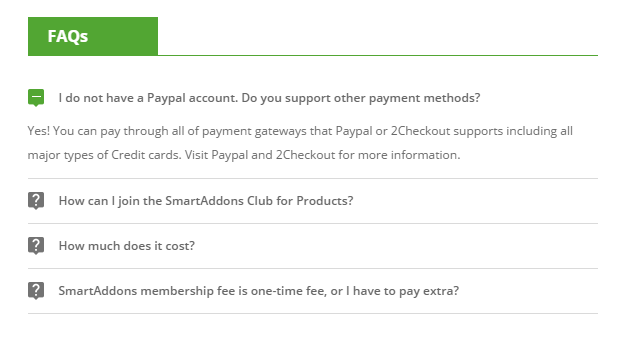
4.4.8 Education Faq – Top8 Position
Module Position – Module Suffix
Module Class Suffix: Not Use
Module Type: Sj Content Accordion
Frontend Appearance
Backend Settings
To configure this module, please go to Extensions >> Module Manager >> Click “New” button to create a new module >> Select “Sj Content Accordion” module.
- Module: backend settings
- Items Option: backend settings
- Image Option: backend settings
- Advanced: backend settings
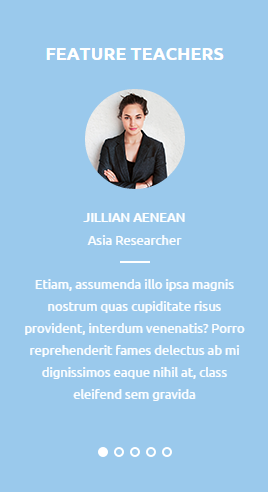
4.4.9 Feature Teachers – Top9 Position
Module Position – Module Suffix
Module Class Suffix: feature-teachers
Module Type: Custom HTML
Frontend Appearance
Backend Settings
To configure this module, please go to Extensions >> Module Manager >> Click “New” button to create a new module >> Select “Custom HTML” module.
- Module: backend settings
- Options: backend settings
- Advanced: backend settings
Copy and paste the Code into editor:
|
1 2 3 4 5 6 7 8 9 10 11 12 13 14 15 16 17 18 19 20 21 22 23 24 25 26 27 28 29 30 31 32 33 34 35 36 37 38 39 40 41 42 43 44 45 46 |
<div class="carousel-custommer">[carousel width="100%" height="100%" align="center" count="5" control="yes"] [carousel_item ] <div class="customslider"> <div class="item-image"><img src="images/demo/customer1.png" alt="" /></div> <div class="content-main"> <h3 class="title">Jillian Aenean</h3> <span class="adred">Asia Researcher</span> <p class="post-commnets">Etiam, assumenda illo ipsa magnis nostrum quas cupiditate risus provident, interdum venenatis? Porro reprehenderit fames delectus ab mi dignissimos eaque nihil at, class eleifend sem gravida</p> </div> </div> [/carousel_item] [carousel_item ] <div class="customslider"> <div class="item-image"><img src="images/demo/customer2.png" alt="" /></div> <div class="content-main"> <h3 class="title">Jillian Aenean</h3> <span class="adred">Asia Researcher</span> <p class="post-commnets">Etiam, assumenda illo ipsa magnis nostrum quas cupiditate risus provident, interdum venenatis? Porro reprehenderit fames delectus ab mi dignissimos eaque nihil at, class eleifend sem gravida</p> </div> </div> [/carousel_item] [carousel_item ] <div class="customslider"> <div class="item-image"><img src="images/demo/customer3.png" alt="" /></div> <div class="content-main"> <h3 class="title">Jillian Aenean</h3> <span class="adred">Asia Researcher</span> <p class="post-commnets">Etiam, assumenda illo ipsa magnis nostrum quas cupiditate risus provident, interdum venenatis? Porro reprehenderit fames delectus ab mi dignissimos eaque nihil at, class eleifend sem gravida</p> </div> </div> [/carousel_item] [carousel_item ] <div class="customslider"> <div class="item-image"><img src="images/demo/customer3.png" alt="" /></div> <div class="content-main"> <h3 class="title">Jillian Aenean</h3> <span class="adred">Asia Researcher</span> <p class="post-commnets">Etiam, assumenda illo ipsa magnis nostrum quas cupiditate risus provident, interdum venenatis? Porro reprehenderit fames delectus ab mi dignissimos eaque nihil at, class eleifend sem gravida</p> </div> </div> [/carousel_item] [carousel_item ] <div class="customslider"> <div class="item-image"><img src="images/demo/customer3.png" alt="" /></div> <div class="content-main"> <h3 class="title">Jillian Aenean</h3> <span class="adred">Asia Researcher</span> <p class="post-commnets">Etiam, assumenda illo ipsa magnis nostrum quas cupiditate risus provident, interdum venenatis? Porro reprehenderit fames delectus ab mi dignissimos eaque nihil at, class eleifend sem gravida</p> </div> </div> [/carousel_item] [/carousel]</div> |
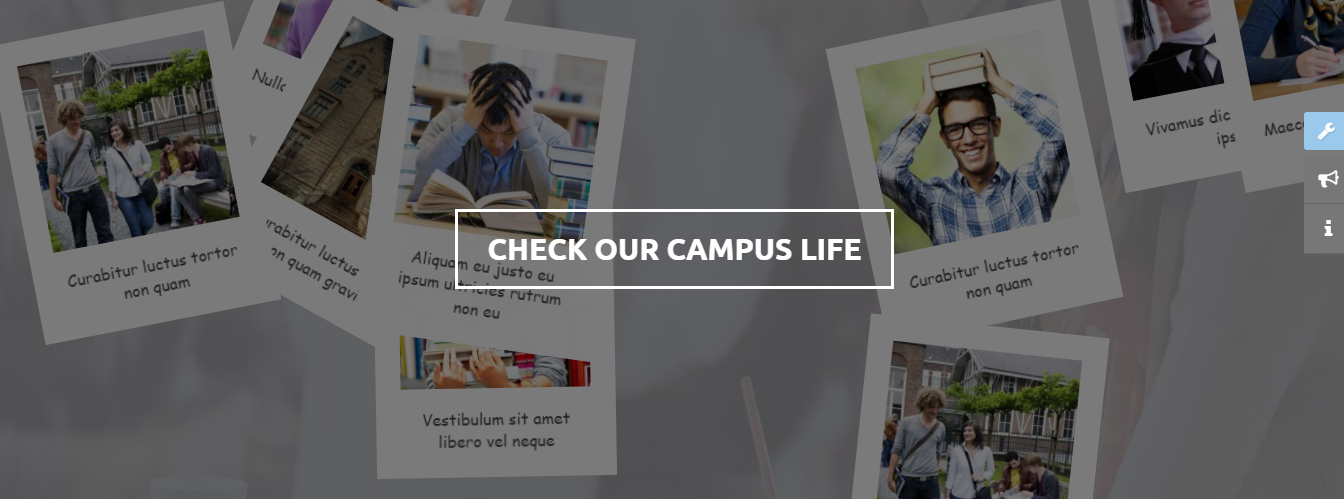
4.4.10 SJ Scattered Gallery for K2 – Top10 Position
Module Position – Module Suffix
Module Class Suffix: style-me-scattered
Module Type: SJ Scattered Gallery for K2
Frontend Appearance
Backend Settings
To configure this module, please go to Extensions >> Module Manager >> Click “New” button to create a new module >> Select “SJ Scattered Gallery for K2” module.
- Module: backend settings
- Source Options: backend settings
- Item Options: backend settings
- Image Options: backend settings
- Advanced: backend settings
4.4.11 Subscribe Our Newsletter – Top11 Position
Module Position – Module Suffix
Module Class Suffix: newsletter
Module Type: AcyMailing Module
Frontend Appearance

Backend Settings
To configure this module, please go to Extensions >> Module Manager >> Click “New” button to create a new module >> Select “AcyMailing Module” module.
- Module: backend settings
- Advanced: backend settings
4.4.12 Social Icon – Top12 Position
Module Position – Module Suffix
Module Class Suffix: social-icon
Module Type: Custom HTML
Frontend Appearance

Backend Settings
To configure this module, please go to Extensions >> Module Manager >> Click “New” button to create a new module >> Select “Custom HTML” module.
- Module: backend settings
- Options: backend settings
- Advanced: backend settings
Copy and paste the Code into editor:
|
1 |
<div class="list-icon">[social type="rss" title="Rss" color="yes"]#[/social] [social type="facebook" title="Facebook" color="yes"]http://www.facebook.com/SmartAddons.page[/social] [social type="twitter" title="Twitter" color="yes"]https://twitter.com/smartaddons[/social] [social type="google-plus" title="Google-Plus" color="yes"]https://plus.google.com/u/0/+Smartaddons/posts[/social] [social type="linkedin" title="Linkedin" color="yes"]http://www.linkedin.com/in/smartaddons[/social]</div> |
4.4.13 Map Custom – Bottom1 Position
Module Position – Module Suffix
Module Class Suffix: Not Use
Module Type: Custom HTML
Frontend Appearance
Backend Settings
To configure this module, please go to Extensions >> Module Manager >> Click “New” button to create a new module >> Select “Custom HTML” module.
- Module: backend settings
- Options: backend settings
- Advanced: backend settings
Copy and paste the Code into editor:
|
1 |
<div><img src="images/sj_univer/demo/1.png" alt="" /></div> |
4.4.14 Get In Touch – Bottom2 Position
Module Position – Module Suffix
Module Class Suffix: get-in-touch
Module Type: Custom HTML
Frontend Appearance
Backend Settings
To configure this module, please go to Extensions >> Module Manager >> Click “New” button to create a new module >> Select “Custom HTML” module.
- Module: backend settings
- Options: backend settings
- Advanced: backend settings
Copy and paste the Code into editor:
|
1 2 3 4 5 6 7 |
<p>Lorem ipsum dolor sit amet, consectetur adipisicing elit</p> <ul> <li><span class="lea">Add:</span> Lafayette has a great customer service</li> <li><span class="lea">Tel:</span> 02 8000 11 800</li> <li><span class="lea">Email:</span> university@gmail.com</li> <li><span class="lea">Hotline</span>: 647-507-1376</li> </ul> |
4.4.15 Useful Link – Bottom3 Position
Module Position – Module Suffix
Module Class Suffix: useful-link
Module Type: Menu
Frontend Appearance
Backend Settings
To configure this module, please go to Extensions >> Module Manager >> Click “New” button to create a new module >> Select “Menu” module.
- Module: backend settings
- Advanced: backend settings
4.4.16 Clients Say About Us – Bottom4 Position
Module Position – Module Suffix
Module Class Suffix: clients-say
Module Type: Custom HTML
Frontend Appearance
Backend Settings
To configure this module, please go to Extensions >> Module Manager >> Click “New” button to create a new module >> Select “Custom HTML” module.
- Module: backend settings
- Options: backend settings
- Advanced: backend settings
Copy and paste the Code into editor:
|
1 2 3 4 5 6 7 8 9 10 11 12 13 14 15 16 17 18 19 20 21 22 23 24 25 26 27 28 29 30 31 |
<div class="carousel-custommer">[carousel width="100%" height="100%" align="center" count="3" control="yes"] [carousel_item ] <div class="customslider"> <div class="item-image"><img src="images/demo/customer1.png" alt="" /> <div class="over-image"> </div> </div> <div class="content-main"> <p class="post-commnets">“Harum congue adipisci nostrum laborum luctus nibh, nihil malesuada modi! Voluptate, eleifend! Excepturi mattis”</p> <h3 class="title"><span class="use">Jillian Aenean</span> - Student</h3> </div> </div> [/carousel_item] [carousel_item ] <div class="customslider"> <div class="item-image"><img src="images/demo/customer2.png" alt="" /> <div class="over-image"> </div> </div> <div class="content-main"> <p class="post-commnets">“Harum congue adipisci nostrum laborum luctus nibh, nihil malesuada modi! Voluptate, eleifend! Excepturi mattis”</p> <h3 class="title"><span class="use">Eker Gilmore</span> - Student</h3> </div> </div> [/carousel_item] [carousel_item ] <div class="customslider"> <div class="item-image"><img src="images/demo/customer3.png" alt="" /> <div class="over-image"> </div> </div> <div class="content-main"> <p class="post-commnets">“Harum congue adipisci nostrum laborum luctus nibh, nihil malesuada modi! Voluptate, eleifend! Excepturi mattis”</p> <h3 class="title"><span class="use">Jillian Gilmore</span> - Student</h3> </div> </div> [/carousel_item] [/carousel]</div> |
5COPYRIGHT – Back to top
To remove Designed by SmartAddons.Com at the footer of template, please purchase our Copyright Removal here
6SUPPORT – Back to top
Thank you so much for purchasing this template. If you have any questions that are beyond the scope of this help file, please send us via: Submit a Ticket
Thanks so much!
