
Items filtered by date: April 2013
SJ Health Template Changelog
VERSION 1.2.1 - Released on 17-Mar-2014
+ Fixed date and month error of blog category
VERSION 1.2.0 - Released on 24-May-2013
+ Joomla 3.1 package is available with: Popular Tags module, Tags component content, Tags component contact, Tags component weblinks
# Fix bug on version 1.1.0 with Joomla 3.0 packages
VERSION 1.1.0 - Released on 14-Apr-2013
# Fix bug on version 1.0.0
VERSION 1.0.0 - Released on 19-Dec-2012
+ Release version for Joomla 2.5 and Joomla 3.0
View DemoRead More
SJ Company Template Changelog
VERSION 1.3.0 - Released on 17-May-2014
+ Upgraded to Joomla version 3.3
# Fixed css logo
# Fixed bug of js after removing Mootool
- Removed Mootool
+ Updated YT Framework Plugin error when installing 2 templates on a site
VERSION 1.2.0 - Released on 16-May-2013
+ Joomla 3.1.x packages are available
+ Support LESS-CSS
^ Update: Plugin, Shortcode
# Fix bug for slideshow when login
VERSION 1.1.0 - Released on 1-Apr-2013
# Fix bug on the Version 1.0
^ Update UI for backend template
^ Support shortcode - bonuspage
^ Update and add new params
VERSION 1.0.0 - Released on 28-Nov-2012
- Release version for Joomla 2.5 and Joomla 3.0
View Demo Read More
SJ Slider for JoomShopping Changelog
SJ Contact Ajax Responsive Userguide
REQUIREMENTS
1. Joomla!, supported versions are listed in our intro page.INSTALLATION
1. Prepare your module package (zip file; please UNZIP first if it is indicated in the file name)2. All steps are in administrator backend of Joomla!:
- In your Administrator page, go to Extensions -> Extension Manager
In this page, click Choose File, select module package. - Then click Upload & Install

- Please wait for module being installed, usually within several seconds
- Now go to Extensions -> Module Manager, click New and create one instance for module you have installed
- Then configure it as SETTINGS part hereafter
SETTINGS
1. This module with sample layout is below:
- Basic Options
- Captcha Options
- Map Options
- Advanced Options


SJ Suggested Posts for Kunena
REQUIREMENTS
1. Joomla!, supported versions are listed in our intro page.2. Kunena Forum component.
INSTALLATION
1. Prepare your module package (zip file; please UNZIP first if it is indicated in the file name)2. All steps are in administrator backend of Joomla!:
- In your Administrator page, go to Extensions -> Extension Manager
In this page, click Choose File, select module package. - Then click Upload & Install
- Please wait for module being installed, usually within several seconds
- Now go to Extensions -> Module Manager, click New and create one instance for module you have installed
- Then configure it as SETTINGS part hereafter
SETTINGS
1. This module with sample layout is below:
- Basic Options
- Other Options
- Advanced Options


YT News Template Userguide
|
If you want to install the template exactly like our demo (same data), you should purchase and install the Quickstart Package.
- Important Notes
- 1. Download Template and Extensions
- 2. YT News Template - Installation and Configuration
- 3. Imperative Plugins - Installation and Configuration
- 4. Other Extensions - Installation and Configuration
Important Notes
- Joomla! 2.5
- Some premium SJ Extensions (see part 3-Core Plugins and 4-Other Extensions)
1. Download Template and Extensions
STEP 1: Login at SmartAddons.com

STEP 2: Go to Download -> Free Joomla Templates

STEP 3: Under Free Templates, click YT News to download

STEP 4: Under YT News -> Download packages as you want

2. YT News -Installation and Configuration
2.1 Installation
- Log in Administrator of Joomla! v2.5.x, go to Extensions -> Extension Manager
On this page, click Choose File button, select our template file you have downloaded then click Upload & Install

- Set YT News as default template

2.2 Configuration
The parameters of YT News Template are divided into the following groups:- Global Settings
- Main Body Column Settings
- Layout Settings
- Styles Settings
- Top Menu Settings
- Content Component
- Advanced Options


3. Imperative Plugins-Installation and Configuration
You need to install: Yt Plugin, SJ Core and YT Extra Params plugin.- Yt Plugin supports Yt Framework for adding extra parameters used with Mega Menu and to compress CSS/JS/HTML when optimizing code.
- While that, SJ Core is used for resizing images in Content Component and other extensions by us.
- Lastly, YT Extra Param help to set up Mega Menu.
3.1 Installation
- Now you install YT Extra Params, Yt Plugin and SJ Core in turn
- STEP 1: In Administrator on Joomla! v2.5.x, go to Extensions -> Extension Manager
On this page, click Choose File button, choose plugin file (extracted from extensions zip file) from then click Upload & Install

- STEP 2: Now, go to Enable Yt Plugin (for Yt Framework) and YT Extra Param in Extension/Plug-in Manager
3.2 Configuration of YT Plugin (for Yt Framework)


4. Other Extensions - Installation and Configuration
After creating data, you can install and configure extensions to have a Website as like as our pre-made demo.4.1 Install
4.1.1 List of extensions used in YT News demo
You can find a list of modules/plugins/components which are used in YT News4.1.2 Installation
- In Administrator on Joomla! v2.5.x, go to Extensions -> Extension Manager
On this page, click Choose File button, choose an extension file then click Upload & Install

- Install the rest of extensions as step above
4.2 Configuration

By this screenshot, you will see how module is placed in the default layout:

4.2.1 Mega Menu - Home


4.2.4 SJ News Splash
Suffix: blank

4.2.5 Login Module
Suffix: blank

4.2.6 Banners Moudule
Suffix: clear

4.2.7 Smart Search
Suffix: blank

4.2.8 Breadcrumb
Suffix: balnk

4.2.9 Sj News Frontpage
Suffix: blank

4.2.10 SJ Multi Video
Suffix: _video

4.2.11 SJ News Content
Suffix: blank

4.2.12 SJ Module Tabs
Suffix: blank

4.2.13 SJ Basic News Module
Suffix: blank

4.2.14 Menu Module
There are several positions that use Menu module. Here we will configure an example. Let take "Main Menu" at left position, others will be the same.
Suffix: blank

4.2.15 SJ Hot Topic Module
Suffix: blank

4.2.16 Who's Online Module
Suffix: blank

4.2.17 Sponsored Ads - Custom HTML
Suffix: _blank

SJ Real Estate Template Userguide
|
If you want to install the template exactly like our demo (same data), you should purchase and install the Quickstart Package.
- Important Notes
- 1. Download Template and Extensions
- 2. SJ Real Estate Template - Installation and Configuration
- 3. Imperative Plugins - Installation and Configuration
- 4. Other Extensions - Installation and Configuration
Important Notes
- Joomla! 2.5
- Content component (customized and included in Quickstart)
- Some premium SJ Extensions (see part 3-Core Plugins and 4-Other Extensions)
1. Download Template and Extensions
1.1 Used for members of JTC - Joomla Template Club
STEP 1: Login at SmartAddons.com

STEP 2: Go to Download -> Joomla Templates Club (JTC)

STEP 3: Under Premium Joomla Templates, click SJ Real Estate to download

STEP 4: Under SJ Real Estate --> Download packages as you want

1.2 Used for single product purchased via e-cart
Receive Donwload-Info email -> Download packages as you want

2. SJ Real Estate -Installation and Configuration
2.1 Installation
- Log in Administrator of Joomla! v2.5.x, go to Extensions -> Extension Manager
On this page, click Choose File button, select our template file you have downloaded then click Upload & Install
- Set SJ Real Estate as default template

2.2 Configuration
The parameters of SJ Real Estate Template are divided into the following groups:- Global Settings
- Main Body Column Settings
- Layout Settings
- Styles Settings
- Top Menu Settings
- Content Component
- Advanced Options


3. Imperative Plugins-Installation and Configuration
You need to install: Yt Plugin, SJ Core and YT Mega Popup plugin.- Yt Plugin supports Yt Framework for adding extra parameters used with Mega Menu and to compress CSS/JS/HTML when optimizing code.
- While that, SJ Core is used for resizing images in Content Component and other extensions by us.
- Lastly, YT Mega Popup support to show popup for Images, Slideshow, Iframes, YouTubes, Ajaxs.
3.1 Installation
- Now you install YT Mega Popup, Yt Plugin and SJ Core in turn
- STEP 1: In Administrator on Joomla! v2.5.x, go to Extensions -> Extension Manager
On this page, click Choose File button, choose plugin file (extracted from extensions zip file) from then click Upload & Install
- STEP 2: Now, go to Enable SJ Core, Yt Plugin (for Yt Framework) and YT Mega Popup in Extension/Plug-in Manager
3.2 Configuration of YT Plugin (for Yt Framework)
4. Other Extensions - Installation and Configuration
After creating data, you can install and configure extensions to have a Website as like as our pre-made demo.4.1 Install
4.1.1 List of extensions used in SJ Real Estate demo
You can find a list of modules/plugins/components which are used in SJ Real Estate by clicking menu Features -> Extensions of demo Website
4.1.2 Installation
- In Administrator on Joomla! v2.5.x, go to Extensions -> Extension Manager
On this page, click Choose File button, choose an extension file then click Upload & Install
- Install the rest of extensions as step above
4.2 Configuration
By this screenshot, you will see how module is placed in the default layout:

4.2.1 Mega Menu - Features


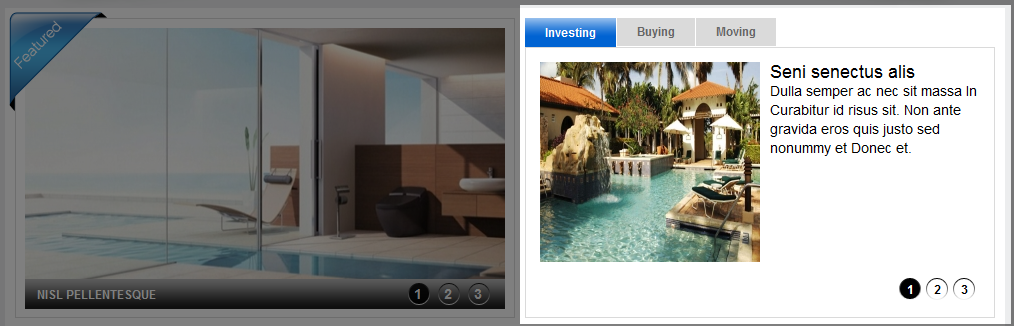
4.2.4 SJ Content Mega Slider
Suffix: blank
BACK END

4.2.5 SJ Content Slideshow
Suffix: badge-featured
BACK END

4.2.6 SJ News Ajax Tabs
Suffix: blank
BACK END

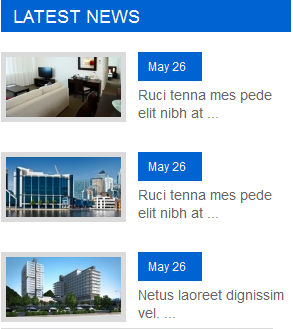
4.2.7 Latest news - SJ Basic News
There are several positions that use SJ Basic News module. Here we will configure an example. Let take "Latest News" at right position, others will be the same.
Suffix: bg_color
BACK END

4.2.8 Banners Module
Suffix: clear
BACK END

4.2.9 Company - Menu Module
There are several positions that use Menu module. Here we will configure an example. Let take "Company" at right position, others will be the same.
Suffix: blank
BACK END

4.2.10 Follow us - Custom HTML
There are several positions that use Custom HTML module. Here we will configure an example. Let take "Follow us" at user12 position, others will be the same.
Suffix: blank
BACK END

4.2.11 Footer Module
Suffix: blank
BACK END

Smart News Userguide
|
If you want to install the template exactly like our demo (same data), you should purchase and install the Quickstart Package.
- Important Notes:
- 1. Download Template and Extensions
- 2. Smart News Template - Installation and Configuration
- 3. Imperative Plugins - Installation and Configuration
- 4. Other Extensions - Installation and Configuration
Important Notes
- Joomla! 1.7 or 2.5
- Some premium SJ Extensions (see part 3-Core Plugins and 4-Other Extensions)
1. Download Template and Extensions
1.1 Used for members of JTC - Joomla Template Club
STEP 1: Login at SmartAddons.com

STEP 2: Go to Download -> Free Joomla Templates or Joomla Templates Club

STEP 3: Under Free Joomla Templates, click Smart News to download

STEP 4: Under Smart News -> Download packages as you want

1.2 Used for single product purchased via e-cart
Receive Donwload-Info email -> Download packages as you want

2. Smart News -Installation and Configuration
2.1 Installation
- Log in Administrator of Joomla! v2.5.x, go to Extensions -> Extension Manager
On this page, click Choose File button, select our template file you have downloaded then click Upload & Install
- Set Smart News as default template

2.2 Configuration
The parameters of Smart News Template are divided into the following groups:- Global Settings
- Main Body Column Settings
- Layout Settings
- Style Settings
- Top Menu Settings
- Content Component Settings
- Advanced Options


3. Imperative Plugins-Installation and Configuration
You need to install: Yt Plugin, SJ Core and Yt Mega Popup plugin.- Yt Plugin supports Yt Framework for adding extra parameters used with Mega Menu and to compress CSS/JS/HTML when optimizing code.
- While that, SJ Core is used for resizing images in Content Component and other extensions by us.
3.1 Installation
- STEP 1: In Administrator on Joomla! v2.5.x, go to Extensions -> Extension Manager
On this page, click Choose File button, choose plugin file plg_content_sj_relatednews.zip (extracted from extensions zip file) from then click Upload & Install
- STEP 2: Now, go to Enable SJ Core, Yt Plugin (for Yt Framework) and Yt Mega Popup in Extension/Plug-in Manager
3.2 Configuration of YT Plugin (for Yt Framework)

4. Other Extensions - Installation and Configuration
After creating data, you can install and configure extensions to have a Website as like as our pre-made demo.4.1 Install
4.1.1 List of extensions used in Smart News demo

4.1.2 Installation
- In Administrator on Joomla! v2.5.x, go to Extensions -> Extension Manager
On this page, click Choose File button, choose an extension file then click Upload & Install
- Install the rest of extensions as step above
4.2 Configuration
By this screenshot, you will see how module is placed in the default layout:

4.2.1 Mega Menu - Features

4.2.2 Mega Menu - Travel

4.2.3 Mega Menu - Sport

4.2.4 Mega Menu - Health

4.2.5 Login Form
Suffix: blank
BACK END

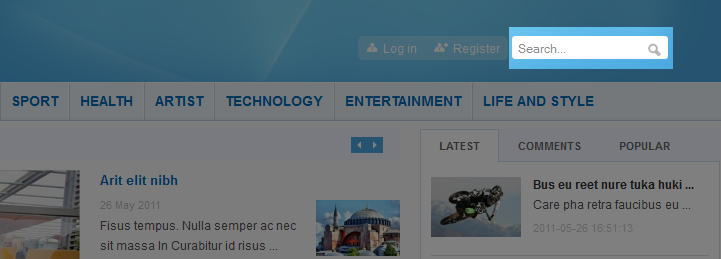
4.2.6 Search
Suffix: blank
BACK END

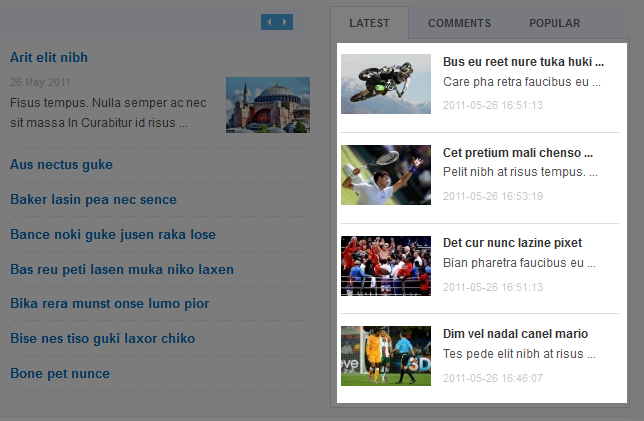
4.2.7 SJ News Splash
Suffix: blank
BACK END

4.2.8 SJ News Frontpage
Suffix: blank
BACK END

4.2.9 SJ Module Tabs
Suffix: blank
BACK END

4.2.10 SJ Basic News
Suffix: heath
BACK END

4.2.11 SJ Article Slider
There are several positions (user 6 and user 10) that use SJ Article Slider module. Here we will configure an example. Let take "user 10" position, others will be the same.
Suffix: blank
BACK END

4.2.12 Breadcrumbs Modules
Suffix: blank

4.2.13 SJ Content Accordion Module
Suffix: clear
BACK END

4.2.14 SJ Mega News II
Suffix: blank
BACK END

4.2.15 SJ Content Simple Tabs Module
Suffix: Not Used
BACK END

4.2.16 SJ Content Category Module
Suffix: blank
BACK END

4.2.17 Custom HTML
Suffix: blank
BACK END

4.2.18 Footer
Now there are one Menu module placed in this position. You can try some other ones.

SJ Expo - Responsive Joomla Template

SJ Expo - An elegant Joomla template has been released with support for K2 component. Based on YT Framework, enabling responsive layout, offering short-codes collection and more, SJ Expo is unique and easy to set style for content without much coding knowledge.


