1SYSTEM REQUIREMENT – Back to top
SJ Hexagon is compatible with Joomla v2.5 and Joomla v3.x. Please make sure your system meets the following requirements:
1.1 System Requirement – Joomla version 2.5
Software
- Software: PHP 5.2.4+ (5.4+ recommended)
- MySQL: 5.0.4+
Web Sever
- Apache: 2.x+
- Microsoft: IIS 7
- Nginx: 1.0 (1.1 recommended)
1.2 System Requirement – Joomla version 3.x
Software
- Software: PHP 5.3.1+ (5.4+ recommended)
Databases
- MySQL(InnoDB support required): 5.1+
- MSSQL 10.50.1600.1+
- PostgreSQL 8.3.18+
Web Severs
- Apache 2.x+
- Microsoft IIS 7
- Nginx 1.0 (1.1 recommended)
1.3 Browser Requirement
The requirements are the same with both Joomla 2.5 and Joomla 3.x
- Firefox 4+
- IE (Internet Explorer) 8+
- Google Chrome 10+
- Opera 10+
- Safari 5+
1.4 Development Environment
The requirements are the same with both Joomla 2.5 and Joomla 3.x
During development process, Localhost is preferred. You can use the following servers on your PC to develop your site.
Windows
- WAMPSEVER
- XAMPP for Windows
Linux
- LAMP Bubdle
- XAMPP for Linux
Mac OS
- MAMP & MAMP Pro
- XAMPP for Mac OS
2DOWNLOAD – Back to top
Download Packages from our store:
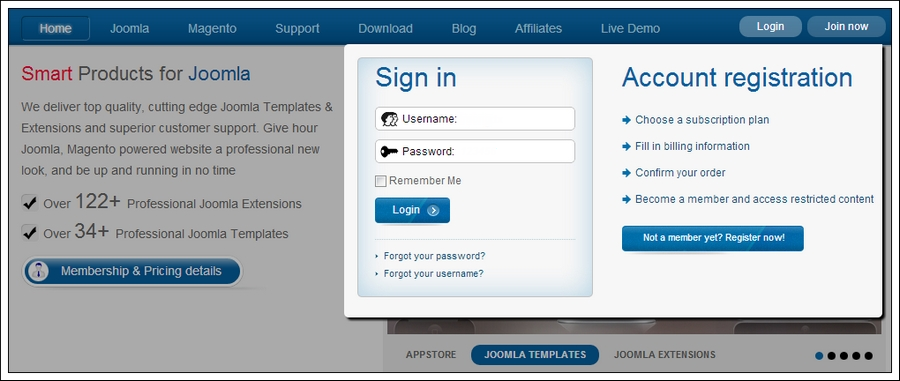
Step 1: Login your account
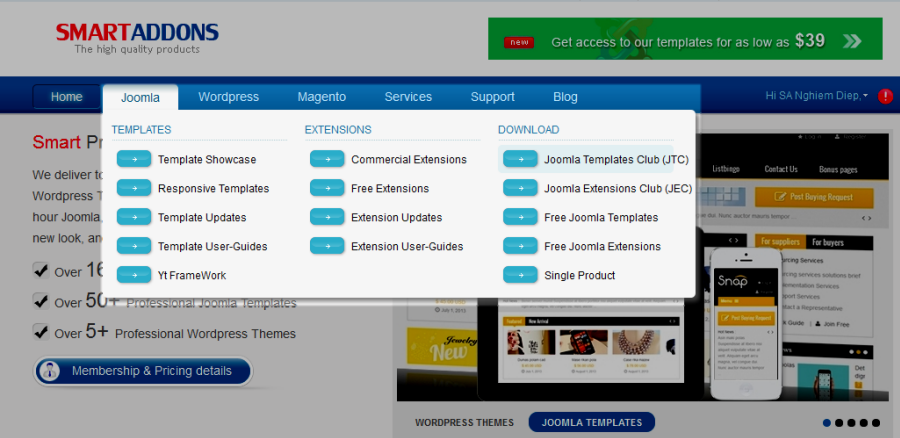
Step 2: Go to Joomla > Download > Joomla Templates Club
Step 3: Under Premium Joomla Templates –> Find and Download Template as you want

Note: Download K2 Component for Joomla: Here
3INSTATLLATION – Back to top
There are two ways to install a Joomla Template:
- Install Quickstart: By using this package, you will set the template exactly as our Demo with sample data. This is applied when you need a fresh Joomla with our template.
- Install Template and Extensions: This is applied when you have already installed a Joomla instance on your server. You will need only be using the zipped files in “Extensions” and “Template” folders mentioned above.
3.1 Install with Quickstart Package:
The following steps will guide to install a quickstart package of SmartAddons Joomla Template: Click here
3.2 Install with Template; Extensions:
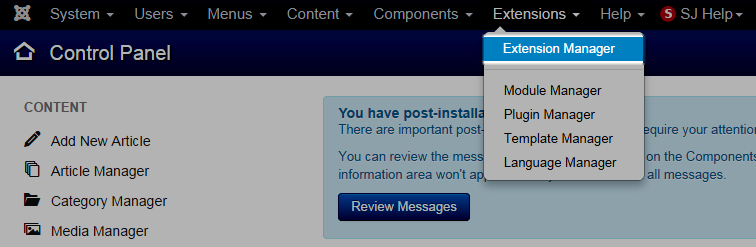
Step 1: Access the installation panel
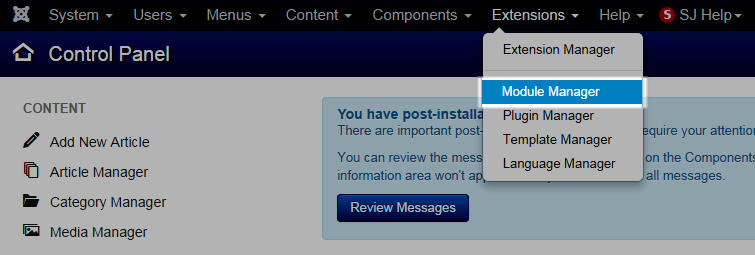
Navigate to Extensions >> Extension Manager.
Step 2: Install Template
- Install with option: Upload Package File
Firstly, you choose file template.zip that you have downloaded and then Click on the button Upload & Install to install the uploaded package.

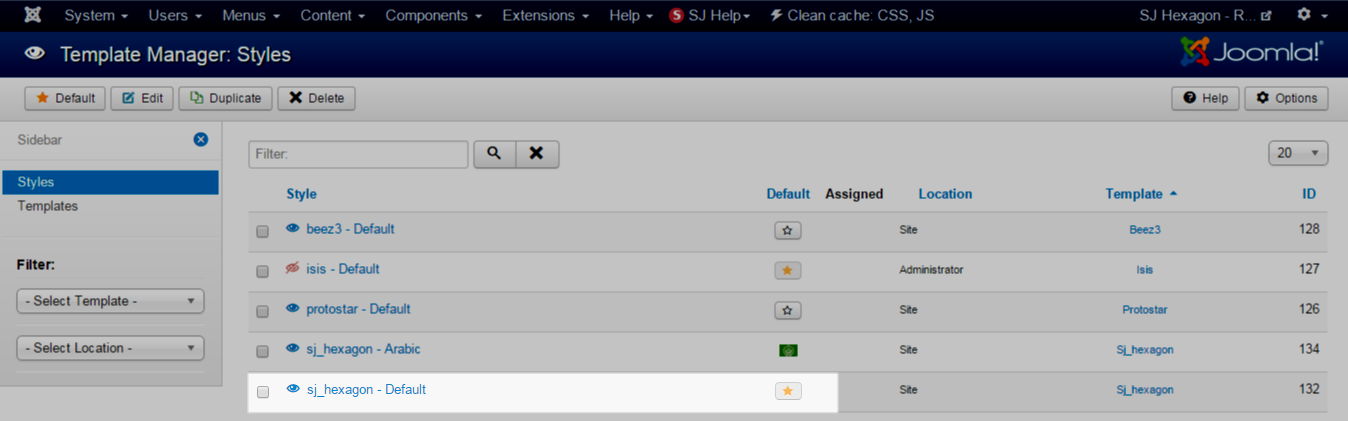
Step 3: Set New Installed Template As Default Template
- Go to Extensions >> Template Manager.
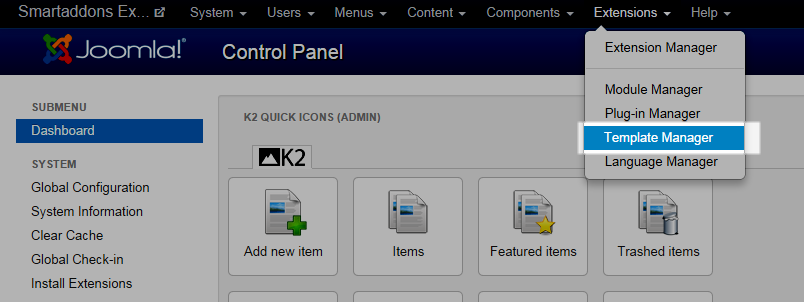
- In order to display your site with the new installed template, you have to set the template as default template
The extensions package include of (Modules/Extensions and Plugins).
Note: Extensions installation is the same with Template installation as above
Here is list of extensions that are used in the template.
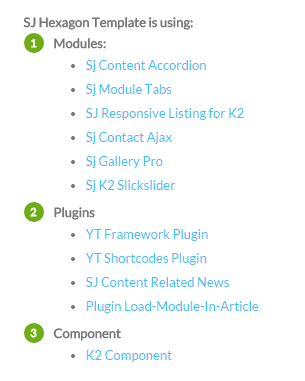
ENABLE MODULES
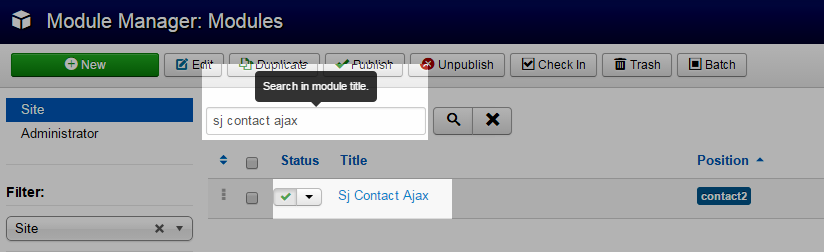
- Go to Extensions >> Module Manager.
- Find the new installed module. For example: with “SJ Contact Ajax “ module.
You can use the search or filter option to find the new installed module easier and enable module.
- Enable and set position for the module
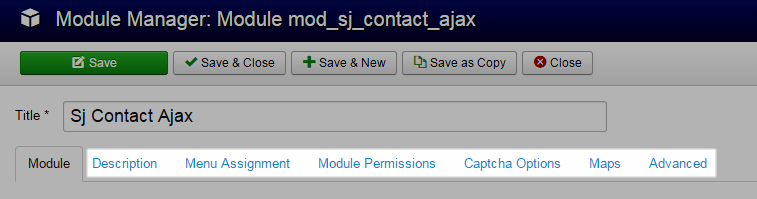
When you find the new installed module, please open its configuration panel.
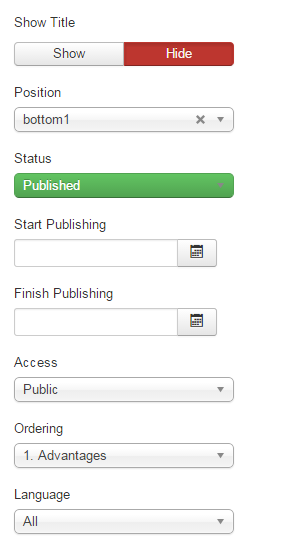
To display the module in front-page, you must publish it and set right position for the module.
Please note that not all module positions can be active in front-page, so please make sure the module is assigned to an active module position.
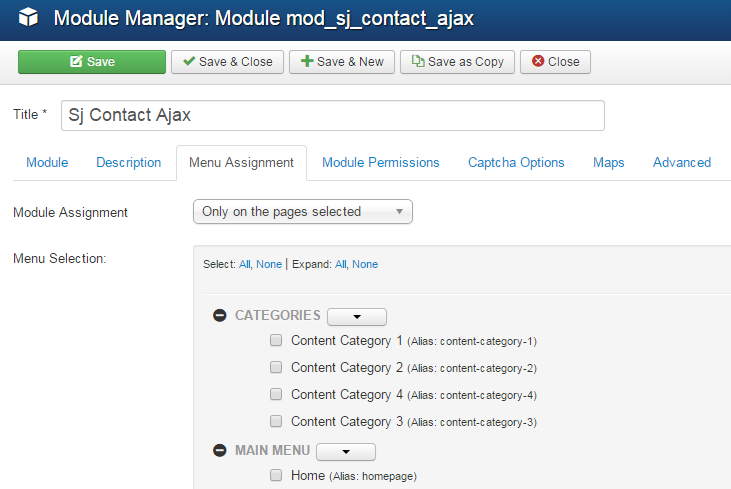
- Assign the modules to specific menus
You have to assign the modules to specific menus so that the module will be displayed in the assigned menus. There are 4 options : “On all pages, No pages, Only on the pages selected, On all pages except those selected”
- Configure the new installed module
Normally, each module has its own settings, the settings allow you to customize the module so that you can have it displayed in front-page as you wish.
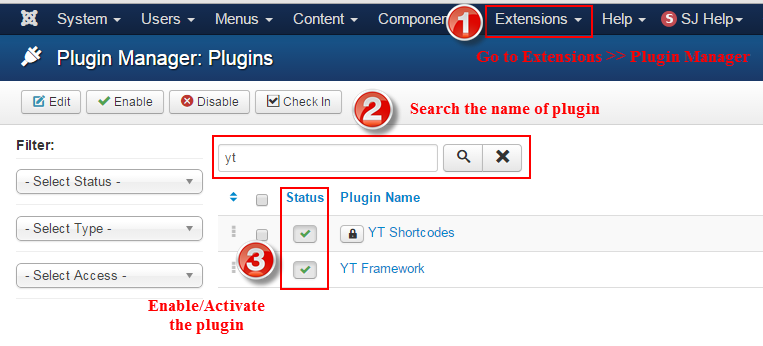
ENABLE PLUGIN
Note: all plug-ins listed are imperative.
- YT Framework Plug-in supports to add extra parameters used with Mega Menu and to compress CSS/JS/HTML when optimizing code. Besides, configure Yt Framework to show SJ Help with Report Bugs, Template Tutorials and YT Framework Tutorials or include j Query into template. You can go here for getting more information of this plugin.
- YT Shortcode offer you an amazing tool to create advanced custom content with minimal effort or even without any knowledge how to code HTML. Please go here for getting more information of this plugin.
- SJ Content Related News is a simple plugin for content component. It helps you to show other articles in the same category. Please go here for getting more information of this plugin.
You need to install and activate them when using this template. Let’s start from 1 – 2 – 3 to active plug-ins as below:
3.3 Install multilingual site in SJ Template
To help you about language problem when you work with SJ Template. We will instruct you how to set up multilingual site in SJ Template. FOLLOW US!
4CONFIGURATION – Back to top
The following part we will guide how to configure the template becomes the same with our home page – Demo
4.1 Layout Position
4.1.1 Home Layout 1

4.1.2 Home Layout 2
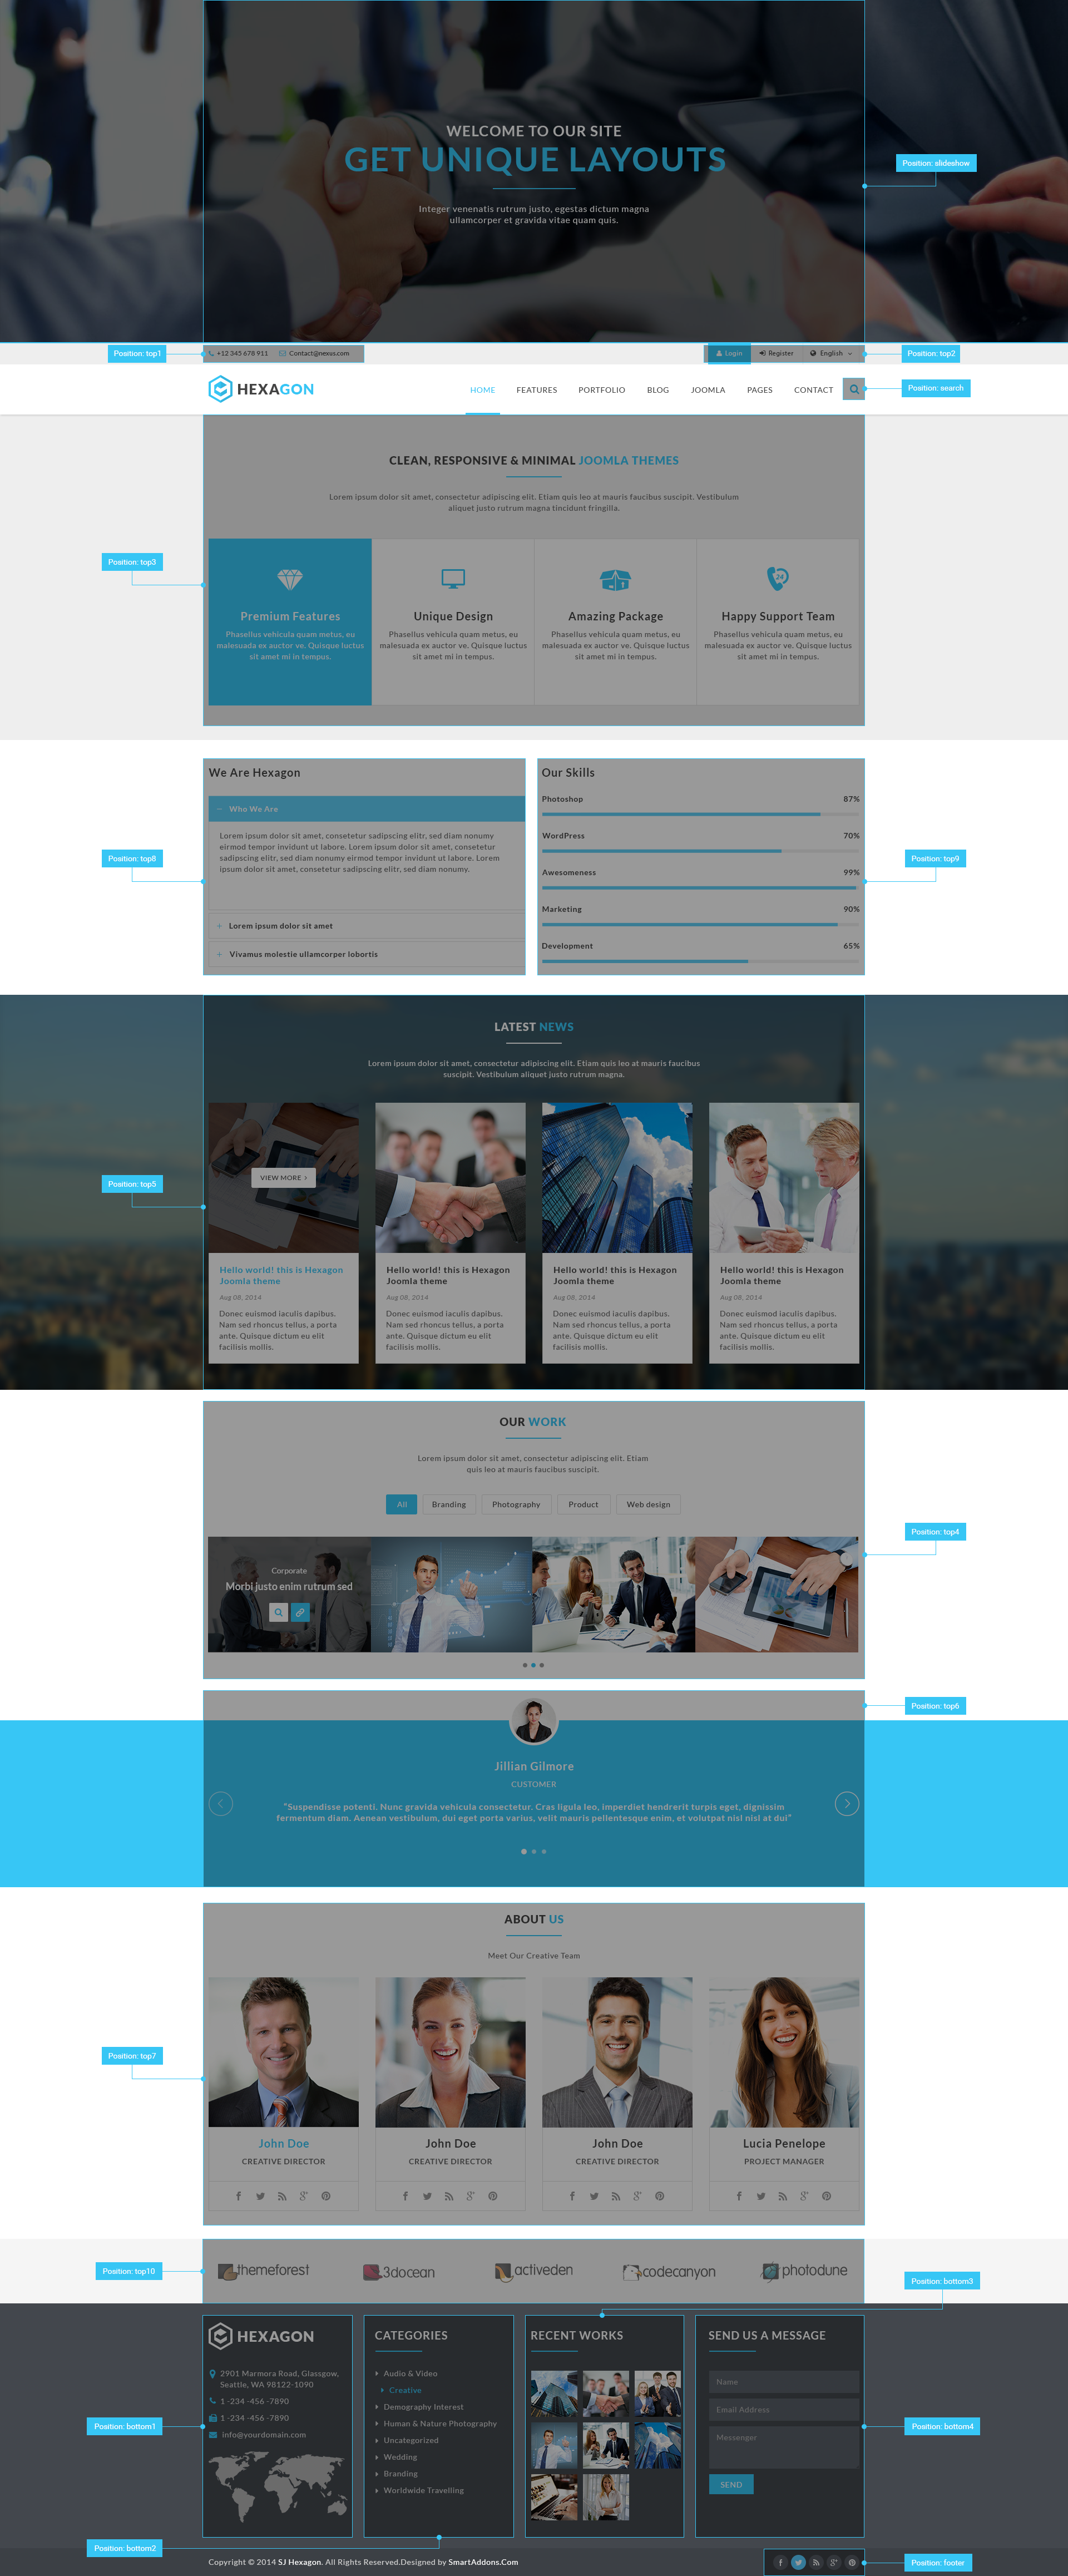
4.2 Template Configuration
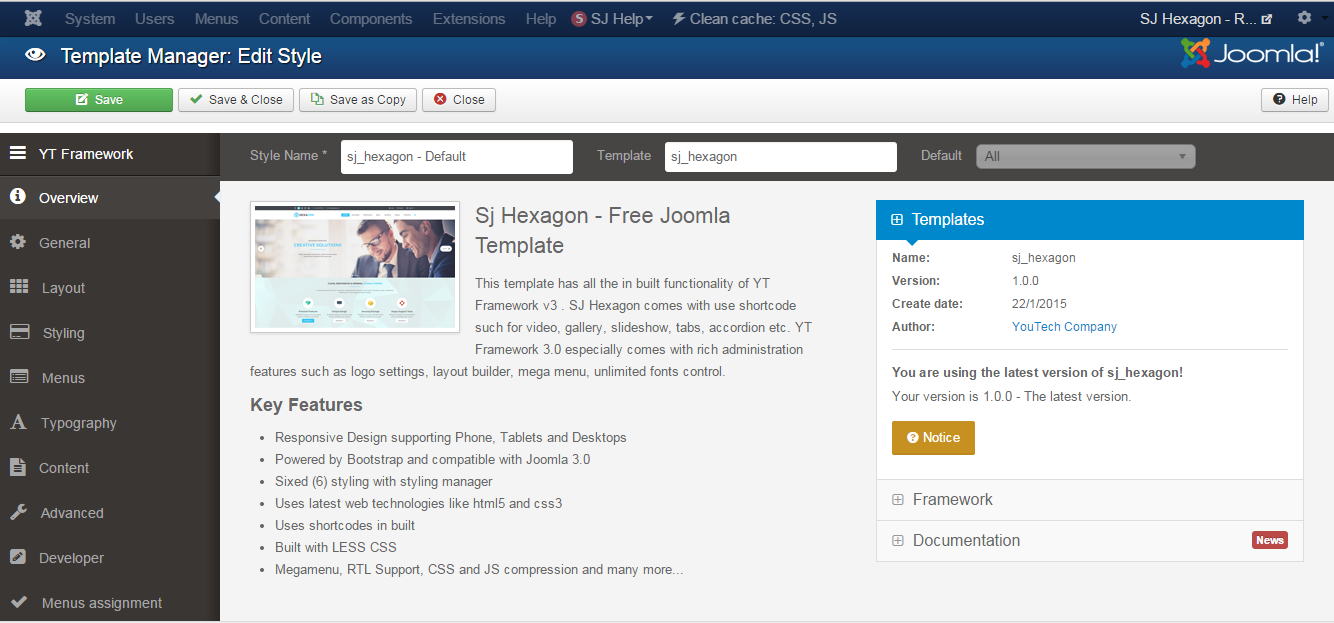
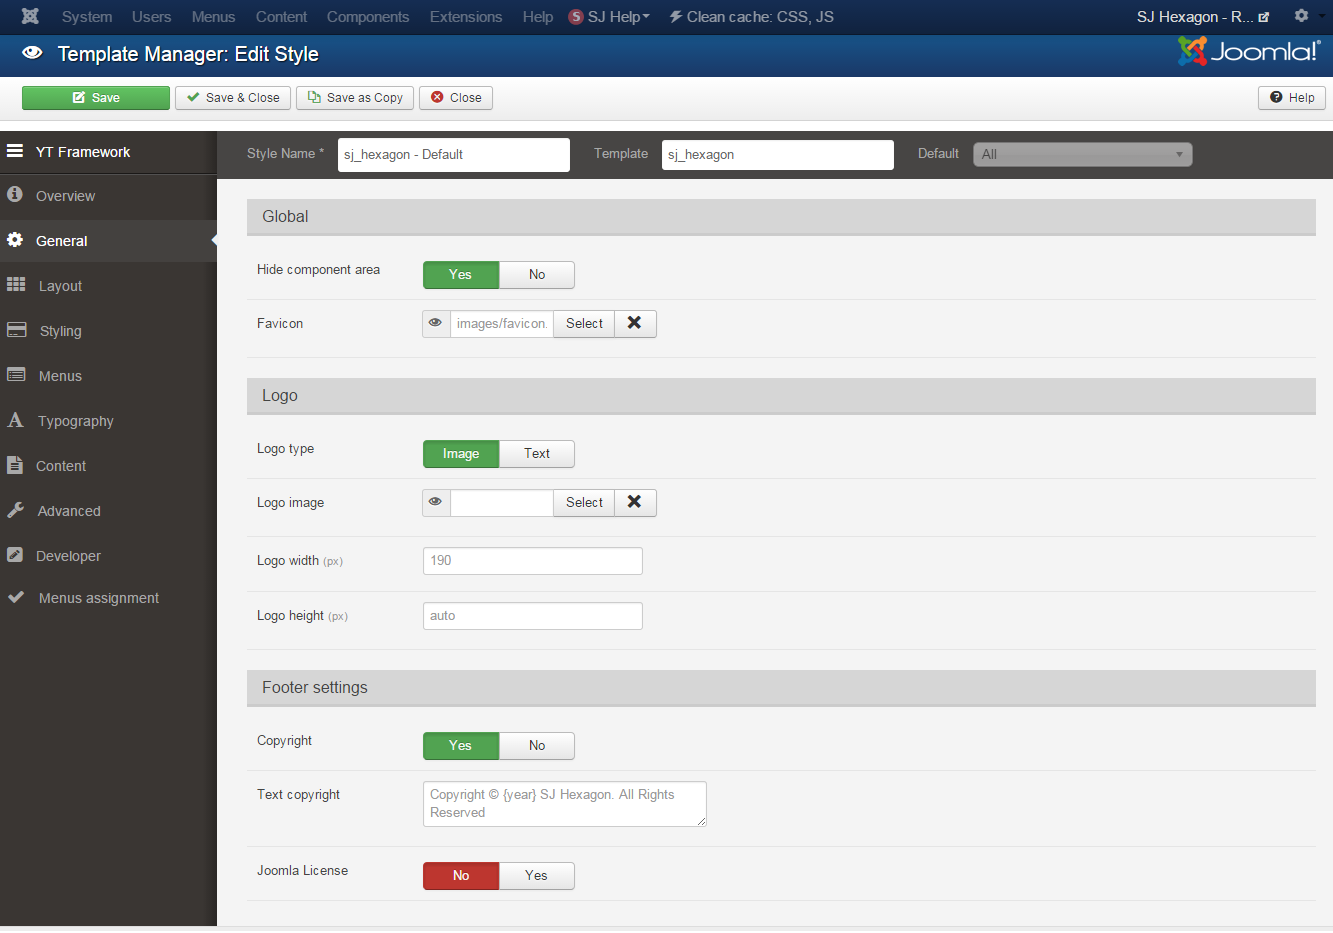
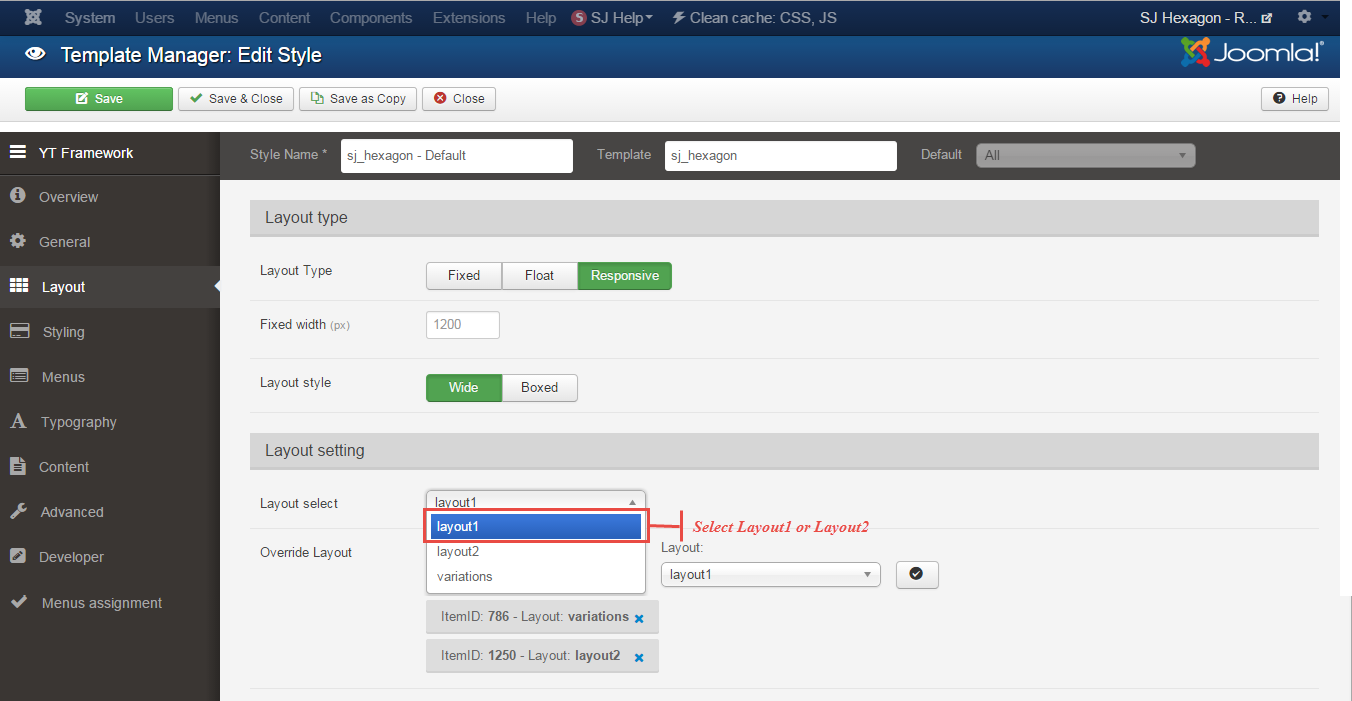
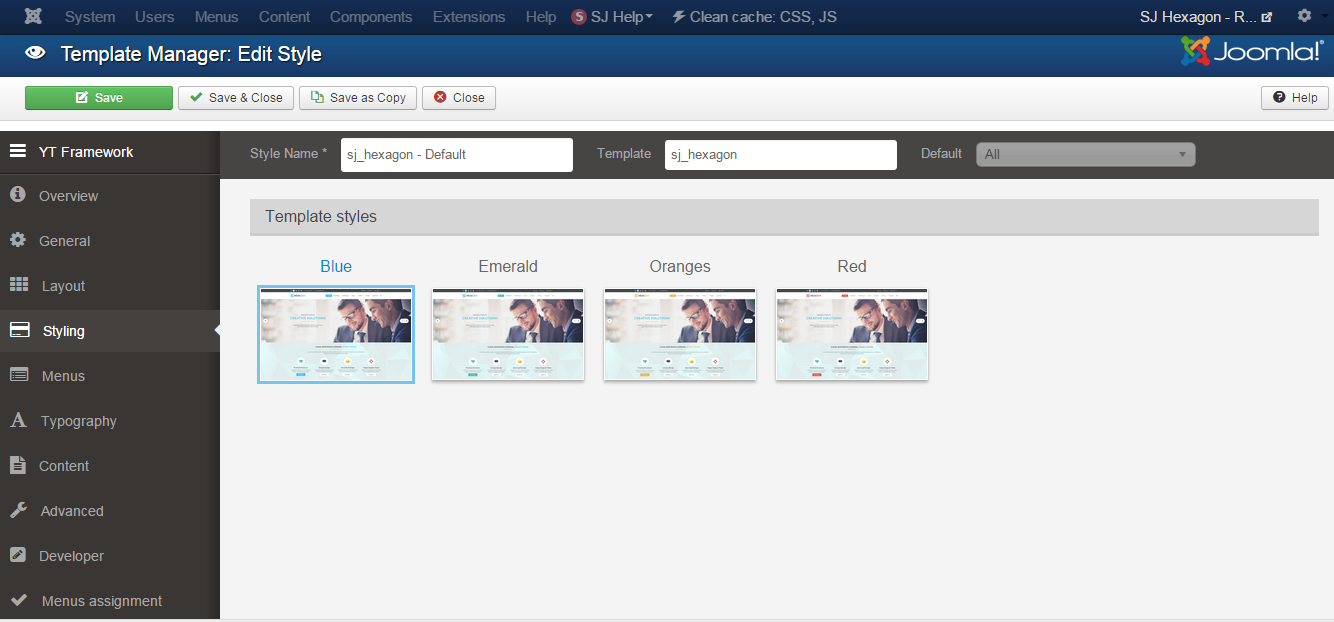
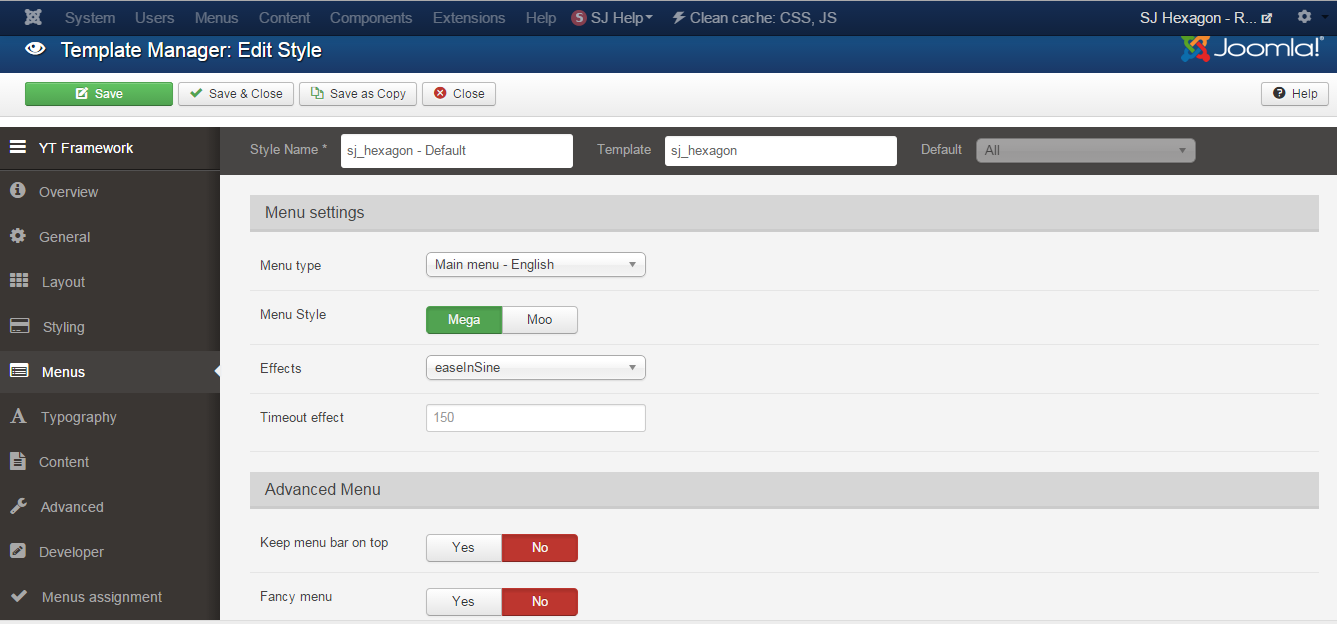
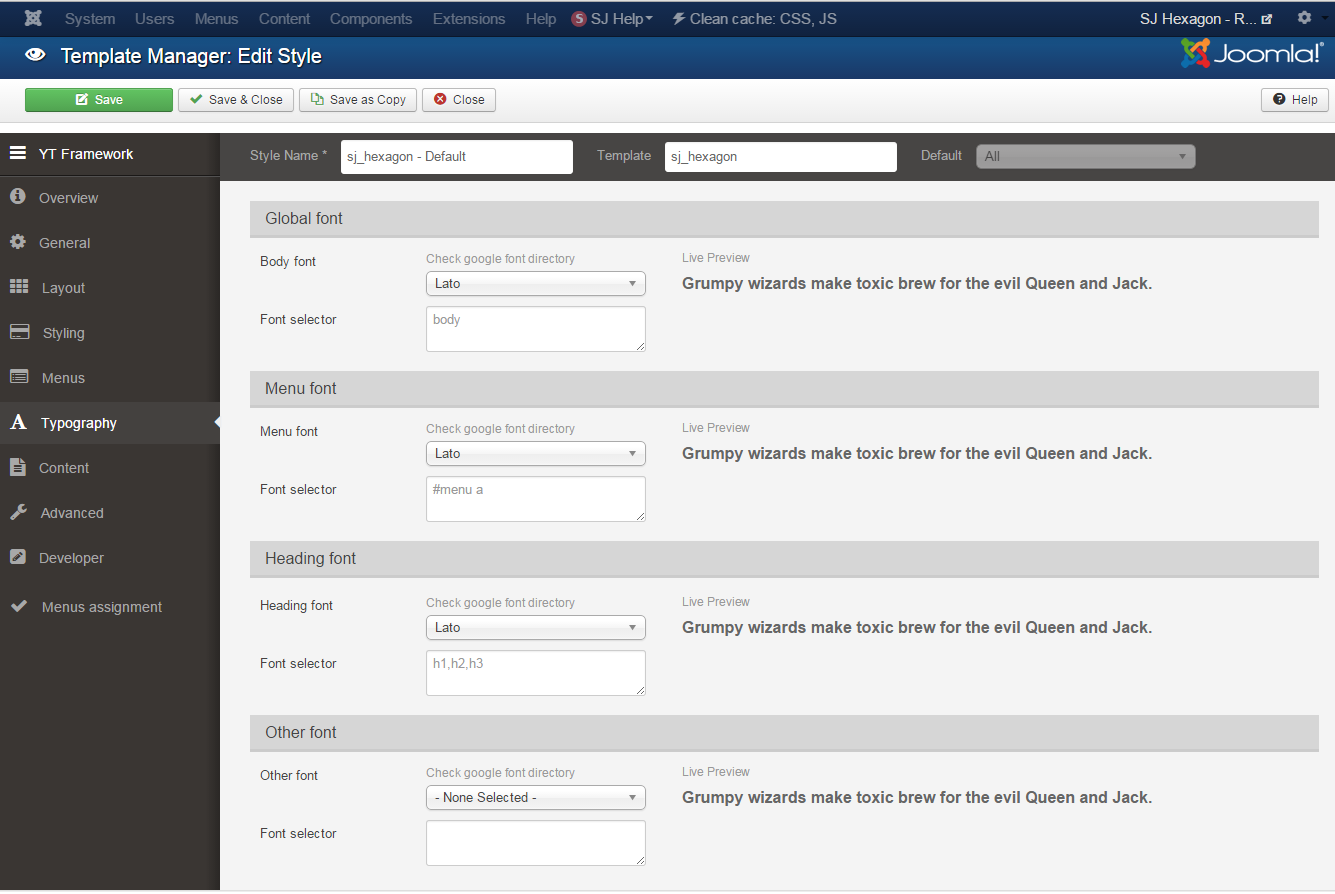
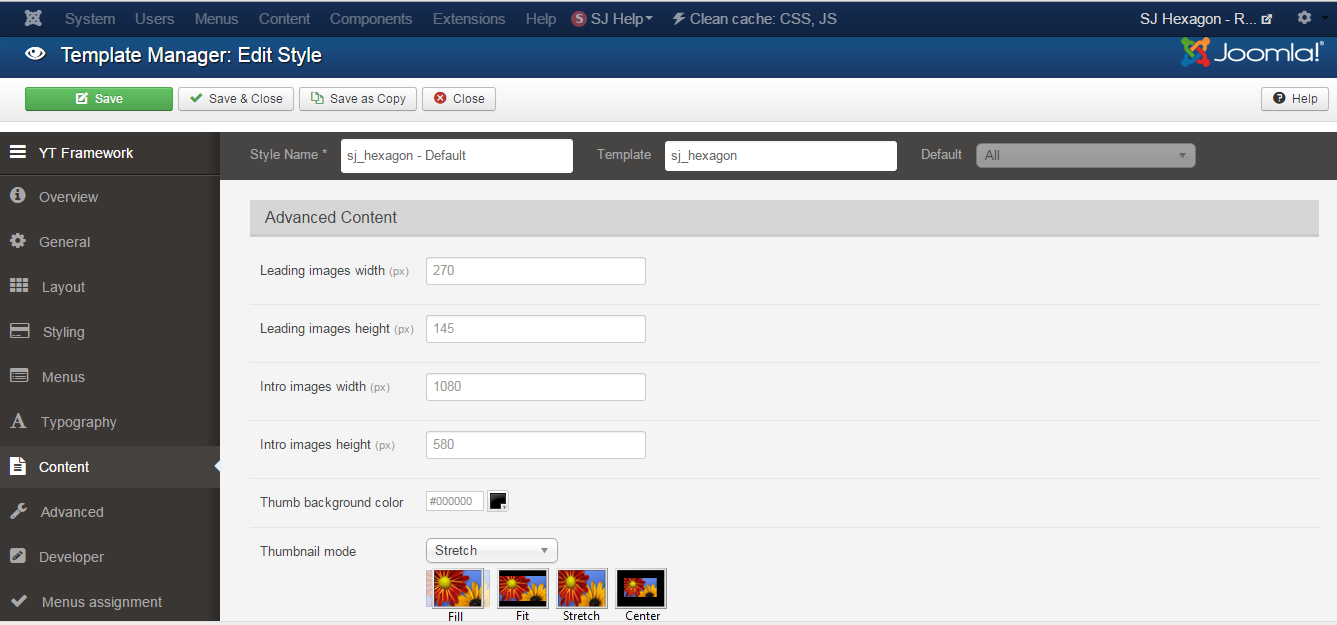
Go to Extensions > Template Manager > SJ Hexagon. All of parameters of this template are divided into the following groups, in which they are explained themselves:
OVERVIEW
GENERAL
LAYOUT
STYLING
MENUS
TYPOGRAPHY
CONTENT
ADVANCED
4.3 Menu Configuration
If you want to make your site same as SJ Hexagon demo site, this would be helpful. We will only show the important, customized settings.
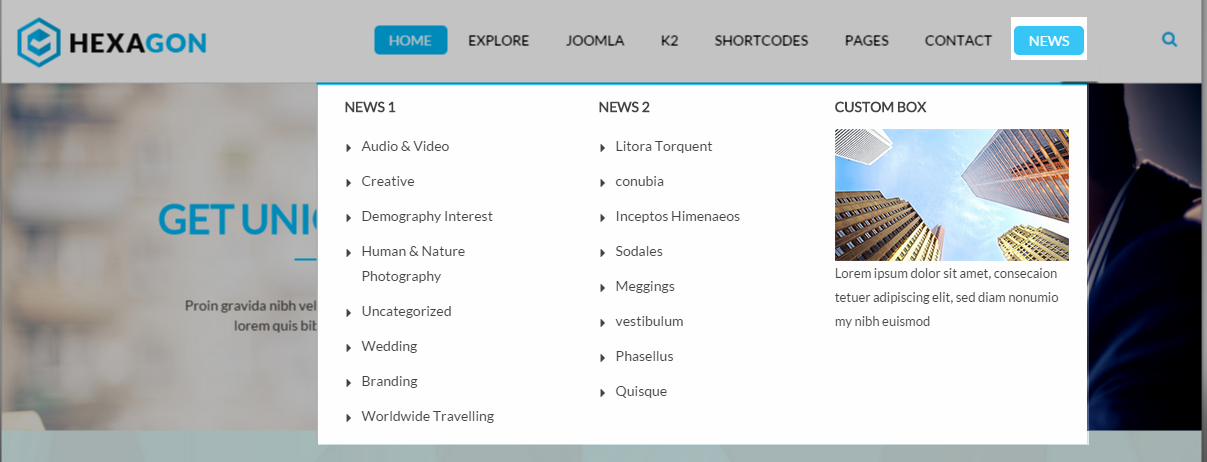
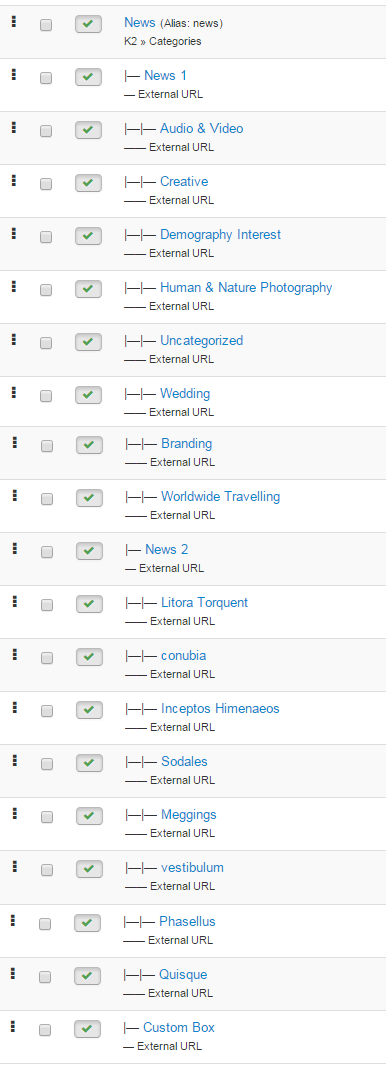
News Menu Configuration
Frontend Appearance
Tree of News Menu
Backend Settings
News Menu
|
1 2 |
Menu Item Type: Categories Template Style: Use default |
- Menu Detail Settings: Click Here
- YT Menu Params Settings: Click Here
News 1
|
1 2 |
Menu Item Type: External URL Template Style: Use default |
- Menu Detail Settings: Click Here
- YT Menu Params Settings: Click Here
News 2
|
1 2 |
Menu Item Type: External URL Template Style: Use default |
- Menu Detail Settings: Click Here
- YT Menu Params Settings: Click Here
Custom Box
|
1 2 |
Menu Item Type: External URL Template Style: Use default |
- Menu Detail Settings: Click Here
- YT Menu Params Settings: Click Here
NOTE: To configure image of “Custom Box” >> Please go to “Module Manager” >> Select “Custom HTML” Module with Title: “Custom Box Mega” >> Change image you want
Backend Settings
- Module: backend settings
- Advanced: backend settings
Copy and paste Custom HTML
4.4 Extension Configuration
4.4.1. Top 1 Position
4.4.1.1 Phone Mail
Module Position – Module Suffix
Module Class Suffix: Not Use
Frontend Appearance

Backend Settings
To configure these modules, please go to Extensions >> Module Manager >> Click “New” button to create a new module >> Select “Custom HTML” module.
- Module: backend settings
- Menu Assignment: backend settings
- Options: backend settings
- Advanced: backend settings
Copy and paste Custom HTML
|
1 2 3 4 |
<ul class="pull-left phone-mail"> <li>[icon name="phone" ]+12 345 678 911</li> <li class="hidden-xs">[icon name="envelope-o " ] info@yourdomain.com</li> </ul> |
4.4.1.2 Social Networking Top – Layout 2
Module Position – Module Suffix
Module Class Suffix: Not Use
Frontend Appearance

Backend Settings
To configure these modules, please go to Extensions >> Module Manager >> Click “New” button to create a new module >> Select “Custom HTML” module.
- Module: backend settings
- Menu Assignment: backend settings
- Options: backend settings
- Advanced: backend settings
Copy and paste Custom HTML
|
1 |
<div class="pull-left social-cus-mod hidden-sm hidden-xs">[social type="facebook" style="cicle"]http://www.facebook.com/SmartAddons.page[/social] [social type="twitter" style="cicle" ]http://twitter.com/#!/smartaddons [/social] [social type="google-plus" style="cicle" ]https://plus.google.com/u/0/103151395684525745793/posts[/social] [social type="linkedin" style="cicle"]http://linkedin.com/smartaddons/joomla-templates[/social]</div> |
4.4.2. Login Form- Top 2 Position
Module Position – Module Suffix
Module Class Suffix: Not Use
Frontend Appearance

Backend Settings
To configure these modules, please go to Extensions >> Module Manager >> Click “New” button to create a new module >> Select “Login” module.
- Module: backend settings
- Menu Assignment: backend settings
- Advanced: backend settings
4.4.3. Language Switcher – Top 2 Position
Module Position – Module Suffix
Module Class Suffix: “pull-right”
Frontend Appearance

To configure these modules, please go to Extensions >> Module Manager >> Click “New” button to create a new module >> Select “”Module Language Switcher”.
Backend Settings
- Module: backend settings
- Menu Assignment: backend settings
- Advanced: backend settings
4.4.4. K2 Tools
Module Position – Module Suffix
Module Class Suffix: “me_search”
Frontend Appearance

Backend Settings
- Module: backend settings
- Menu Assignment: backend settings
- Advanced: backend settings
- Module: backend settings
- Menu Assignment: backend settings
- Source Options: backend settings
- Item Options: backend settings
- Image Options: backend settings
- Effect Options: backend settings
- Advanced: backend settings
- Module: backend settings
- Menu Assignment: backend settings
- Source Options: backend settings
- Item Options: backend settings
- Image Options: backend settings
- Effect Options: backend settings
- Advanced: backend settings
- Module: backend settings
- Menu Assignment: backend settings
- Options: backend settings
- Advanced: backend settings
- Module: backend settings
- Menu Assignment: backend settings
- Options: backend settings
- Advanced: backend settings
- Module: backend settings
- Menu Assignment: backend settings
- Source Options: backend settings
- Tabs Options: backend settings
- Advanced: backend settings
- Menu Assignment: backend settings
- Advanced: backend settings
- Module: backend settings
- Menu Assignment: backend settings
- Advanced: backend settings
- Menu Assignment: backend settings
- Module: backend settings
- Menu Assignment: backend settings
- Advanced: backend settings
- Module: backend settings
- Menu Assignment: backend settings
- Module: backend settings
- Menu Assignment: backend settings
- Advanced: backend settings
- Module: backend settings
- Menu Assignment: backend settings
- Module: backend settings
- Menu Assignment: backend settings
- Advanced: backend settings
- Menu Assignment: backend settings
- Module: backend settings
- Menu Assignment: backend settings
- Advanced: backend settings
- Menu Assignment: backend settings
- Module: backend settings
- Menu Assignment: backend settings
- Options: backend settings
- Advanced: backend settings
- Module: backend settings
- Advanced: backend settings
- Module: backend settings
- Advanced: backend settings
- Module: backend settings
- Advanced: backend settings
- Module: backend settings
- Captcha Options: backend settings
- Maps: backend settings
- Advanced: backend settings
- Module: backend settings
- Options: backend settings
- Advanced: backend settings
To configure these modules, please go to Extensions >> Module Manager >> Click “New” button to create a new module >> Select “K2 Tools” module.
4.4.5 Slideshow Position
4.4.5.1 Sj K2 Slick Slider – Slideshow Position
Module Position – Module Suffix
Module Class Suffix: “slick-slider-hexagon”
Frontend Appearance
Backend Settings
To configure these modules, please go to Extensions >> Module Manager >> Click “New” button to create a new module >> Select “ Sj K2 Slick Slider” module.
4.4.5.2 Sj K2 Slick Slider layout 2 – Slideshow Position
Module Position – Module Suffix
Module Class Suffix: “slick-slider-hexagon”
Frontend Appearance

Backend Settings
To configure these modules, please go to Extensions >> Module Manager >> Click “New” button to create a new module >> Select “ Sj K2 Slick Slider” module.
4.4.6 Top 3 Position
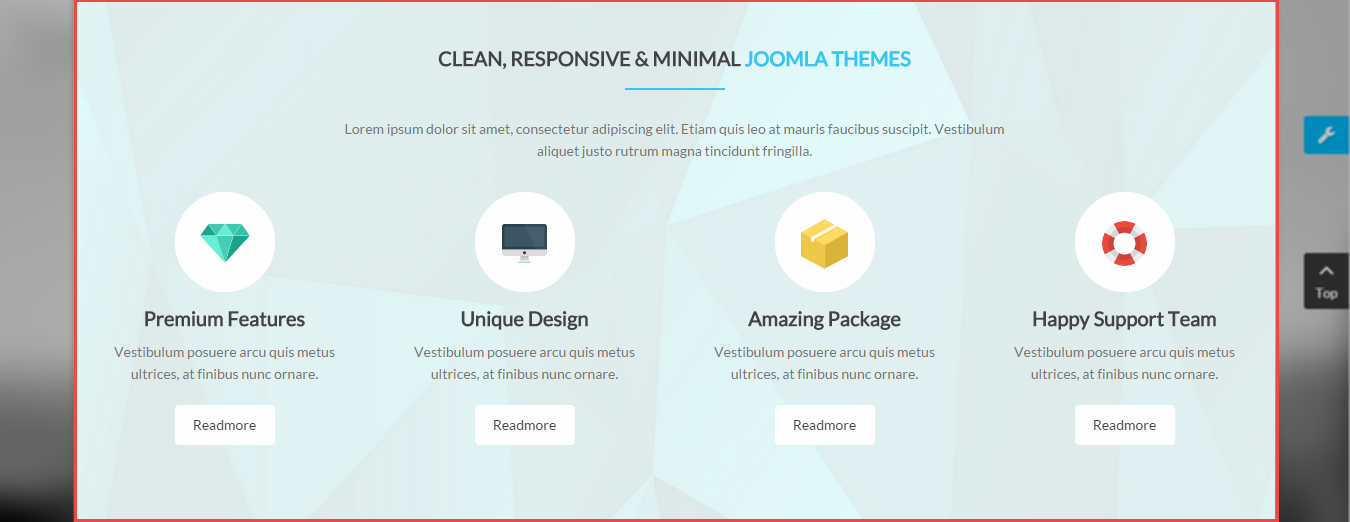
4.4.6.1 Clean, Responsive & Minimal|Joomla Themes – Top 3 Position
Module Position – Module Suffix
Module Class Suffix: “cus-res-min-jo”
Frontend Appearance
Backend Settings
To configure these modules, please go to Extensions >> Module Manager >> Click “New” button to create a new module >> Select “ Custom HTML Module”.
Copy and paste Custom HTML
|
1 2 3 4 5 6 7 8 9 10 11 12 13 14 15 16 17 18 19 20 21 22 23 24 25 26 27 28 29 |
<p class="post-text">Lorem ipsum dolor sit amet, consectetur adipiscing elit. Etiam quis leo at mauris faucibus suscipit. Vestibulum aliquet justo rutrum magna tincidunt fringilla.</p> <div class="main"> <div class="row"> <div class="col-md-3 col-sm-6 item" data-sr="enter top and scale up 100% over 0.5s"> <div class="image-icon"><a href="#"> <img src="images/demo/rubie.png" alt="" /> </a></div> <h3 class="title"><a href="#">Premium Features</a></h3> <p class="des">Vestibulum posuere arcu quis metus ultrices, at finibus nunc ornare.</p> <div class="read-more"><a href="#">Readmore</a></div> </div> <div class="col-md-3 col-sm-6 item" data-sr="enter bottom and scale up 100% over 0.7s"> <div class="image-icon"><a href="#"> <img src="images/demo/desktop.png" alt="" /> </a></div> <h3 class="title"><a href="#">Unique Design</a></h3> <p class="des">Vestibulum posuere arcu quis metus ultrices, at finibus nunc ornare.</p> <div class="read-more"><a href="#">Readmore</a></div> </div> <div class="col-md-3 col-sm-6 item" data-sr="enter top and scale up 100% over 0.9s"> <div class="image-icon"><a href="#"> <img src="images/demo/box.png" alt="" /> </a></div> <h3 class="title"><a href="#">Amazing Package</a></h3> <p class="des">Vestibulum posuere arcu quis metus ultrices, at finibus nunc ornare.</p> <div class="read-more"><a href="#">Readmore</a></div> </div> <div class="col-md-3 col-sm-6 item" data-sr="enter bottom and scale up 100% over 1s"> <div class="image-icon"><a href="#"> <img src="images/demo/support.png" alt="" /> </a></div> <h3 class="title"><a href="#">Happy Support Team</a></h3> <p class="des">Vestibulum posuere arcu quis metus ultrices, at finibus nunc ornare.</p> <div class="read-more"><a href="#">Readmore</a></div> </div> </div> </div> |
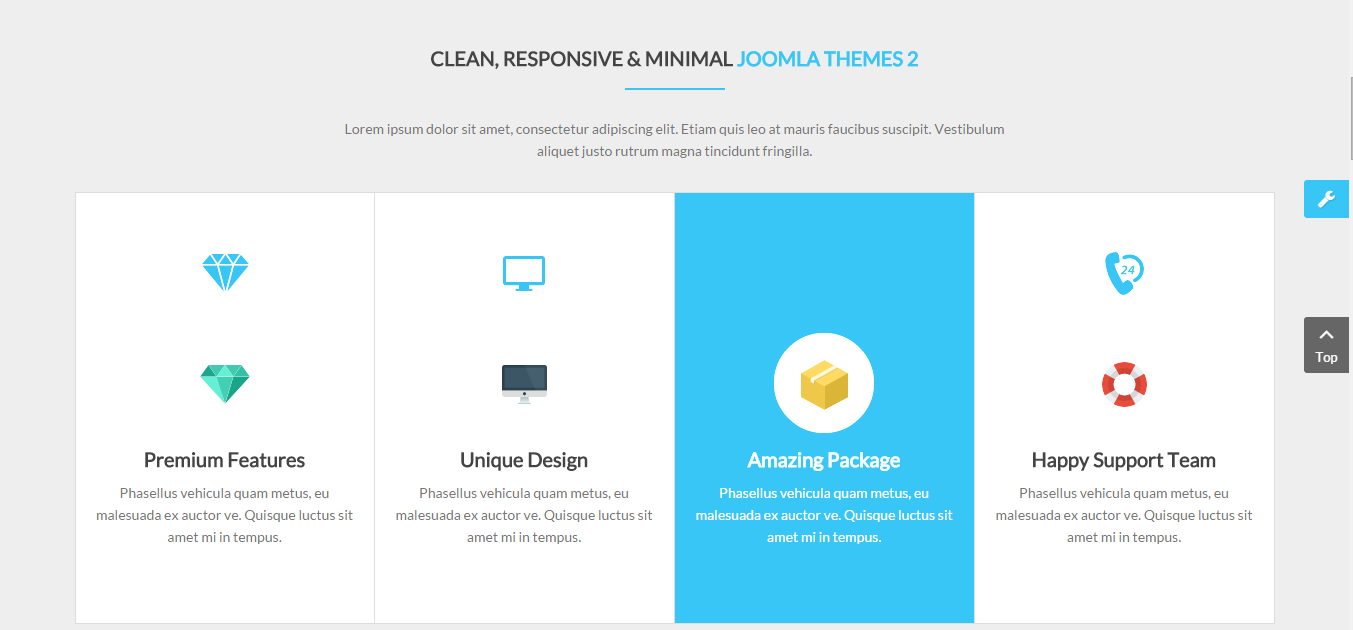
4.4.6.2 Clean, Responsive & Minimal|Joomla Themes 2- Top 3 Position
Module Position – Module Suffix
Module Class Suffix: “cus-res-min-jo”
Frontend Appearance
Backend Settings
To configure these modules, please go to Extensions >> Module Manager >> Click “New” button to create a new module >> Select “ Custom HTML Module”.
Copy and paste Custom HTML
|
1 2 3 4 5 6 7 8 9 10 11 12 13 14 15 16 17 18 19 20 21 22 23 24 25 |
<p class="post-text">Lorem ipsum dolor sit amet, consectetur adipiscing elit. Etiam quis leo at mauris faucibus suscipit. Vestibulum aliquet justo rutrum magna tincidunt fringilla.</p> <div class="main"> <div class="row"> <div class="col-md-3 col-sm-6 item" data-sr="enter bottom and move 200px over 0.5s"> <div class="image-icon"><a href="#"> <img src="images/demo/rubie.png" alt="" /> </a></div> <h3 class="title"><a href="#">Premium Features</a></h3> <p class="des">Phasellus vehicula quam metus, eu malesuada ex auctor ve. Quisque luctus sit amet mi in tempus.</p> </div> <div class="col-md-3 col-sm-6 item" data-sr="enter bottom and move 200px over 0.7s"> <div class="image-icon"><a href="#"> <img src="images/demo/desktop.png" alt="" /> </a></div> <h3 class="title"><a href="#">Unique Design</a></h3> <p class="des">Phasellus vehicula quam metus, eu malesuada ex auctor ve. Quisque luctus sit amet mi in tempus.</p> </div> <div class="col-md-3 col-sm-6 item" data-sr="enter bottom and move 200px over 0.9s"> <div class="image-icon"><a href="#"> <img src="images/demo/box.png" alt="" /> </a></div> <h3 class="title"><a href="#">Amazing Package</a></h3> <p class="des">Phasellus vehicula quam metus, eu malesuada ex auctor ve. Quisque luctus sit amet mi in tempus.</p> </div> <div class="col-md-3 col-sm-6 item" data-sr="enter bottom and move 200px over 1.2s"> <div class="image-icon"><a href="#"> <img src="images/demo/support.png" alt="" /> </a></div> <h3 class="title"><a href="#">Happy Support Team</a></h3> <p class="des">Phasellus vehicula quam metus, eu malesuada ex auctor ve. Quisque luctus sit amet mi in tempus.</p> </div> </div> </div> |
4.4.7 Top 4 Position
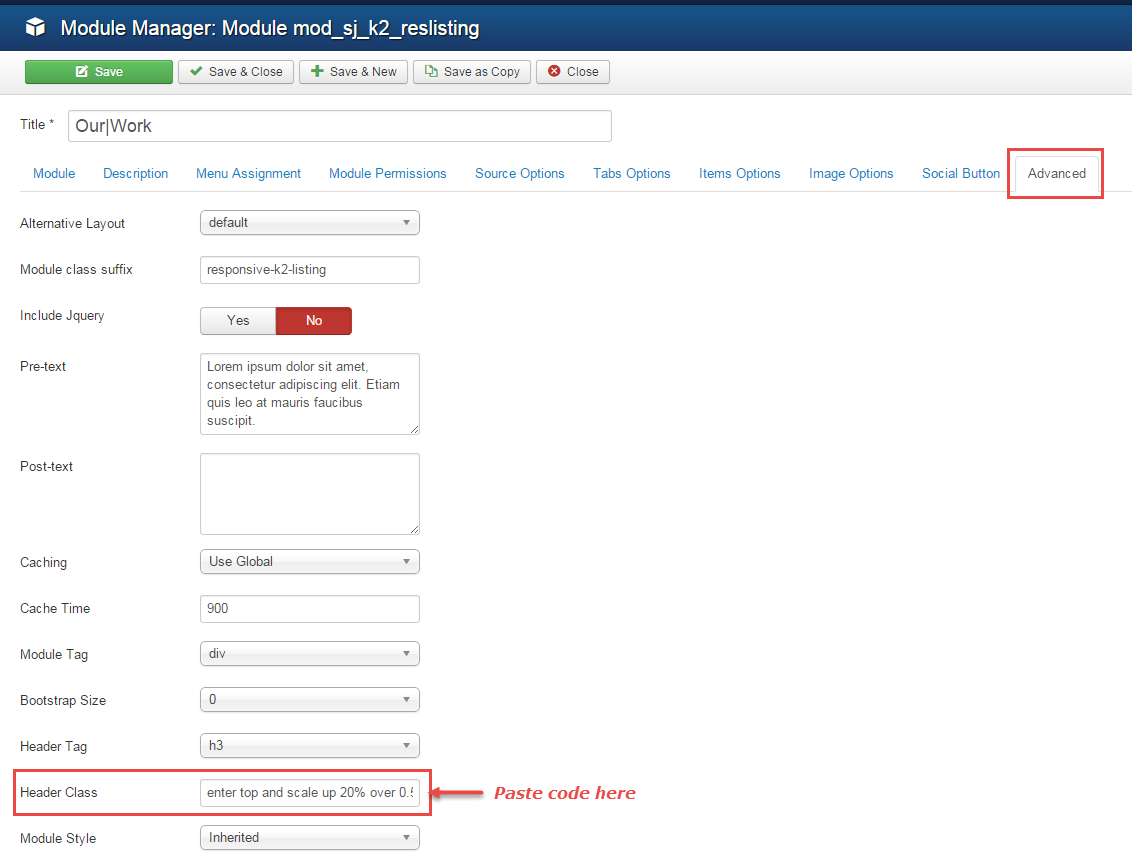
4.4.7.1 Our|Work – Top 4 Position
Module Position – Module Suffix
Module Class Suffix: “responsive-k2-listing”
Frontend Appearance

Backend Settings
To configure these modules, please go to Extensions >> Module Manager >> Click “New” button to create a new module >> Select “Sj Responsive Listing for K2 Module”.
4.4.7.2 Our|Work Layout 2 – Top 4 Position
Module Position – Module Suffix
Module Class Suffix: “responsive-k2-listing”
Frontend Appearance

Backend Settings
To configure these modules, please go to Extensions >> Module Manager >> Click “New” button to create a new module >> Select “Sj Responsive Listing for K2 Module”.
4.4.8 Top 5 Position
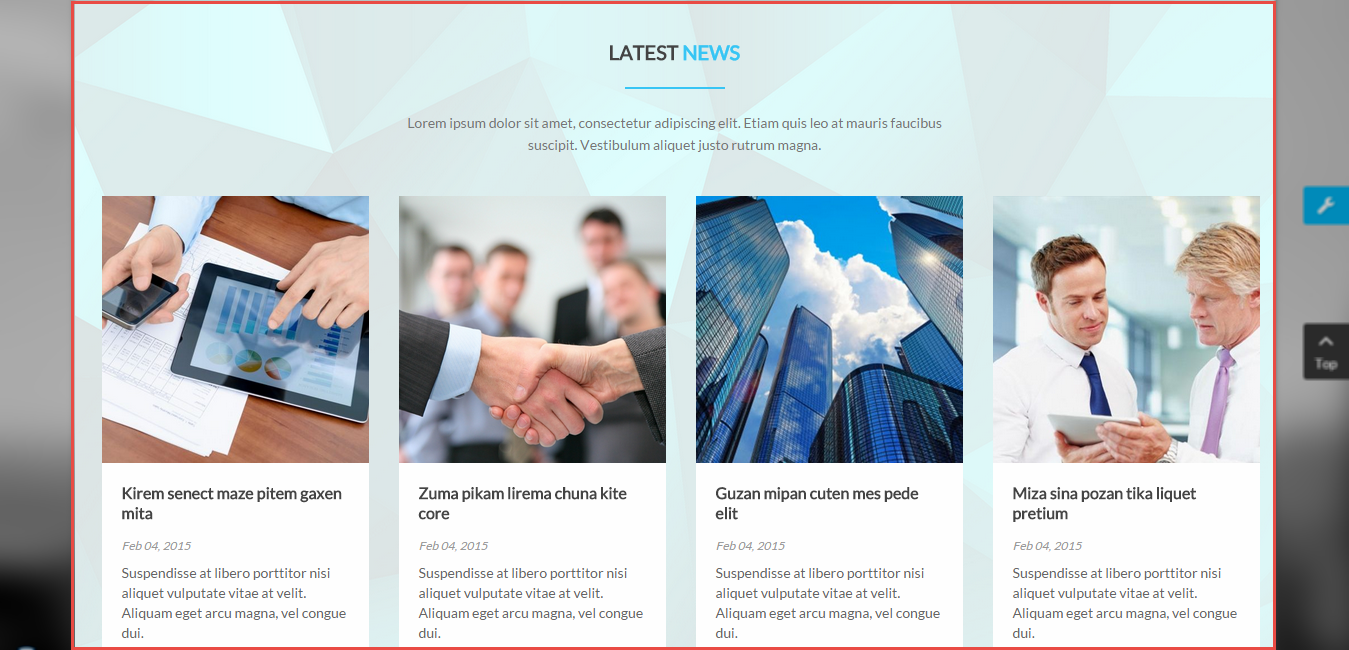
4.4.8.1 Latest|News – Top 5 Position
Module Position – Module Suffix
Module Class Suffix: ” k2-latest-new”
Frontend Appearance
Backend Settings
To configure these modules, please go to Extensions >> Module Manager >> Click “New” button to create a new module >> Select “K2 Content Module”.
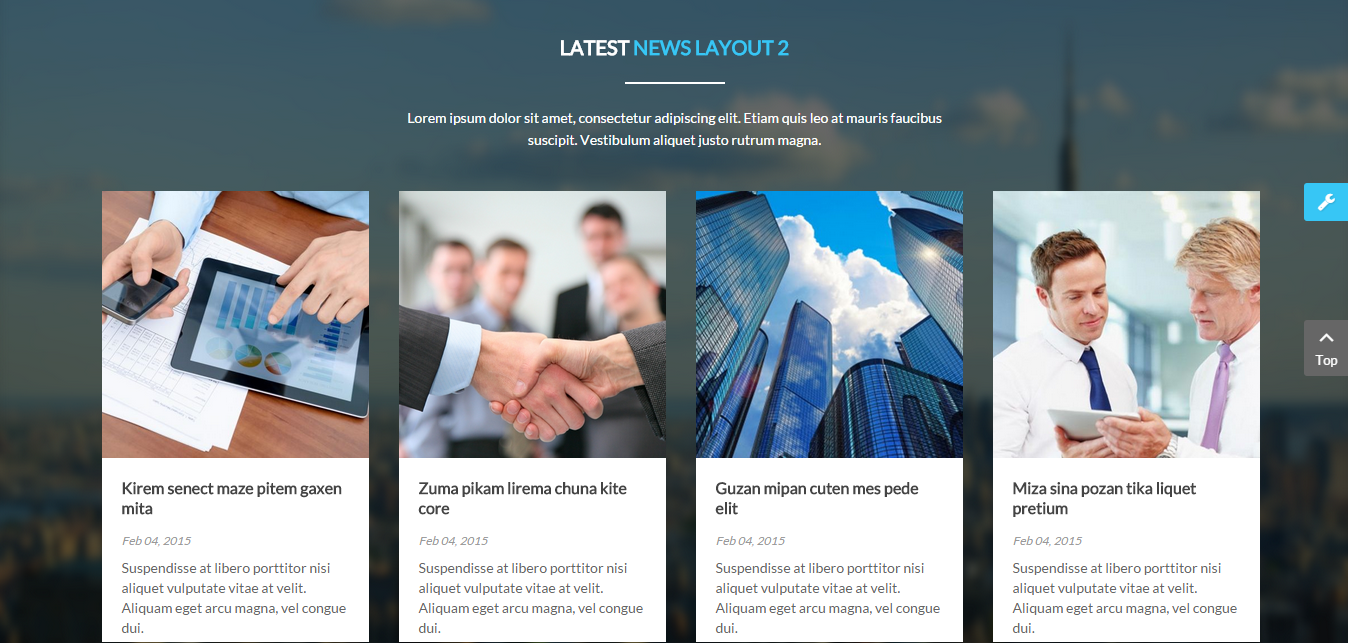
4.4.8.2 Latest|News Layout 2 – Top 5 Position
Module Position – Module Suffix
Module Class Suffix: ” k2-latest-new”
Frontend Appearance
Backend Settings
To configure these modules, please go to Extensions >> Module Manager >> Click “New” button to create a new module >> Select “K2 Content Module”.
4.4.9 Top 6 Position
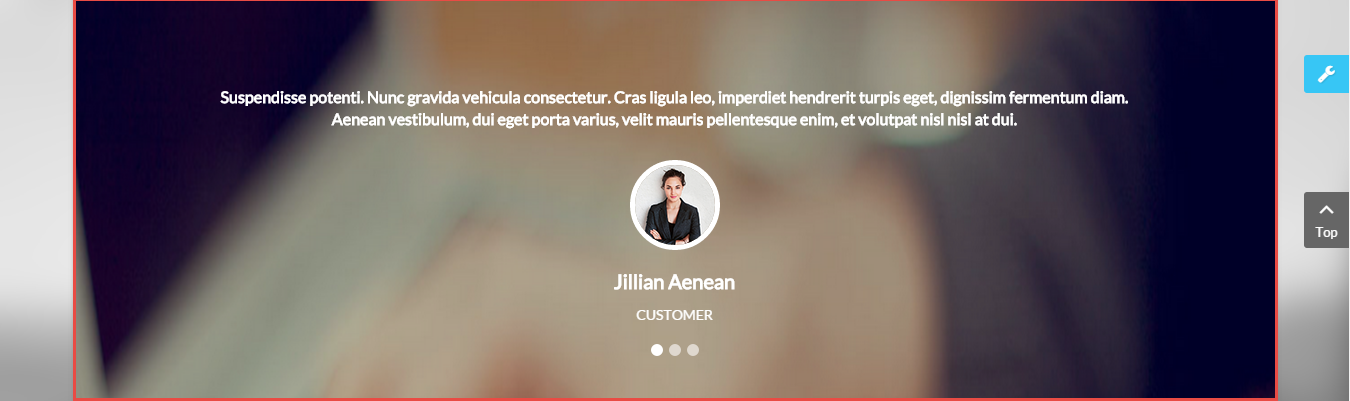
4.4.9.1 Custom Carousel Home – Top 6 Position
Module Position – Module Suffix
Module Class Suffix: “carousel-custommer”
Frontend Appearance
Backend Settings
To configure these modules, please go to Extensions >> Module Manager >> Click “New” button to create a new module >> Select “Custom HTML Module”.
Copy and paste Custom HTML
|
1 2 3 4 5 6 7 8 9 10 11 12 13 14 15 16 17 18 19 20 21 22 |
<div class="carousel-custommer">[carousel width="100%" height="100%" align="center" count="3" control="yes"] [carousel_item ] <div class="customslider"> <p class="post-commnets">Suspendisse potenti. Nunc gravida vehicula consectetur. Cras ligula leo, imperdiet hendrerit turpis eget, dignissim fermentum diam. Aenean vestibulum, dui eget porta varius, velit mauris pellentesque enim, et volutpat nisl nisl at dui.</p> <div class="item-image"><img src="images/demo/customer1.png" alt="" /></div> <h3 class="title">Jillian Aenean</h3> <p class="level">Customer</p> </div> [/carousel_item] [carousel_item ] <div class="customslider"> <p class="post-commnets">Suspendisse potenti. Nunc gravida vehicula consectetur. Cras ligula leo, imperdiet hendrerit turpis eget, dignissim fermentum diam. Aenean vestibulum, dui eget porta varius, velit mauris pellentesque enim, et volutpat nisl nisl at dui.</p> <div class="item-image"><img src="images/demo/customer2.png" alt="" /></div> <h3 class="title">Eker Gilmore</h3> <p class="level">Customer</p> </div> [/carousel_item] [carousel_item ] <div class="customslider"> <p class="post-commnets">Suspendisse potenti. Nunc gravida vehicula consectetur. Cras ligula leo, imperdiet hendrerit turpis eget, dignissim fermentum diam. Aenean vestibulum, dui eget porta varius, velit mauris pellentesque enim, et volutpat nisl nisl at dui.</p> <div class="item-image"><img src="images/demo/customer3.png" alt="" /></div> <h3 class="title">Jillian Gilmore</h3> <p class="level">Customer</p> </div> [/carousel_item] [/carousel]</div> |
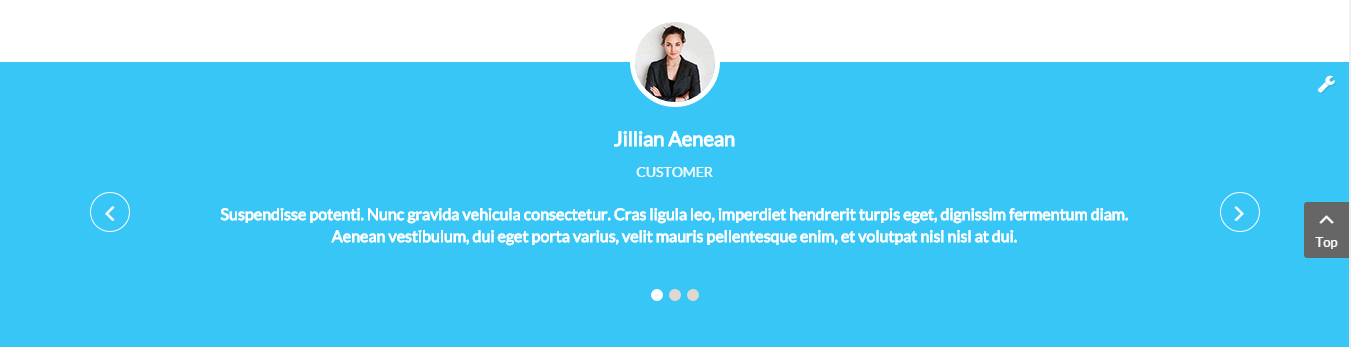
4.4.9.2 Custom Carousel Home Layout 2 – Top 6 Position
Module Position – Module Suffix
Module Class Suffix: “carousel-custommer”
Frontend Appearance
Backend Settings
To configure these modules, please go to Extensions >> Module Manager >> Click “New” button to create a new module >> Select “Custom HTML Module”.
Copy and paste Custom HTML
|
1 2 3 4 5 6 7 8 9 10 11 12 13 14 15 16 17 18 19 20 21 22 |
<div class="carousel-custommer">[carousel width="100%" height="100%" align="center" count="3" control="yes"] [carousel_item ] <div class="customslider"> <div class="item-image"><img src="images/demo/customer1.png" alt="" /></div> <h3 class="title">Jillian Aenean</h3> <p class="level">Customer</p> <p class="post-commnets">Suspendisse potenti. Nunc gravida vehicula consectetur. Cras ligula leo, imperdiet hendrerit turpis eget, dignissim fermentum diam. Aenean vestibulum, dui eget porta varius, velit mauris pellentesque enim, et volutpat nisl nisl at dui.</p> </div> [/carousel_item] [carousel_item ] <div class="customslider"> <div class="item-image"><img src="images/demo/customer2.png" alt="" /></div> <h3 class="title">Eker Gilmore</h3> <p class="level">Customer</p> <p class="post-commnets">Suspendisse potenti. Nunc gravida vehicula consectetur. Cras ligula leo, imperdiet hendrerit turpis eget, dignissim fermentum diam. Aenean vestibulum, dui eget porta varius, velit mauris pellentesque enim, et volutpat nisl nisl at dui.</p> </div> [/carousel_item] [carousel_item ] <div class="customslider"> <div class="item-image"><img src="images/demo/customer3.png" alt="" /></div> <h3 class="title">Jillian Gilmore</h3> <p class="level">Customer</p> <p class="post-commnets">Suspendisse potenti. Nunc gravida vehicula consectetur. Cras ligula leo, imperdiet hendrerit turpis eget, dignissim fermentum diam. Aenean vestibulum, dui eget porta varius, velit mauris pellentesque enim, et volutpat nisl nisl at dui.</p> </div> [/carousel_item] [/carousel]</div> |
4.4.10 Top 7 Position
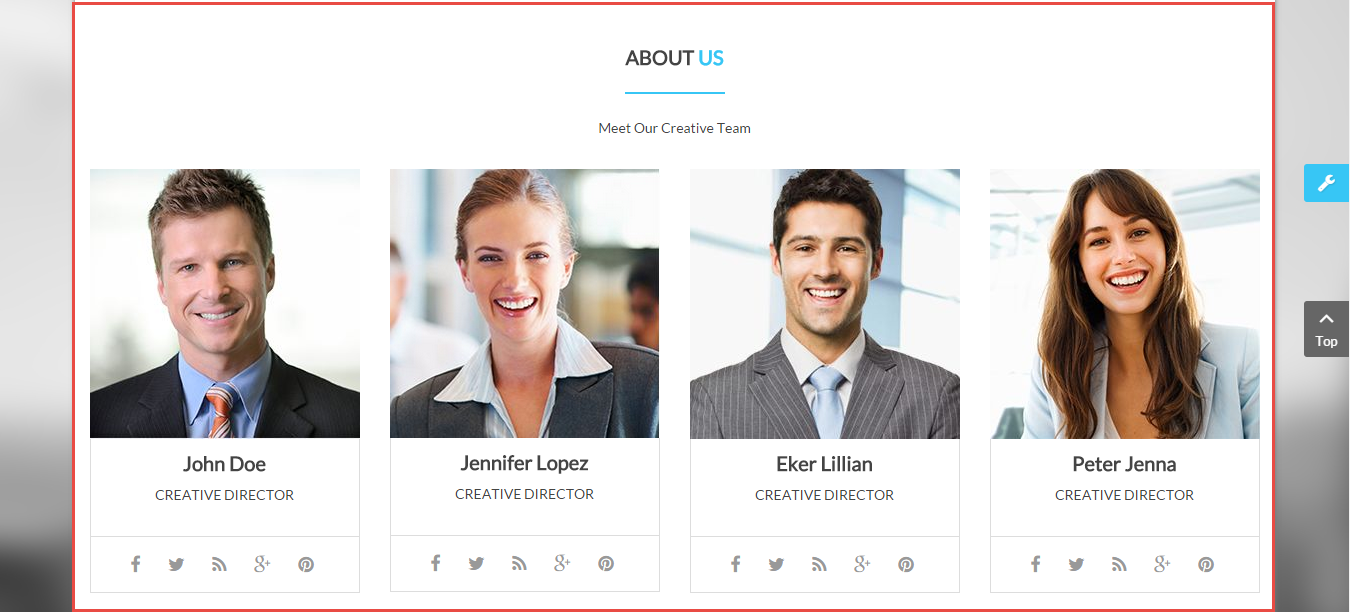
4.4.10.1 About|Us – Top 7 Position
Module Position – Module Suffix
Module Class Suffix: “about-us-home”
Frontend Appearance
Backend Settings
To configure these modules, please go to Extensions >> Module Manager >> Click “New” button to create a new module >> Select “Custom HTML Module”.
Copy and paste Custom HTML
|
1 2 3 4 5 6 7 8 9 10 11 12 13 14 15 16 17 18 19 20 21 22 23 24 25 26 27 28 29 30 31 32 33 34 35 36 37 38 39 40 41 42 43 44 45 46 47 48 49 50 51 52 53 54 55 56 57 58 59 60 61 |
<p class="post-text">Meet Our Creative Team</p> <div class="main"> <div class="row"> <div class="col-md-3 col-sm-6 col-xs-6 item" data-sr="enter top and move 100px over 0.8s"> <div class="image-item"><a href="#"><img src="images/demo/s1.jpg" alt="" /></a></div> <div class="content"> <h3 class="title"><a title="" href="#">John Doe</a></h3> <p class="level">Creative Director</p> <ul class="social"> <li class="icon"><a href="#">[icon name="facebook" ]</a></li> <li class="icon"><a href="#">[icon name="twitter" ]</a></li> <li class="icon"><a href="#">[icon name="rss" ]</a></li> <li class="icon"><a href="#">[icon name="google-plus" ]</a></li> <li class="icon"><a href="#">[icon name="pinterest" ]</a></li> </ul> </div> </div> <div class="col-md-3 col-sm-6 col-xs-6 item" data-sr="enter bottom and move 100px over 0.8s"> <div class="image-item"><a href="#"><img src="images/demo/s2.jpg" alt="" /></a></div> <div class="content"> <h3 class="title"><a title="" href="#">Jennifer Lopez</a></h3> <p class="level">Creative Director</p> <ul class="social"> <li class="icon"><a href="#">[icon name="facebook" ]</a></li> <li class="icon"><a href="#">[icon name="twitter" ]</a></li> <li class="icon"><a href="#">[icon name="rss" ]</a></li> <li class="icon"><a href="#">[icon name="google-plus" ]</a></li> <li class="icon"><a href="#">[icon name="pinterest" ]</a></li> </ul> </div> </div> <div class=" col-md-3 col-sm-6 col-xs-6 item" data-sr="enter top and move 100px over 0.8s"> <div class="image-item"><a href="#"><img src="images/demo/s3.jpg" alt="" /></a></div> <div class="content"> <h3 class="title"><a title="" href="#">Eker Lillian</a></h3> <p class="level">Creative Director</p> <ul class="social"> <li class="icon"><a href="#">[icon name="facebook" ]</a></li> <li class="icon"><a href="#">[icon name="twitter" ]</a></li> <li class="icon"><a href="#">[icon name="rss" ]</a></li> <li class="icon"><a href="#">[icon name="google-plus" ]</a></li> <li class="icon"><a href="#">[icon name="pinterest" ]</a></li> </ul> </div> </div> <div class="col-md-3 col-sm-6 col-xs-6 item " data-sr="enter bottom and move 100px over 0.8s"> <div class="image-item"><a href="#"><img src="images/demo/s4.jpg" alt="" /></a></div> <div class="content"> <h3 class="title"><a title="" href="#">Peter Jenna</a></h3> <p class="level">Creative Director</p> <ul class="social"> <li class="icon"><a href="#">[icon name="facebook" ]</a></li> <li class="icon"><a href="#">[icon name="twitter" ]</a></li> <li class="icon"><a href="#">[icon name="rss" ]</a></li> <li class="icon"><a href="#">[icon name="google-plus" ]</a></li> <li class="icon"><a href="#">[icon name="pinterest" ]</a></li> </ul> </div> </div> </div> </div> |
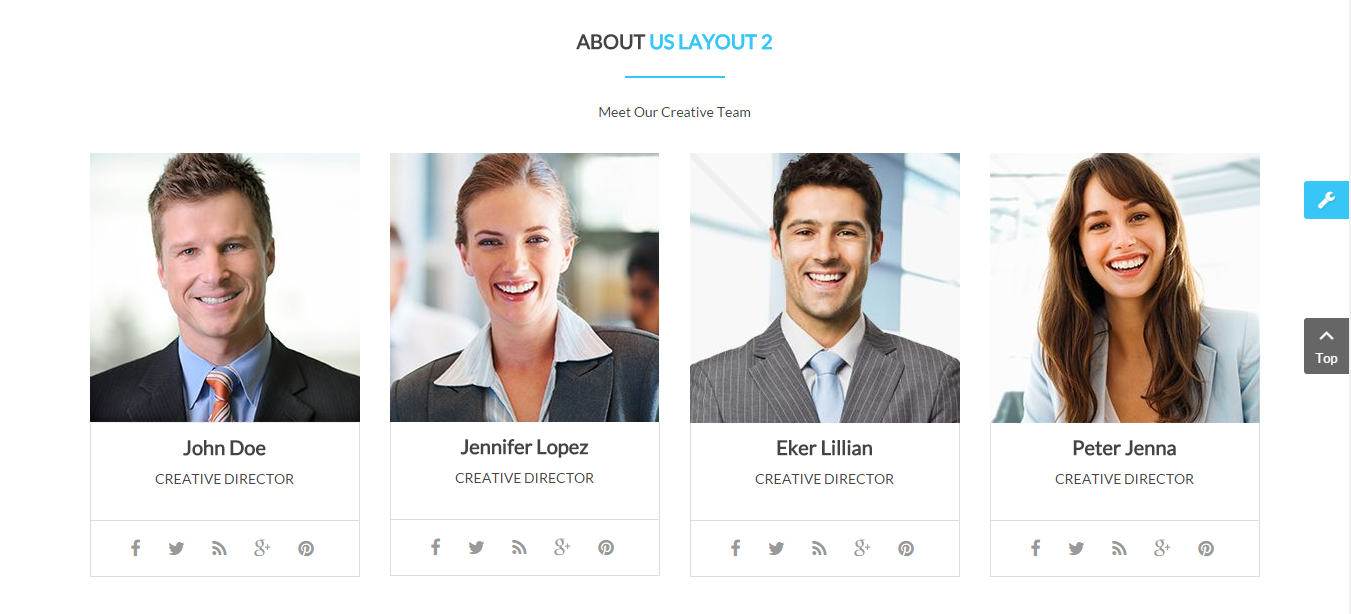
4.4.10.2 About|Us Layout 2 – Top 7 Position
Module Position – Module Suffix
Module Class Suffix: “about-us-home”
Frontend Appearance
Backend Settings
To configure these modules, please go to Extensions >> Module Manager >> Click “New” button to create a new module >> Select “Custom HTML Module”.
Copy and paste Custom HTML
|
1 2 3 4 5 6 7 8 9 10 11 12 13 14 15 16 17 18 19 20 21 22 23 24 25 26 27 28 29 30 31 32 33 34 35 36 37 38 39 40 41 42 43 44 45 46 47 48 49 50 51 52 53 54 55 56 57 58 59 60 61 |
<p class="post-text">Meet Our Creative Team</p> <div class="main"> <div class="row"> <div class="col-md-3 col-sm-6 col-xs-6 item" data-sr="enter top and move 100px over 0.8s"> <div class="image-item"><a href="#"><img src="images/demo/s1.jpg" alt="" /></a></div> <div class="content"> <h3 class="title"><a title="" href="#">John Doe</a></h3> <p class="level">Creative Director</p> <ul class="social"> <li class="icon"><a href="#">[icon name="facebook" ]</a></li> <li class="icon"><a href="#">[icon name="twitter" ]</a></li> <li class="icon"><a href="#">[icon name="rss" ]</a></li> <li class="icon"><a href="#">[icon name="google-plus" ]</a></li> <li class="icon"><a href="#">[icon name="pinterest" ]</a></li> </ul> </div> </div> <div class="col-md-3 col-sm-6 col-xs-6 item" data-sr="enter bottom and move 100px over 0.8s"> <div class="image-item"><a href="#"><img src="images/demo/s2.jpg" alt="" /></a></div> <div class="content"> <h3 class="title"><a title="" href="#">Jennifer Lopez</a></h3> <p class="level">Creative Director</p> <ul class="social"> <li class="icon"><a href="#">[icon name="facebook" ]</a></li> <li class="icon"><a href="#">[icon name="twitter" ]</a></li> <li class="icon"><a href="#">[icon name="rss" ]</a></li> <li class="icon"><a href="#">[icon name="google-plus" ]</a></li> <li class="icon"><a href="#">[icon name="pinterest" ]</a></li> </ul> </div> </div> <div class=" col-md-3 col-sm-6 col-xs-6 item" data-sr="enter top and move 100px over 0.8s"> <div class="image-item"><a href="#"><img src="images/demo/s3.jpg" alt="" /></a></div> <div class="content"> <h3 class="title"><a title="" href="#">Eker Lillian</a></h3> <p class="level">Creative Director</p> <ul class="social"> <li class="icon"><a href="#">[icon name="facebook" ]</a></li> <li class="icon"><a href="#">[icon name="twitter" ]</a></li> <li class="icon"><a href="#">[icon name="rss" ]</a></li> <li class="icon"><a href="#">[icon name="google-plus" ]</a></li> <li class="icon"><a href="#">[icon name="pinterest" ]</a></li> </ul> </div> </div> <div class="col-md-3 col-sm-6 col-xs-6 item " data-sr="enter bottom and move 100px over 0.8s"> <div class="image-item"><a href="#"><img src="images/demo/s4.jpg" alt="" /></a></div> <div class="content"> <h3 class="title"><a title="" href="#">Peter Jenna</a></h3> <p class="level">Creative Director</p> <ul class="social"> <li class="icon"><a href="#">[icon name="facebook" ]</a></li> <li class="icon"><a href="#">[icon name="twitter" ]</a></li> <li class="icon"><a href="#">[icon name="rss" ]</a></li> <li class="icon"><a href="#">[icon name="google-plus" ]</a></li> <li class="icon"><a href="#">[icon name="pinterest" ]</a></li> </ul> </div> </div> </div> </div> |
4.4.11 Top 8 Position
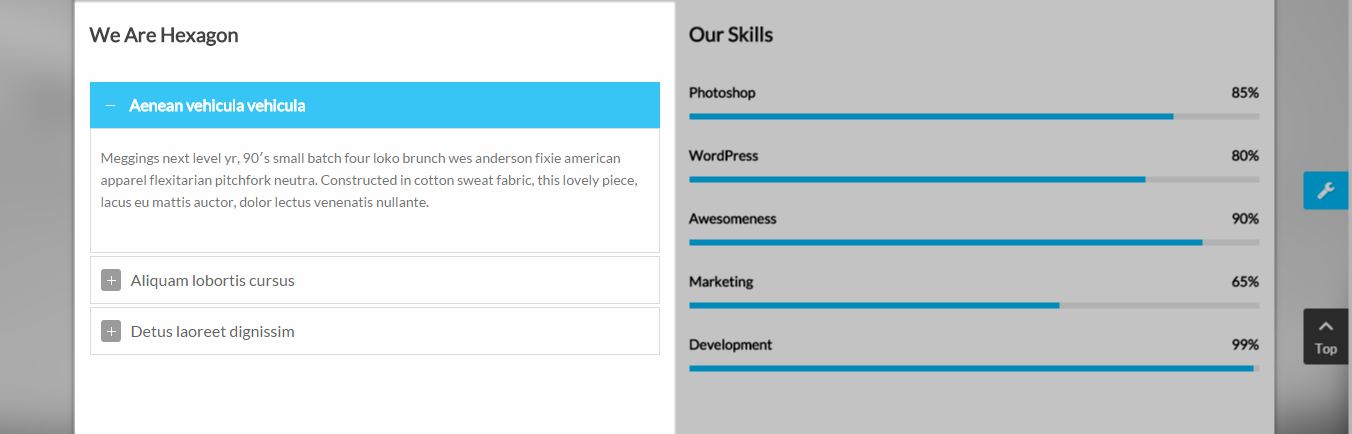
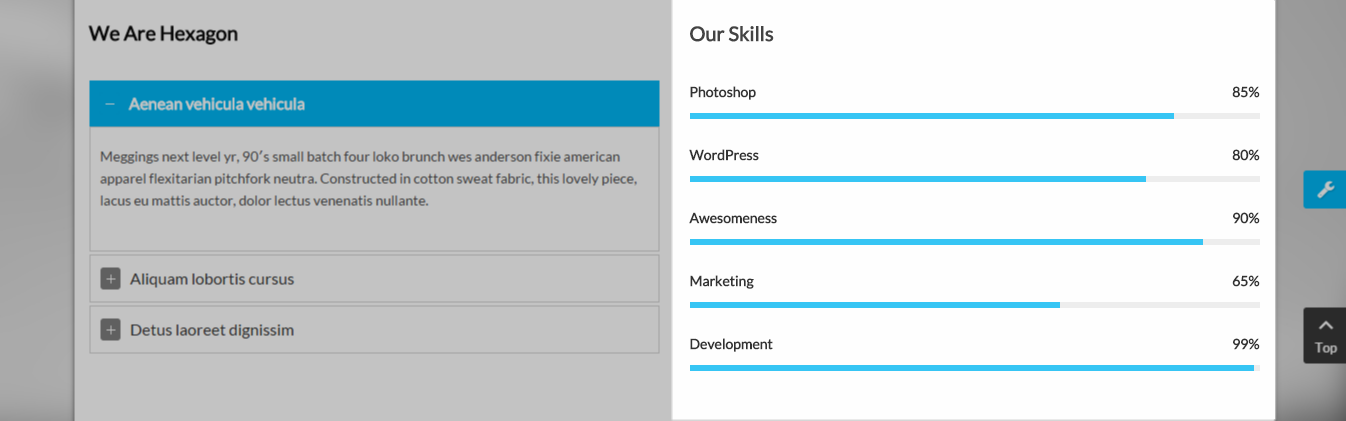
4.4.11.1 We Are Hexagon – Top 8 Position
Module Position – Module Suffix
Module Class Suffix: “content-accordion”
Frontend Appearance
Backend Settings
To configure these modules, please go to Extensions >> Module Manager >> Click “New” button to create a new module >> Select “Sj Content Accordion Module”.
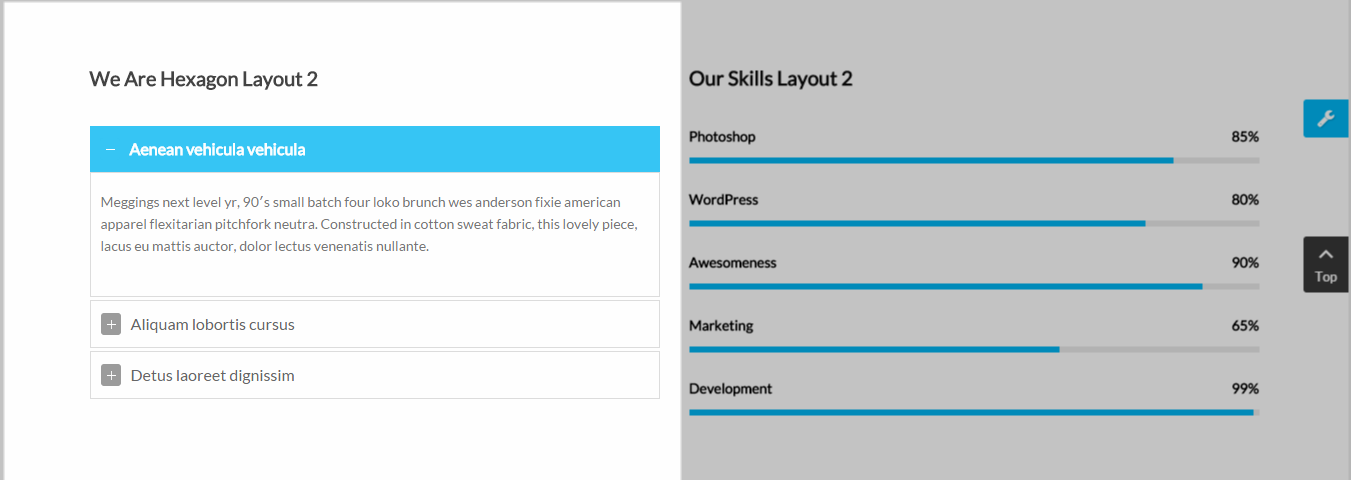
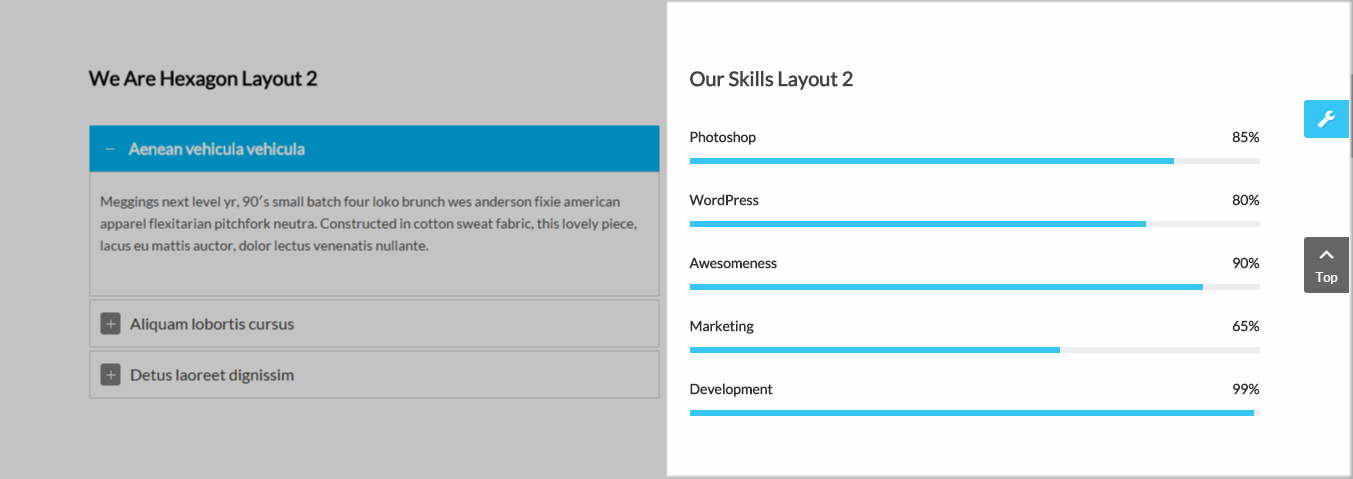
4.4.11.2 We Are Hexagon Layout 2 – Top 8 Position
Module Position – Module Suffix
Module Class Suffix: “content-accordion”
Frontend Appearance
Backend Settings
To configure these modules, please go to Extensions >> Module Manager >> Click “New” button to create a new module >> Select “Sj Content Accordion Module”.
4.4.12 Top 9 Position
4.4.12.1 Our Skills – Top 9 Position
Module Position – Module Suffix
Module Class Suffix: “our-skills”
Frontend Appearance
Backend Settings
To configure these modules, please go to Extensions >> Module Manager >> Click “New” button to create a new module >> Select “Custom HTML Module”.
Copy and paste Custom HTML
|
1 |
<div>[skill width='WIDTH_SKILL' no_number="yes|no"] [skill_item title='Photoshop' number='85'] [skill_item title='WordPress' number='80'] [skill_item title='Awesomeness' number='90'] [skill_item title='Marketing' number='65'] [skill_item title='Development' number='99'] [/skill]</div> |
4.4.12.2 Our Skills Layout 2 – Top 9 Position
Module Position – Module Suffix
Module Class Suffix: “our-skills”
Frontend Appearance
Backend Settings
To configure these modules, please go to Extensions >> Module Manager >> Click “New” button to create a new module >> Select “Custom HTML Module”.
Copy and paste Custom HTML
|
1 |
[skill width='WIDTH_SKILL' no_number="yes|no"] [skill_item title='Photoshop' number='85'] [skill_item title='WordPress' number='80'] [skill_item title='Awesomeness' number='90'] [skill_item title='Marketing' number='65'] [skill_item title='Development' number='99'] [/skill] |
4.4.13 Banner Link – Top 10 Position
Module Position – Module Suffix
Module Class Suffix: “banner-link”
Frontend Appearance

Backend Settings
To configure these modules, please go to Extensions >> Module Manager >> Click “New” button to create a new module >> Select “Module Custom HTML.
Copy and paste Custom HTML
|
1 2 3 4 5 6 7 |
<ul> <li class="item-banner"><a title="" href="#"> <img src="images/demo/themeforest.png" alt="" /> </a></li> <li class="item-banner"><a title="" href="#"> <img src="images/demo/3doceon.png" alt="" /> </a></li> <li class="item-banner"><a title="" href="#"> <img src="images/demo/activeden.png" alt="" /> </a></li> <li class="item-banner"><a title="" href="#"> <img src="images/demo/codecan.png" alt="" /> </a></li> <li class="item-banner"><a title="" href="#"> <img src="images/demo/photodune.png" alt="" /> </a></li> </ul> |
4.4.14 Contact Hexagon
Module Position – Module Suffix
Module Class Suffix: “mod-contact-hexagon”
Frontend Appearance
Backend Settings
To configure these modules, please go to Extensions >> Module Manager >> Click “New” button to create a new module >> Select “Custom HTML Module”.
Copy and paste Custom HTML
|
1 2 3 4 5 6 |
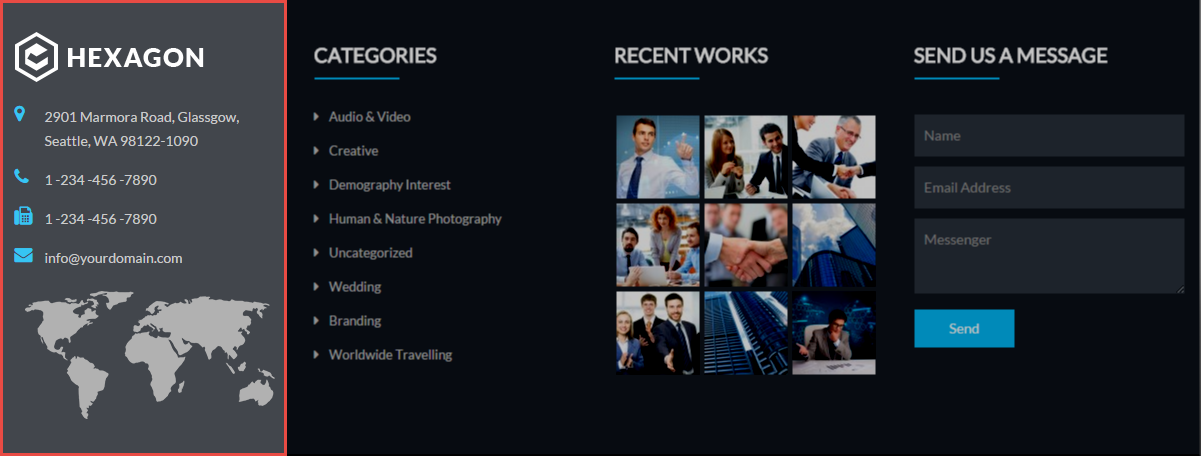
<ul class="contact-hexagon"> <li>[icon name="map-marker" ]2901 Marmora Road, Glassgow, Seattle, WA 98122-1090</li> <li>[icon name="phone" ]1 -234 -456 -7890</li> <li>[icon name="fax" ]1 -234 -456 -7890</li> <li>[icon name="envelope" ] info@yourdomain.com</li> </ul> |
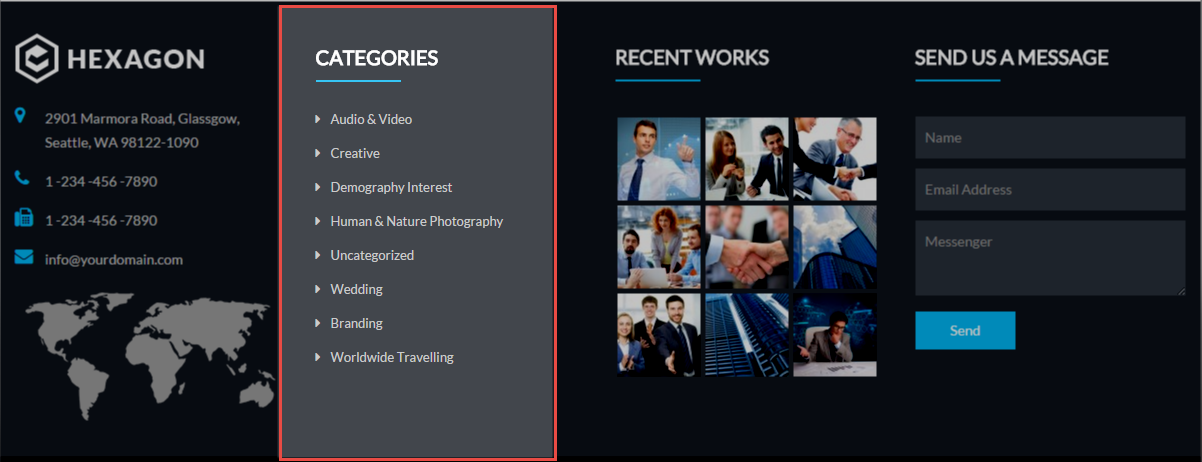
4.4.15 Categories
Module Position – Module Suffix
Module Class Suffix: “menu-categories”
Frontend Appearance
Backend Settings
To configure these modules, please go to Extensions >> Module Manager >> Click “New” button to create a new module >> Select “Menu Module”.
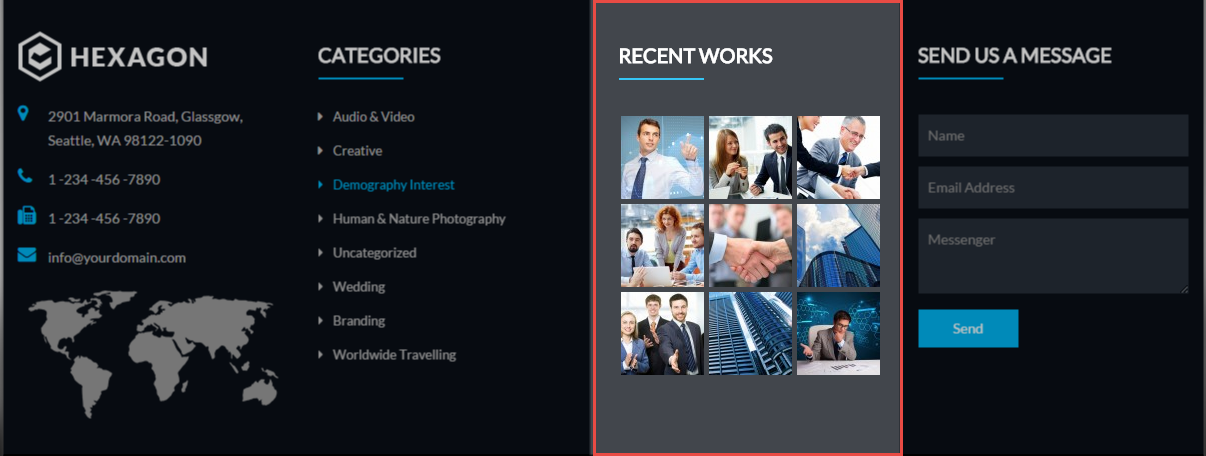
4.4.16 Recent Works
Module Position – Module Suffix
Device Class Suffix: “preset01-3 preset02-3 preset03-4 preset04-3 preset05-3”
Frontend Appearance
Backend Settings
To configure these modules, please go to Extensions >> Module Manager >> Click “New” button to create a new module >> Select “Sj Gallery Pro Module”.
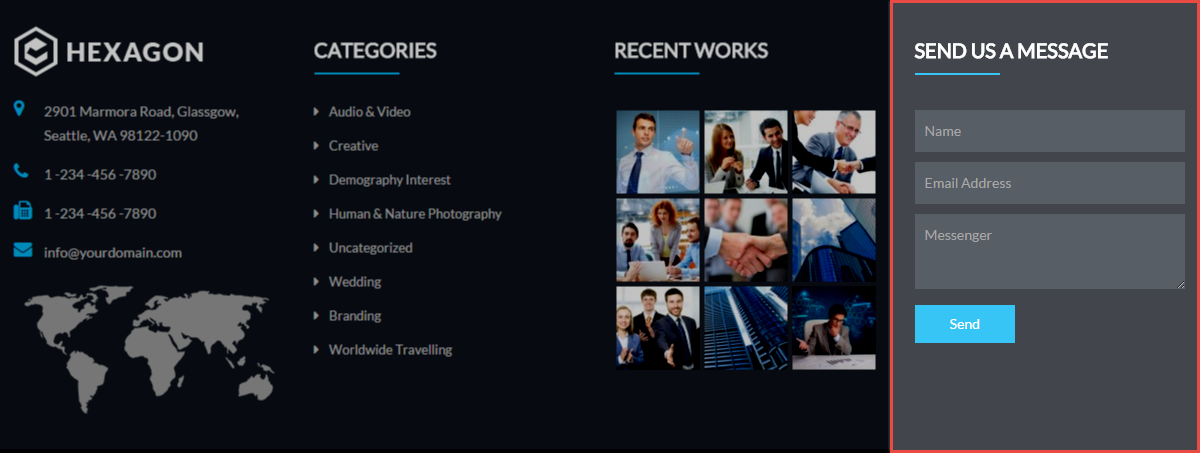
4.4.17 Send Us A Message
Module Position – Module Suffix
Module Class Suffix: “contact-home”
Frontend Appearance
Backend Settings
To configure these modules, please go to Extensions >> Module Manager >> Click “New” button to create a new module >> Select “Sj Contact Ajax Module ”.
4.4.18 Social Networking
Module Position – Module Suffix
Module Class Suffix: Not Use
Frontend Appearance

Backend Settings
To configure these modules, please go to Extensions >> Module Manager >> Click “New” button to create a new module >> Select “Custom HTML Module ”.
Copy and paste Custom HTML
|
1 |
<div class="pull-right social-cus-mod">[social type="facebook" style="cicle"]http://www.facebook.com/SmartAddons.page[/social] [social type="twitter" style="cicle" ]http://twitter.com/#!/smartaddons [/social] [social type="google-plus" style="cicle" ]https://plus.google.com/u/0/103151395684525745793/posts[/social] [social type="linkedin" style="cicle"]http://linkedin.com/smartaddons/joomla-templates[/social]</div> |
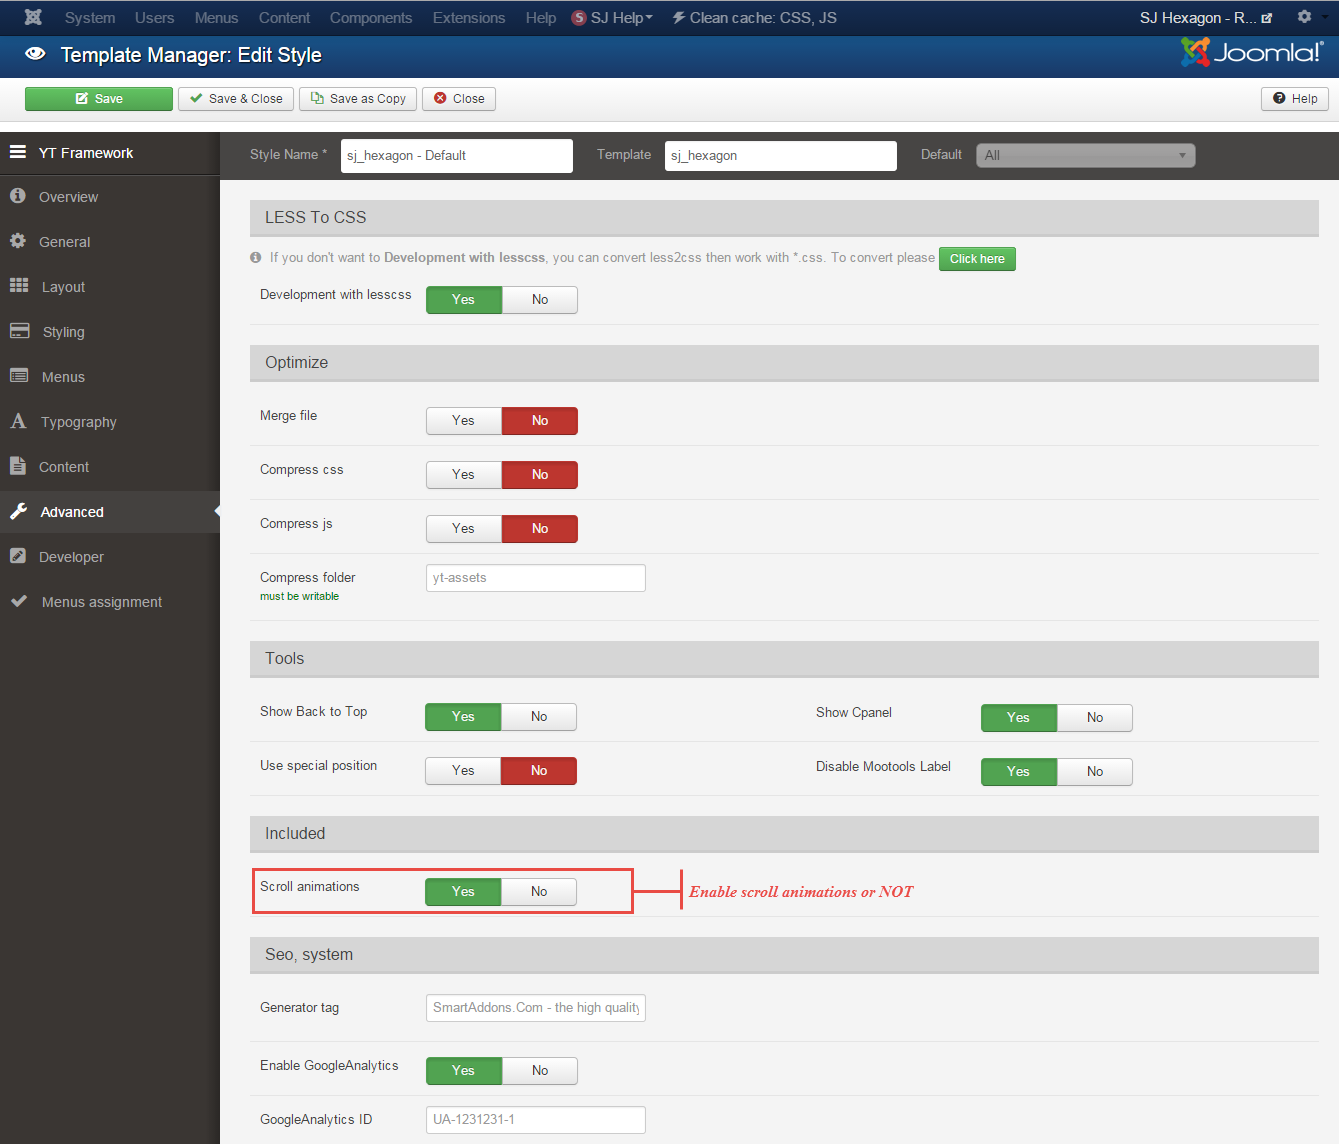
4.5 The Scroll animation of the module
1. Please go Here to readmore “Scroll animations”
2. For example: If You want to set the “scroll animations” for module “SJ Responsive Listing for K2” – At Position “Top 4”, Please copy code as following:
You Copy code:
|
1 2 3 4 |
<!-- These 3 lines are equivalent --> <div data-sr="enter left and move 50px over 1.33s"> Foo </div> <div data-sr="enter from the bottom after 1s"> Bar </div> <div data-sr="wait 2.5s and then ease-in-out 100px"> Baz </div> |
And paste the code into the parameter “Header Class” as the image:
3. Else if you dont want to set the “scroll animation” for all modules. Please go to your Administrator Panel >> Extensions >> Template Manager >> hit “sj_hexagon – Default” >> click “Advanced” tab >> scroll down to find “Scroll animations” >> choose “No”
4.6 Title of Module Configuration
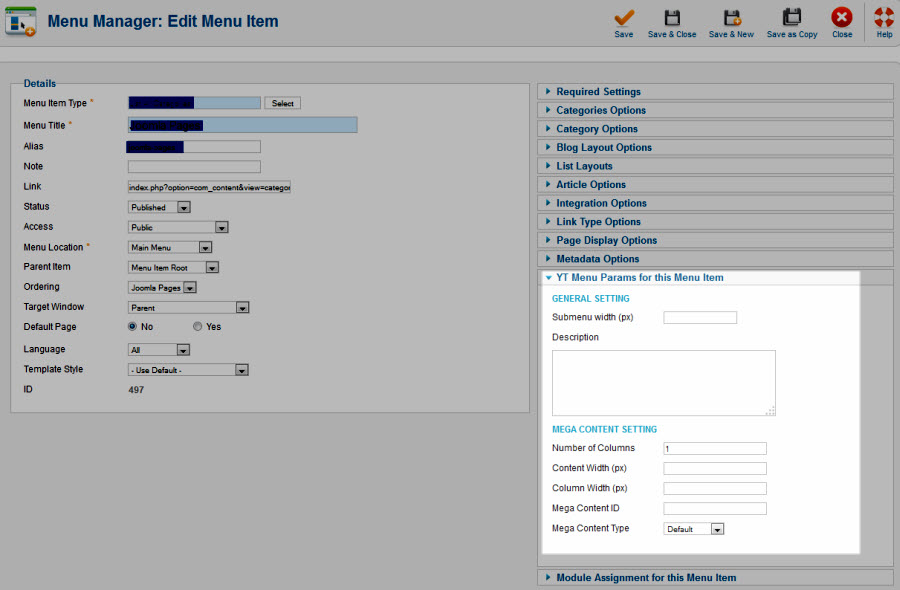
When you type any words after the vertical bar “|”, the words will be changed into the blue color (same with the theme color). For example as the image:

5SUPPORT – Back to top
Thank you so much for purchasing this template. If you have any questions that are beyond the scope of this help file, please send us via: Submit a Ticket
Thanks so much!
