1SYSTEM REQUIREMENTS – Back to top
SO ShoppyStore is compatible with Opencart 2.0.x. Please make sure your system meets the following requirements:
2INSTALLATION – Back to top
There are two ways to install a SO Template:
- Install Quickstart: By using this package, you will set the template exactly as our Demo with sample data.
- Install Template : If you exist a opencart website you can install only template.
2.1 Install with Quickstart Package:
Step 1: Open your Browser and type : localhost/phpmyadmin or yourdomain/phpmyadmin
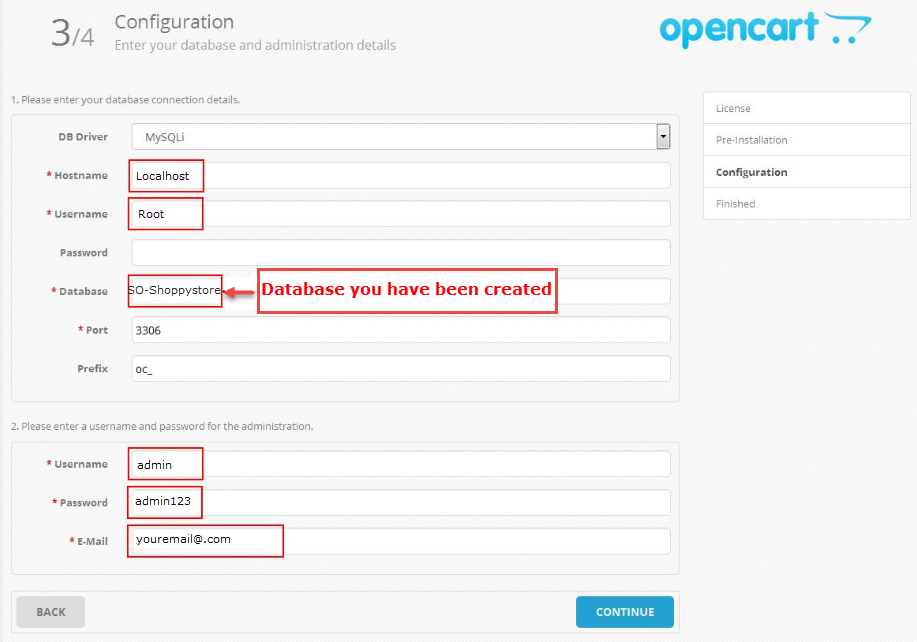
Step 2: Then create database

As an example, name of opencart is SO-Shoppystore: Https://Opencart/SO-Shoppystore/upload/install/index.php then click “install” button
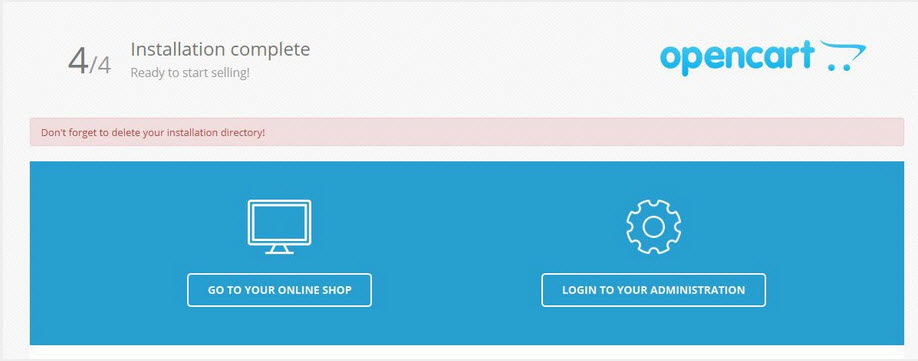
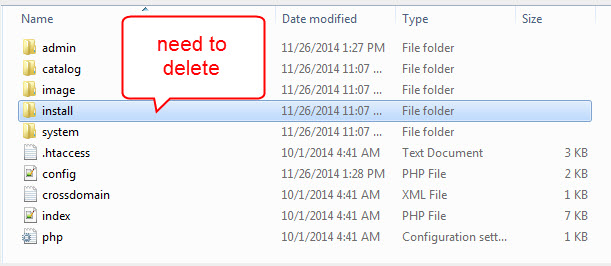
You need to delete install folder
Note:
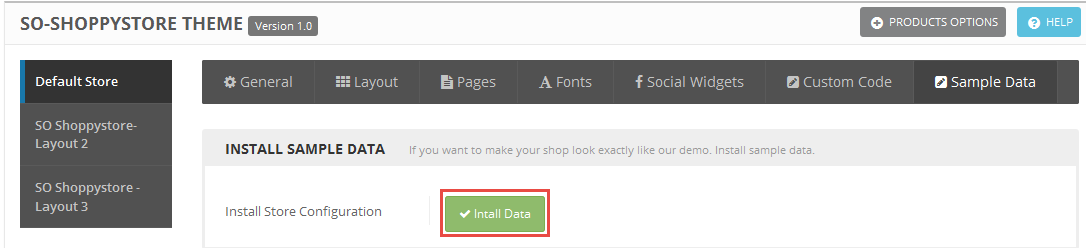
After installing quickstart package and choosing Layout you want. To retrieve sample data for theme default, please go to Extension >> Modules >> Theme Control Panel(Click “edit” button) >> Choose Sample Data >> Click “Install data” button
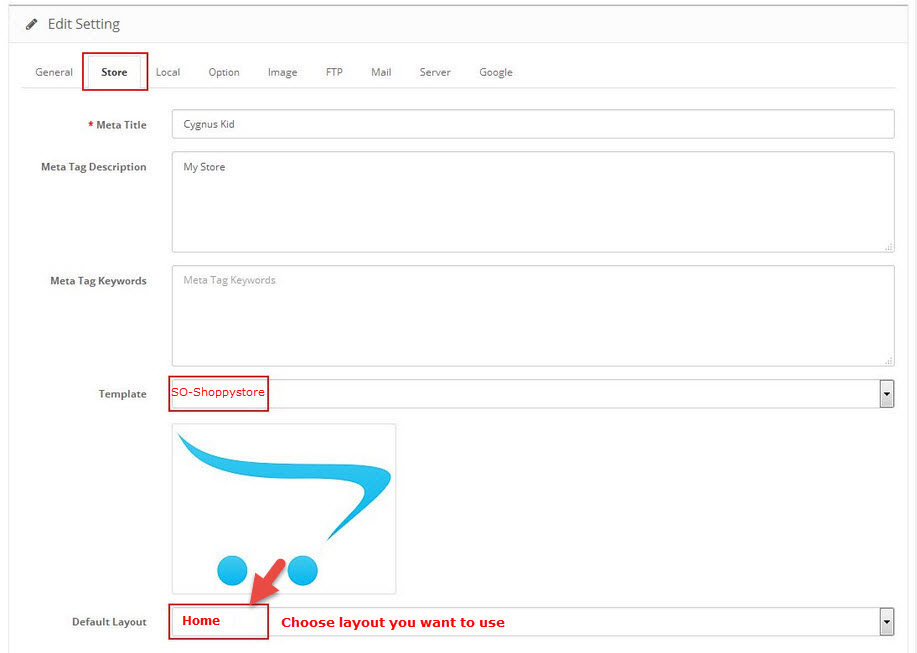
- Go to System -> Settings
- At tab Store Name , choose your default store, click Edit button
- Choose tab Store
2.2 Install Theme
You can download Opencart here.
You can install default Opencart the same as part 2.1 Install with Quickstart Package
Feel free to check the detailed VIDEO TUTORIAL
You can try install via FTP by following these steps:
Step1: Upload theme package to your Root folder (Example: upload the file so_shoppystore_template_oc2.3.0_v1.0.0.ocmod.zip
Step2: Use Cpanel to unzip this file
Step3: Move all folders into ‘upload’ folder to Root folder

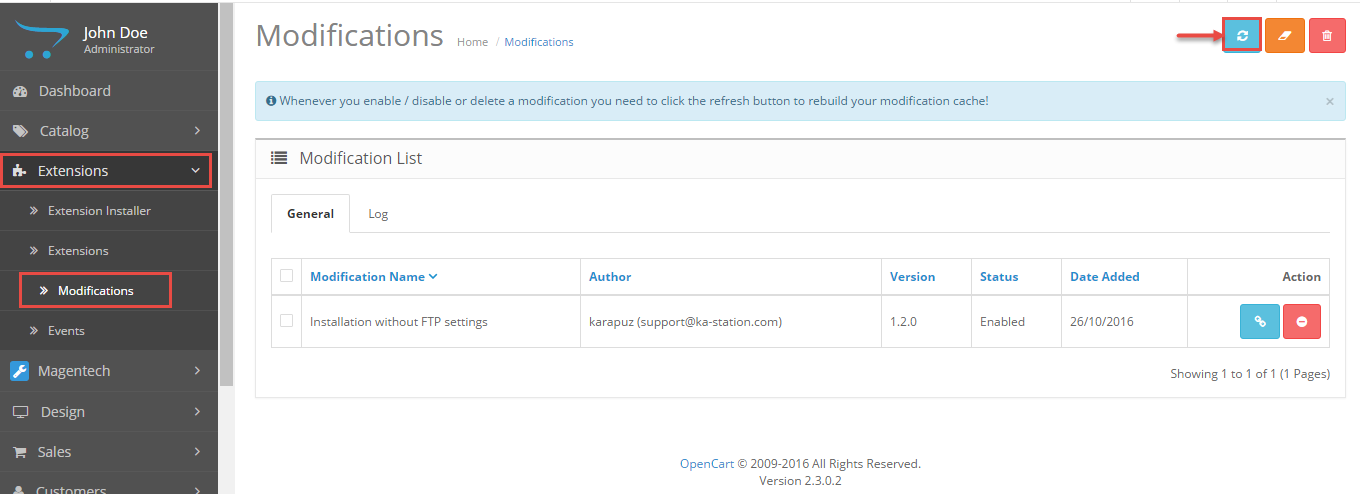
Step 4: Go to Admin => Extensions => Modification => Click Refresh button
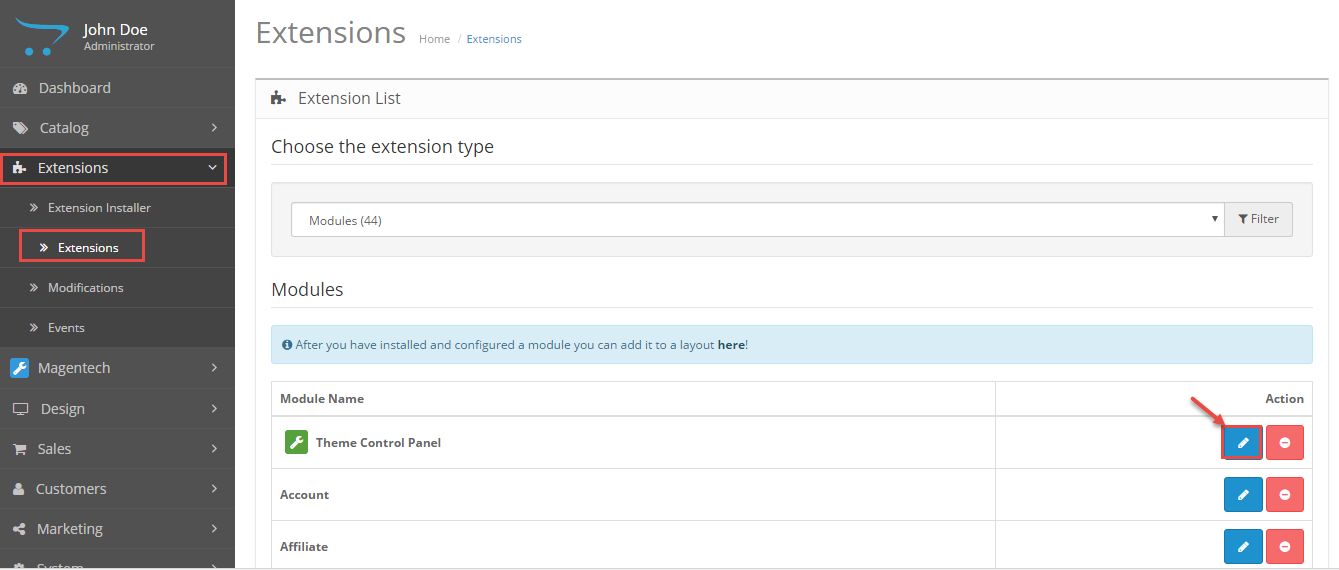
Step 5: Go to Admin => Extensions => Extensions => Filter: Modules => Click to install Theme control panel module
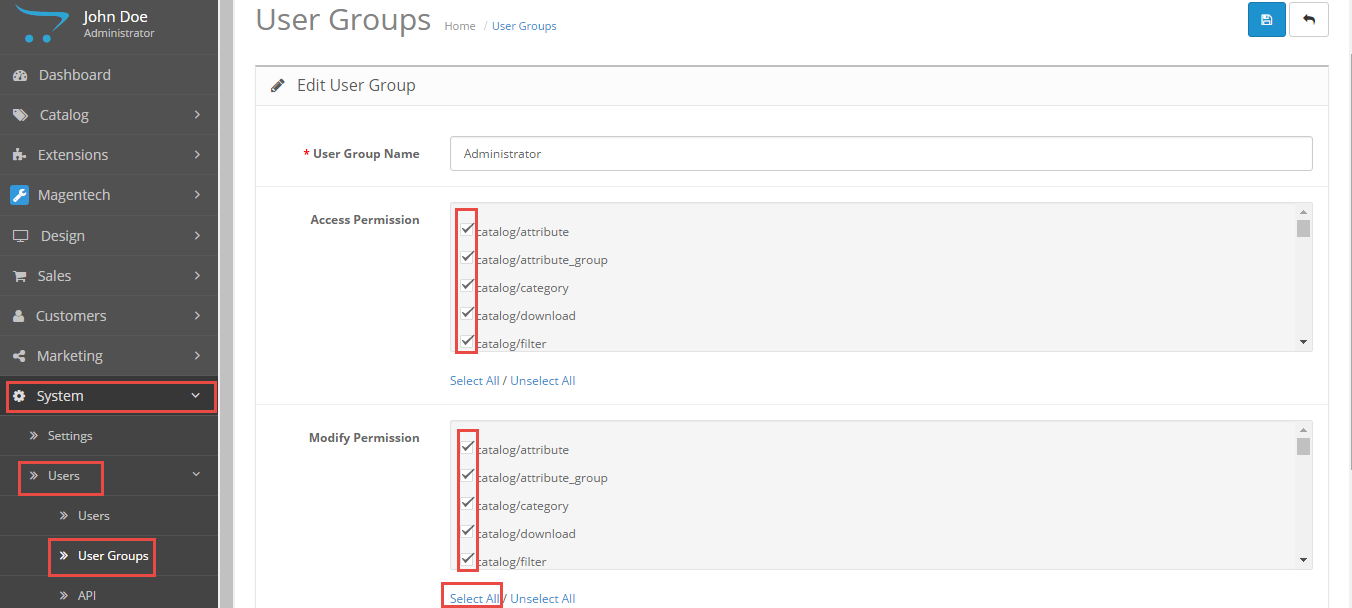
Step 6: Go to Admin => Systems => Users => User groups => Edit Administrator => Select All in all permissions => Save
You to use the new Extension Installer featured in OpenCart 2.0
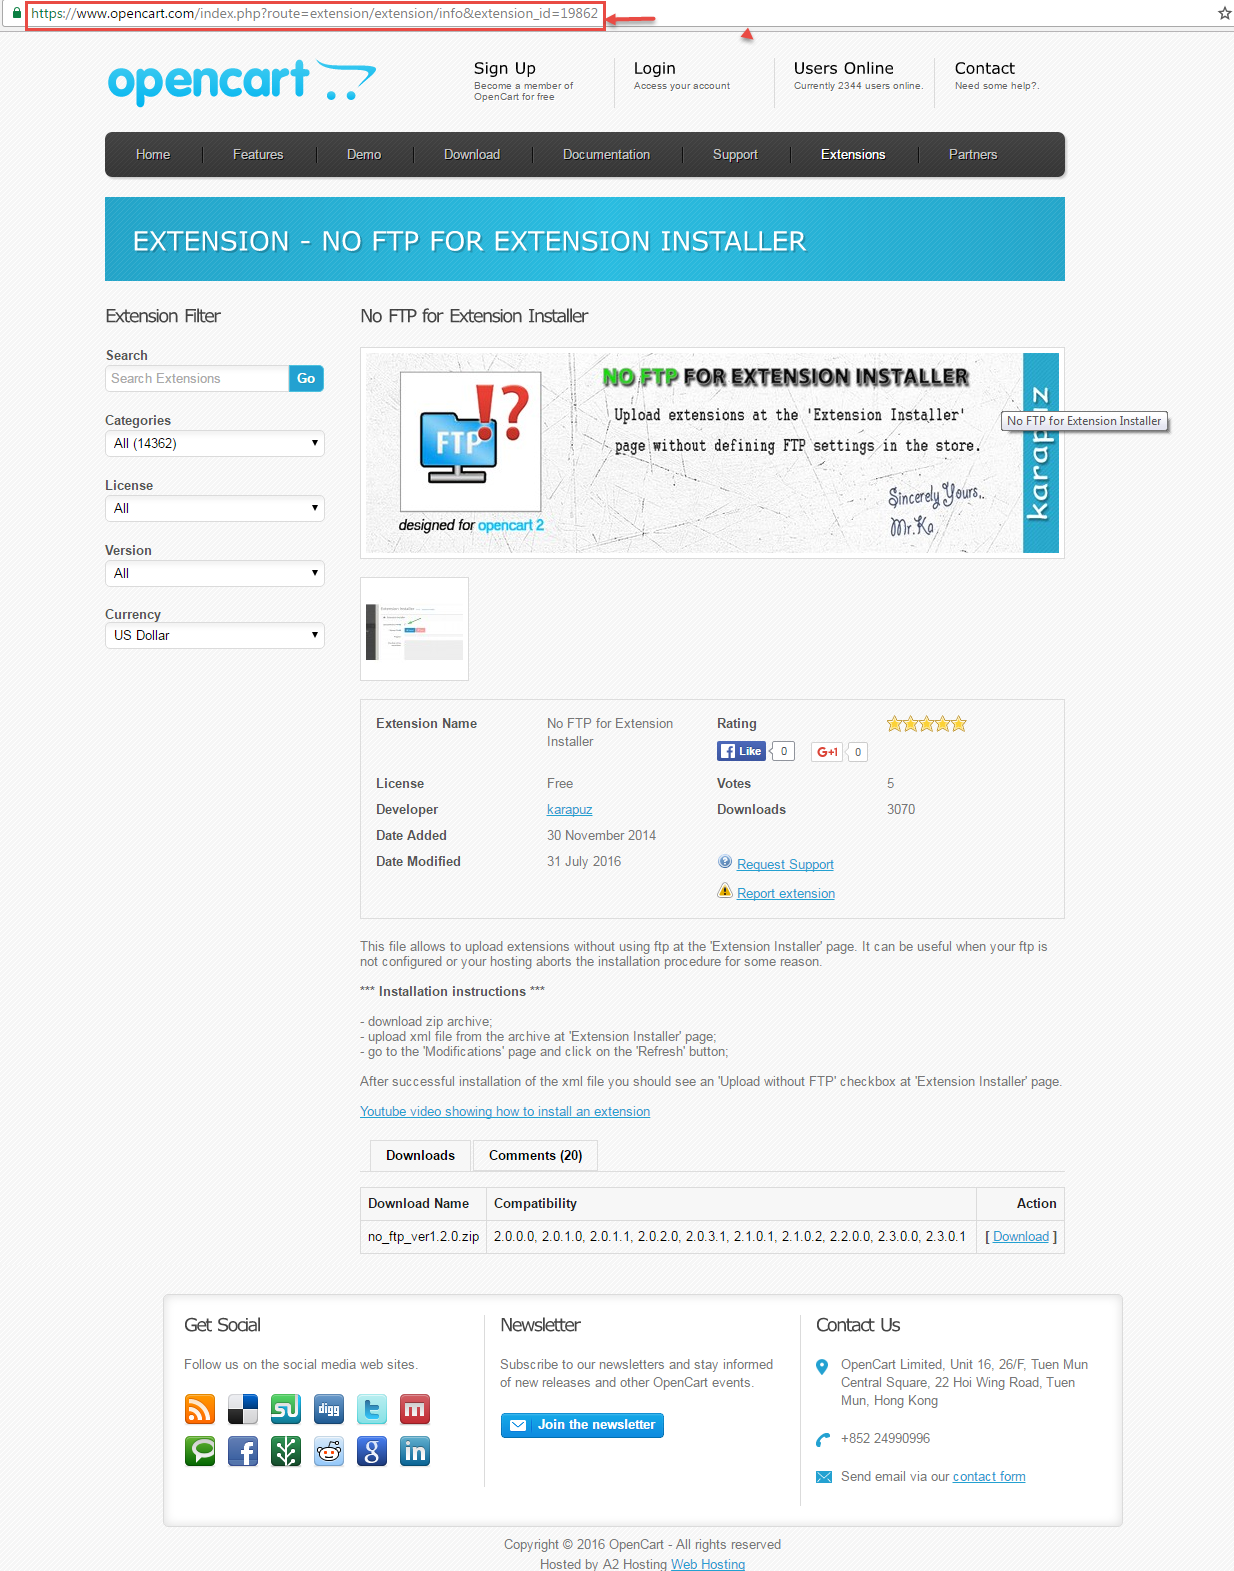
- Step 1 : Please type the following link: https://www.opencart.com/index.php?route=extension/extension/info&extension_id=19862. Extension allows to upload extensions without using FTP
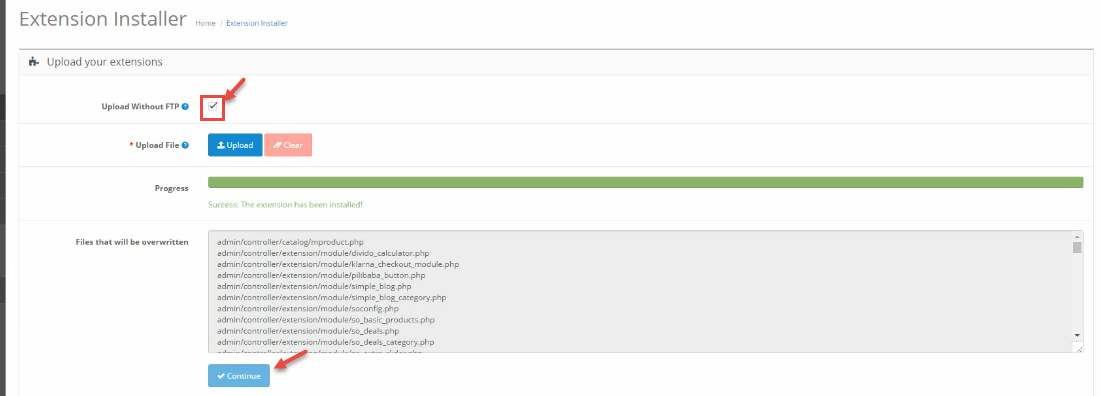
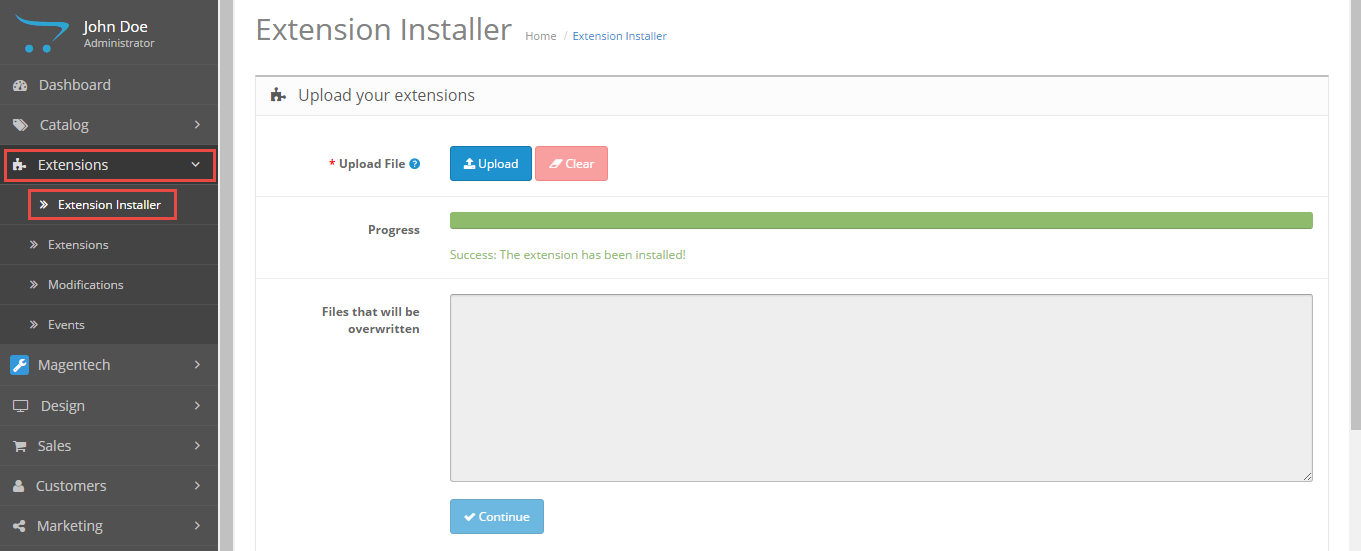
- Step 2: Go to Extensions > Extension Installer > Click Upload and select the “no_ftp.ocmod.XML” file to upload. Then You should see the message Success: You have installed your extension!
- Step 3: Go to Extensions > Extension Installer > Click Upload and select the “so23_shoppystore_template_oc2.3.0_v1.2.0.zip” file to upload. Then You should see the message Success: You have installed your extension!
- Step 4: Go to System > User > User-Group > Click “Edit” button > Then you click “Select All” button
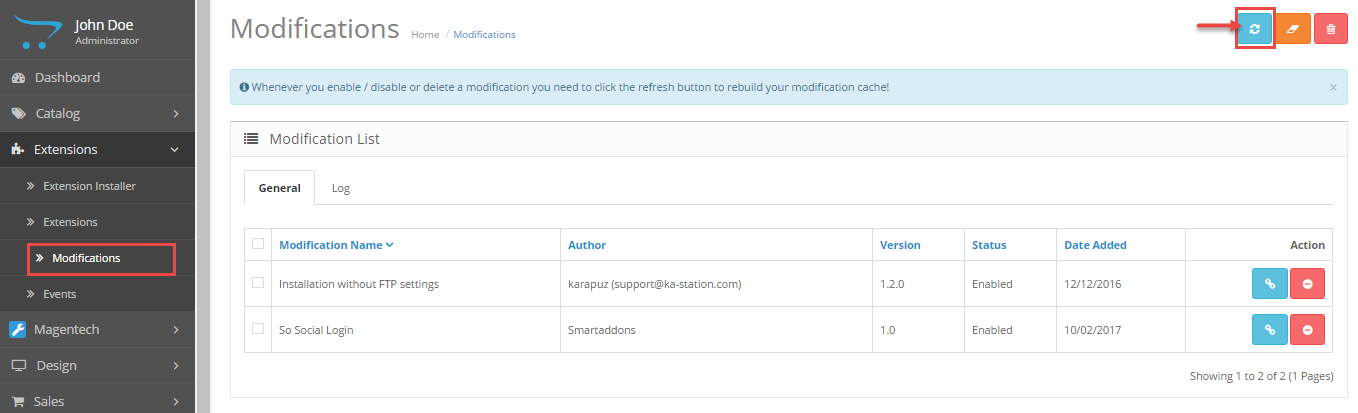
- Step 6: Go to Extensions > Modifications > Click “Refresh” button to run “ocmod.xml” file
- Step 7: Go to Extensions > Theme Control Panel and edit your store: General Tab, Layout Tab, Page Tab…
- Step 8: Go to Extensions >> Modifications >> Click “Refresh” button
- Step 9: Refresh your site and you got it
2.3 Select Layout
Feel free to check the detailed VIDEO TUTORIAL
2.4 CreateColor Theme Control
Feel free to check the detailed VIDEO TUTORIAL
2.5 Install Language and Override Language
You can read more information: Here
Step1: Extracting
Extract the archive file of the language pack you have downloaded into your PC: “patch_language_v2.3.x”
Step 2: Renaming
The folders are need to be changed:
patch_language_v.2.3.x\admin\language\%locale%
patch_language_v.2.3.x\catalog\language\%locale%
patch_language_v.2.3.x\admin\language\%locale%\%locale%.php
patch_language_v.2.3.x\catalog\language\%locale%\%locale%.php
Rename both of these folders to the language of your choice: replace “%locale%” with the name of the language (English, German…).
Step3:Uploading
Upload the admin and catalog folders you have replaced into your folder upload theme
Step4: Translating
Then please go to Catalog > language > extension > choose 1 of 5 files PHP >> translate the text to your preference
3CONFIGURATION – Back to top
3.1 Layout Position
3.1.1 Layout1
3.1.2 Layout2

3.1.3 Layout3
3.1.4 Layout4
3.1.5 Layout5
3.2 Theme Configuration
3.2.1. Template Configuration
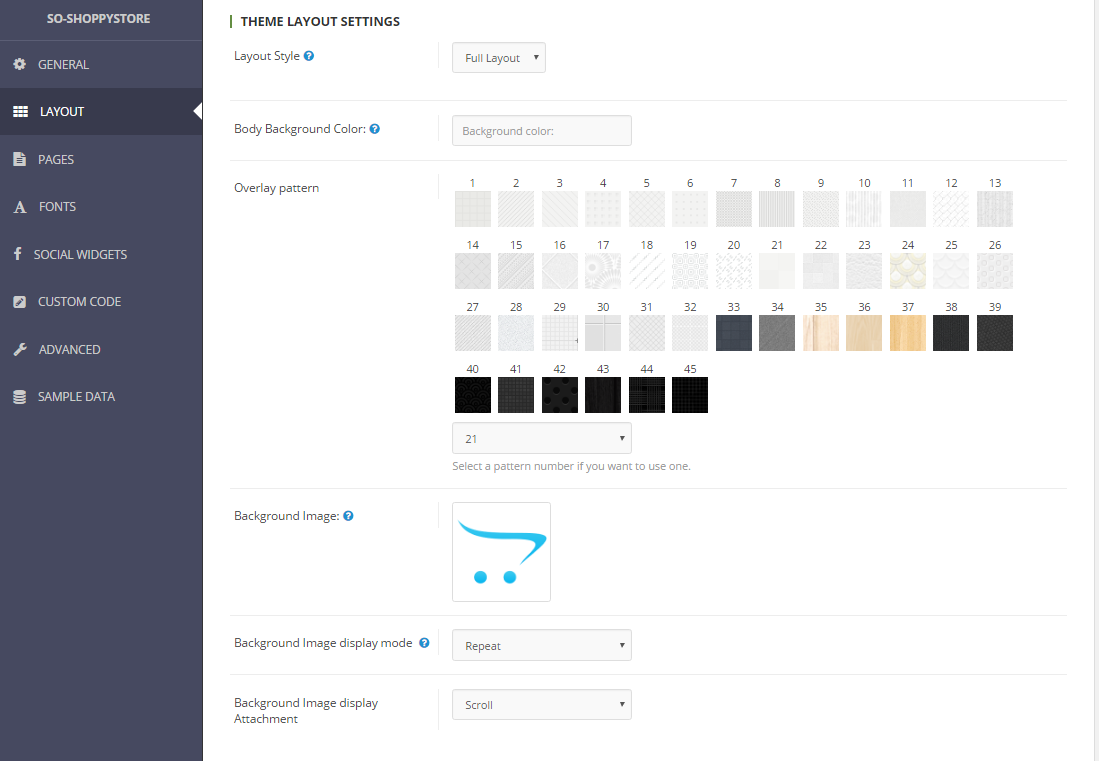
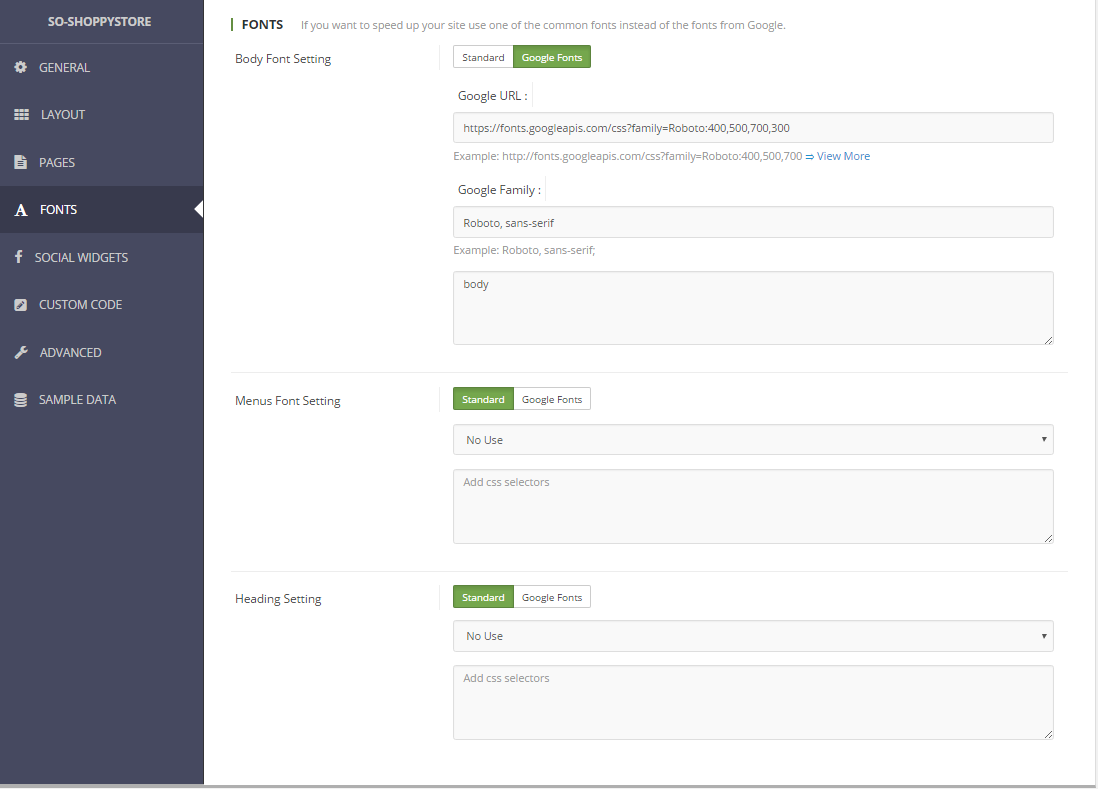
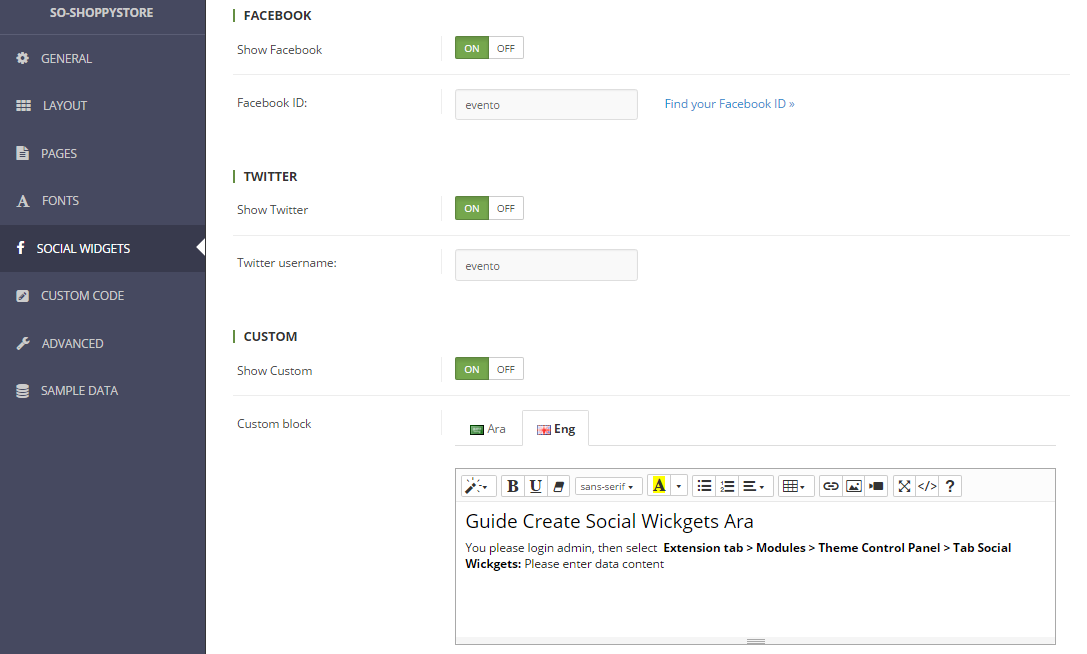
Go to Extensions > Modules > Theme Control Panel >> Click “Edit” Button. All of parameters of this theme are divided into the following groups, in which they are explained themselves:
General
Layout
Pages
Fonts
Social Widgets Accounts
Custom Code
3.3 Menu Configuration
Frontend Appearance

3.3.1.1 Create New Megamenu
Go to Extensions >> Modules >> Find module “SO Mega Menu” >> Click “Edit” button >> Enter a menu’s name: “SO Mega Menu” >> Then Click “Save” button >> Create New Megamenu Here
3.3.1.2 Features Menu Configuration
Frontend Appearance
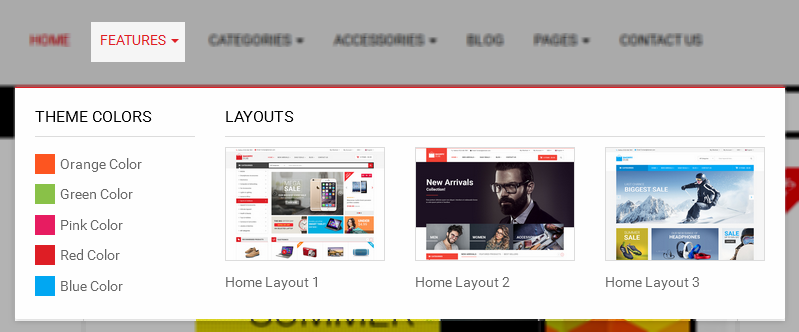
To create this menu, please go to Extensions >> Modules >> ” SO Megamenu > SO Megamenu” >> Click “Edit” button >> Click “Creat new Item” >> Creat new item Here
Check the menu item in the boxes in the left column, click “Creat new Item” to add Submenus to the menu and drag/drop to arrange them.
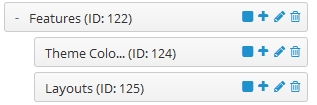
To configure Features Menu, click on “pencil” symbol to configure its backend settings

To configure Theme Colors – Submenu, click on “pencil” symbol to configure its backend settings
Copy and paste the Code into editor:
|
1 2 3 4 5 6 7 8 9 10 11 12 13 14 15 16 17 18 19 |
<div class="column layout-color"> <h3>Theme Colors</h3> <div> <ul class="row-list"> <li class="color orange"><a href="index.php?scheme=orange">Orange Color</a></li> <li class="color green"><a href="index.php?scheme=green">Green Color</a></li> <li class="color pink"><a href="index.php?scheme=pink">Pink Color</a></li> <li class="color red"><a href="index.php?scheme=red">Red Color</a></li> <li class="color blue"><a href="index.php?scheme=blue">Blue Color</a></li> </ul> </div> </div> |
To configure Layouts – Submenu, click on “pencil” symbol to configure its backend settings
Copy and paste the Code into editor:
|
1 2 3 4 5 6 7 8 9 10 11 12 13 14 15 16 17 18 19 20 21 22 23 24 25 26 27 28 29 30 31 32 |
<div class="column"> <h3>Layouts</h3> <ul class="row"> <li class="col-sm-4"> <a href="http://dev.ytcvn.com/ytc_templates/opencart/so_shoppystore/"> <img src="image/catalog/demo/banners/layout1.jpg" alt="img-layout1"> <span>Home Layout 1</span> </a> </li> <li class="col-sm-4"> <a href=" http://dev.ytcvn.com/ytc_templates/opencart/so_shoppystore/layout2/"> <img src="image/catalog/demo/banners/layout2.jpg" alt="img-layout2"> <span>Home Layout 2</span> </a> </li> <li class="col-sm-4"> <a href=" http://dev.ytcvn.com/ytc_templates/opencart/so_shoppystore/layout3/"> <img src="image/catalog/demo/banners/layout3.jpg" alt="img-layout3"> <span>Home Layout 3</span> </a> </li> </ul> </div> |
3.3.1.3 Categories Menu Configuration
Frontend Appearance
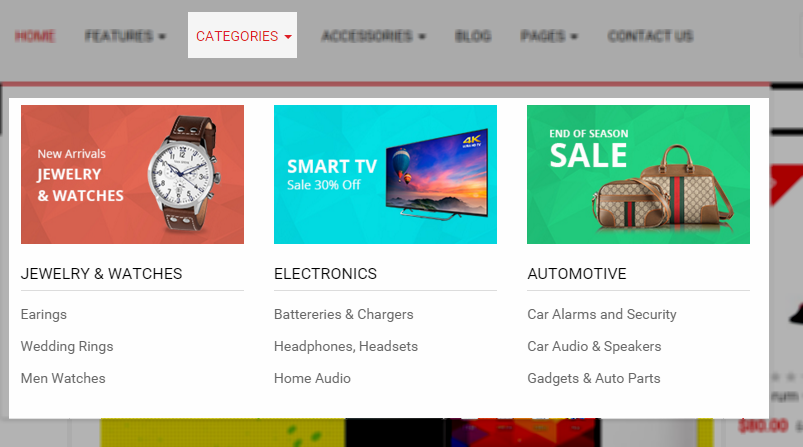
To create this menu, please go to Extensions >> Modules >> ” SO Megamenu > SO Megamenu” >> Click “Edit” button >> Click “Creat new Item” >> Creat new item Here
Check the menu item in the boxes in the left column, click “Creat new Item” to add Submenus to the menu and drag/drop to arrange them.
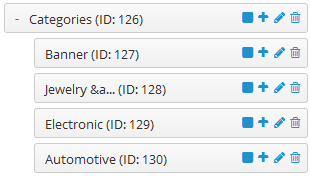
To configure Categories Menu, click on “pencil” symbol to configure its backend settings
To configure Banner – Submenu, click on “pencil” symbol to configure its backend settings
Copy and paste the Code into editor:
|
1 2 3 4 5 6 7 8 9 10 11 12 13 14 15 |
<div class="row"> <div class="col-sm-4 img img1"> <a href="#"><img src="image/catalog/cms/img1.jpg" alt="banner1"></a> </div> <div class="col-sm-4 img img2"> <a href="#"><img src="image/catalog/cms/img2.jpg" alt="banner2"></a> </div> <div class="col-sm-4 img img3"> <a href="#"><img src="image/catalog/cms/img3.jpg" alt="banner3"></a> </div> </div> |
To configure Jewelry & Watches – Submenu, click on “pencil” symbol to configure its backend settings
To configure Electronic – Submenu, click on “pencil” symbol to configure its backend settings
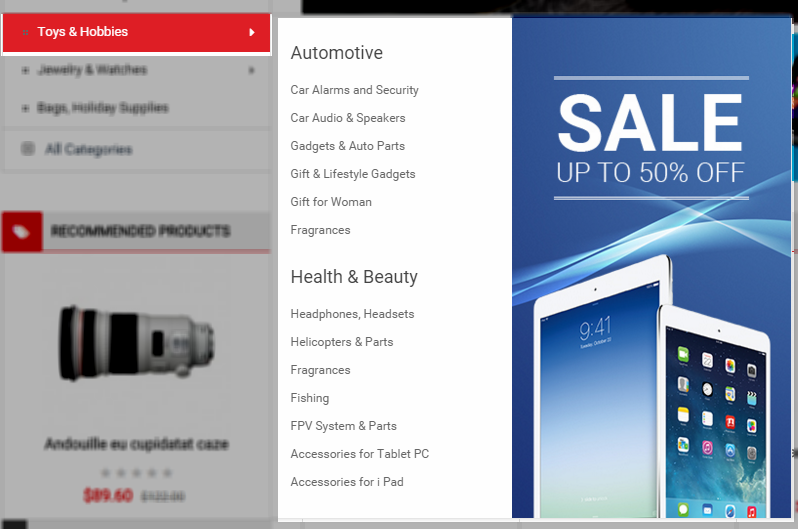
To configure Automotive – Submenu, click on “pencil” symbol to configure its backend settings
3.3.1.4 Accessories Menu Configuration
Frontend Appearance
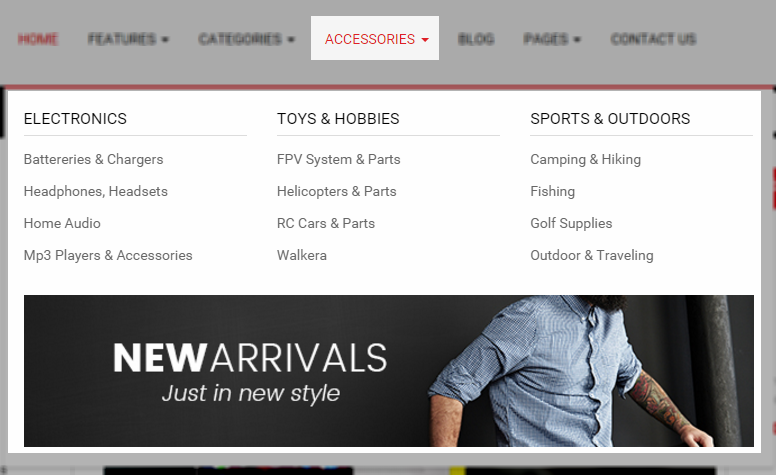
To create this menu, please go to Extensions >> Modules >> ” SO Megamenu > SO Megamenu” >> Click “Edit” button >> Click “Creat new Item” >> Creat new item Here
Check the menu item in the boxes in the left column, click “Creat new Item” to add Submenus to the menu and drag/drop to arrange them.

To configure Accessories Menu, click on “pencil” symbol to configure its backend settings
To configure Electronic – Submenu, click on “pencil” symbol to configure its backend settings
To configure Toys & Hobbies – Submenu, click on “pencil” symbol to configure its backend settings
To configure Sports & Outdoors – Submenu, click on “pencil” symbol to configure its backend settings
To configure HTML – Submenu, click on “pencil” symbol to configure its backend settings
Copy and paste the Code into editor:
|
1 |
<a href="#"><img src="image/catalog/demo/banners/t23.jpg" style="width: 100%;" alt="banner"></a> |
Frontend Appearance

3.3.2.1 Create New Verticalmenu
Go to Extensions >> Modules >> Find module “SO Mega Menu” >> Click “Edit” button >> Enter a menu’s name: “SO Verticalmenu” >> Then Click “Save” button >> Create New Megamenu Here
3.3.2.2 Automotive & Motocrycle Menu Configuration
Frontend Appearance
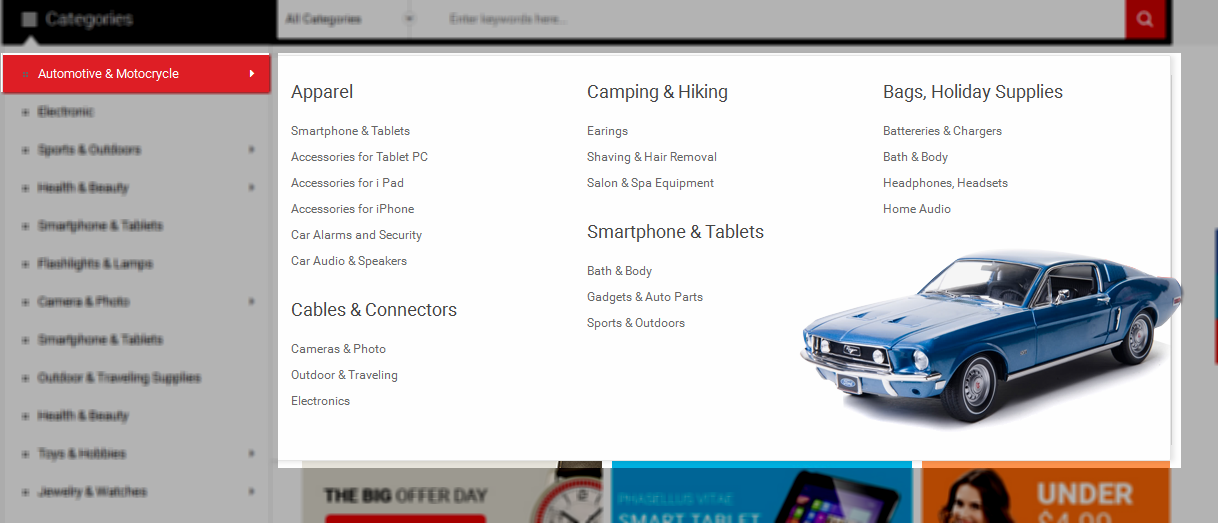
To create this menu, please go to Extensions >> Modules >> ” SO Megamenu > SO Verticalmenu” >> Click “Edit” button >> Click “Creat new Item” >> Creat new item Here
Check the menu item in the boxes in the left column, click “Creat new Item” to add Submenus to the menu and drag and drop to arrange them.
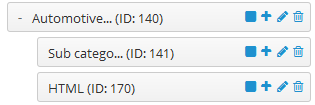
To configure Automotive & Motocrycle Menu, click on “pencil” symbol to configure its backend settings
To configure Sub category – Submenu, click on “pencil” symbol to configure its backend settings
To configure HTML – Submenu, click on “pencil” symbol to configure its backend settings
Copy and paste the Code into editor:
|
1 |
<div class="image-position"><img src="image/catalog/demo/banners/menu1-bg.jpg" alt="banner"></div> |
3.3.2.3 Sports & Outdoors Menu Configuration
Frontend Appearance
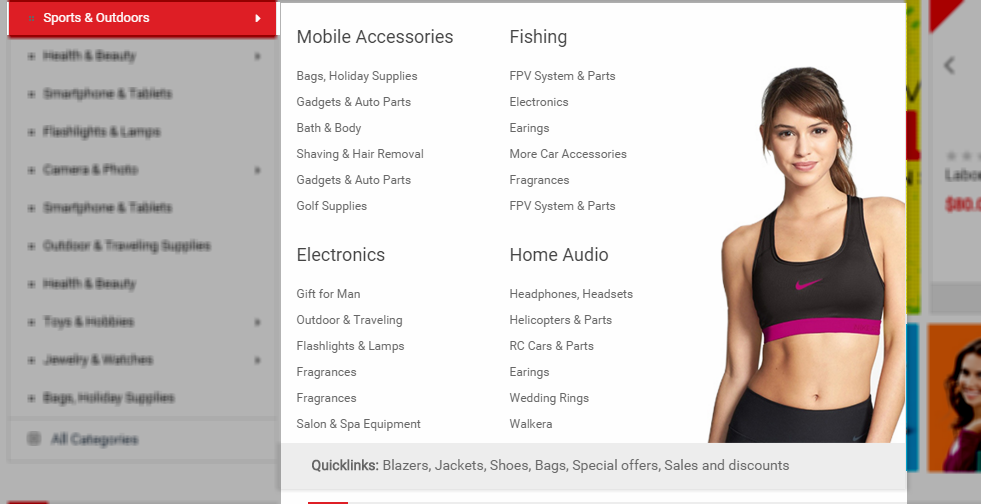
To create this menu, please go to Extensions >> Modules >> ” SO Megamenu > SO Verticalmenu” >> Click “Edit” button >> Click “Creat new Item” >> Creat new item Here
Check the menu item in the boxes in the left column, click “Creat new Item” to add Submenus to the menu and drag and drop to arrange them.
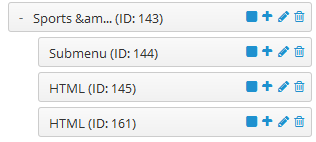
To configure Sports & Outdoors Menu, click on “pencil” symbol to configure its backend settings
To configure Submenu – Submenu, click on “pencil” symbol to configure its backend settings
To configure HTML – Submenu, click on “pencil” symbol to configure its backend settings
Copy and paste the Code into editor:
|
1 |
<img src="image/catalog/demo/banners/t10.jpg" alt="banner"> |
To configure HTML2 – Submenu, click on “pencil” symbol to configure its backend settings
Copy and paste the Code into editor:
|
1 |
<strong>Quicklinks:</strong> <a href="#" title="Blazers">Blazers, </a><a href="#" title="Jackets">Jackets, </a><a href="#" title="Shoes">Shoes, </a><a href="#" title="Bags">Bags, </a><a href="#" title="Special offers">Special offers, </a><a href="#" title="Sales and discounts">Sales and discounts</a> |
3.3.2.4 Health & Beauty Menu Configuration
Frontend Appearance
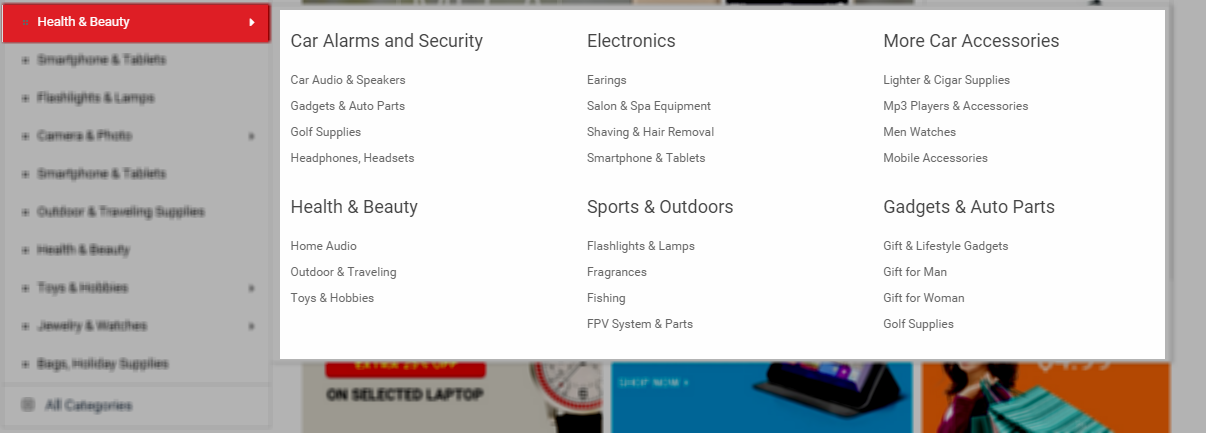
To create this menu, please go to Extensions >> Modules >> ” SO Megamenu > SO Verticalmenu” >> Click “Edit” button >> Click “Creat new Item” >> Creat new item Here
Check the menu item in the boxes in the left column, click “Creat new Item” to add Submenus to the menu and drag and drop to arrange them.
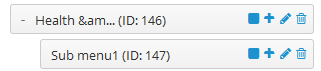
To configure Health & Beauty Menu, click on “pencil” symbol to configure its backend settings
To configure Sub menu1 – Submenu, click on “pencil” symbol to configure its backend settings
3.3.2.5 Camera & Photo Menu Configuration
Frontend Appearance
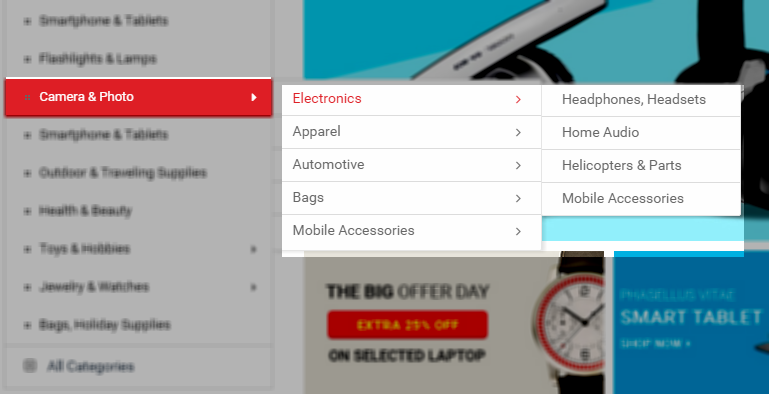
To create this menu, please go to Extensions >> Modules >> ” SO Megamenu > SO Verticalmenu” >> Click “Edit” button >> Click “Creat new Item” >> Creat new item Here
Check the menu item in the boxes in the left column, click “Creat new Item” to add Submenus to the menu and drag and drop to arrange them.
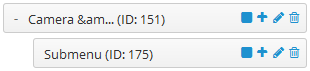
To configure Camera & Photo Menu, click on “pencil” symbol to configure its backend settings
To configure Sub menu – Submenu, click on “pencil” symbol to configure its backend settings
3.3.2.6 Toys & Hobbies Menu Configuration
Frontend Appearance
To create this menu, please go to Extensions >> Modules >> ” SO Megamenu > SO Verticalmenu” >> Click “Edit” button >> Click “Creat new Item” >> Creat new item Here
Check the menu item in the boxes in the left column, click “Creat new Item” to add Submenus to the menu and drag and drop to arrange them.
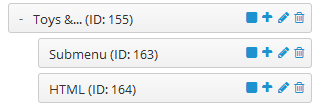
To configure Toys & Hobbies Menu, click on “pencil” symbol to configure its backend settings
To configure Submenu – Submenu, click on “pencil” symbol to configure its backend settings
To configure HTML – Submenu, click on “pencil” symbol to configure its backend settings
Copy and paste the Code into editor:
|
1 |
<img src="image/catalog/demo/banners/t11.jpg" alt="banner"> |
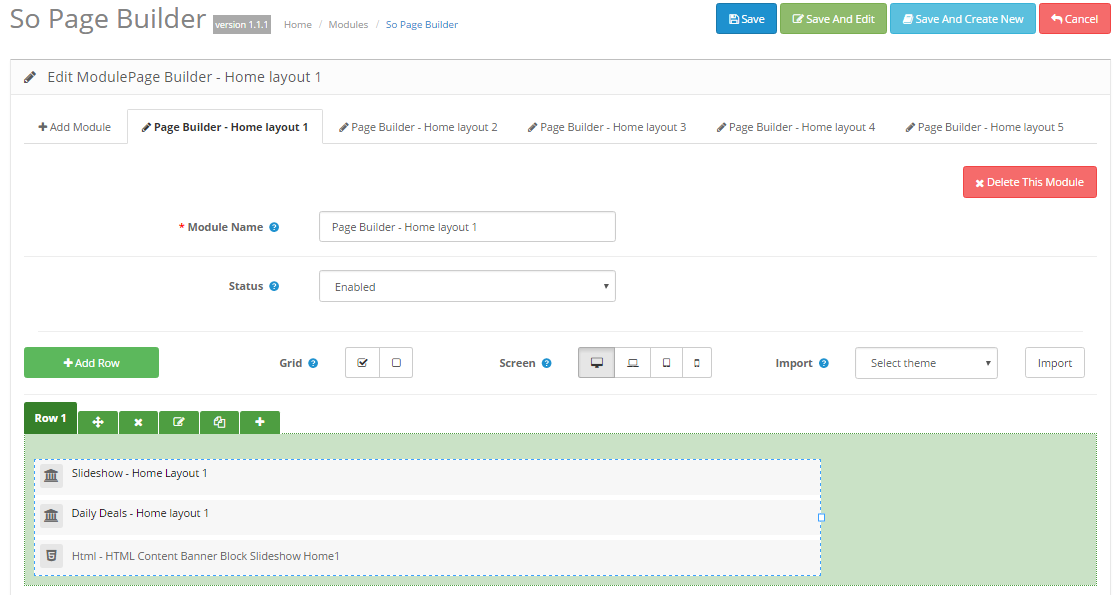
3.4 SO Page Builder Configuration
To configure SO Page Builder, please go to Administrator >> Magentech >> SO Page Builder >> SO Page Builder (Home1 or Home2…)
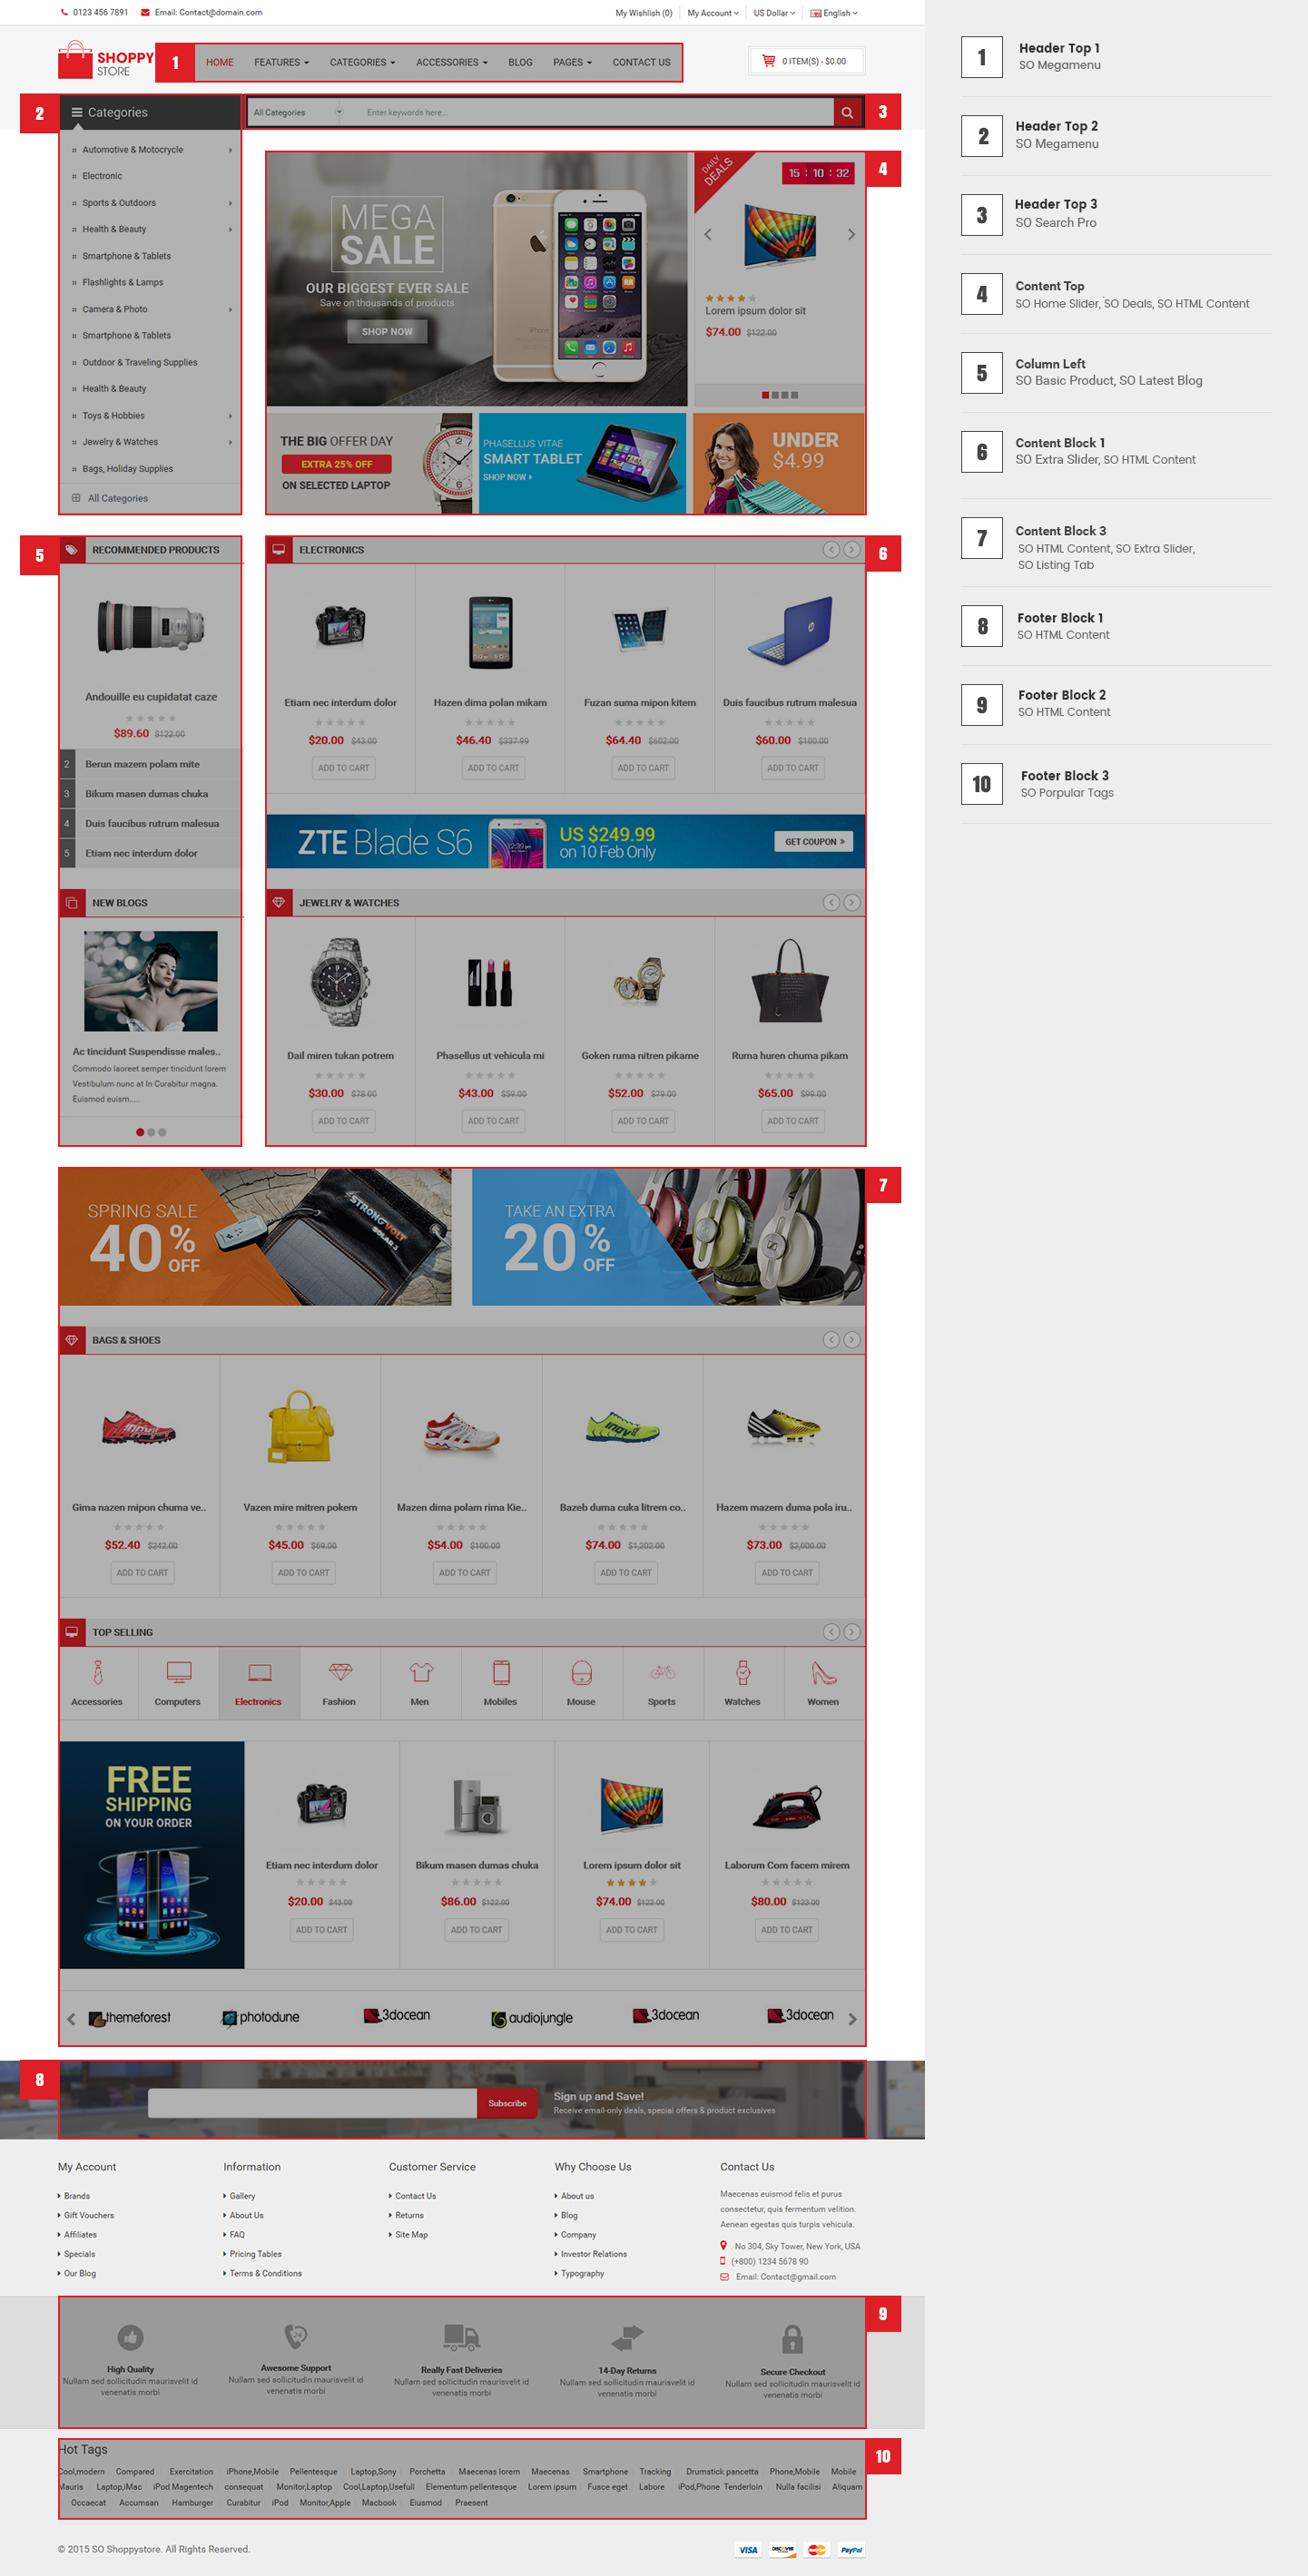
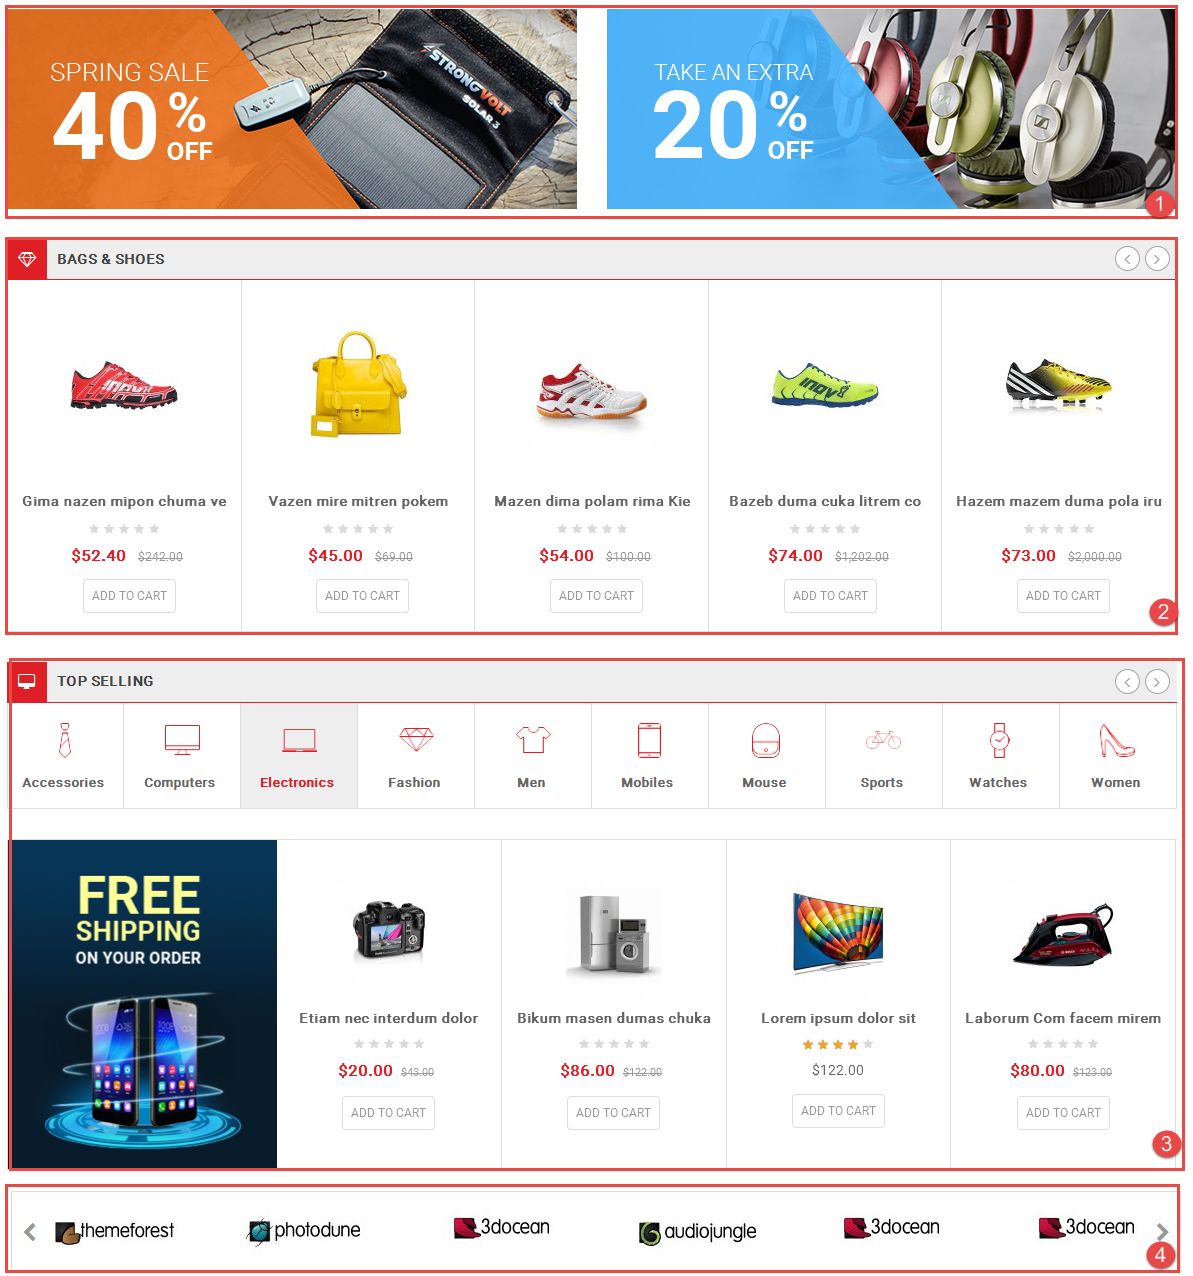
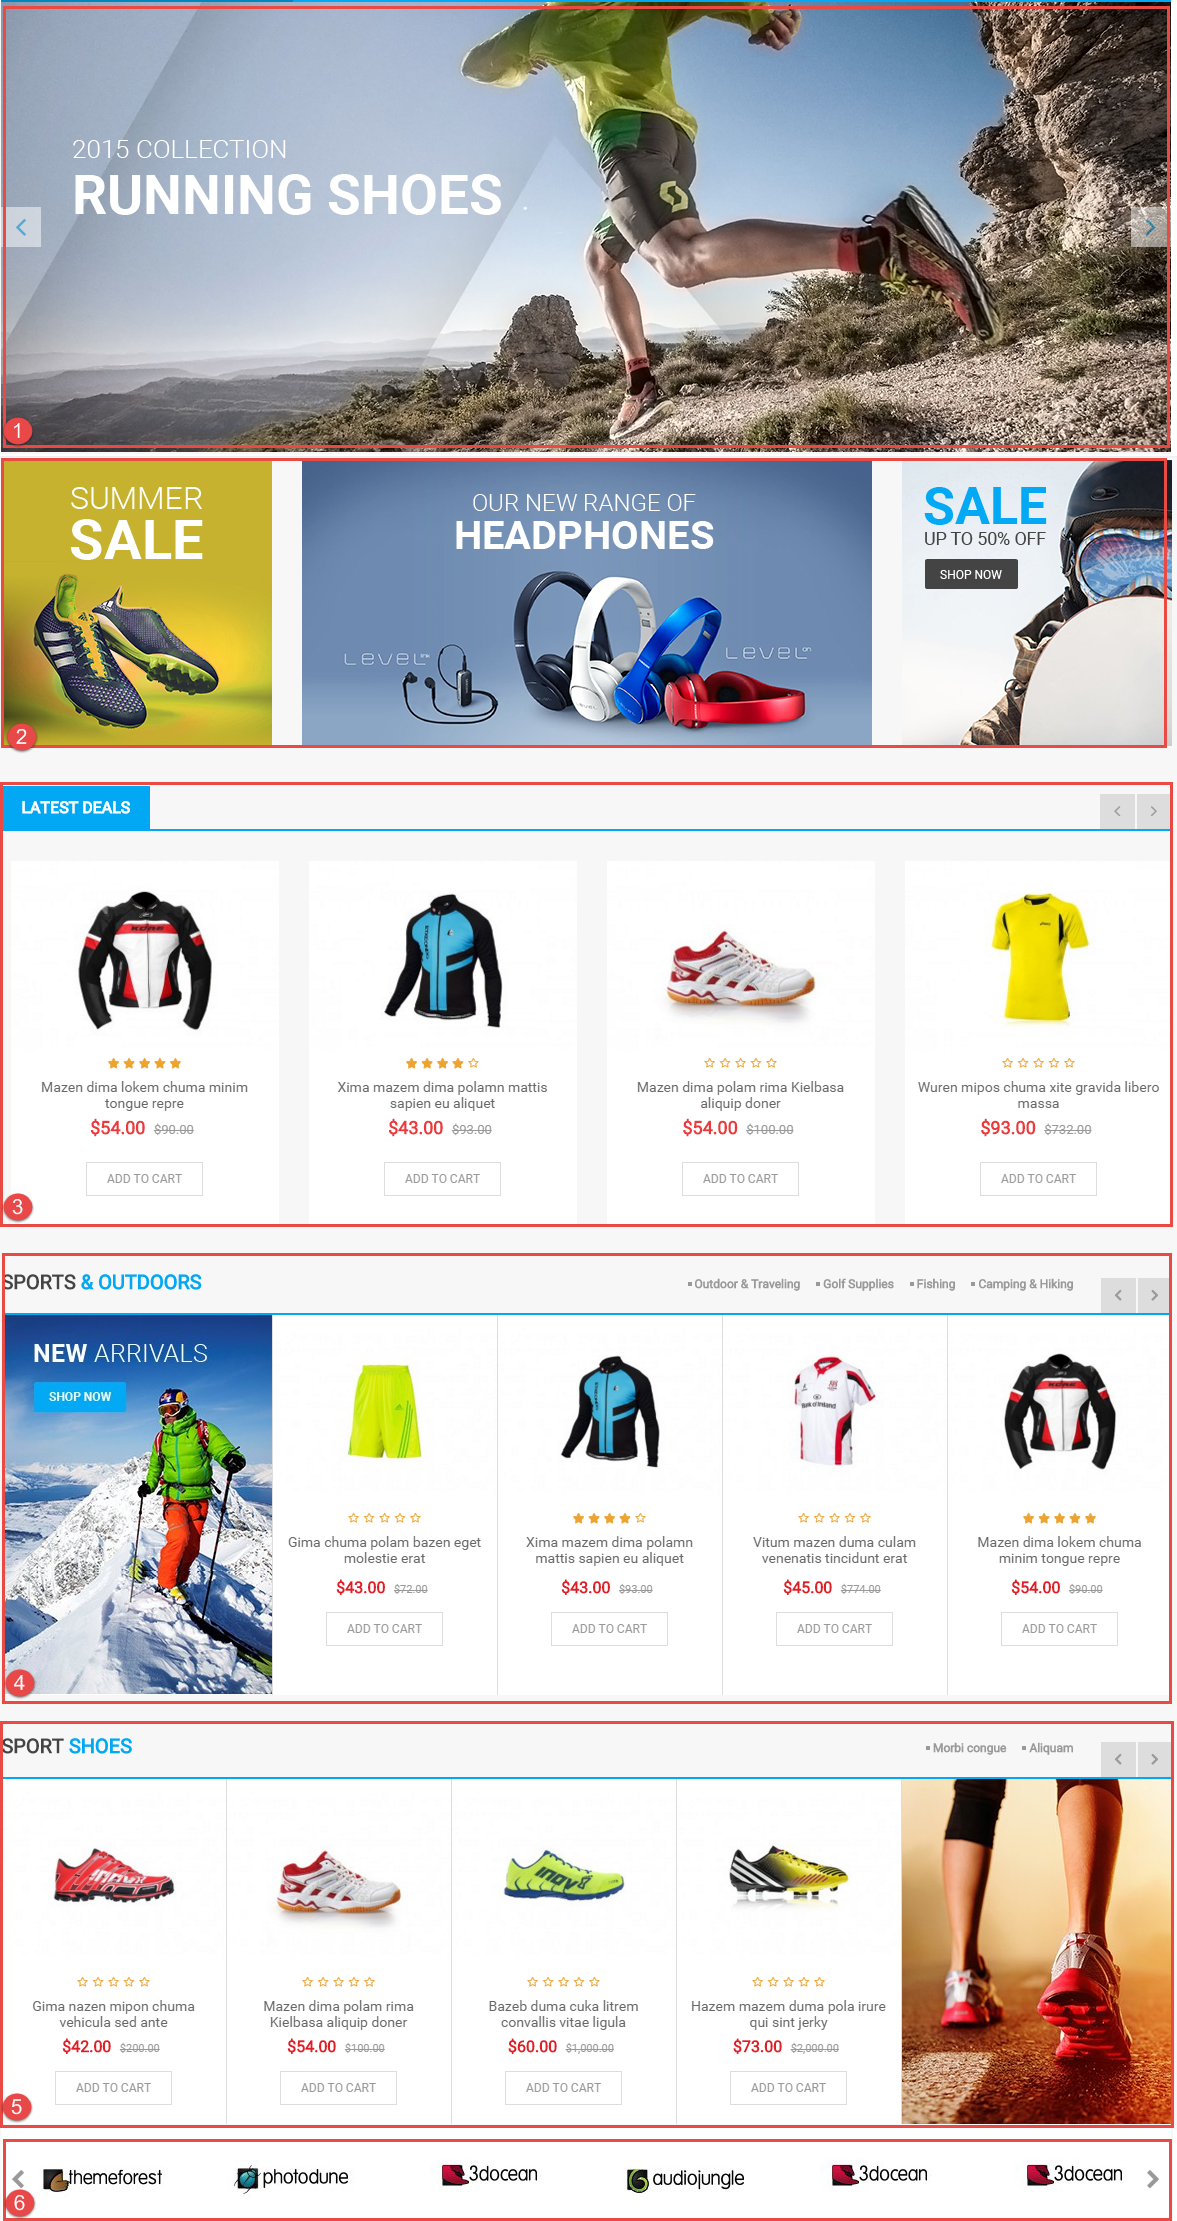
3.5 Extension Configuration – Layout1
Note: To view the Module Positions you can go to Design >> Layouts >> Choose Layout you want then click “Edit” button
The SO ShoppyStore front-page has been integrated with extensions in the Theme as following list:
- Position: Content-menu
- Frontend Appearance
- Backend of SO-Megamenu: Click Here
- Position: Content-Search
- Frontend Appearance

- Backend of SO-SearchPro: Click Here
- Position: Content-block1
- Frontend Appearance
- Backend of SO-Megamenu: Click Here
- Position: Content-top
- Frontend Appearance
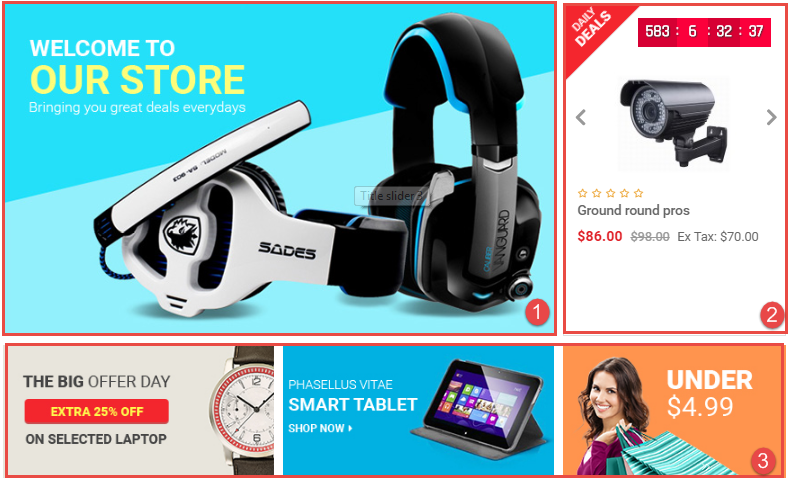
- 2. SO-Deals
Backend of SO-Deals: Click Here
- 3. HTML-Content
Backend of HTML-Content: Click Here
Copy and paste the Code into editor:
|
1 2 3 4 5 6 7 |
<div class="content-banner"> <div class="item"> <a href="#" title="banner"><img src="image/catalog/demo/banners/t1.jpg" alt="banner"></a> </div> <div class="item"> <a href="#" title="banner"><img src="image/catalog/demo/banners/t2.jpg" alt="banner"></a> </div> <div class="item"> <a href="#" title="banner"><img src="image/catalog/demo/banners/t3.jpg" alt="banner"></a> </div> </div> |
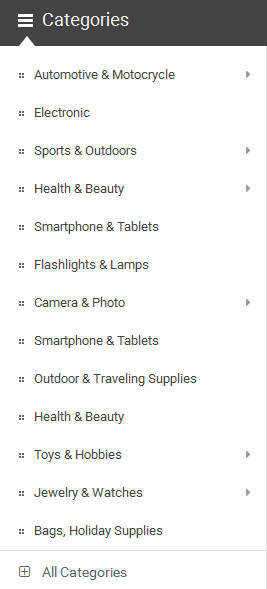
- Position: Column-left
- Frontend Appearance
- 2. SO-Latest-Block
Backend of SO-Latest-Block: Click Here
- Position: Content-block1
- Frontend Appearance
- 2. HTML-Content
Backend of HTML-Content: Click Here
Copy and paste the Code into editor:
|
1 |
<a href="#" title="banner"><img src="image/catalog/demo/banners/t12.jpg" alt="banner"></a> |
- 3. SO-Extraslider
Backend of SO-Extraslider: Click Here
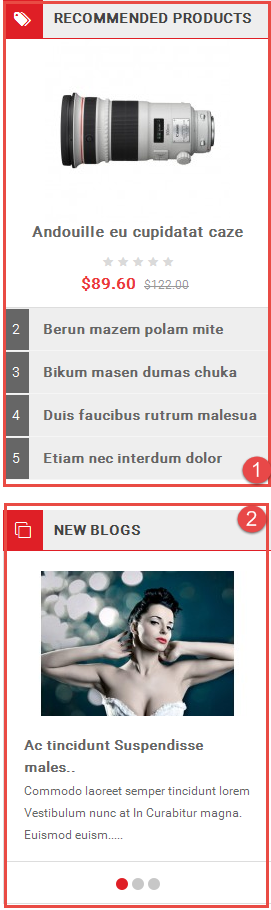
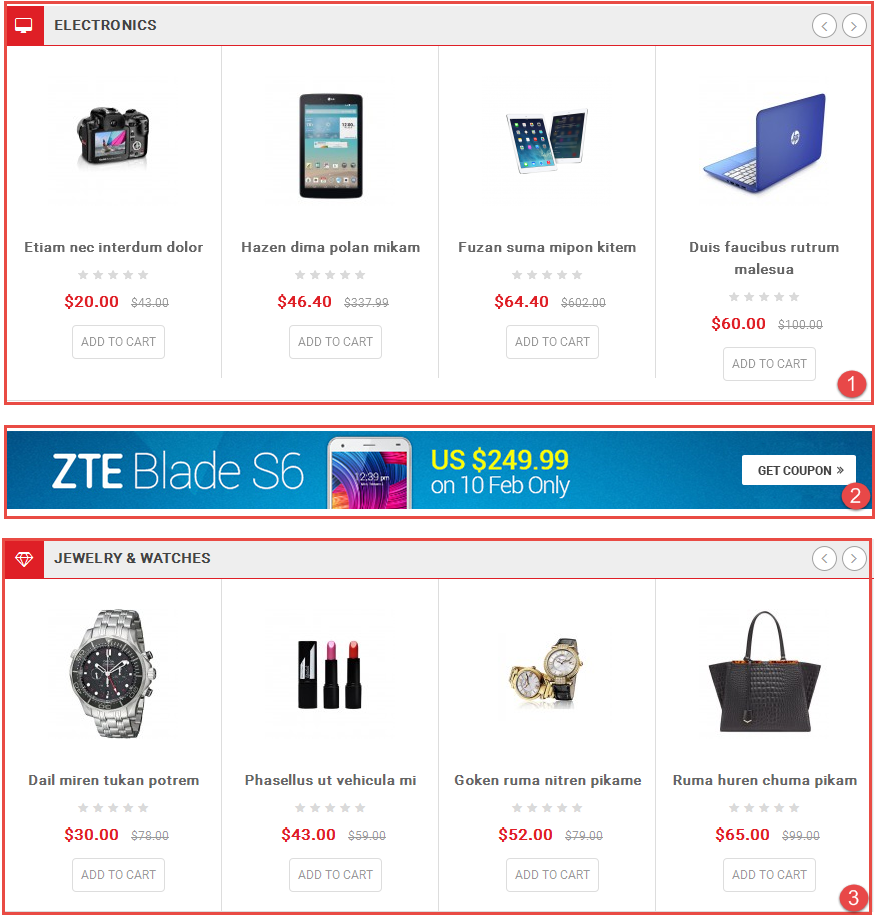
- Position: Content-block3
- Frontend Appearance
- 1. HTML-Content
- 2. SO-Extraslider
- 3. SO-Listing Tabs
- 4. Manufacturers
- Position: footer-block1
- Frontend Appearance
- Backend of Newsletter: Click Here
- Position: footer-block2
- Frontend Appearance
- Backend of HTML: Click Here
- Position: footer-block3
- Frontend Appearance
- Position: Content-top
- Frontend Appearance
- Position: Content-block1
- Frontend Appearance
- Backend of HTML: Click Here
- Position: Column-left
- Frontend Appearance
- 3. SO-Deals
- 4. Backend of HTML: Click Here
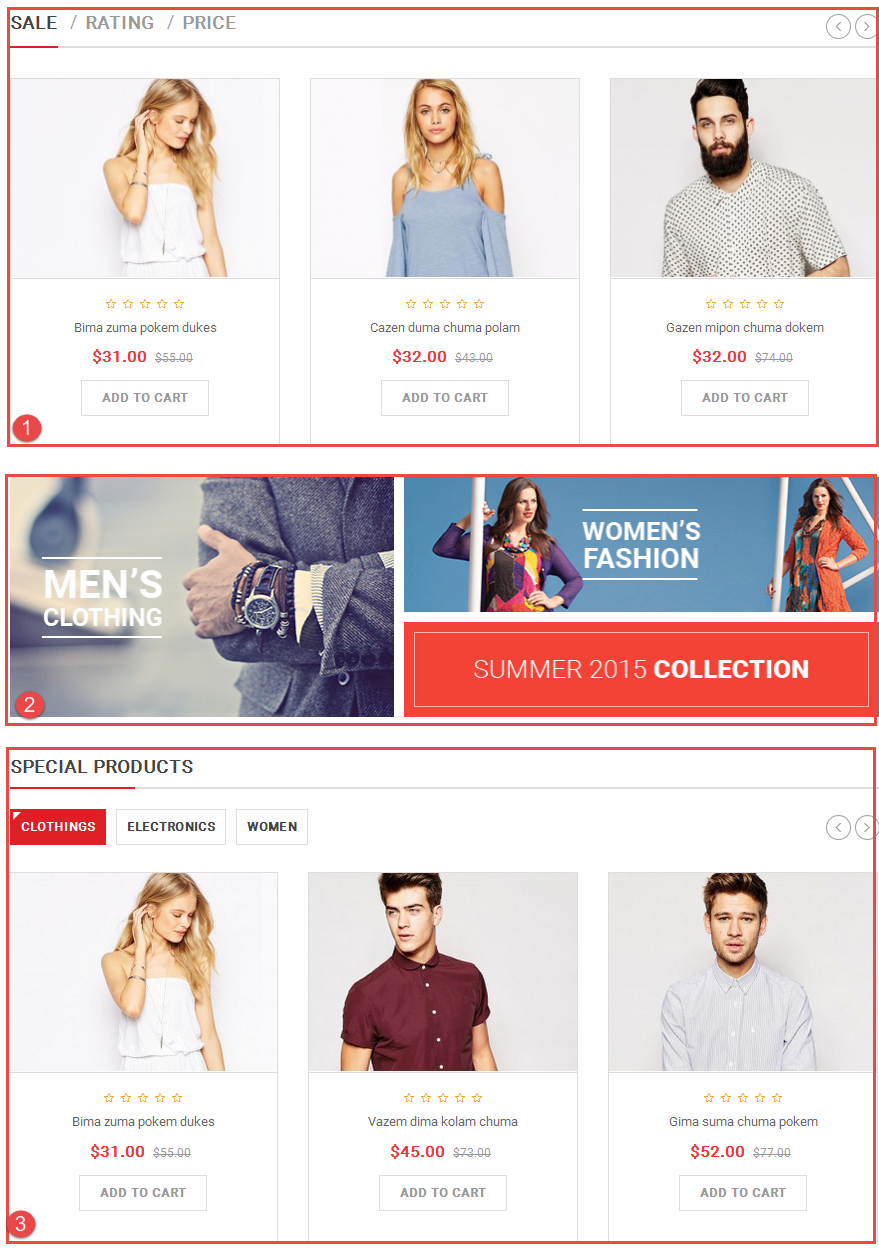
- Position: Content-block2
- Frontend Appearance
- 1. SO-Listing-Tabs
- 2. HTML-Content
- 3. SO-Listing-Tabs – Special Products – Home Layout 2
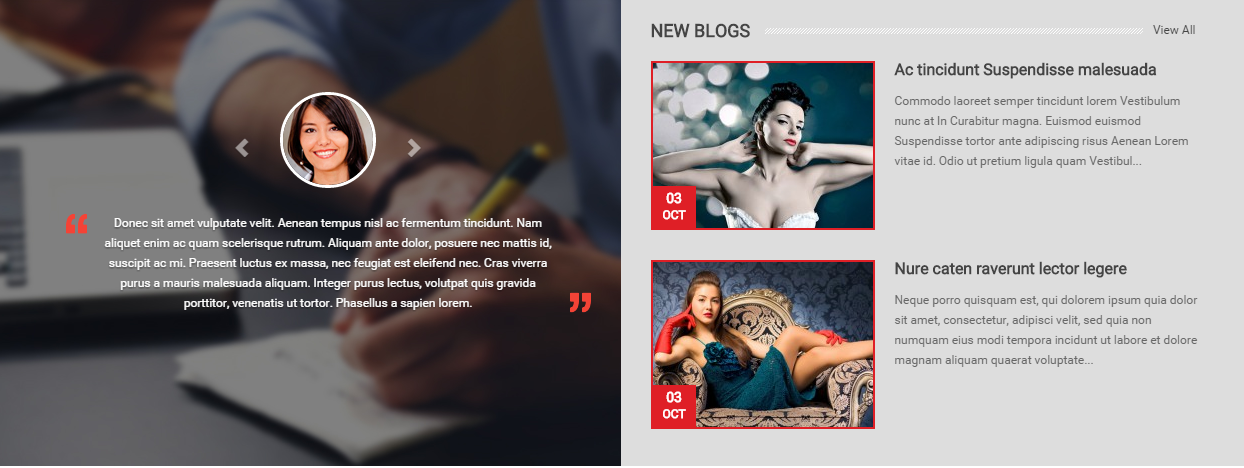
- Position: Content-block3
- Frontend Appearance
- 1. SO-Latest-Blog
- 2. HTML-Content
- Other extensions in Layout2 are configured the same as above extension in Layout1.
- Position: Content-top
- Frontend Appearance
- 2. HTML-Content
- 3. SO-Deals
- 4. SO-Category-Slider – Sports & Outdoors
- 5. SO-Category-Slider – Sport Shoes
Backend of HTML-Content: Click Here
Copy and paste the Code into editor:
|
1 2 3 4 5 6 |
<div class="row"> <div class="col-sm-6"><a href="#" title="banner"><img src="image/catalog/demo/banners/t13.jpg" alt="banner"></a></div> <div class="col-sm-6"><a href="#" title="banner"><img src="image/catalog/demo/banners/t14.jpg" alt="banner"></a></div> </div> |
Backend of SO-Extraslider: Click Here
Backend of SO-Listing Tabs: Click Here
Backend of Manufacturers: Click Here


Copy and paste the Code into editor:
|
1 2 3 4 5 6 7 8 9 10 11 12 13 14 15 16 17 18 19 20 21 22 23 24 25 26 27 28 29 30 31 32 33 34 35 36 37 38 39 40 41 |
<div class="row"> <div class="col-lg-15"> <div class="item"> <span class="icon"><img src="image/catalog/demo/icon/quality.png" alt="icon"></span> <h3 class="title">High Quality</h3> <p class="content">Nullam sed sollicitudin maurisvelit id venenatis morbi</p> </div> </div> <div class="col-lg-15"> <div class="item"> <span class="icon"><img src="image/catalog/demo/icon/support.png" alt="icon"></span> <h3 class="title">Awesome Support</h3> <p class="content">Nullam sed sollicitudin maurisvelit id venenatis morbi</p> </div> </div> <div class="col-lg-15"> <div class="item"> <span class="icon"><img src="image/catalog/demo/icon/ship.png" alt="icon"></span> <h3 class="title">Really Fast Deliveries</h3> <p class="content">Nullam sed sollicitudin maurisvelit id venenatis morbi</p> </div> </div> <div class="col-lg-15"> <div class="item"> <span class="icon"><img src="image/catalog/demo/icon/returns.png" alt="icon"></span> <h3 class="title">14-Day Returns</h3> <p class="content">Nullam sed sollicitudin maurisvelit id venenatis morbi</p> </div> </div> <div class="col-lg-15"> <div class="item"> <span class="icon"><img src="image/catalog/demo/icon/secure.png" alt="icon"></span> <h3 class="title">Secure Checkout</h3> <p class="content">Nullam sed sollicitudin maurisvelit id venenatis morbi</p> </div> </div> </div> |

3.6 Extension Configuration – Layout2
The SO ShoppyStore front-page has been integrated with extensions in the Theme as following list:

Copy and paste the Code into editor:
|
1 2 3 4 5 6 7 8 9 |
<ul class="men-women-acc"> <li class="item"> <a href="#" title="men"> <img src="image/catalog/demo/banners/men.jpg" alt="banner"> <span>Men</span></a> </li> <li class="item"><a href="#" title="women"> <img src="image/catalog/demo/banners/women.jpg" alt="banner"> <span>Women</span></a> </li> <li class="item"><a href="#" title="acc"> <img src="image/catalog/demo/banners/acc.jpg" alt="banner"> <span>Accessories</span></a> </li> </ul> |

Backend of SO-Deals: Click Here
-
General: Click Here
Source Options: Click Here
Item Options: Click Here
Image Options: Click Here
Effect Options: Click Here
Advanced Options: Click Here
Copy and paste the Code into editor:
|
1 |
<a href="#" title="banner"><img src="image/catalog/demo/banners/t18.jpg" alt="banner" style="width: 100%;"></a> |
Backend of Listing-Tabs: Click Here
Backend of HTML-Content: Click Here
Copy and paste the Code into editor:
|
1 2 3 4 5 6 |
<div style="text-align: center;"><br></div> <div class="custom-main-home"> <div class="main-left"> <a href="#" title="banner"> <img src="image/catalog/demo/banners/t15.jpg" alt="banner"> </a> </div> <div class="main-right"> <div class="item"> <a href="#" title="banner"> <img src="image/catalog/demo/banners/t16.jpg" alt="banner"> </a> </div> <div class="item"> <a href="#" title="banner"> <img src="image/catalog/demo/banners/t17.jpg" alt="banner"> </a> </div> </div> </div> |
Backend of SO-Listing-Tabs: Click Here
Backend of SO-Latest-Blog: Click Here
Backend of HTML-Content: Click Here
Copy and paste the Code into editor:
|
1 2 3 4 5 6 7 8 9 10 11 12 13 14 15 16 17 18 19 20 21 22 23 24 25 26 27 28 29 30 31 32 33 34 35 36 37 38 39 40 41 42 43 |
<div id="carousel-example-generic" class="carousel slide" data-ride="carousel"> <!-- Indicators --> <!-- Wrapper for slides --> <div class="carousel-inner" role="listbox"> <div class="item"> <img src="image/catalog/about/t1.jpg" alt="customer"> <div class="carousel-caption"> <p>Donec sit amet vulputate velit. Aenean tempus nisl ac fermentum tincidunt. Nam aliquet enim ac quam scelerisque rutrum. Aliquam ante dolor, posuere nec mattis id, suscipit ac mi. Praesent luctus ex massa, nec feugiat est eleifend nec. Cras viverra purus a mauris malesuada aliquam. Integer purus lectus, volutpat quis gravida porttitor, venenatis ut tortor. Phasellus a sapien lorem.</p> </div> </div> <div class="item"> <img src="image/catalog/about/t2.jpg" alt="customer"> <div class="carousel-caption"> <p>Donec sit amet vulputate velit. Aenean tempus nisl ac fermentum tincidunt. Nam aliquet enim ac quam scelerisque rutrum. Aliquam ante dolor, posuere nec mattis id, suscipit ac mi. Praesent luctus ex massa, nec feugiat est eleifend nec. Cras viverra purus a mauris malesuada aliquam. Integer purus lectus, volutpat quis gravida porttitor, venenatis ut tortor. Phasellus a sapien lorem.</p> </div> </div> <div class="item active"> <img src="image/catalog/about/t3.jpg" alt="customer"> <div class="carousel-caption"> <p>Donec sit amet vulputate velit. Aenean tempus nisl ac fermentum tincidunt. Nam aliquet enim ac quam scelerisque rutrum. Aliquam ante dolor, posuere nec mattis id, suscipit ac mi. Praesent luctus ex massa, nec feugiat est eleifend nec. Cras viverra purus a mauris malesuada aliquam. Integer purus lectus, volutpat quis gravida porttitor, venenatis ut tortor. Phasellus a sapien lorem.</p> </div> </div> </div> <!-- Controls --> <a class="left carousel-control" href="#carousel-example-generic" role="button" data-slide="prev"> <span class="glyphicon glyphicon-chevron-left" aria-hidden="true"></span> <span class="sr-only">Previous</span> </a> <a class="right carousel-control" href="#carousel-example-generic" role="button" data-slide="next"> <span class="glyphicon glyphicon-chevron-right" aria-hidden="true"></span> <span class="sr-only">Next</span> </a> </div> |
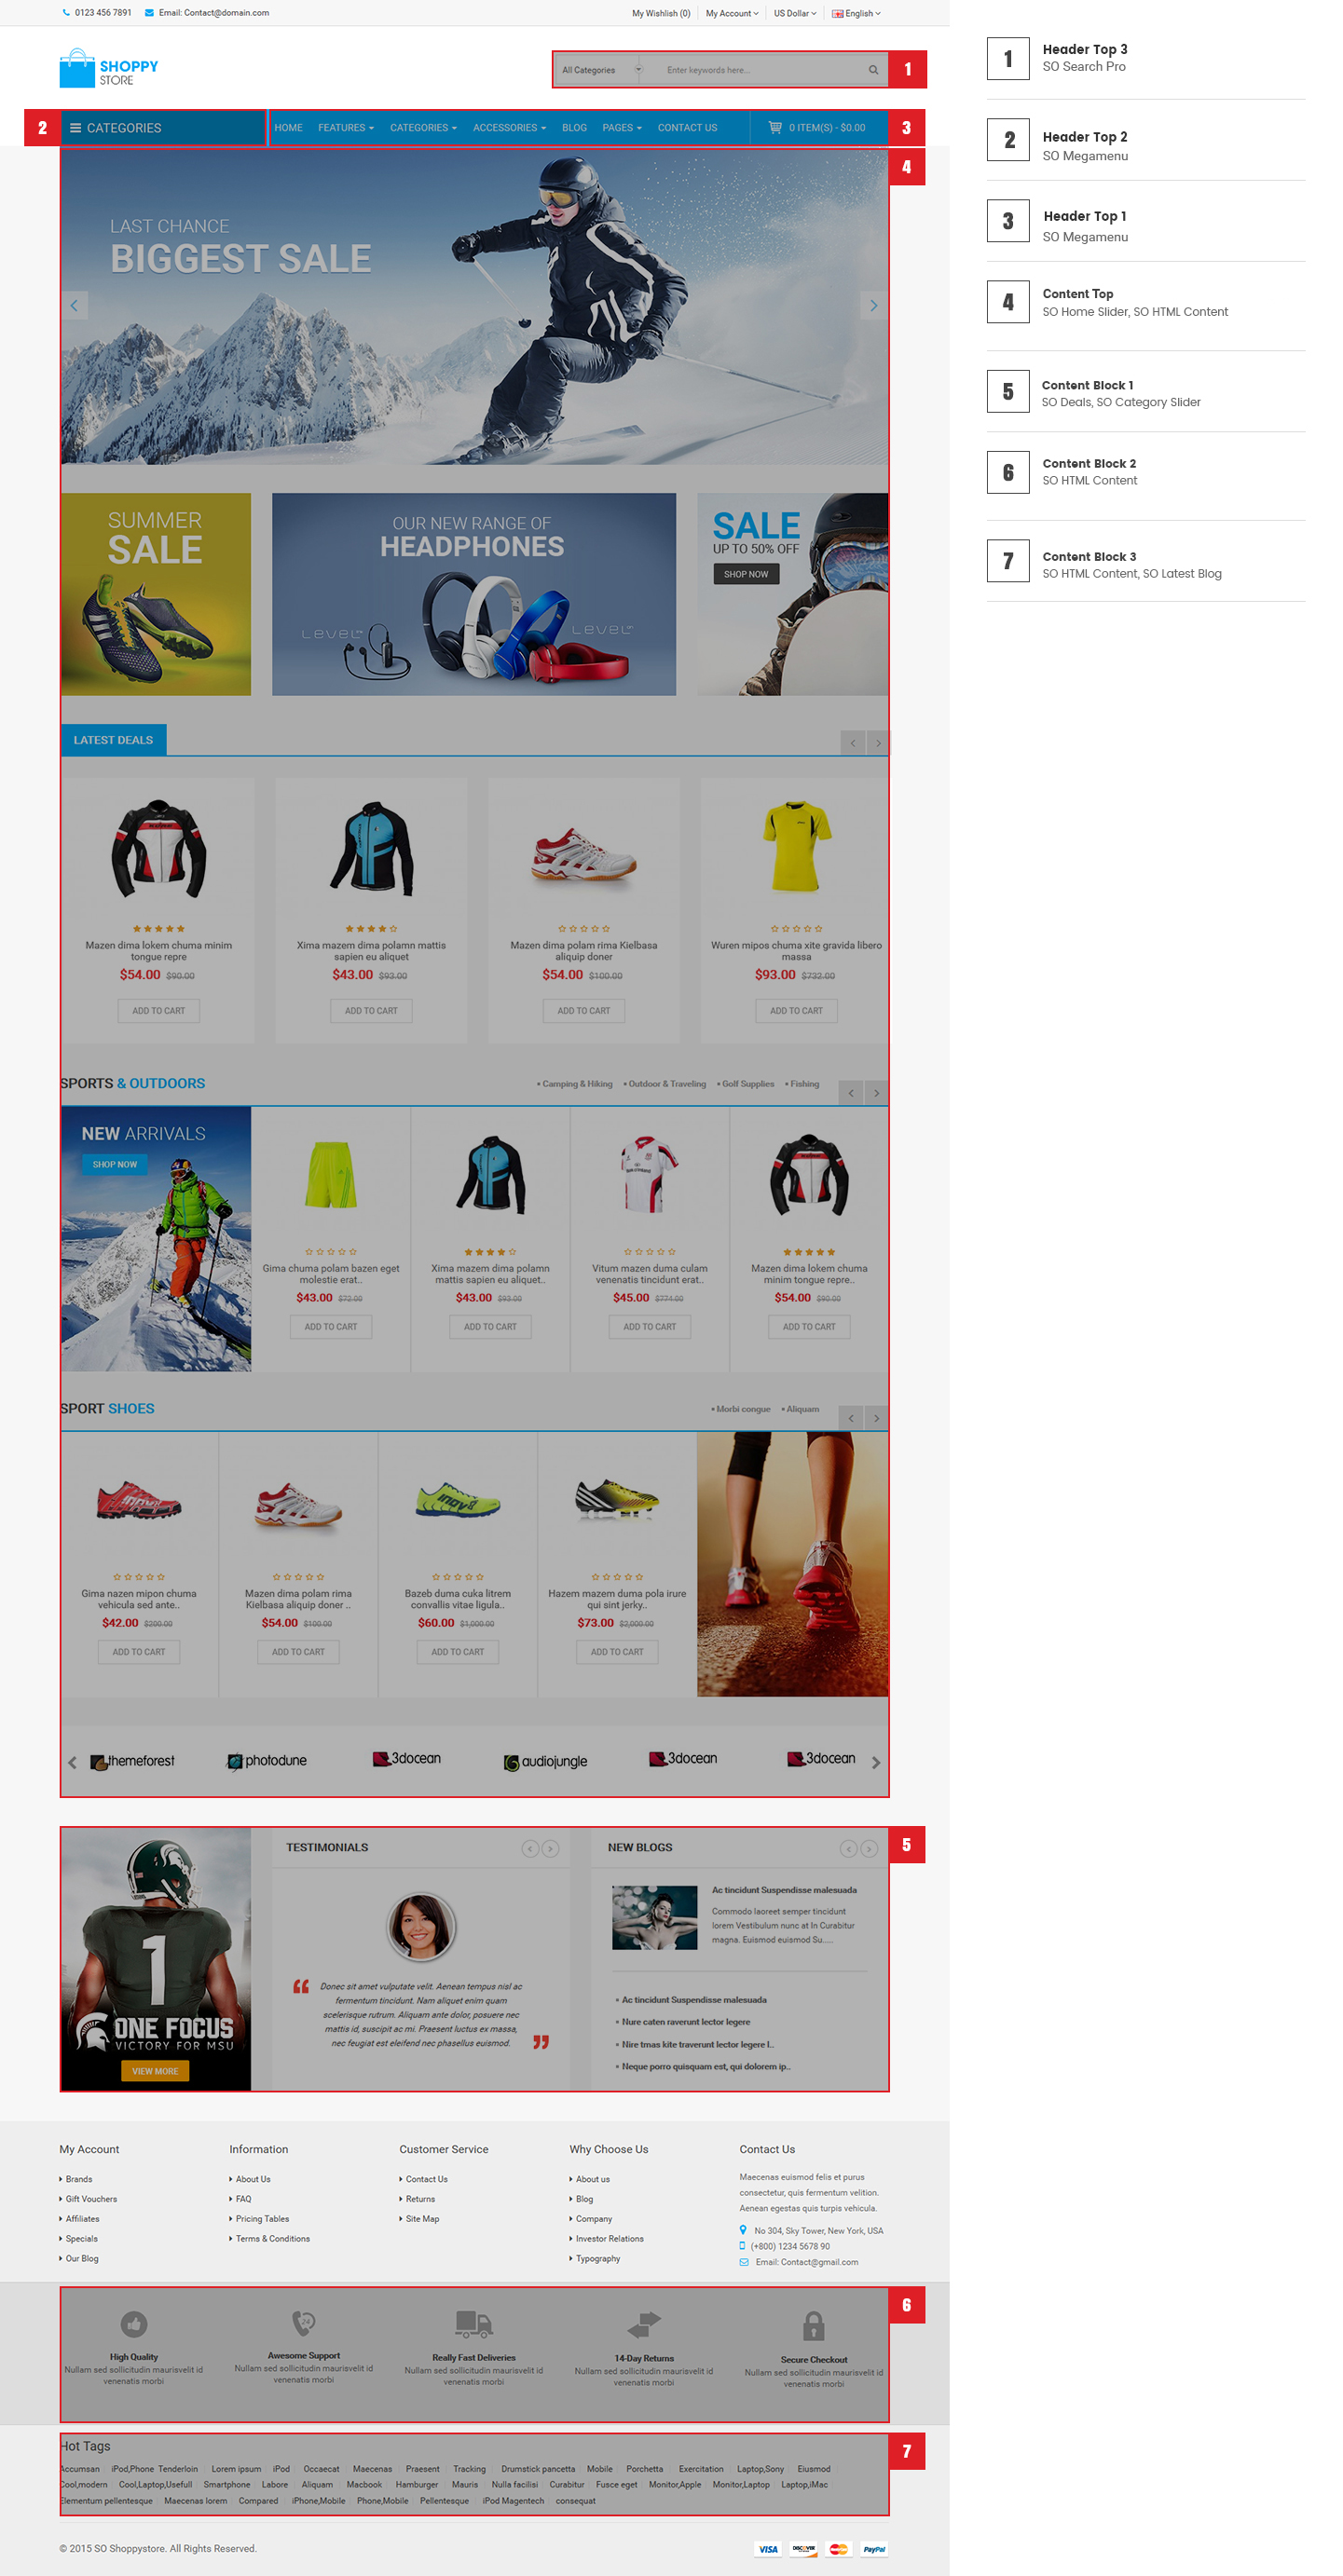
3.7 Extension Configuration – Layout3
The SO Shoppystore front-page has been integrated with extensions in the Theme as following list:
Backend of HTML-Content: Click Here
Copy and paste the Code into editor:
|
1 2 3 4 5 6 7 8 9 |
<ul class="cus-banner-31 row"> <li class="col-sm-3 col-xs-3"><a href="#" title="banner"><img src="image/catalog/demo/banners/t19.jpg" alt="banner"></a></li> <li class="col-sm-6 col-xs-6"><a href="#" title="banner"><img src="image/catalog/demo/banners/t20.jpg" alt="banner"></a></li> <li class="col-sm-3 col-xs-3"><a href="#" title="banner"><img src="image/catalog/demo/banners/t21.jpg" alt="banner"></a></li> </ul> |
Backend of SO-Deals: Click Here
Backend of SO-Category-Slider: Click Here
Backend of SO-Category-Slider: Click Here
- Position: Content-block3
- Frontend Appearance
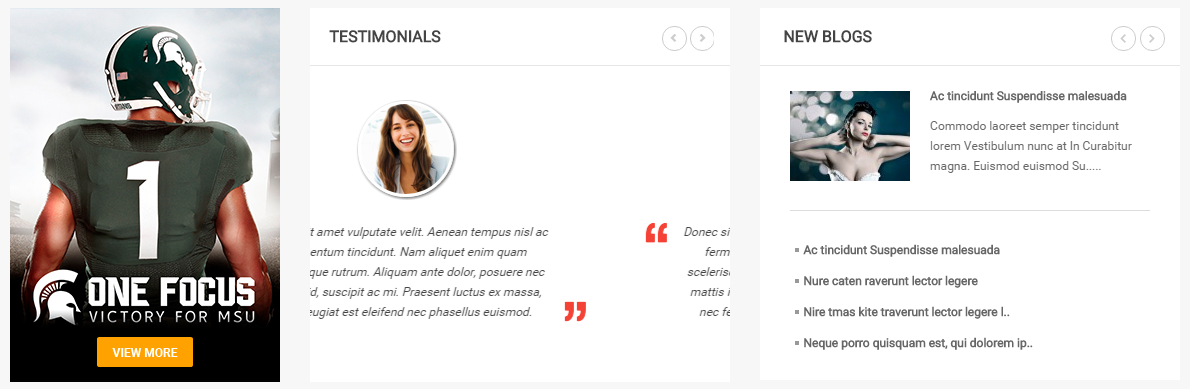
- 1. HTML1 – So HTML Content 2 Home 3
- 2. HTML2 – So HTML Content 3 Home 3
- 3. So-Latest-Blog
- Other extensions in Layout3 are configured the same as above extension in Layout1 and Layout2.
- Position: Content-top
- Frontend Appearance
- Position: Content-top
- Frontend Appearance
- Position: Content-block2
- Frontend Appearance
- 1. SO Extra Slider – Electronic
- Backend of SO-Extraslider: Click Here
- 2. SO Extra Slider – Furniture
- Backend of SO-Extraslider: Click Here
- Position: Column-right
- Frontend Appearance
- 1. SO HTML
- 2. SO-Latest-Blog
- 3. SO HTML
- Position: Content-block4
- Frontend Appearance
- Position: Footer-block1
- Frontend Appearance
- Position: Header-top1
- Frontend Appearance
- Position: Content-top
- Frontend Appearance
- Position: Column-block1
- Frontend Appearance
- Position: Content-block4
- Frontend Appearance
- 1. SO HTML
- 2. SO-Deals
- 3. SO HTML
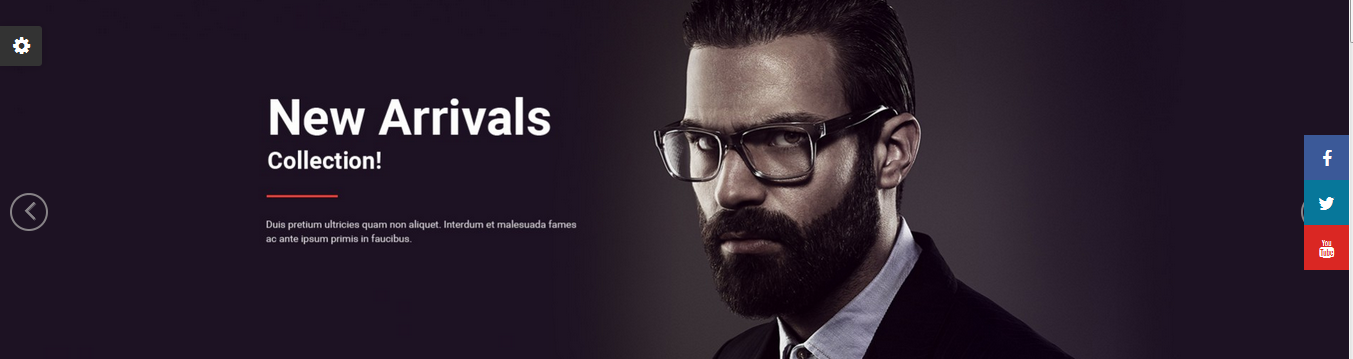
- 4. SO Extra Slider – New Arrivals
- Backend of SO-Extraslider: Click Here
Backend of HTML1: Click Here
Copy and paste the Code into editor:
|
1 |
<a href="#" title="banner"><img src="image/catalog/demo/banners/t22.jpg" alt="banner"></a> |
Backend of HTML2: Click Here
Copy and paste the Code into editor:
|
1 2 3 4 5 6 7 8 9 10 11 12 13 14 15 16 17 18 19 20 21 22 23 24 25 26 27 28 29 30 31 32 33 34 35 36 37 38 39 40 41 42 43 |
<div id="carousel-example-generic" class="carousel slide" data-ride="carousel"> <!-- Indicators --> <!-- Wrapper for slides --> <div class="carousel-inner" role="listbox"> <div class="item"> <img src="image/catalog/about/t1.jpg" alt="customer"> <div class="carousel-caption"> <p>Donec sit amet vulputate velit. Aenean tempus nisl ac fermentum tincidunt. Nam aliquet enim quam scelerisque rutrum. Aliquam ante dolor, posuere nec mattis id, suscipit ac mi. Praesent luctus ex massa, nec feugiat est eleifend nec phasellus euismod.</p> </div> </div> <div class="item active"> <img src="image/catalog/about/t2.jpg" alt="customer"> <div class="carousel-caption"> <p>Donec sit amet vulputate velit. Aenean tempus nisl ac fermentum tincidunt. Nam aliquet enim quam scelerisque rutrum. Aliquam ante dolor, posuere nec mattis id, suscipit ac mi. Praesent luctus ex massa, nec feugiat est eleifend nec phasellus euismod.</p> </div> </div> <div class="item"> <img src="image/catalog/about/t3.jpg" alt="customer"> <div class="carousel-caption"> <p>Donec sit amet vulputate velit. Aenean tempus nisl ac fermentum tincidunt. Nam aliquet enim quam scelerisque rutrum. Aliquam ante dolor, posuere nec mattis id, suscipit ac mi. Praesent luctus ex massa, nec feugiat est eleifend nec phasellus euismod.</p> </div> </div> </div> <!-- Controls --> <a class="left carousel-control" href="#carousel-example-generic" role="button" data-slide="prev"> <span class="glyphicon glyphicon-chevron-left" aria-hidden="true"></span> <span class="sr-only">Previous</span> </a> <a class="right carousel-control" href="#carousel-example-generic" role="button" data-slide="next"> <span class="glyphicon glyphicon-chevron-right" aria-hidden="true"></span> <span class="sr-only">Next</span> </a> </div> |
Backend of So-Latest-Blog: Click Here
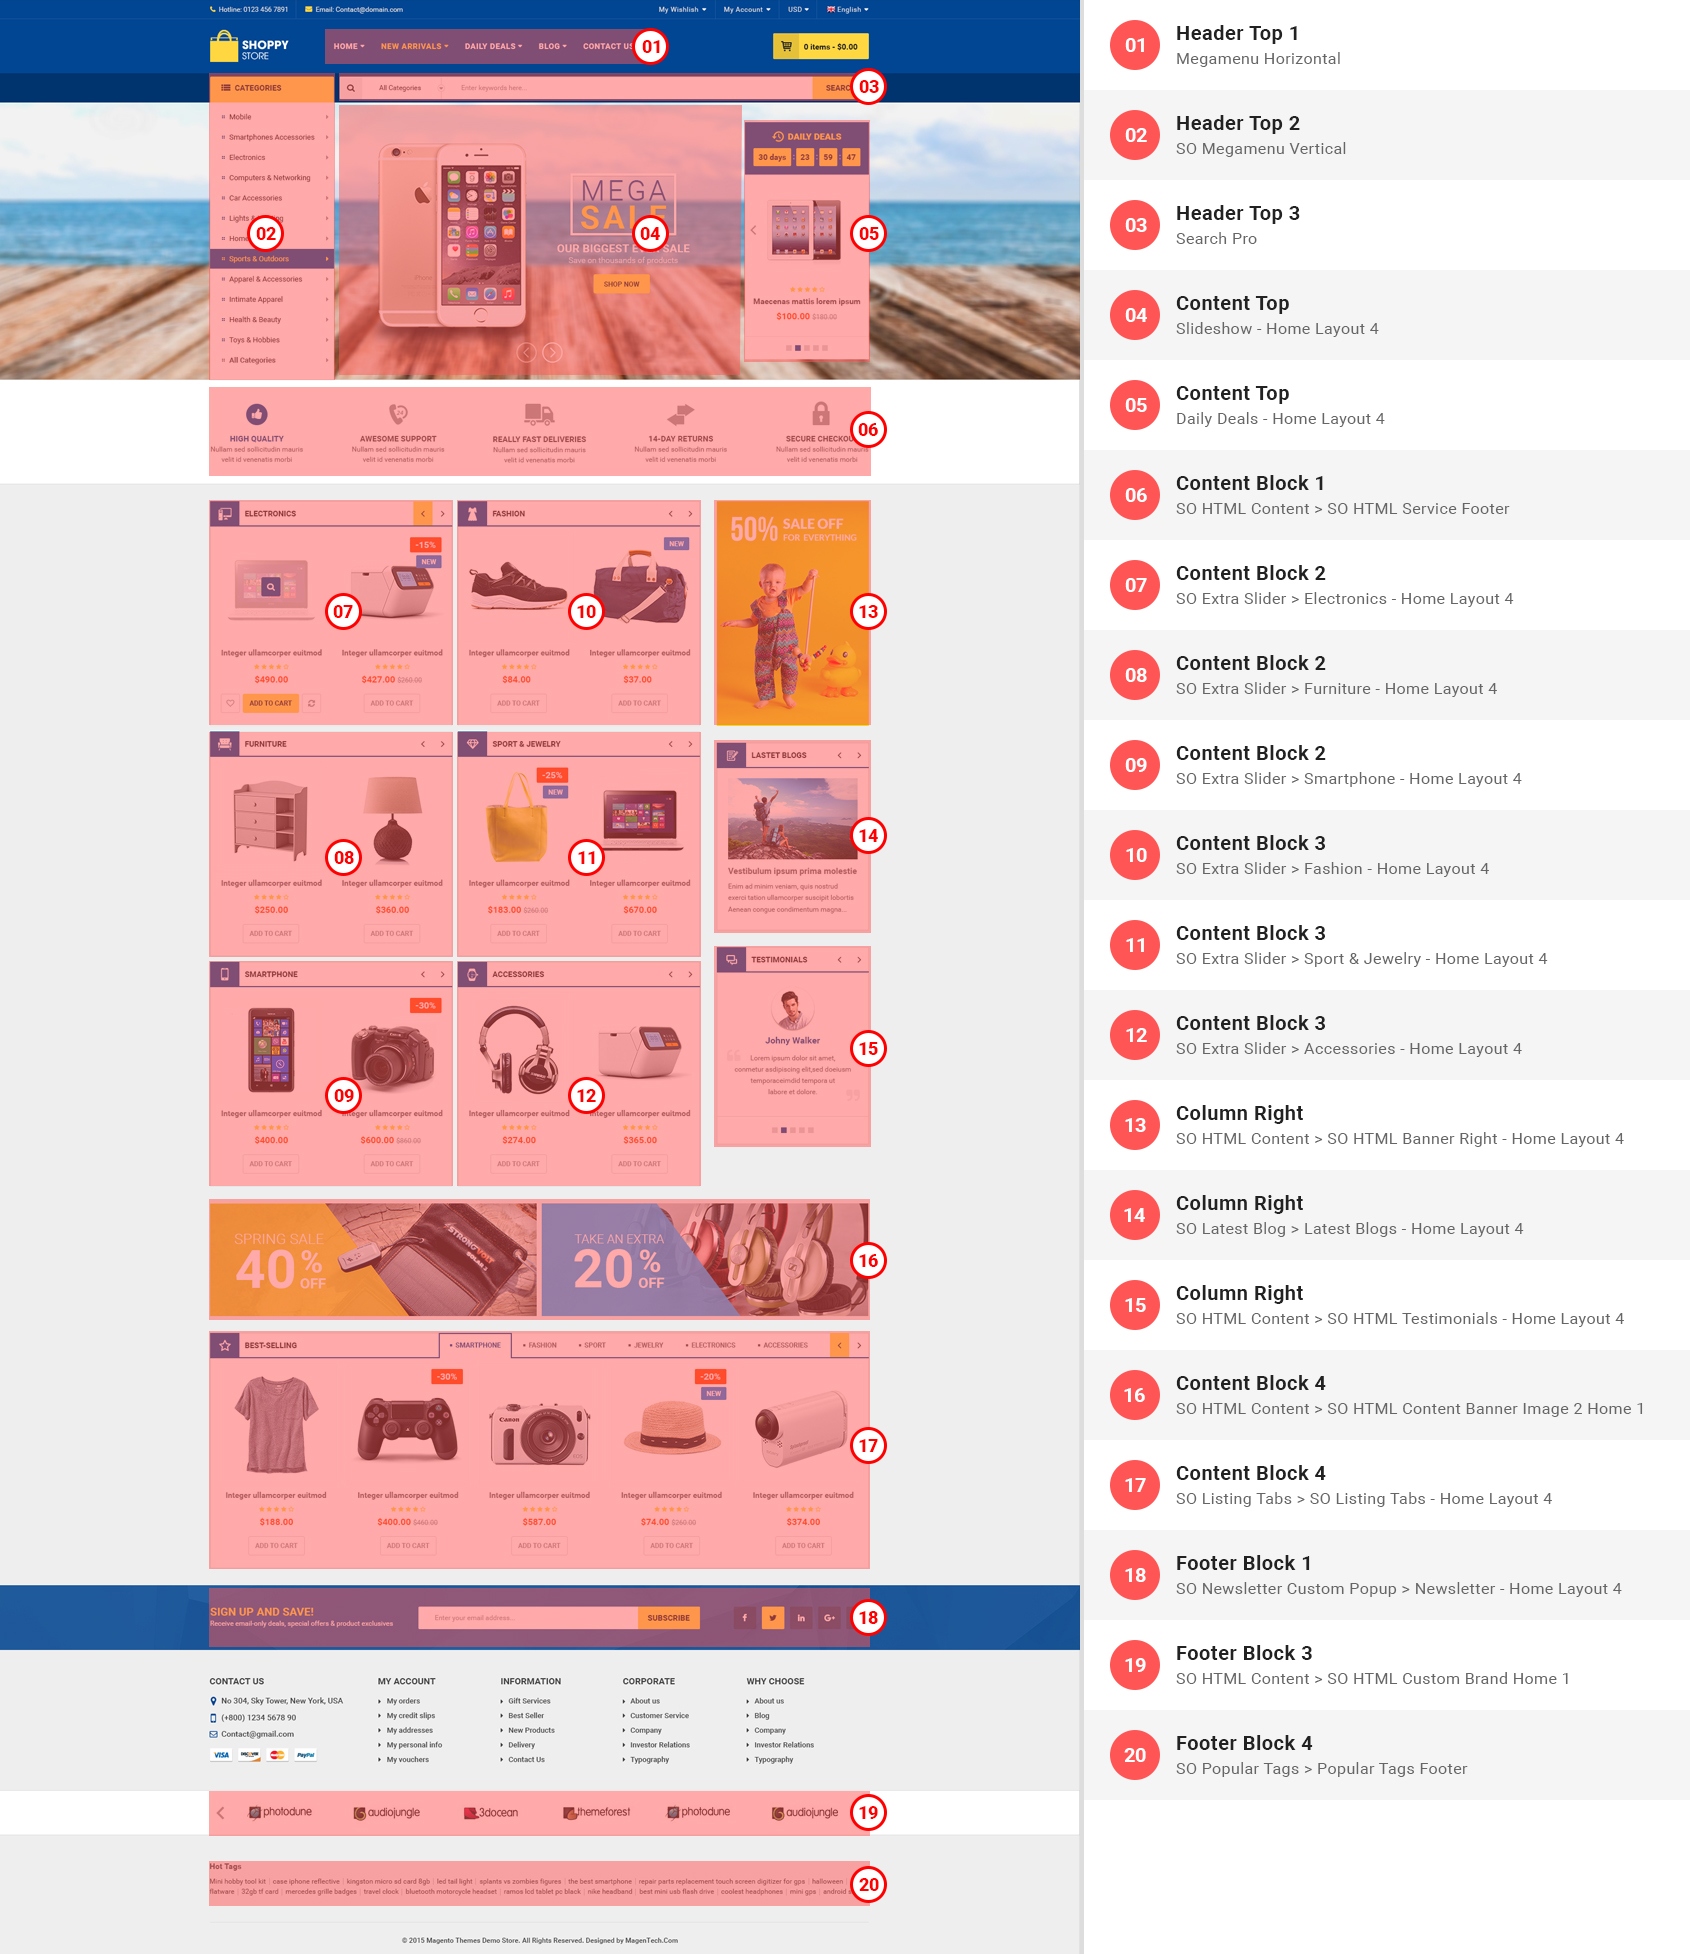
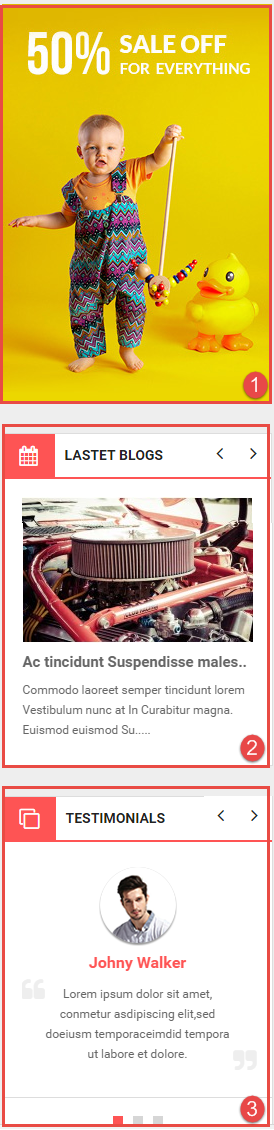
3.8 Extension Configuration – Layout4
Note: To view the Module Positions you can go to Design >> Layouts >> Choose Layout you want then click “Edit” button
The SO ShoppyStore front-page has been integrated with extensions in the Theme as following list:


Backend of SO HTML: Click Here
Copy and paste the Code into editor:
|
1 |
<a href="#" title="banner"><img src="image/catalog/demo/banners/h4-1.jpg" alt="banner"></a> |
Backend of SO-Latest-Blog: Click Here
Backend of SO HTML: Click Here
Copy and paste the Code into editor:
|
1 2 3 4 5 6 7 8 9 10 11 12 13 14 15 16 17 18 19 20 21 22 23 24 25 26 27 28 29 30 31 32 33 34 35 36 37 38 39 40 41 42 43 44 45 46 47 48 49 50 51 52 53 54 55 56 57 58 59 60 61 62 63 64 65 66 67 68 69 70 71 72 73 |
<div class="testimonials"> <h3 class="modtitle"><i class="fa fa-clone" aria-hidden="true"></i>Testimonials</h3> <div class="testimonial-slider"> <div class="item"> <img src="image/catalog/cms/home4/client1.png" alt="Image Client"> <p class="client-name">Johny Walker</p> <div class="item-inner"> <p class="client-des">Lorem ipsum dolor sit amet, conmetur asdipiscing elit,sed doeiusm temporaceimdid tempora ut labore et dolore.</p> </div> </div> <div class="item"> <img src="image/catalog/cms/home4/client2.png" alt="Image Client"> <p class="client-name">Keldy Sang</p> <div class="item-inner"> <p class="client-des">Lorem ipsum dolor sit amet, conmetur asdipiscing elit,sed doeiusm temporaceimdid tempora ut labore et dolore.</p> </div> </div> <div class="item"> <img src="image/catalog/cms/home4/client1.png" alt="Image Client"> <p class="client-name">Super Men</p> <div class="item-inner"> <p class="client-des">Lorem ipsum dolor sit amet, conmetur asdipiscing elit,sed doeiusm temporaceimdid tempora ut labore et dolore.</p> </div> </div> </div> <script> jQuery(document).ready(function($) { var owl_testimonial = $(".testimonial-slider"); owl_testimonial.owlCarousel2({ responsive:{ 0:{ items:1 }, 480:{ items:1 }, 768:{ items:1 }, 992:{ items:1 }, 1200:{ items:1 } }, autoplay:false, loop:true, nav : true, // Show next and prev buttons dots: true, navText: ["", ""], autoplaySpeed : 500, navSpeed : 500, dotsSpeed : 500, autoplayHoverPause: true, margin:30, }); }); </script> </div> |
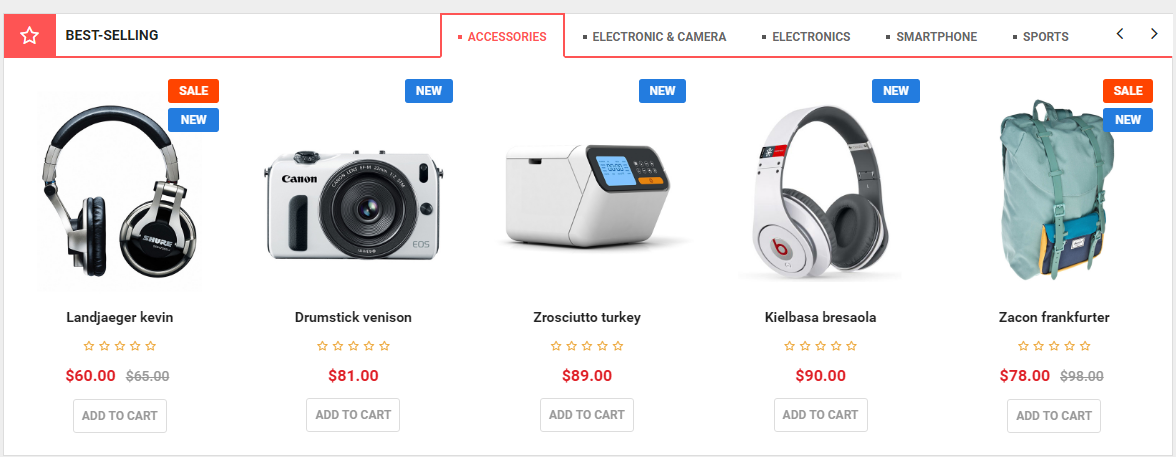

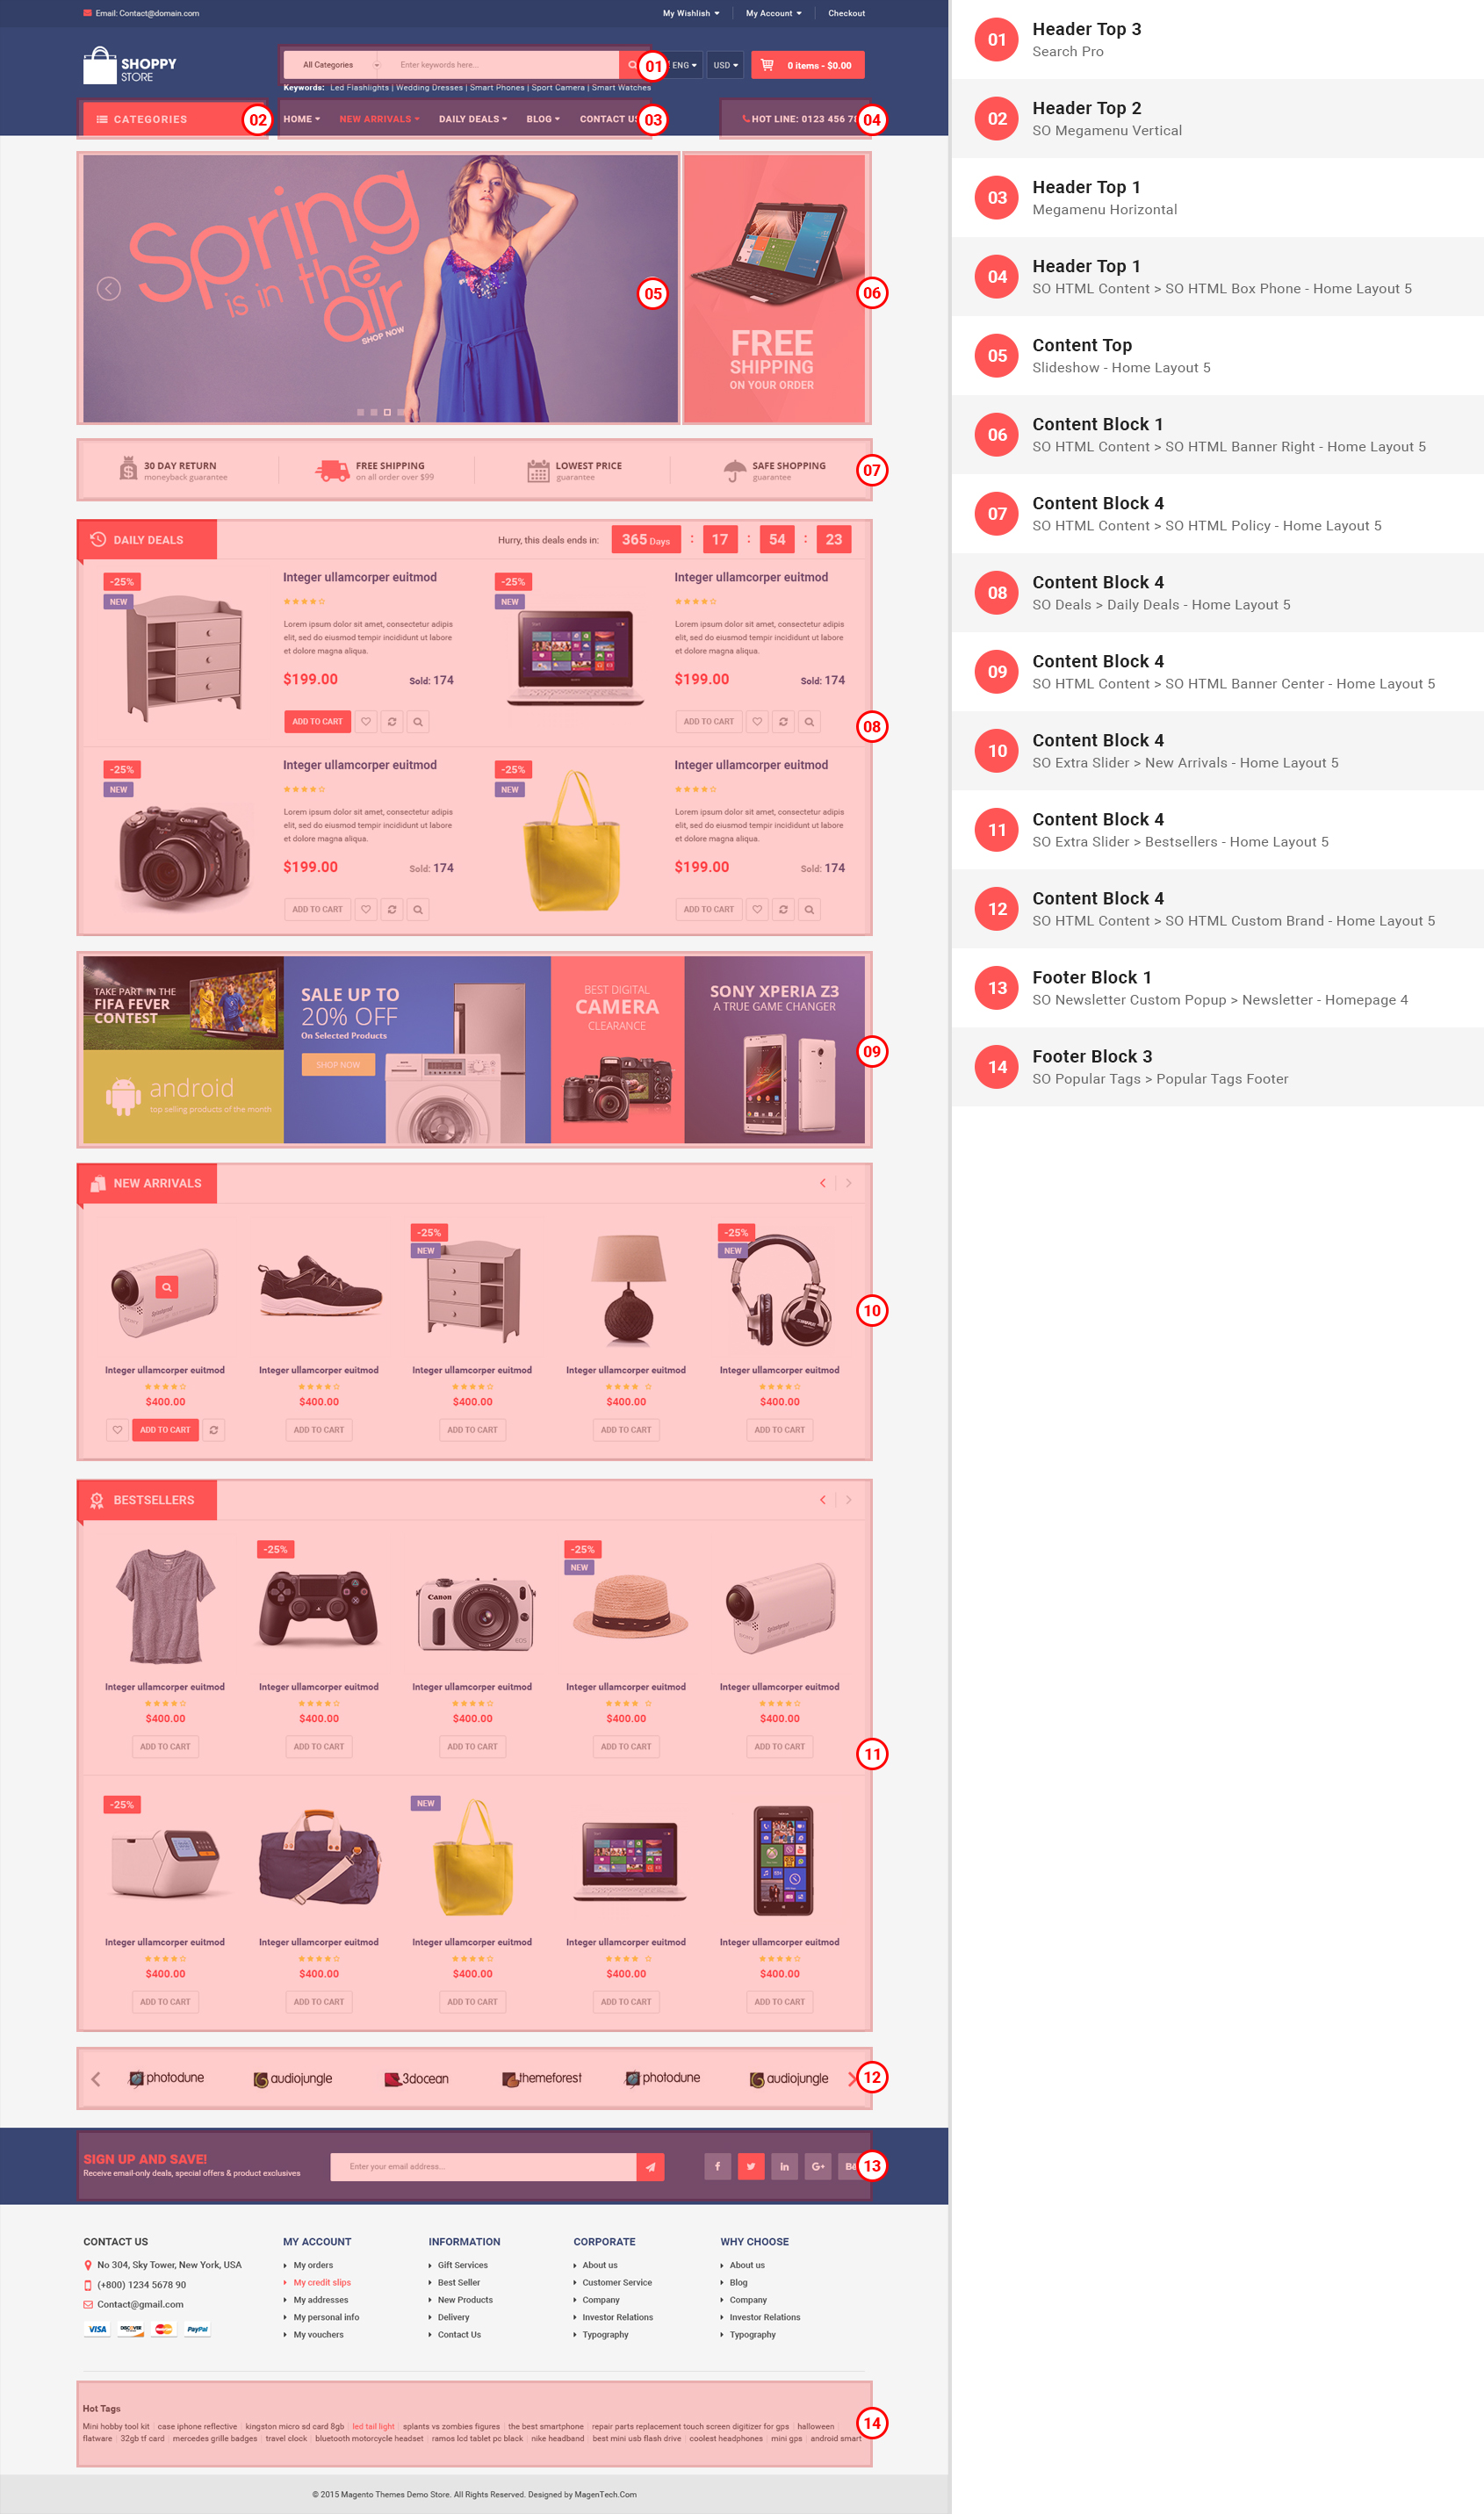
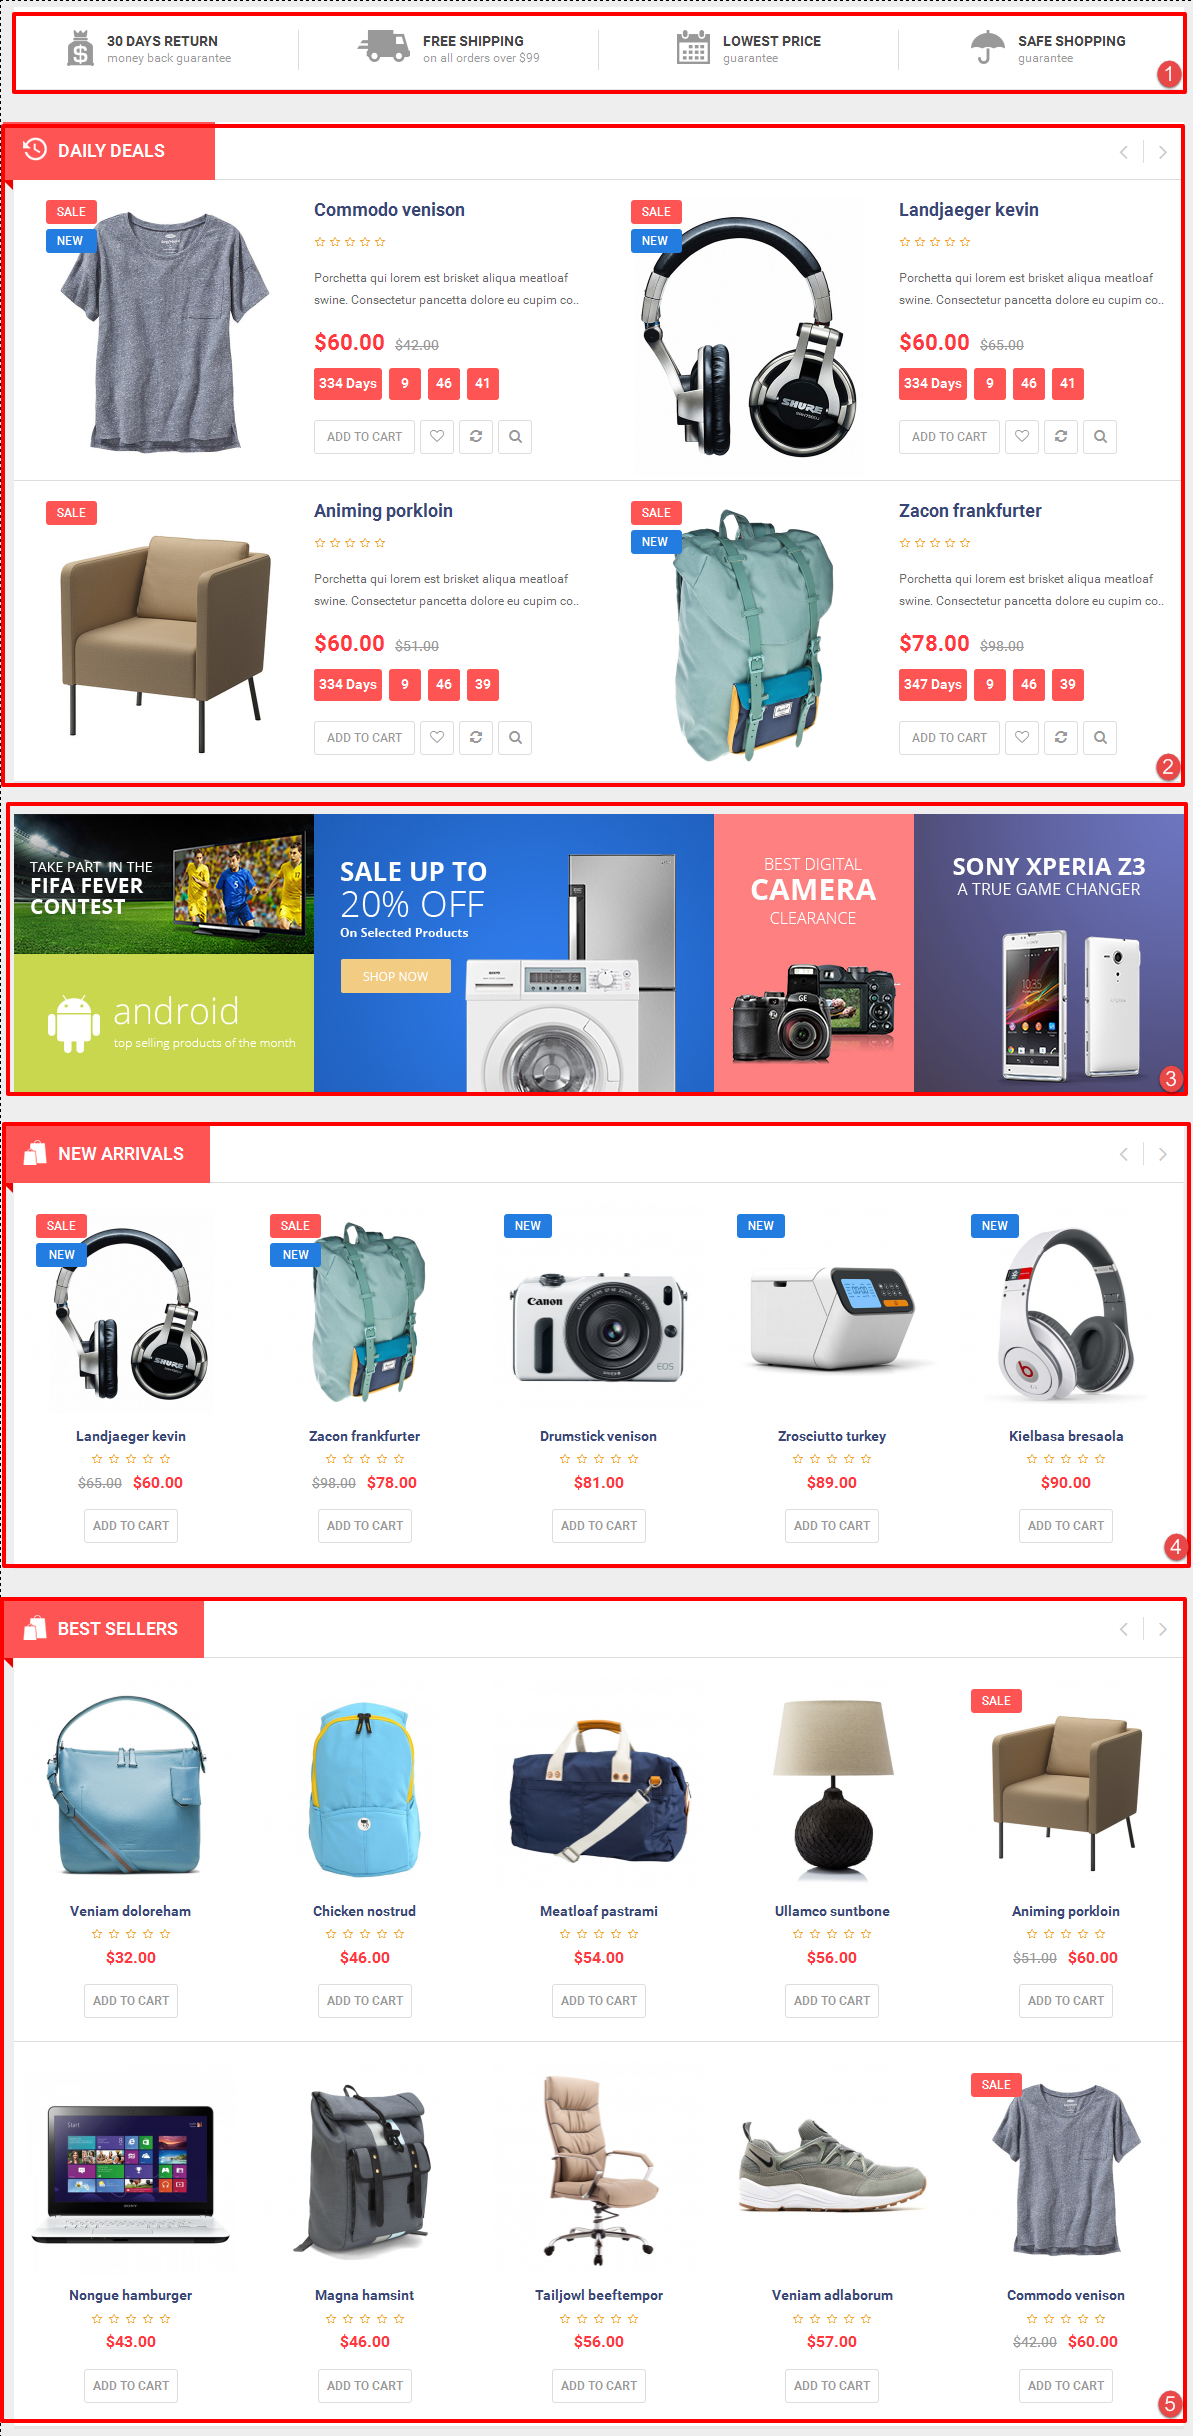
3.9 Extension Configuration – Layout5
Note: To view the Module Positions you can go to Design >> Layouts >> Choose Layout you want then click “Edit” button
The SO ShoppyStore front-page has been integrated with extensions in the Theme as following list:

-
Backend of SO HTML: Click Here
Copy and paste the Code into editor:
|
1 2 3 |
<div class="info-phone"> <p><i class="fa fa-phone"></i>Hot line:<a title="Call: (+123) 456 7890" href="tel:1234567890">0123 456 789</a></p> </div> |

-
Backend of SO HTML: Click Here
Copy and paste the Code into editor:
|
1 |
<a href="#" title="banner"><img src="image/catalog/demo/banners/t1-5.jpg" alt="banner"></a> |
Backend of SO HTML: Click Here
Copy and paste the Code into editor:
|
1 2 3 4 5 6 7 8 9 10 11 12 13 14 15 16 17 18 19 20 21 22 23 24 25 26 27 28 29 30 31 32 33 34 35 36 37 38 39 40 41 42 43 44 |
<div class="row box-polyci"> <div class="col-lg-3 col-md-3 col-sm-6"> <div class="banner-info banner-info1"> <img src="image/catalog/cms/home5/icon1.png" alt="Image Client"> <div class="banner-cont"> <a href="#">30 DAYS RETURN</a> <p>money back guarantee</p> </div> </div> </div> <div class="col-lg-3 col-md-3 col-sm-6"> <div class="banner-info banner-info2"> <div class="inner"> <img src="image/catalog/cms/home5/icon2.png" alt="Image Client"> <div class="banner-cont"> <a href="#">FREE SHIPPING</a> <p>on all orders over $99</p> </div> </div> </div> </div> <div class="col-lg-3 col-md-3 col-sm-6"> <div class="banner-info banner-info3"> <div class="inner"> <img src="image/catalog/cms/home5/icon3.png" alt="Image Client"> <div class="banner-cont"> <a href="#">LOWEST PRICE</a> <p>guarantee</p> </div> </div> </div> </div> <div class="col-lg-3 col-md-3 col-sm-6"> <div class="banner-info banner-info4"> <div class="inner"> <img src="image/catalog/cms/home5/icon4.png" alt="Image Client"> <div class="banner-cont"> <a href="#">SAFE SHOPPING</a> <p>guarantee</p> </div> </div> </div> </div> </div> |
Backend of SO-Deals: Click Here
Backend of SO HTML: Click Here
Copy and paste the Code into editor:
|
1 2 3 4 |
<div class="box-img box-img-1"><a href="#" title="banner"><img src="image/catalog/demo/banners/t2-5.jpg" alt="banner"></a></div> <div class="box-img box-img-2"><a href="#" title="banner"><img src="image/catalog/demo/banners/t3-5.jpg" alt="banner"></a></div> <div class="box-img box-img-3"><a href="#" title="banner"><img src="image/catalog/demo/banners/t4-5.jpg" alt="banner"></a></div> <div class="box-img box-img-4"><a href="#" title="banner"><img src="image/catalog/demo/banners/t5-5.jpg" alt="banner"></a></div> |
4SUPPORT – Back to top
Thank you so much for purchasing this template. If you have any questions that are beyond the scope of this help file, please send us via: Submit a Ticket
Thanks so much!
