1Demo – Back to top
Please go Here to view “Demo Computer” demo
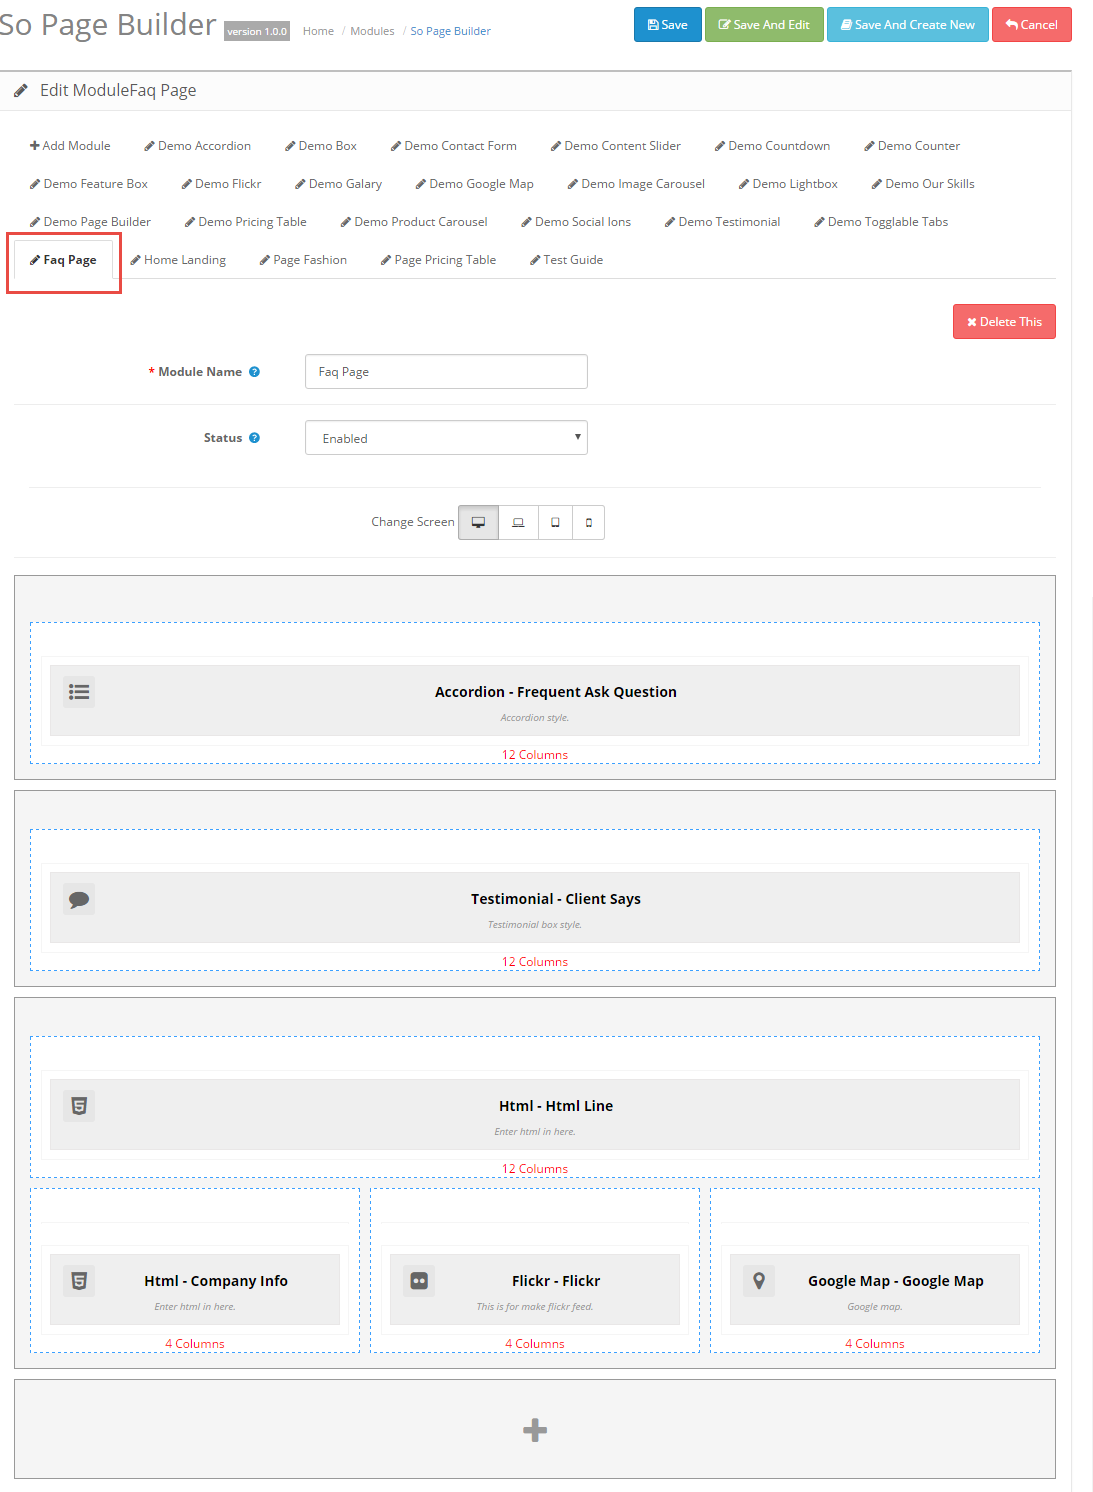
Please go Here to view “Faq Page” demo
Please go Here to view “Faq Furniture” demo
Please go Here to view “Page Sport Bike” demo
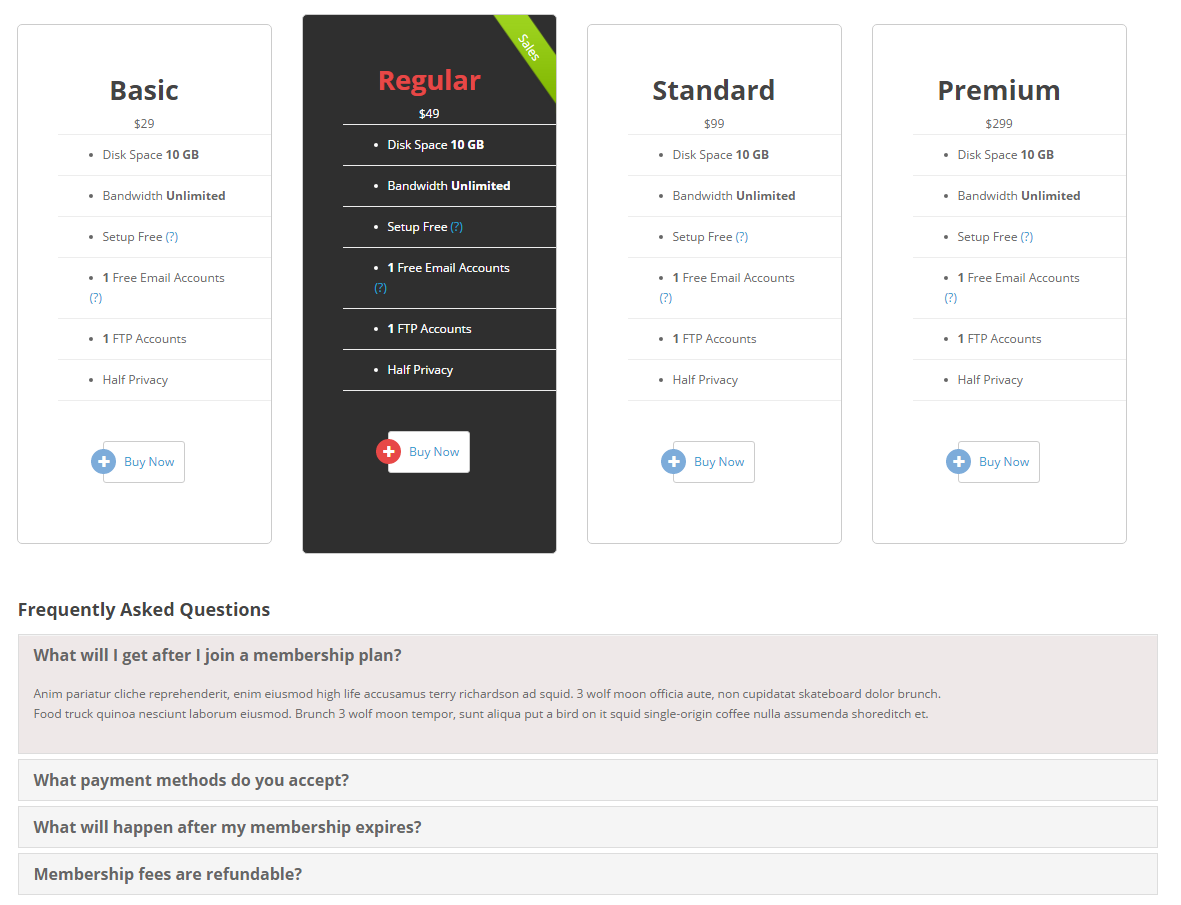
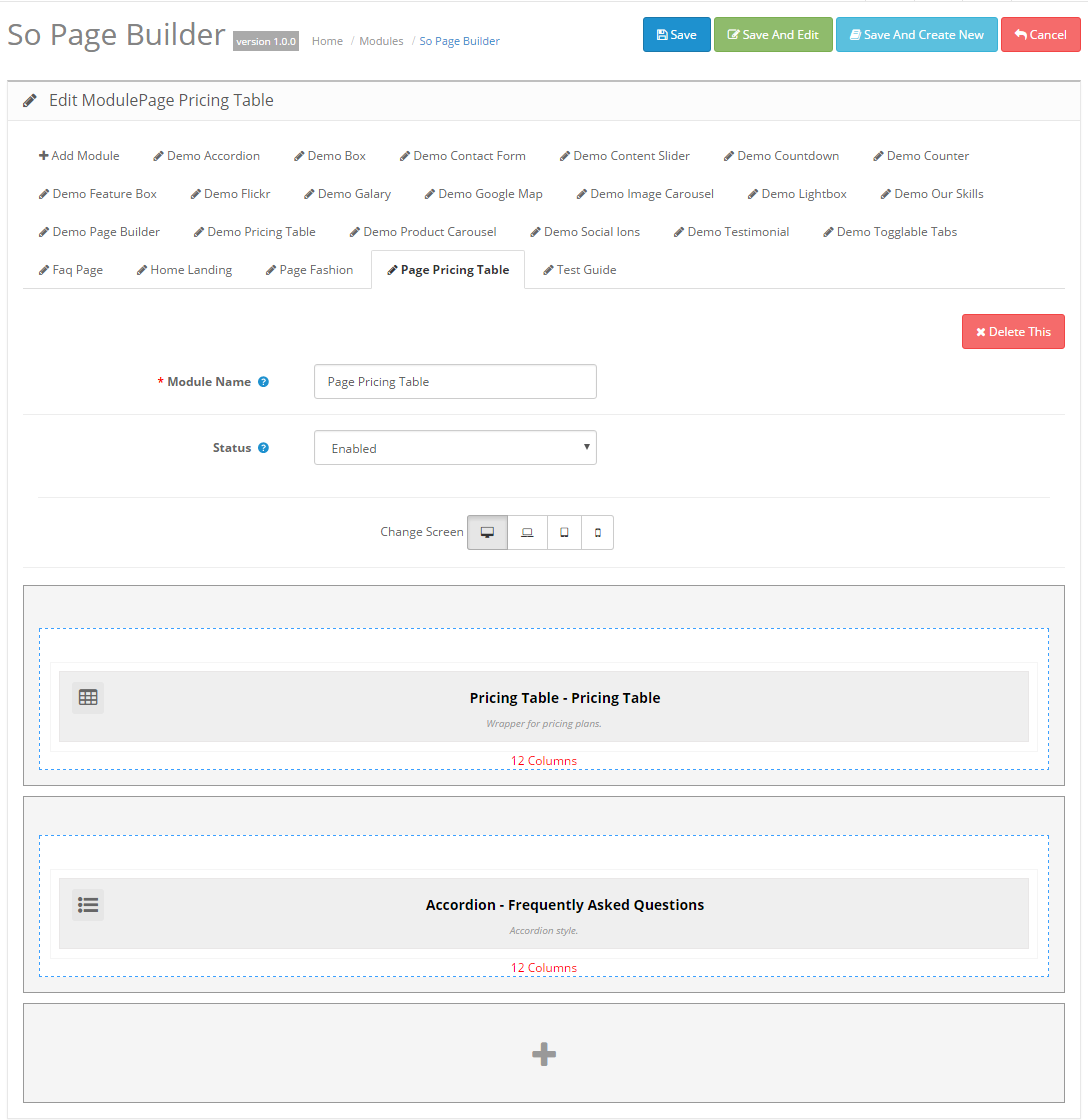
Please go Here to view “Pricing Table” demo
Please go Here to view “Page Fashion” demo
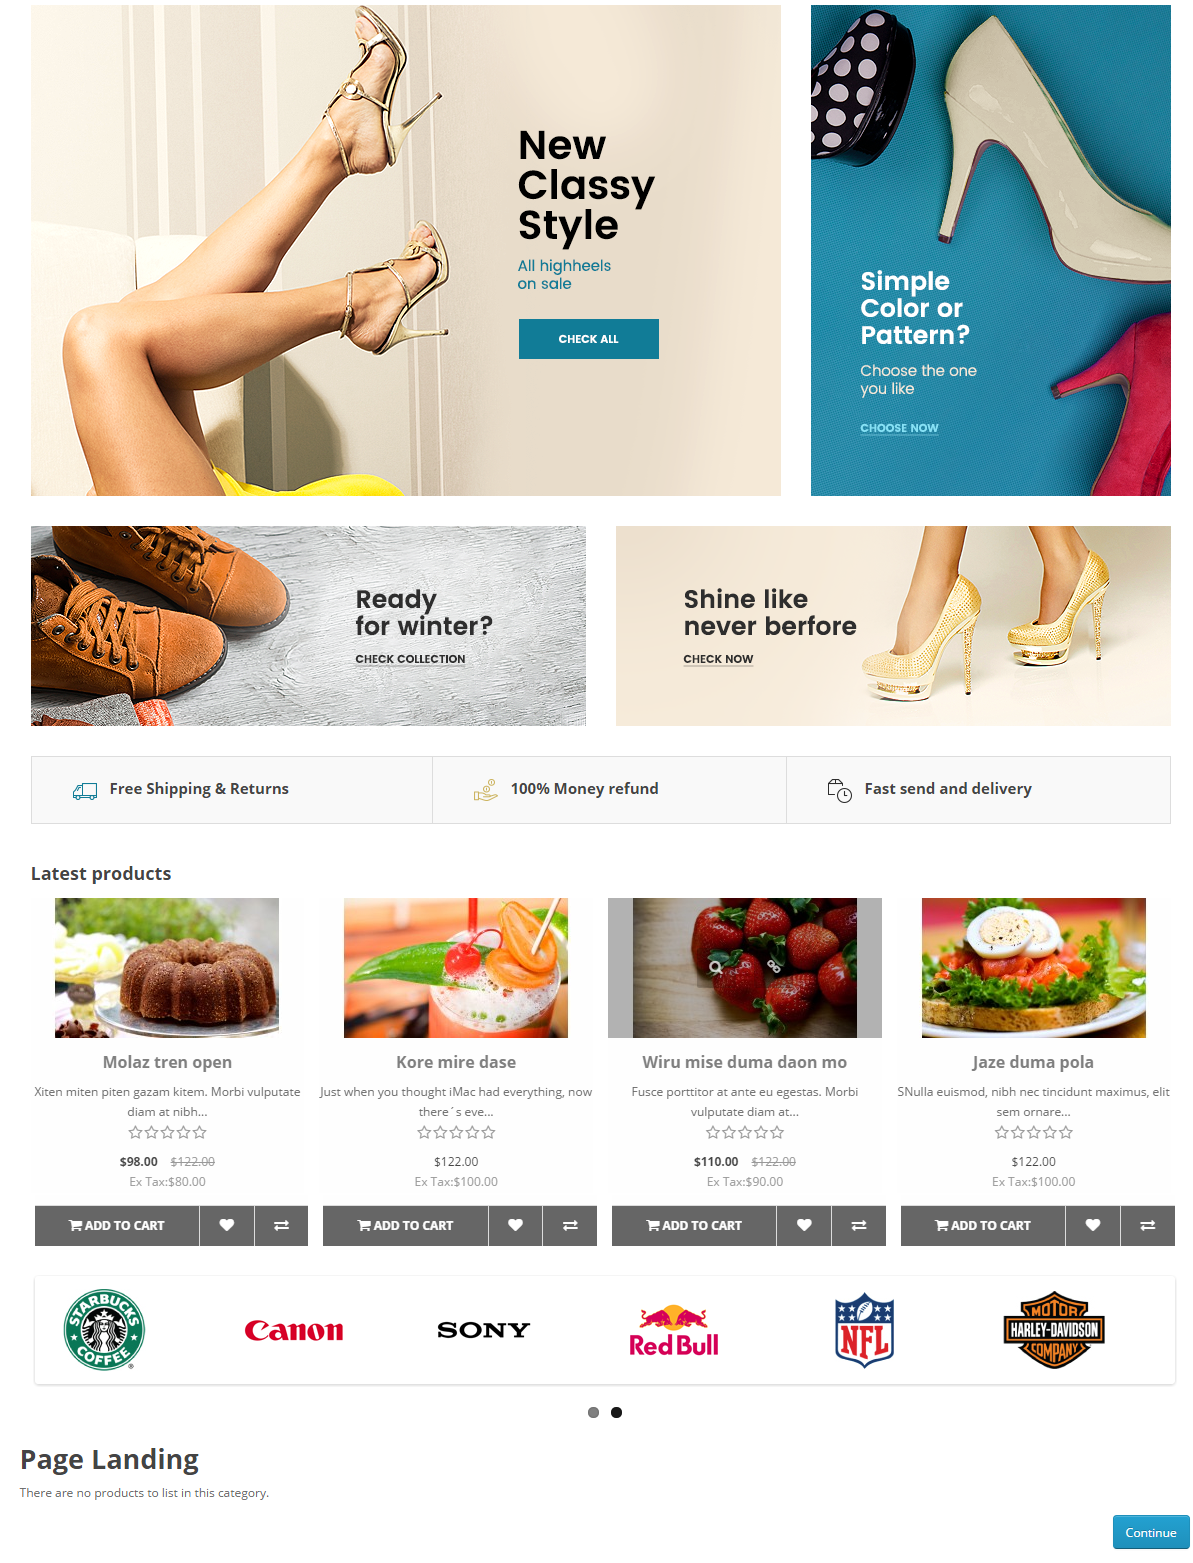
Please go Here to view “Page Landing” demo
Note:
You can go Here to view Admin of SO Page Builder
Account: demo/demo
2REQUIREMENT – Back to top
At the basic level, this module will require the following conditions:
- Compatible with version OpenCart: OpenCart 2.x
- Have responsive
3INSTALLATION – Back to top
2.1 FTP Configuration
There are two ways to configure FTP
Option 1:
Step 1: Please go to System >> Settings >> Your Store >> Click “Edit” button
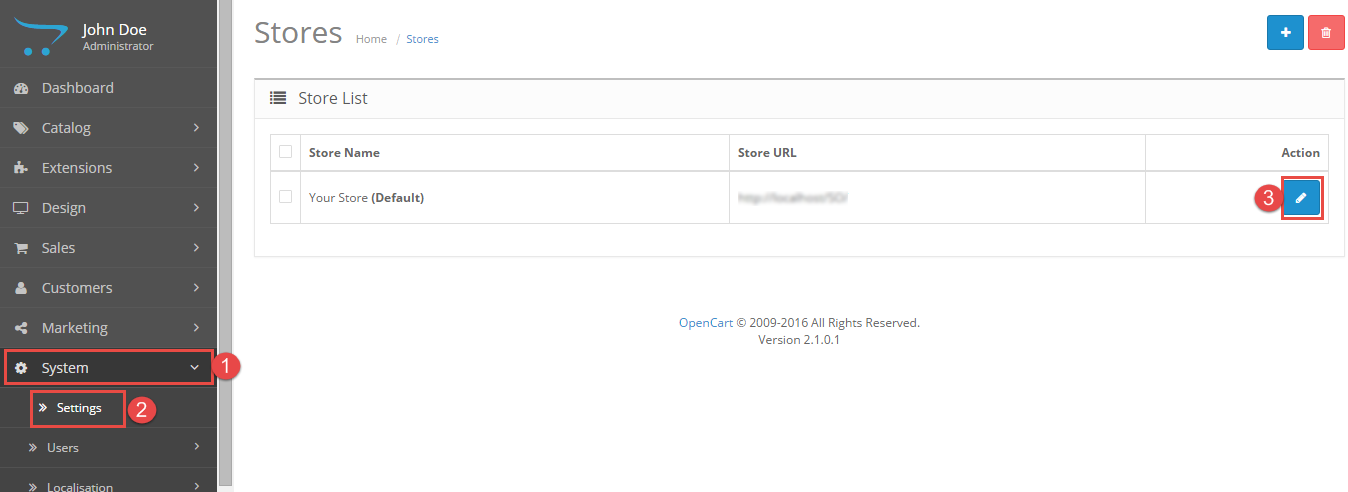
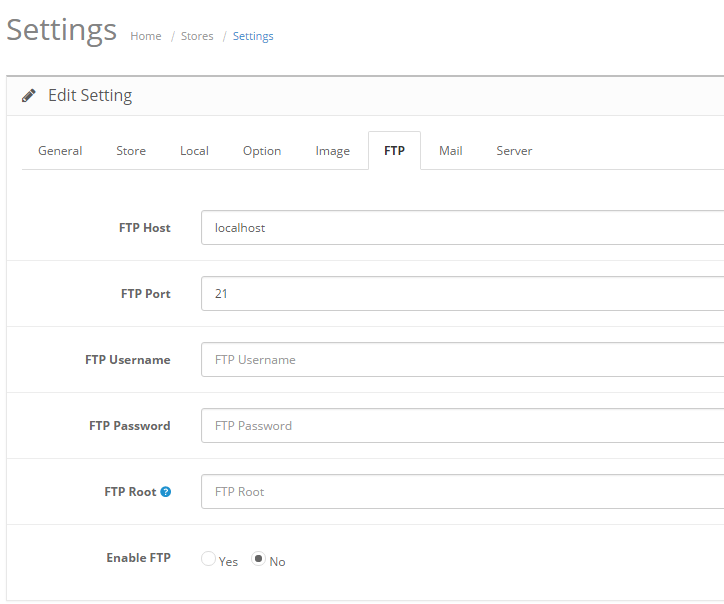
Step 2: Click FTP tab and enter the FTP username & password…
Option 2:
Step 1:Please go Here to dowload file XML of “Quick Fix”
Step 2: Please go to Extensions >> Extension Installer >> Click Upload and select file XML which you just dowloaded
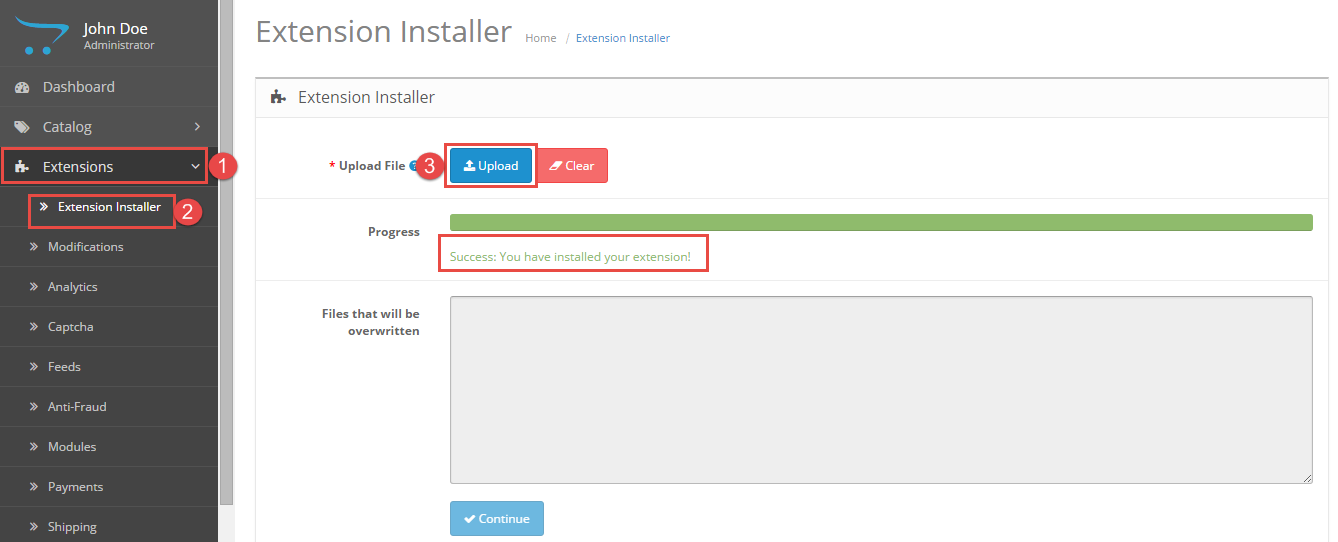
Then You should see the message Success
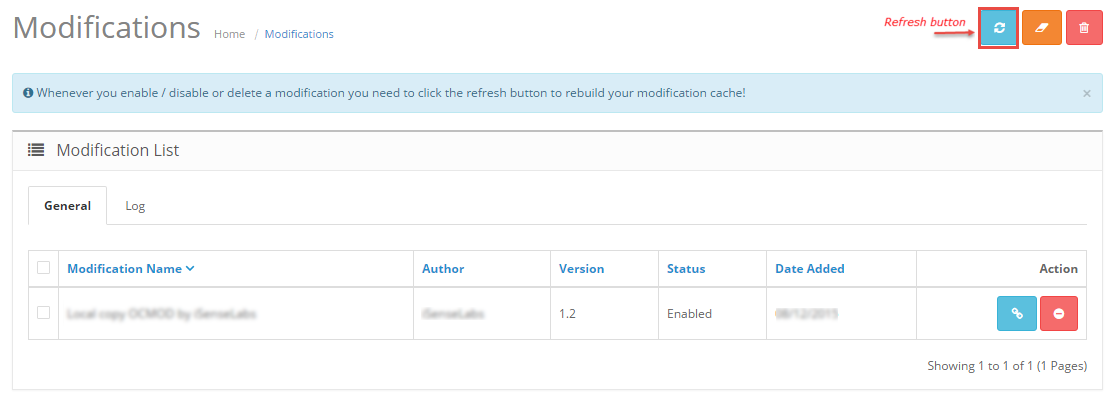
Step 3: Go to Extension >> Modifications >> Click “Refresh” button
2.2 Module Installation
Prepare your module package
- In your Administrator page, go to Extensions >> Extension Installer >> Click Upload and select file so-pagebuilder.ocmod.zip.
Then You should see the message Success
In this page, choose module “SO Page Builder”, click Install button
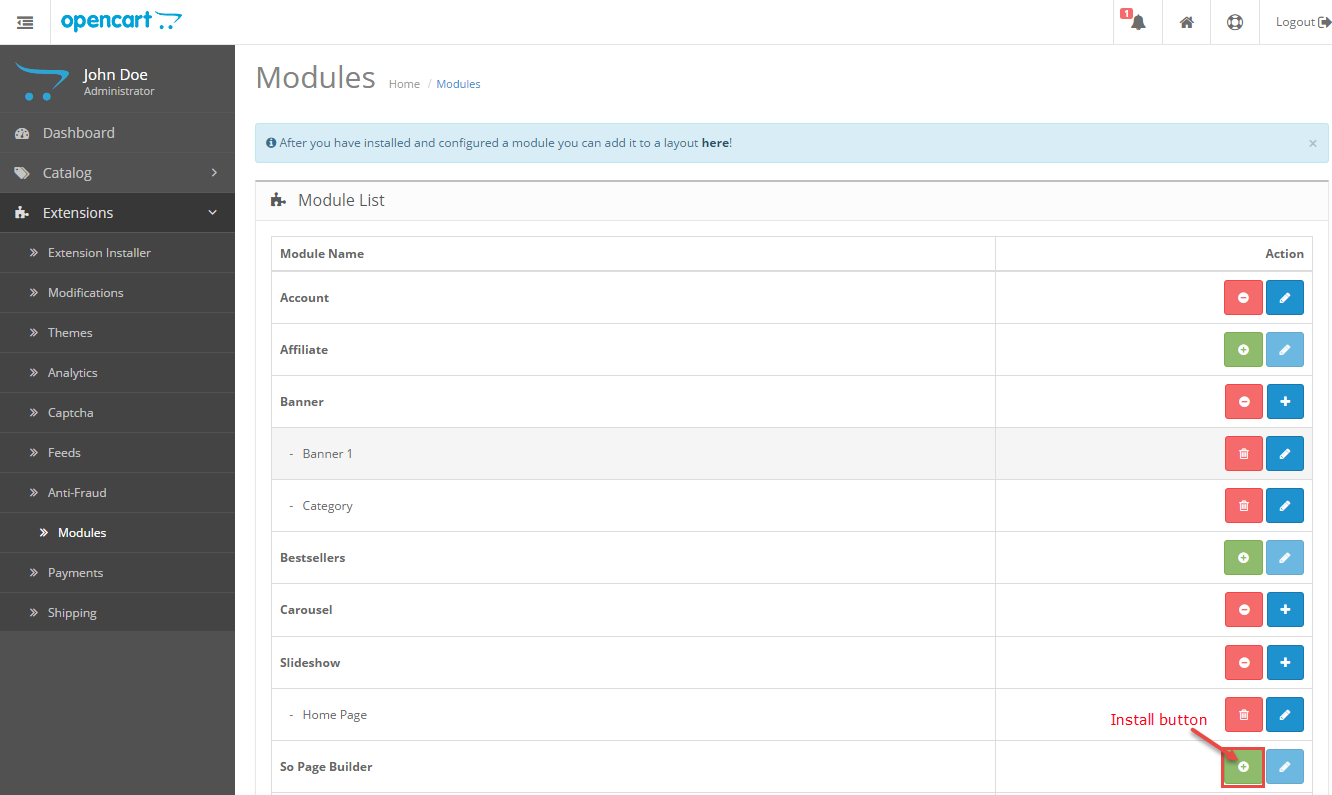
- Please wait for module being installed, usually within several seconds
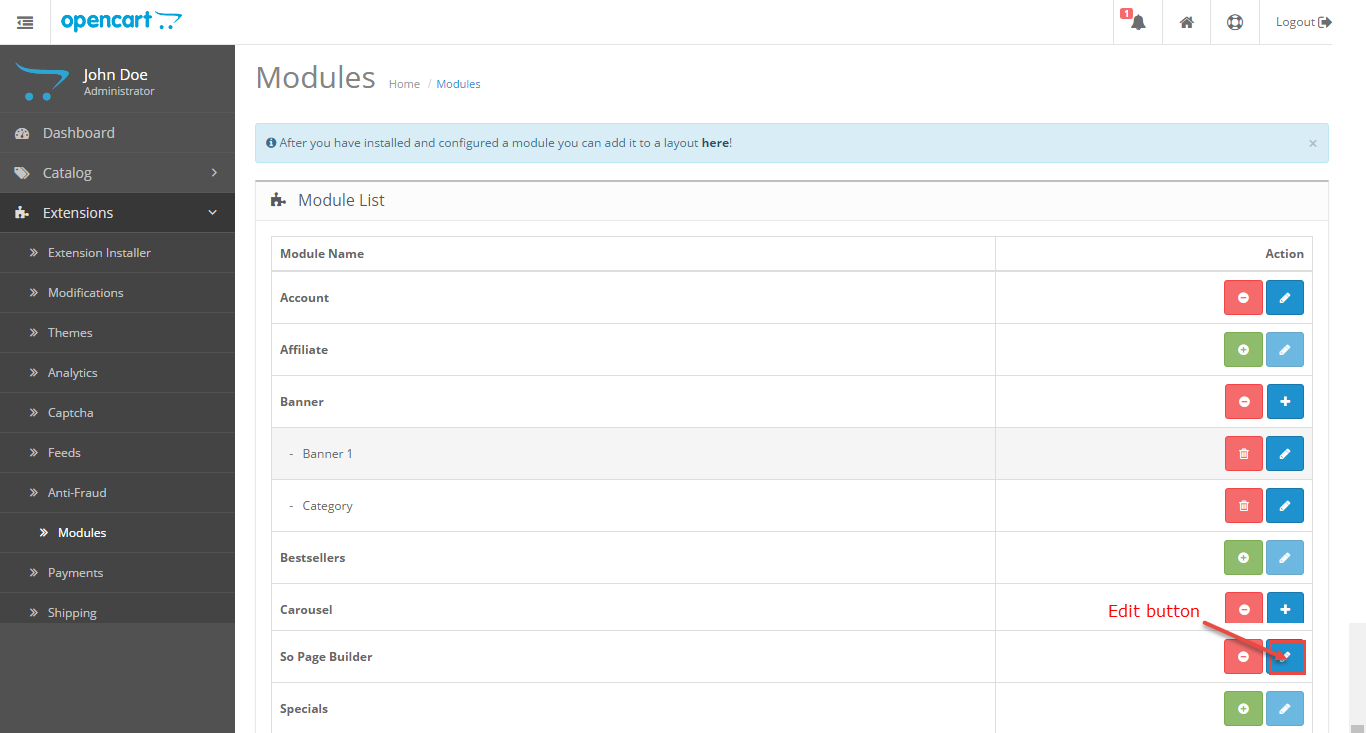
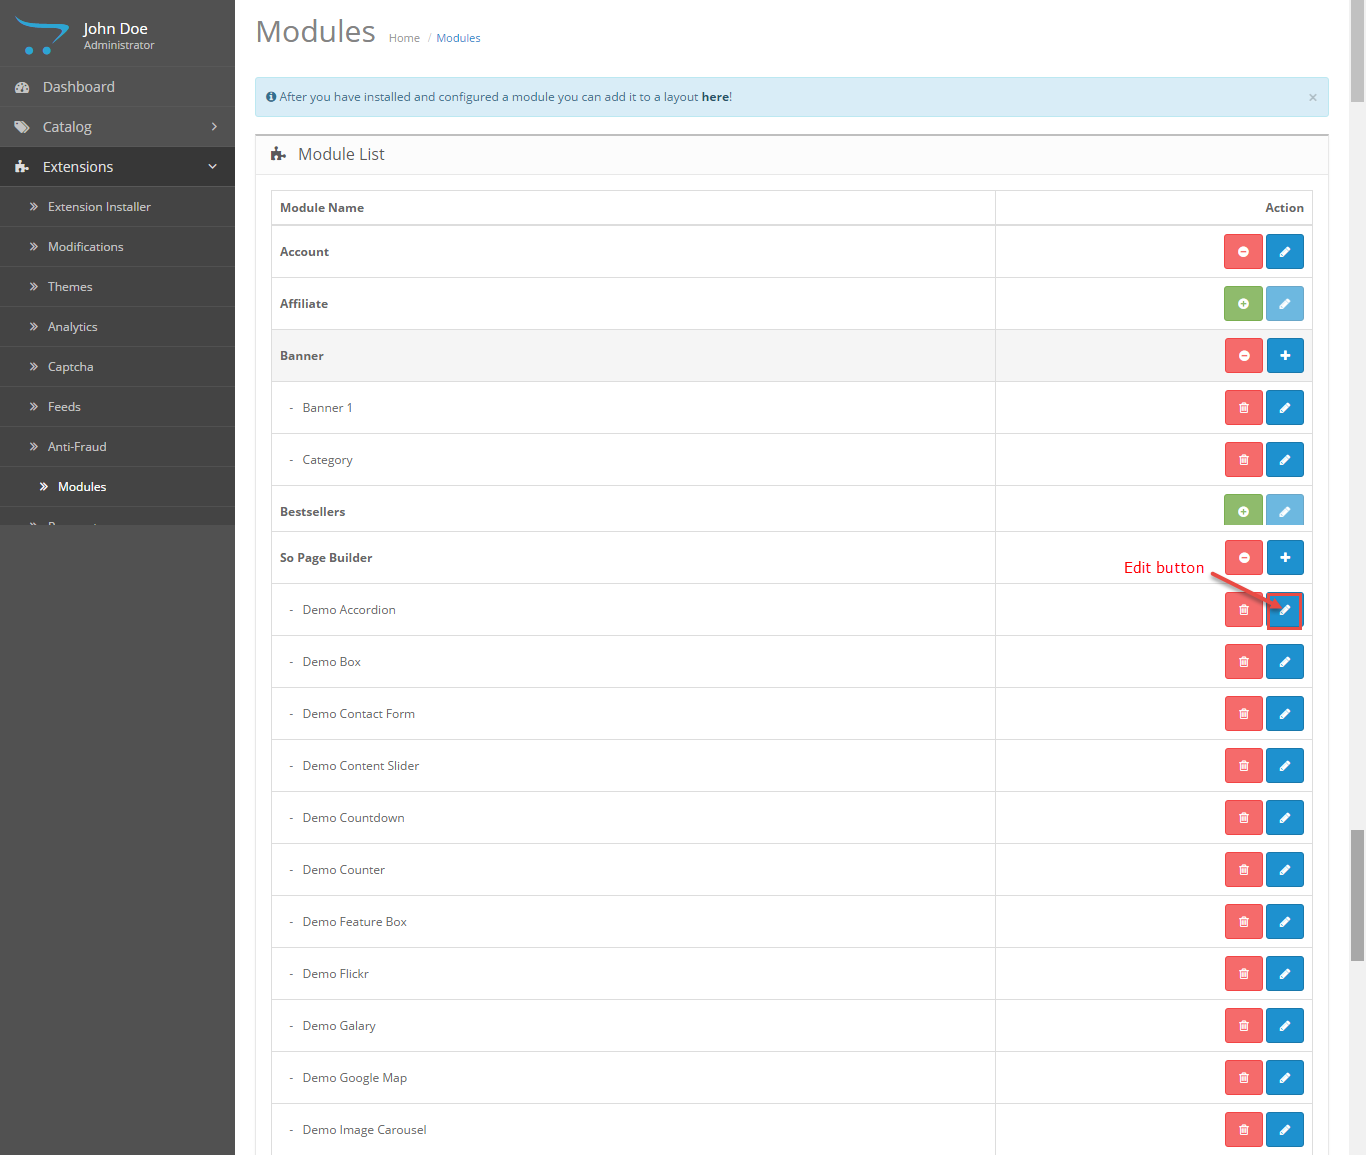
- To Create the name of this module, please go to Extensions >> Modules >> Choose module “SO Page Builder” >> Click “Edit” button
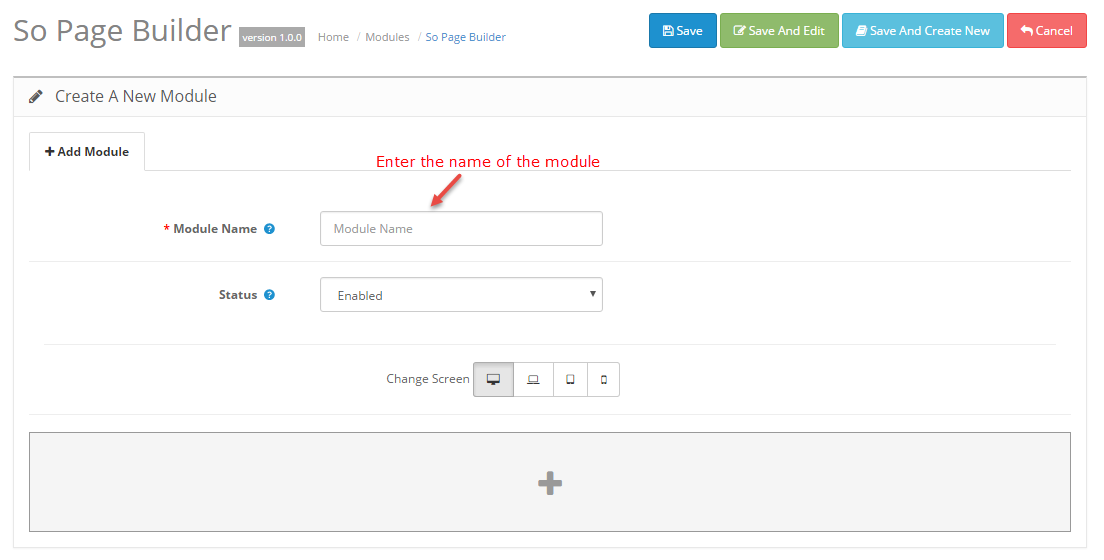
- Enter the name of the Module and fill the fields in the tabs. Then click “Save” button
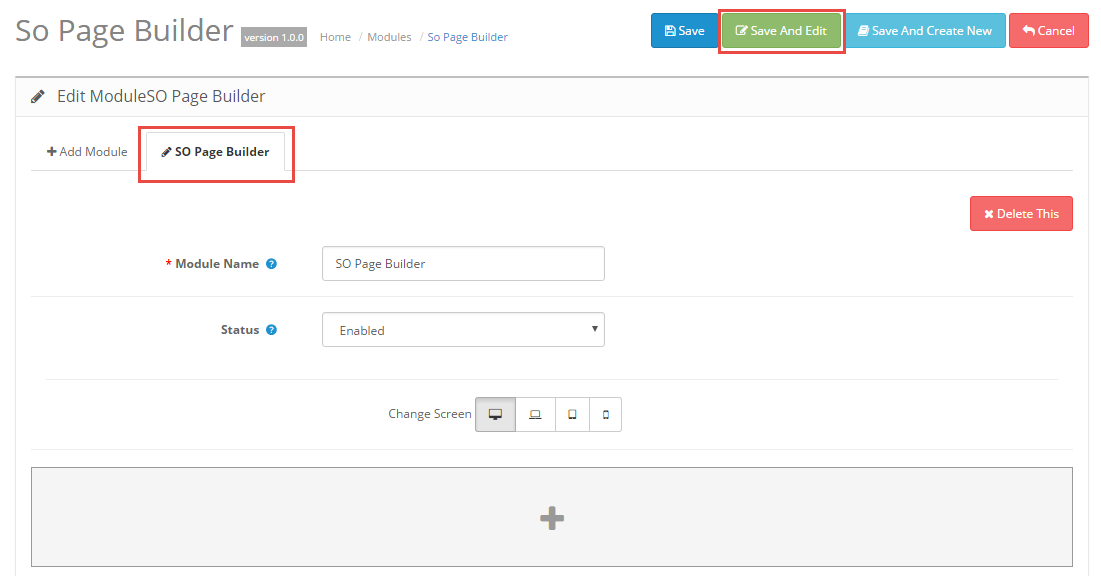
- To Edit the module you have created, there are two ways
- Options 1: Choose the module you have Created >> Then Edit it
- Options 2: Choose the module you have Created >> Then Edit it
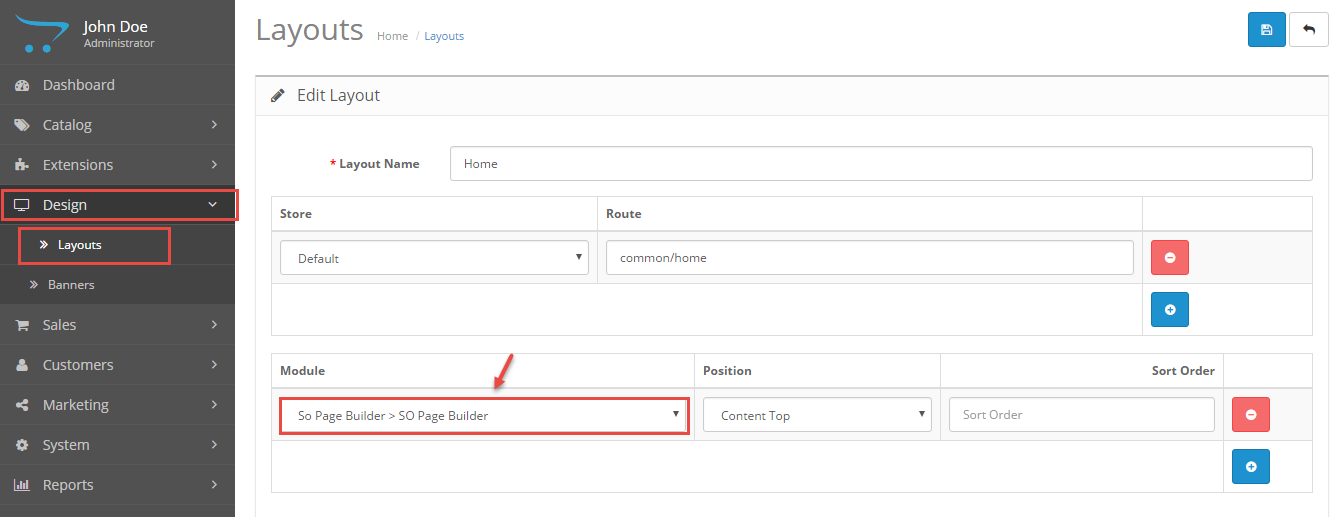
- After you have installed and configured a module you can add it to a layout: Please go to Design >> Layouts >> Choose the layout you want to display
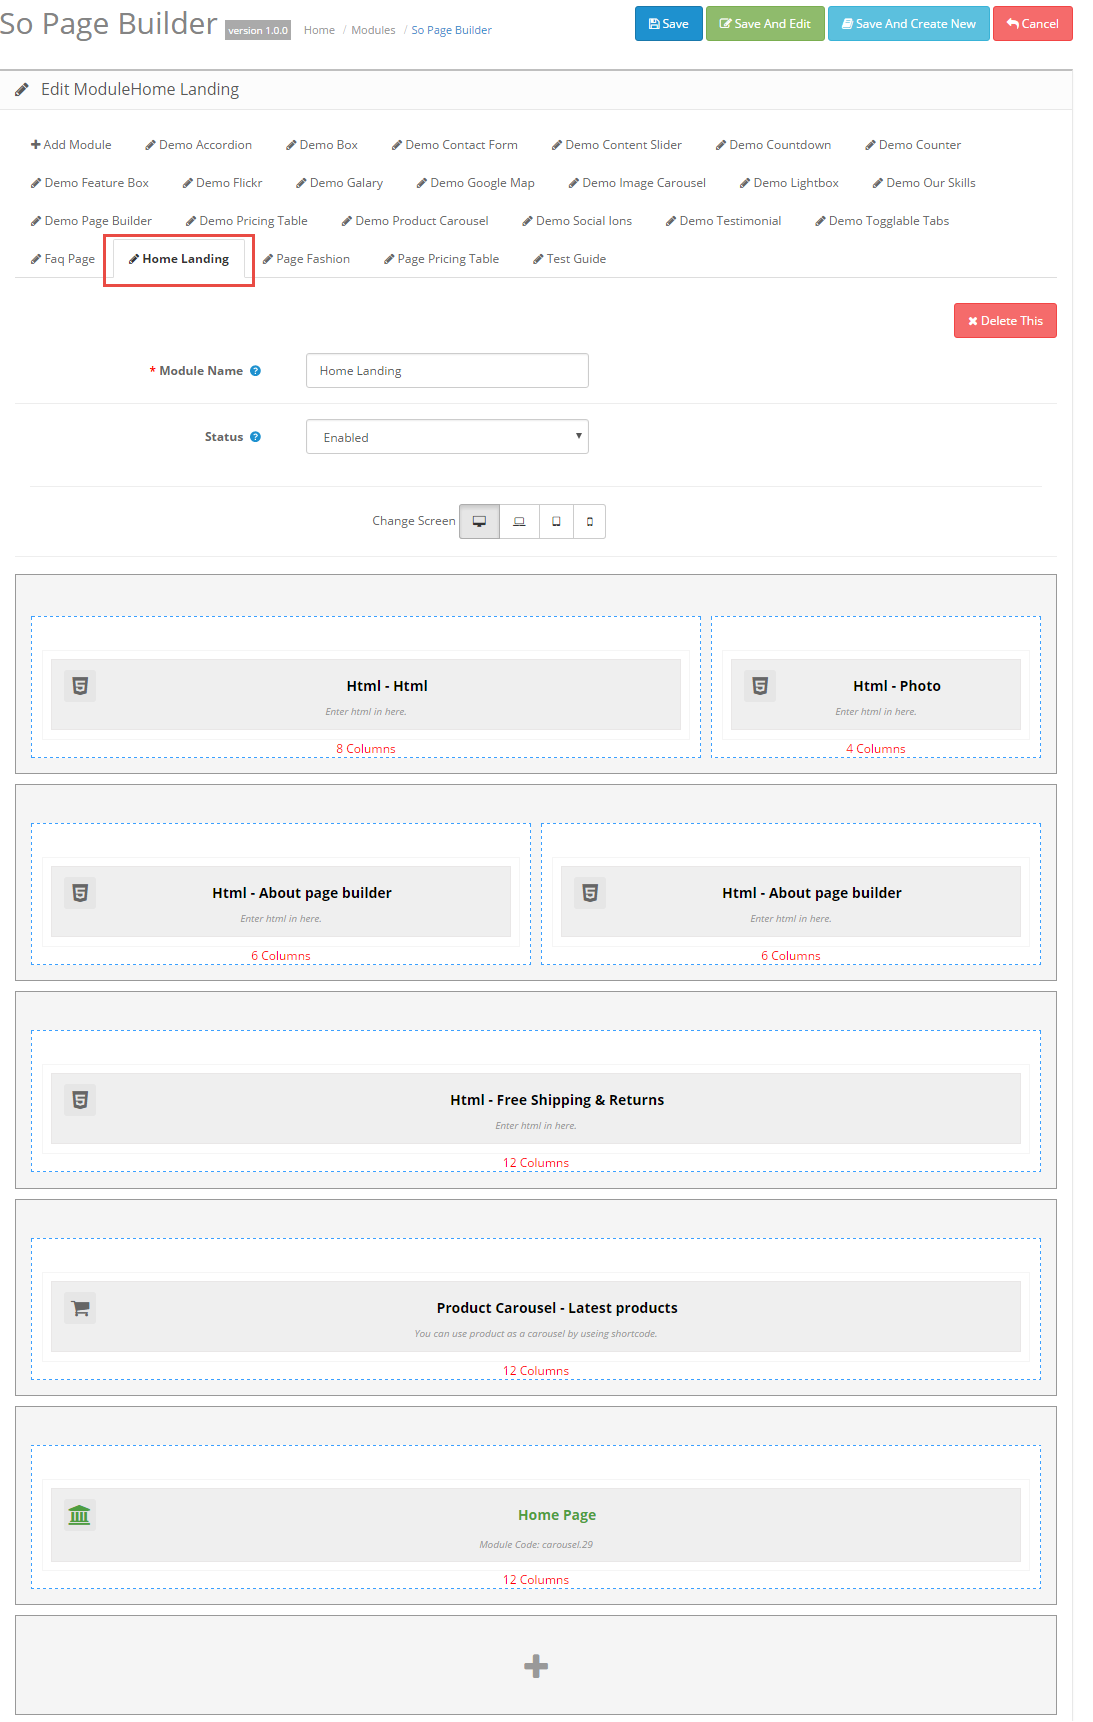
For Example: we choose “Home” layout
4MODULE CONFIGURATION – Back to top
4.1 Module Configuration
Step1: Please go to Administrator page >> Extensions >> Modules >> Add new Module
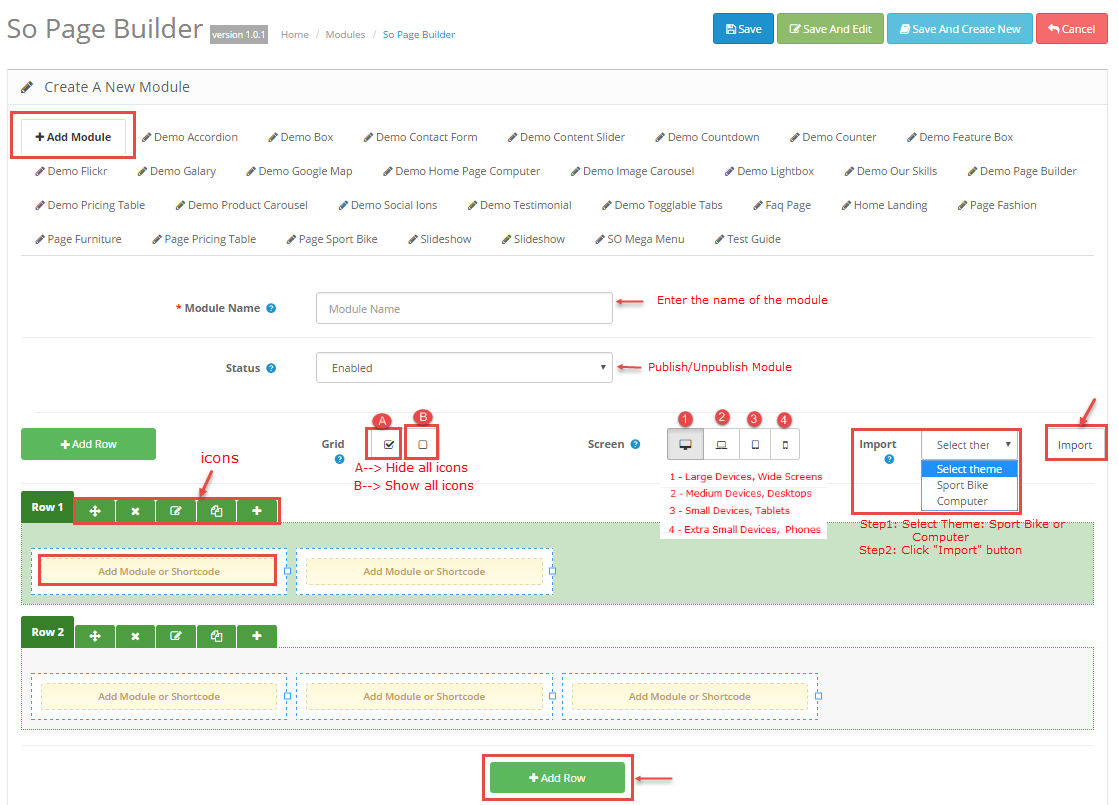
Step2: Click on “Add Row” button and configure in 2 groups of parameters following:
- Config: backend settings
- Advanced:backend settings
Then Click on “Save” button
Note:
- “Save All” button: Allow to save the configuration of the module.
- “Save And Edit” button: Allow to save the location is configured.
4.2 Row Configuration

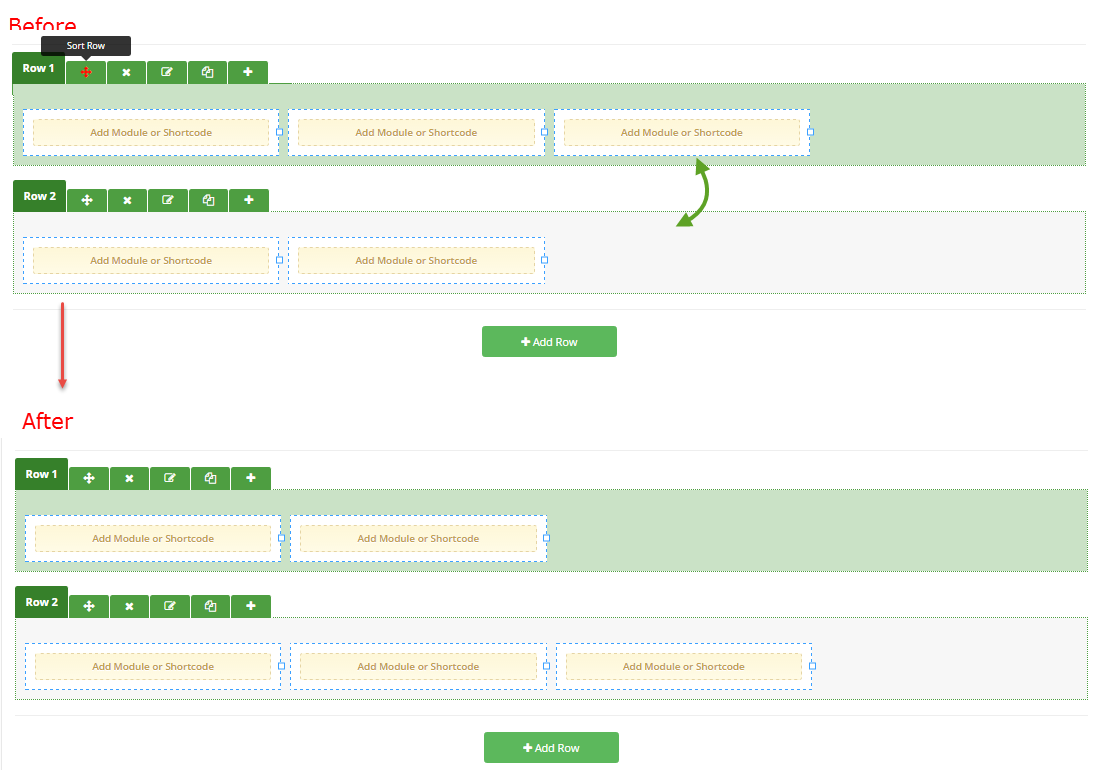
- 1. Sort Row: You can drag and drop the row on the location as you want.
Before –> After
- 2. Delete Row: You can delete this row.
- 3. Edit Row: Allow to edit the column as you want.
The pop-up window will display the backend settings, you can configure in 3 groups of parameters following:- Style: backend settings
- Advanced:backend settings
- Section(For Row Father):backend settings
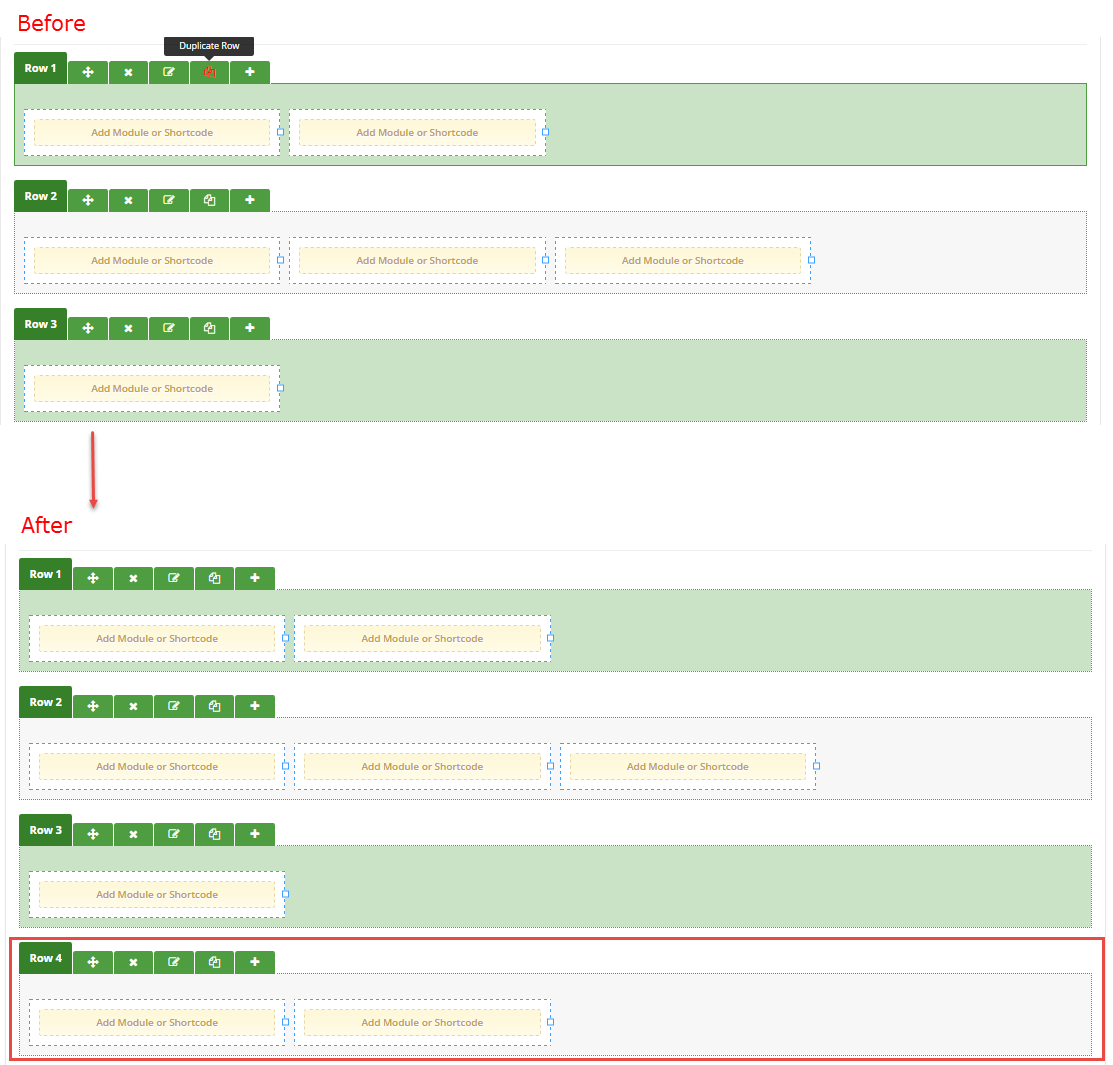
- 4. Duplicate Row: Allow to copy the entire contents of the row.
Before –> After
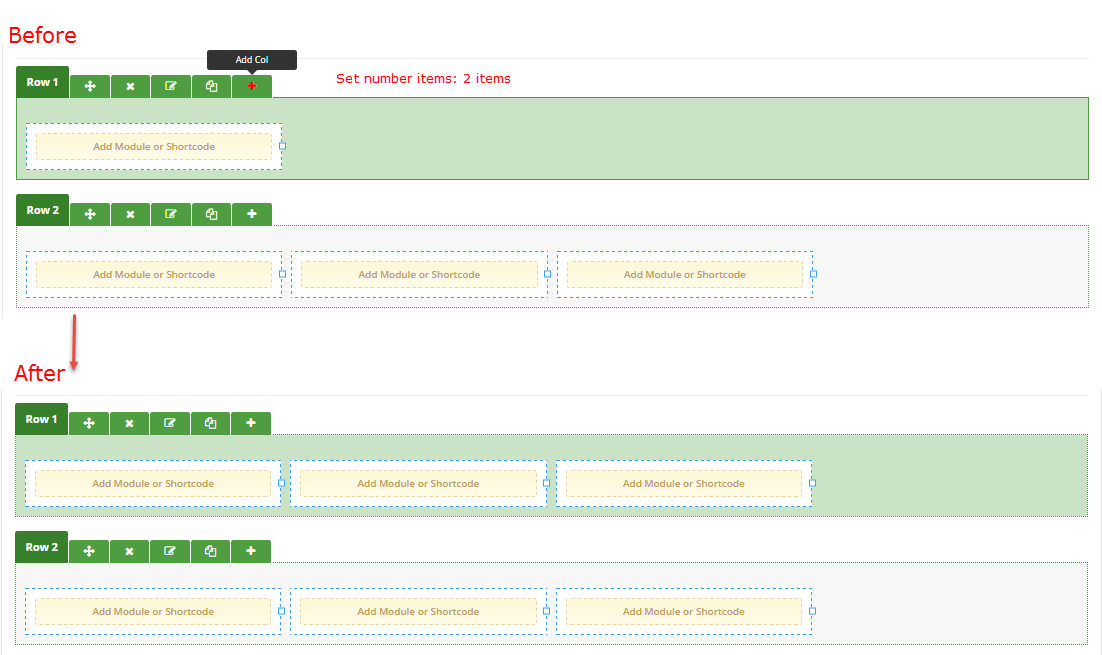
- 5. Add Col: Allow to add col as you want.
The pop-up window will display the backend settings, you can configure in 2 groups of parameters following:- Config: backend settings
- Advanced:backend settings
Before –> After
4.3 Column Configuration

- 1. Sort Col: You can drag and drop the col on the location as you want.
- 2. Delete Col: You can delete this col.
- 3. Edit col: Allow to edit the column as you want.
The pop-up window will display the backend settings, you can configure in 3 groups of parameters following:- Config: backend settings
- Advanced:backend settings
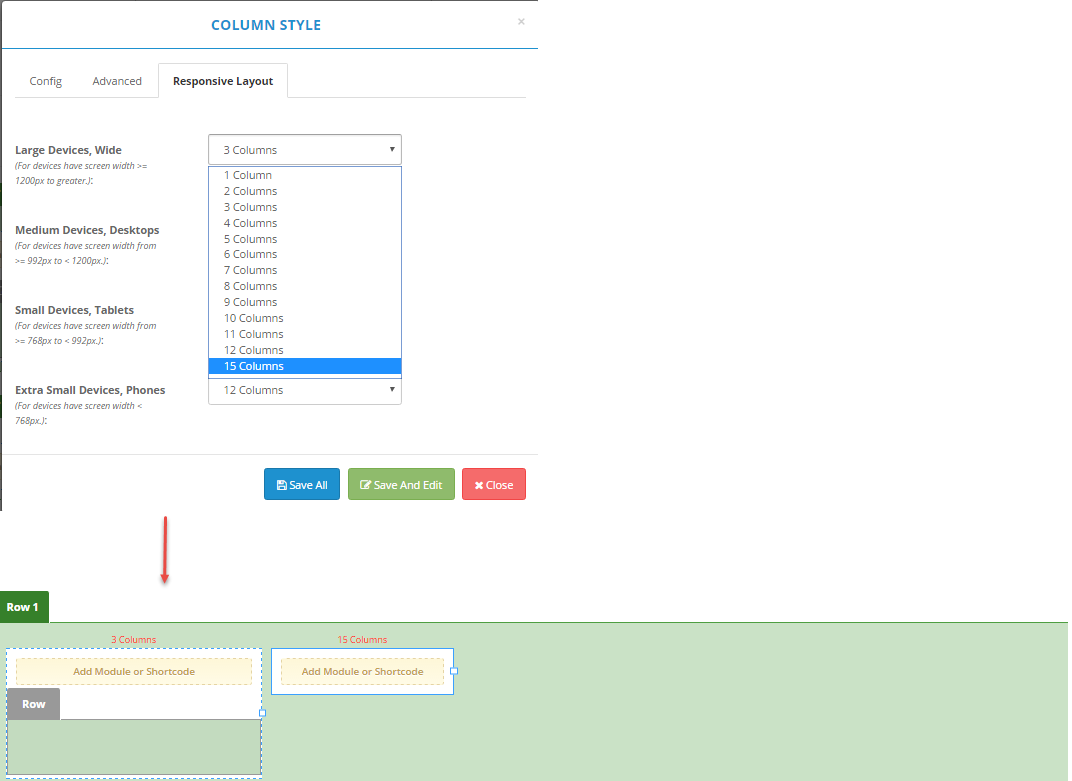
- Responsive layout:backend settings
- 4. Duplicate Row: Allow to copy the entire contents of the col.
- 5. Add Row: Allow to add row as you want.
Before –> After

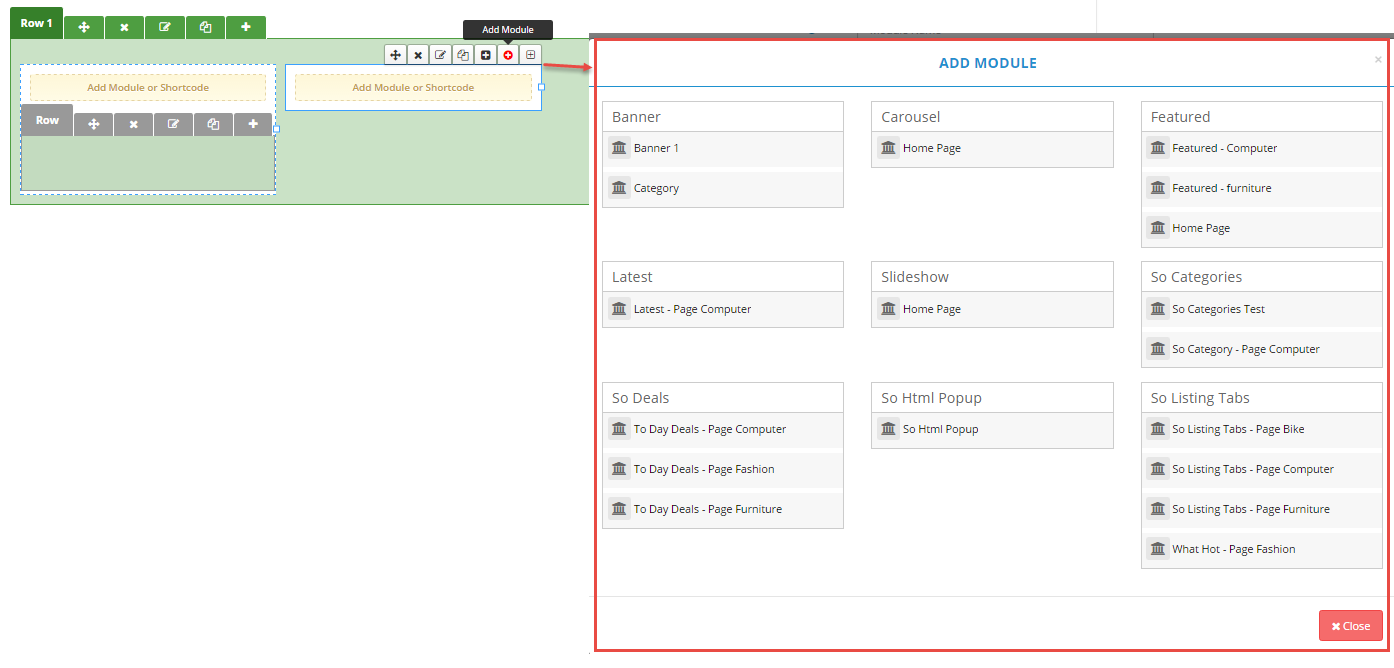
- 6. Add module: You can choose the module that you have installed.
- 7. Add Shortcode: Allow to choose the shortcode as you want.
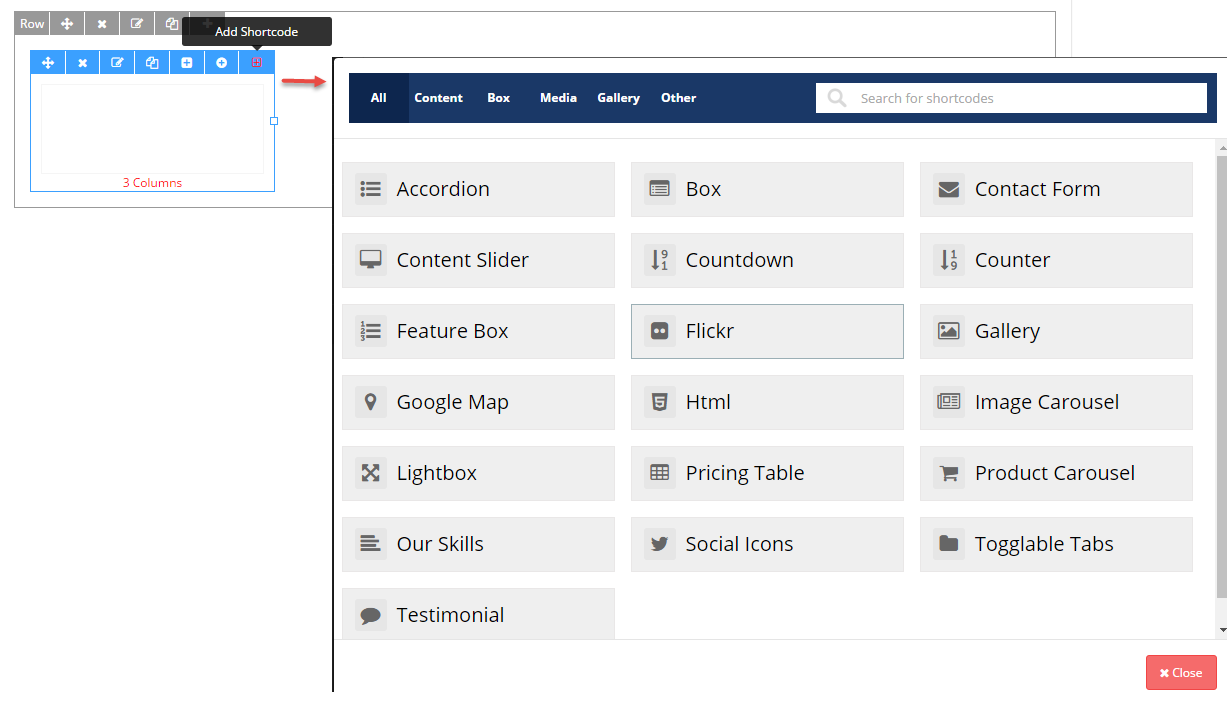
- Please go to here to read more information
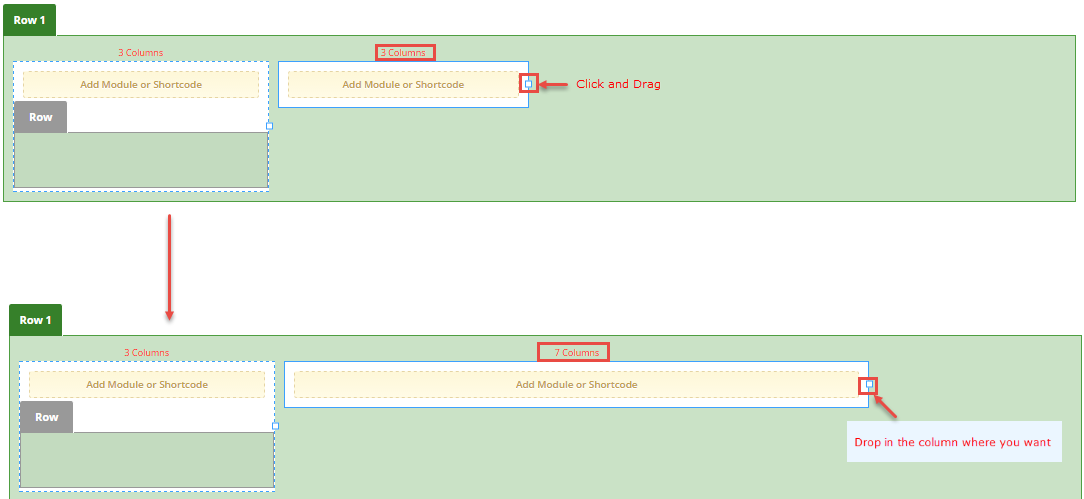
You can hover over the column, drag each column to the value you prefe
Note: If you select “15 columns” (in param “Large Devices Wide”), or you can drag the colmun to the value column = 15 —> Width = 20%

6SUPPORT – Back to top
Thank you so much for purchasing this module. If you have any questions that are beyond the scope of this help file, please send us via: Submit a Ticket
Thanks so much!
