SJ Xmas

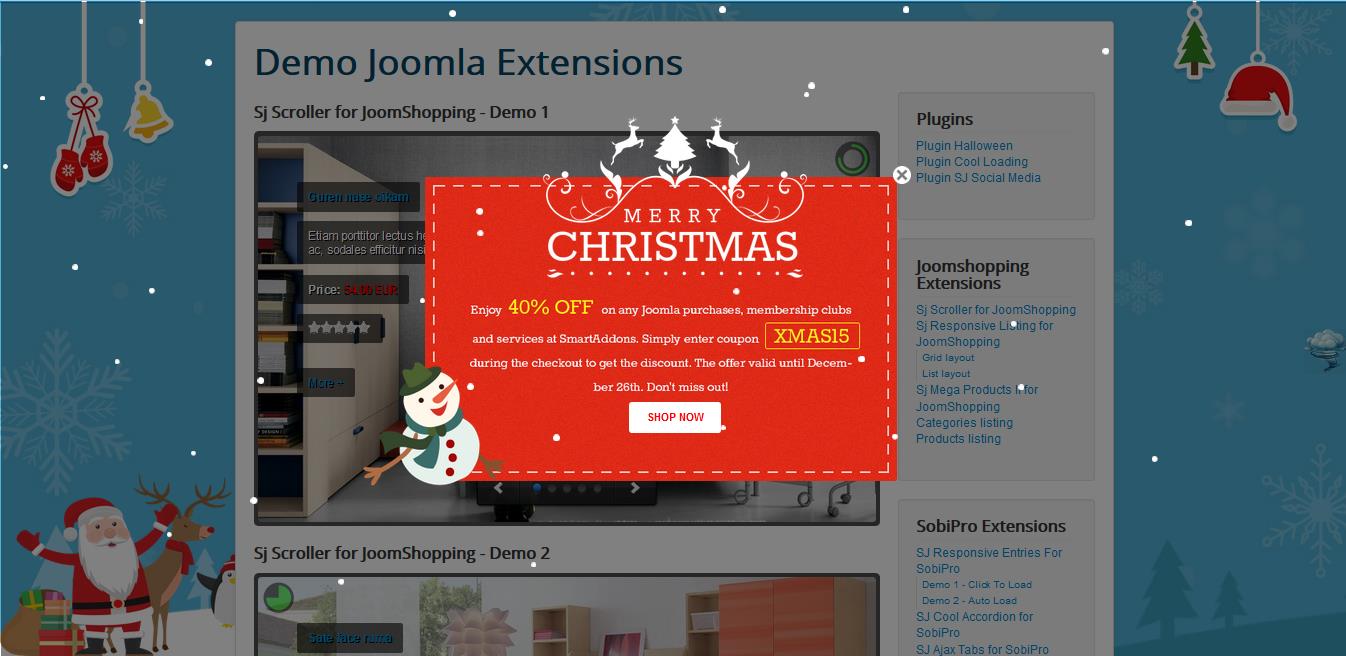
SJ Xmas module displays falling snow along with beautiful Christmas images upon interesting effects. You can choose the way to show snow: the Flake number, color, min/max speed…; the background images; the decor images and so on.

This guide will help you install SJ Xmas step by step.


1REQUIREMENT – Back to top

At the basic level, this module will require the following conditions:

  • Compatible with version Joomla: Joomla! 2.5, Joomla! 3.x

2INSTALLATION – Back to top

Prepare your module package

  • Firstly, you need to UNZIP file that you have downloaded. Please note that you should choose module package that are suitable with each Joomla version which you have just downloaded
  • Secondly, install main module (extracted mod_ file):
  • In your Administrator page, go to Extensions -> Extension Manager. In this page, click Browse, select module package.
  • Then click Upload & Install

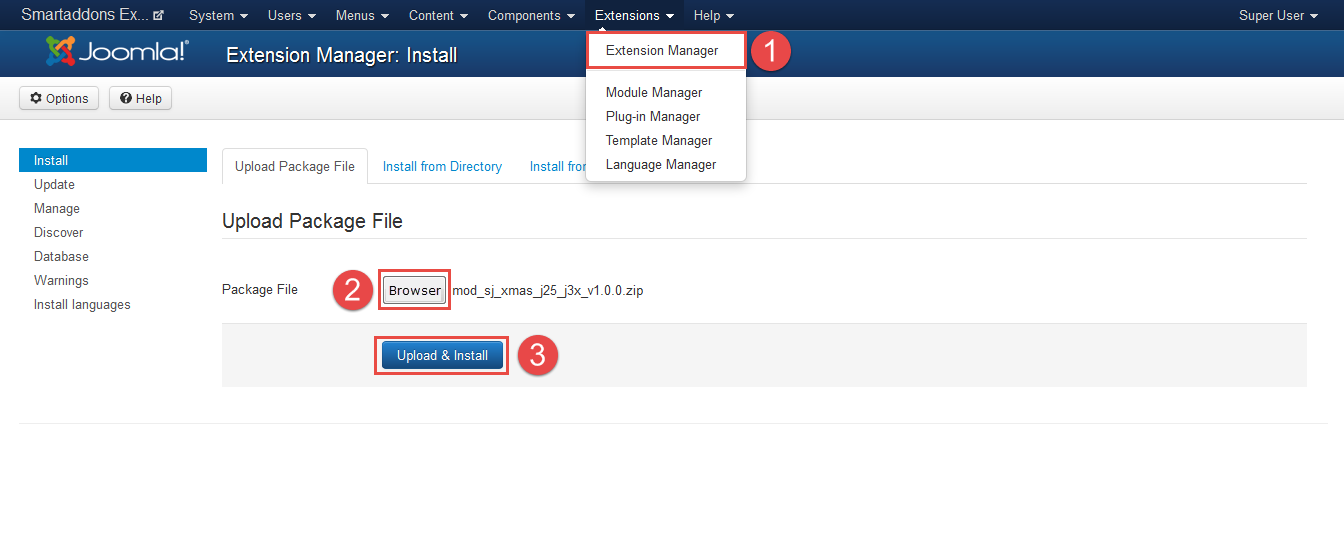
  • Please wait for module being installed, usually within several seconds.
  • Now go to Extensions -> Module Manager, click Select Type box and choose the module you have installed

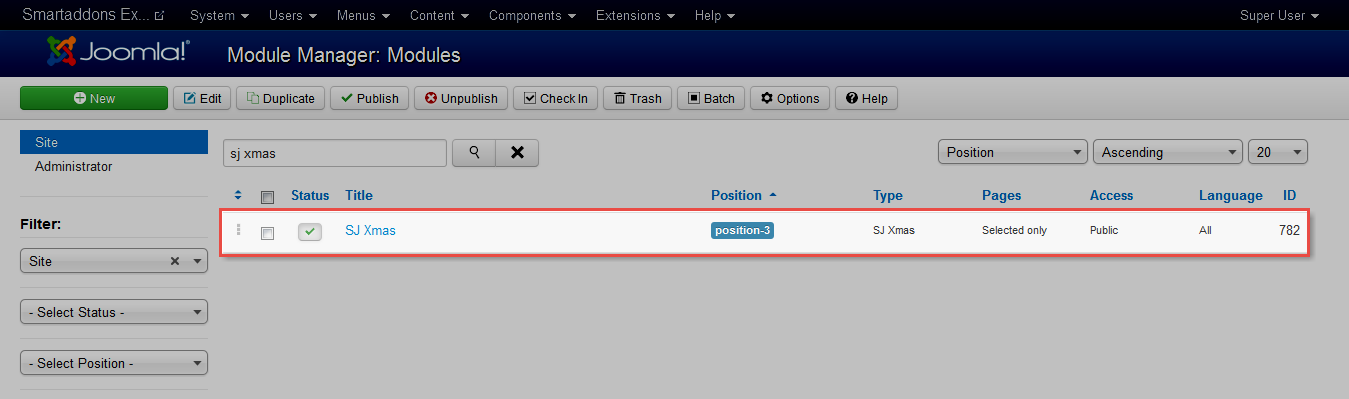
  • Prepare to perform Module Configuration

3MODULE CONFIGURATION – Back to top

3.1 Below is module layout

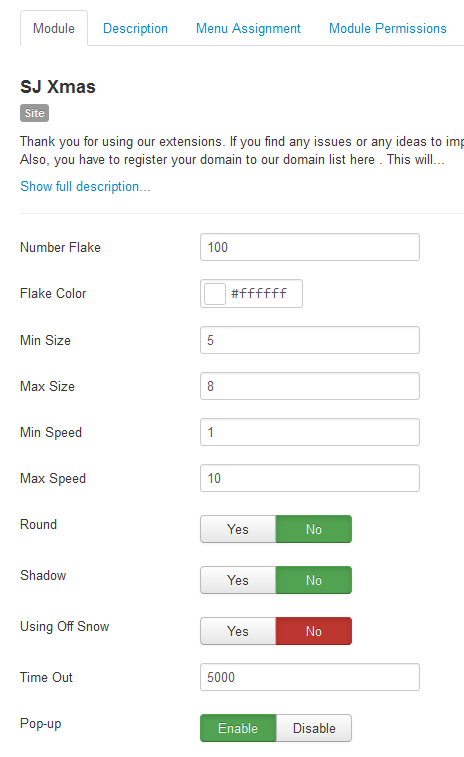
3.2 Module Configuration

Note:We used the images of module’s installation on Joomla 3.x to illustrate

After installing, go to Extensions -> Module Manager and find SJ Xmas to configure

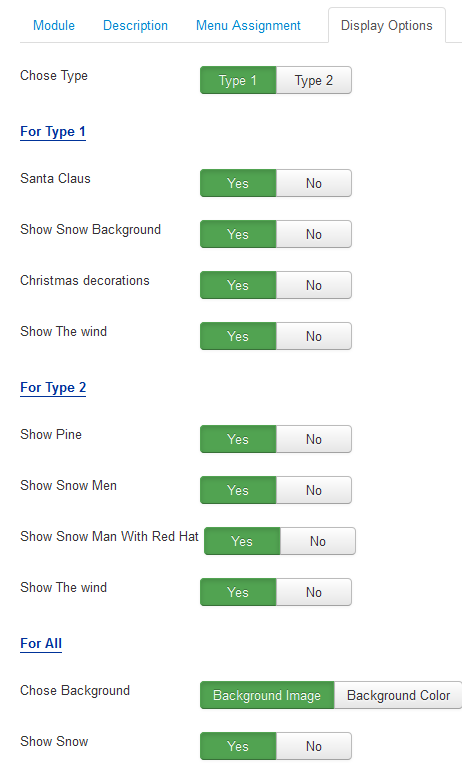
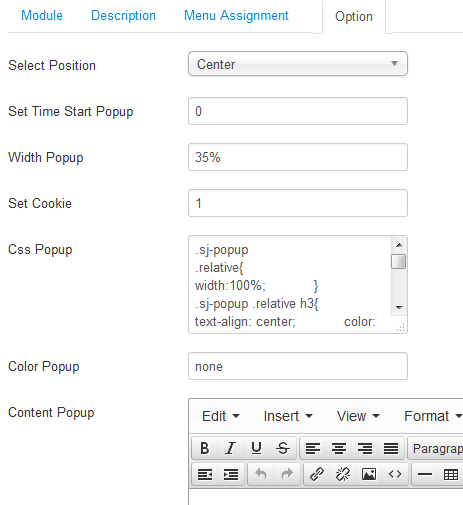
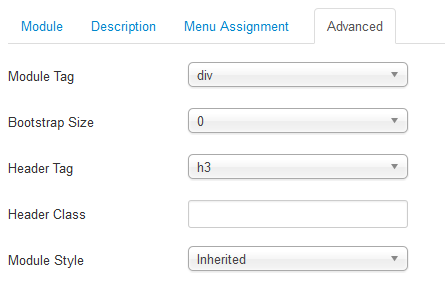
SJ Xmas module is configured in 4 main groups of parameters as following:

  • Module
  • Display Options
  • Option
  • Advanced

Let’s look at the parameters in detail:

Module

    • Number Flake – Allow to input number of snowflake run on screen.
    • Flake Color – Allow to change color of snowflake.
    • Min Size – Allow to input min size of snowflake, units are in pixels.
    • Max Size – Allow to input max size of snowflake, units are in pixels.
    • Min Speed – Allow to input min speed when run effect, units are in seconds.
    • Max Speed – Allow to input max speed when run effect, units are in seconds.
    • Round – Allow to makes the snowflakes rounded if the browser supports it.
    • Shadow – Allow to gives the snowflakes a shadow if the browser supports it.
    • Using Off Snow – Allow to enable/ disable the snow .
    • Time Out – Allow to enter the timeout value.
    • Pop-up – Allow to enable/ disable Pop-up.

Display Options

  • Chose Type – Allow to choose type: Style 1/ Style 2.
  • If you choose “For style 1”:
    • Santa Claus – Allow to show Snow Man with red hat.
    • Show Snow Background – Allow to Show Snow Background OR not.
    • Christmas decorations – Allow to show Christmas decorations OR not.
    • Show The wind – Allow to show Show The wind OR not.
  • If you choose “For style 2”:
    • Show Pine – Allow to show Show Pine Or Not.
    • Show Snow Men – Allow to show Snow Men OR not.
    • Show Snow Men With Red Hat – Allow to show Snow Men With Red Hat OR not.
    • Show The Wind – Allow to show the Wind OR not.
  • For All:
    • Chose Background – Allow to Chose Background: Background Image/ Background Color.
    • Show Snow – Allow to show Snow OR not.

Option

  • Select Position – Allow to Select Position: Center/ Bottom Left/…
  • Set Time Start Popup – Allow to Set Time Start Popup.
  • Width Popup – Allow to enter the Width Popup.
  • Set Cookie – Allow to Set Cookie.
  • Css Popup – Allow to enter the Css Popup.
  • Color Popup – Allow to enter Color Popup.
  • Content Popup – Allow to enter Content Popup.

Advanced

  • Module Tag – Allow to select the HTML Tag for module.
  • Bootstrap Size – Allow to set the number of columns that module will use.
  • Header Tag – Allow to select the HTML Tag for module header/title.
  • Header Class – Support the CSS Class for module header/title.
  • Module Style – Select module style.

4SUPPORT – Back to top

Thank you so much for purchasing this plugin. If you have any questions that are beyond the scope of this help file, please send us via: Submit a Ticket

Thanks so much!