This guide will help you How to install Quickstart package for Joomla v3.x.
Quickstart package is a full website package that includes: templates, extensions, database, images … and once you install the quickstart successfully, you will have a complete website that is exactly same as our Demo.
For the purposes of this article, we will instruct you how to install the quickstart for Joomla v3.x on our servers
With Joomla 3.x Quickstart Installation has only main 3 steps: Configuration, Database, Overview.
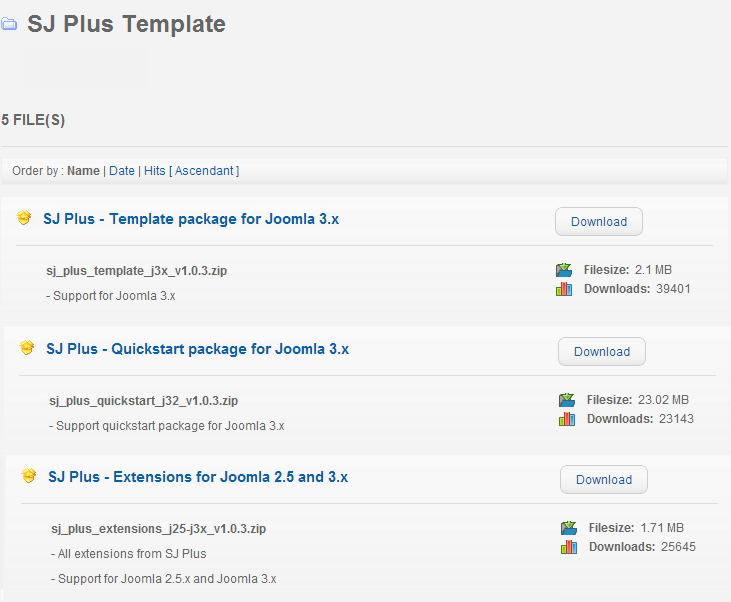
- Firstly, navigate to Menu Joomla > Download > Joomla Templates Club > Template name. All packages will appear as below:
Before installing the Quickstart package, we recommend you back up your site first. You click to learn how to back up a Joomla site. The following steps will guide to install a quickstart package of SmartAddons Joomla Template.
STEP 1: Upload folder quickstart
- If you are using SSH, simply upload your zip file (via FTP) and then 'unzip' the file. If you are using FTP, unzip the file on your computer and then upload those files as below. Though some web hosts have a different structure, in MOST cases, the folder that is used for uploading will be called "public_html." This will take a while to upload all those files and folders. Please keep your patience.
- If you install the quickstart in your localhost, copy the extracted folder to: …\wamp\www (if you are using WAMP) and …\xampp\htdocs (if you are using XAMPP)


STEP 2: Beginning of installation procedure
After uploading is completed, open the browser and type your URL in the address bar. You will see initial Joomla install screen:
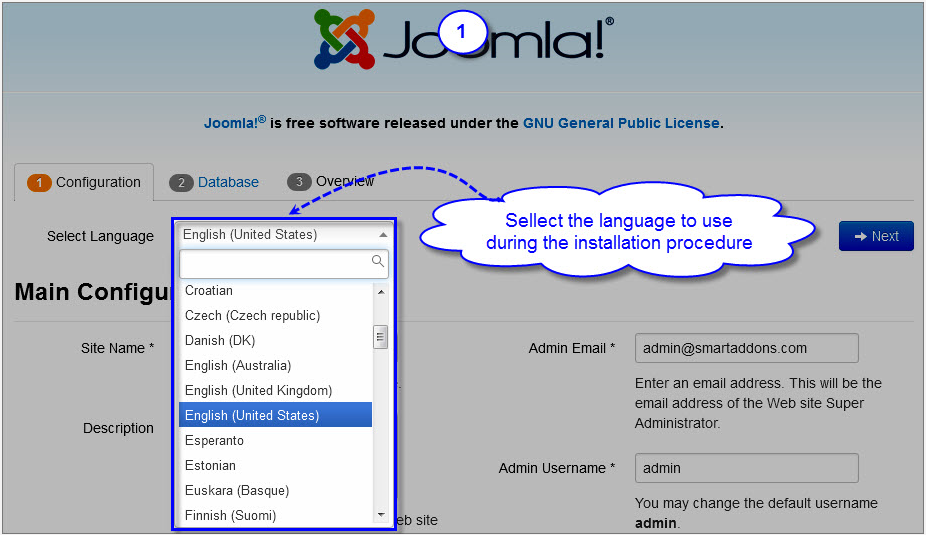
SELECT LANGUAGE
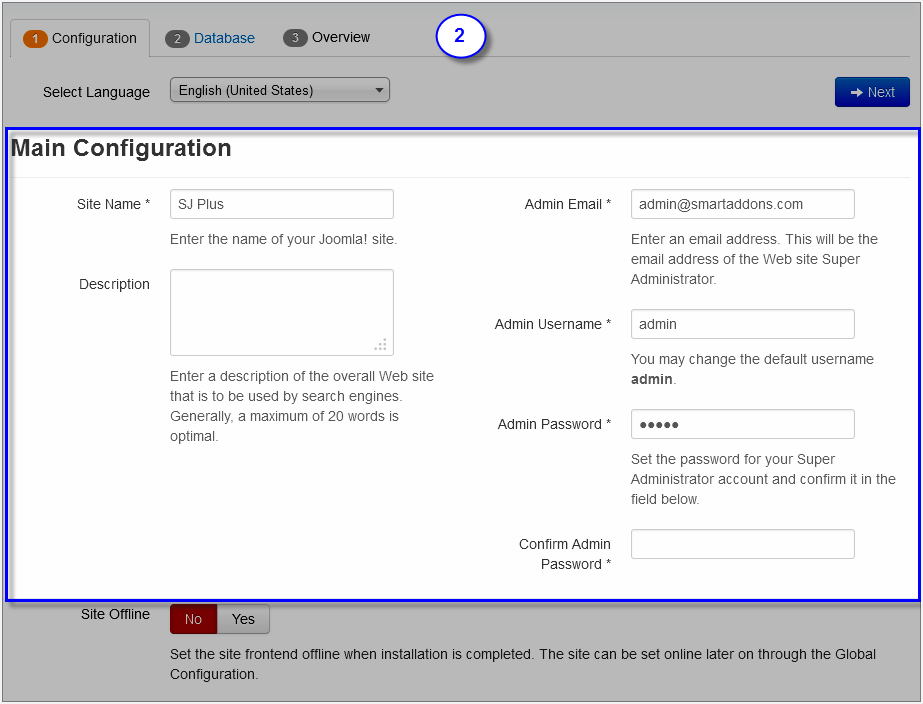
Enter the required information of your site: sitename, email, admin, username and password
STEP 3: Configure Database
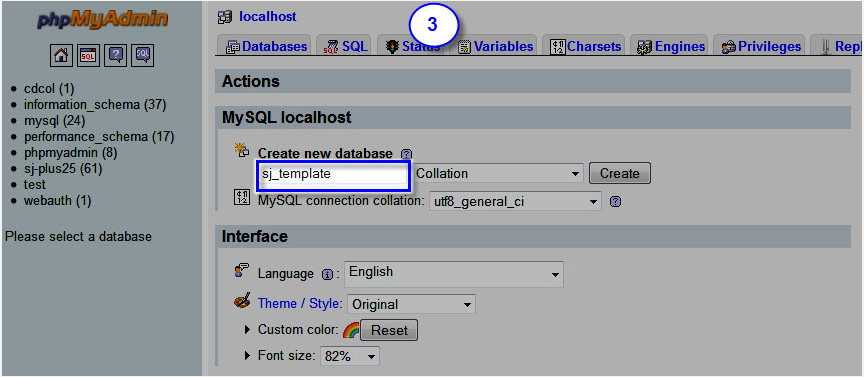
Create Database: Following guide is used for creating database on the localhost. Go to your phpmyadmin (http://localhost/phpmyadmin/) then type of desired database name. You should refer document for creating database on Cpanel.
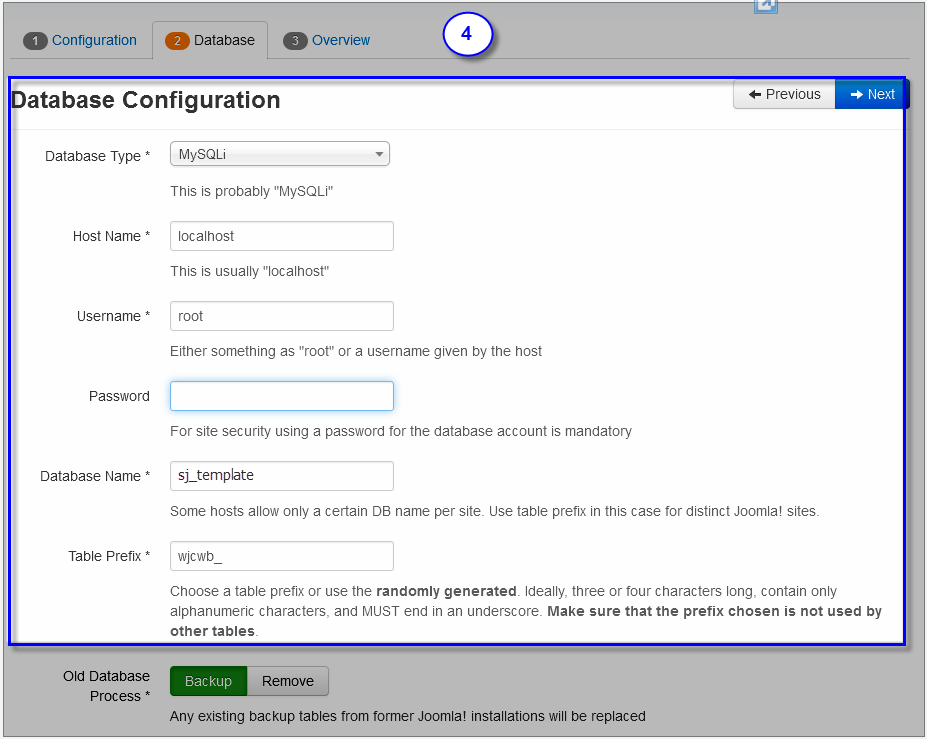
Database Installation: After the step 2, Click Next and go to this step. You will need to fill database name, username and password in here.
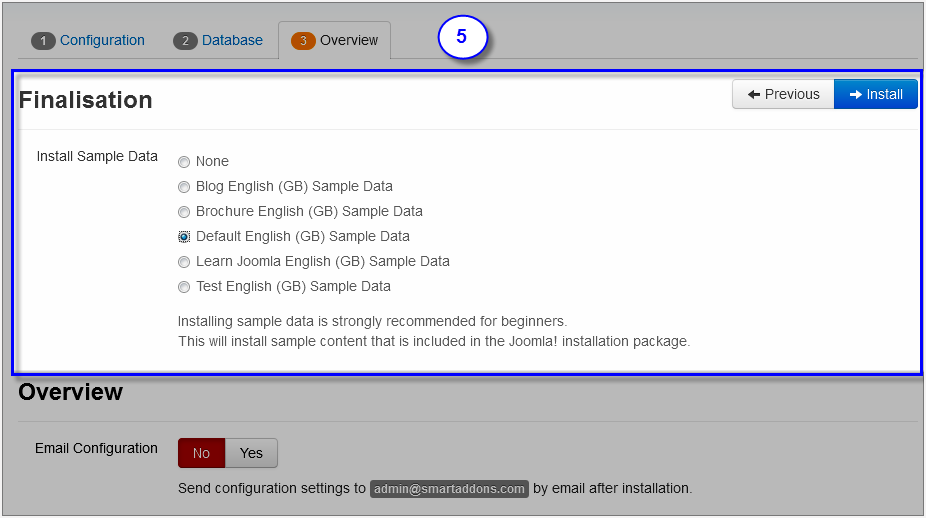
STEP 4: Install Sample Data
If you install sample data, you will have a site like our demo. If you select default sample data, you will get a fresh Joomla site.
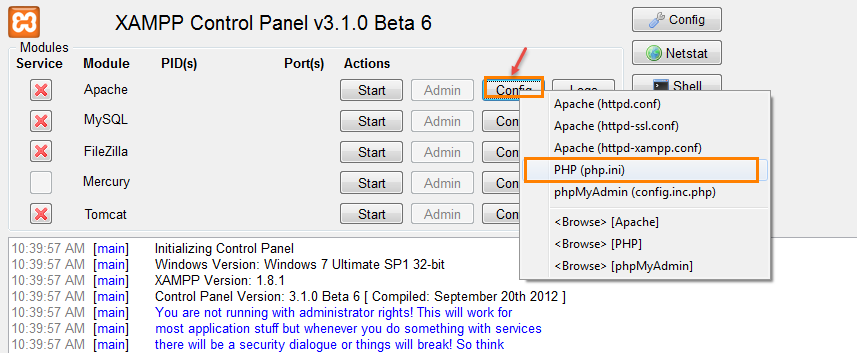
After clicking “install” button, you may get an error or go back to step4: Install Sample Data. You do the following steps:
- Step1: Please go to your Xampp >> Click “Config” button >> Open file “PHP.ini””
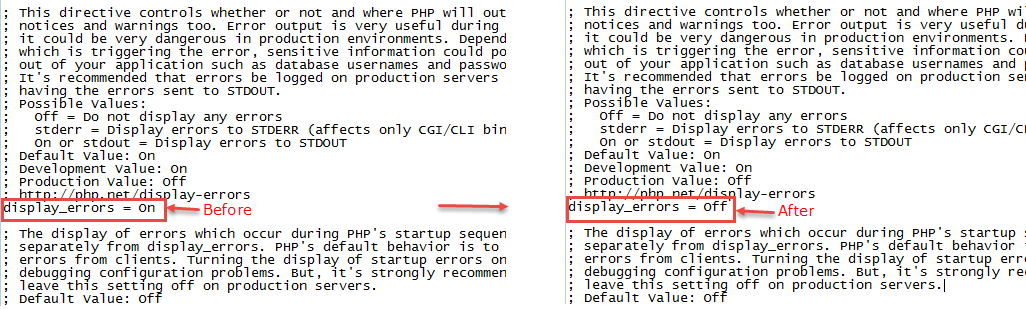
- Step2: Find the line: “Display_errors=On” –> “Display_errors=Off”
- Step3: Restart your Xampp and install your site
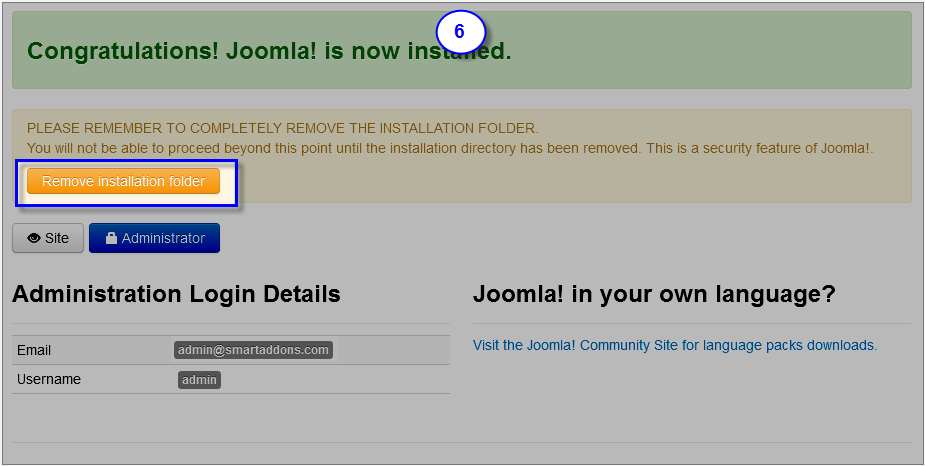
STEP 5: Remove or Rename the Installation folder:
The final step is removing or renaming the Installation folder
Once you have done that you can navigate to the frontend of your site and see the template set up exactly the same way as the demo site. You are now free to edit, change and add to the site to personalize it and start to market your Joomla web presence. Good Luck!
3SUPPORT – Back to top
Thank you so much for reading. If you have any questions that are beyond the scope of this help file, please send us via: Submit a Ticket
Thanks so much!
