In this article, we will guide you How to add new language in OpenCart 2.x system.
Step1: Download the language pack you need for your site.
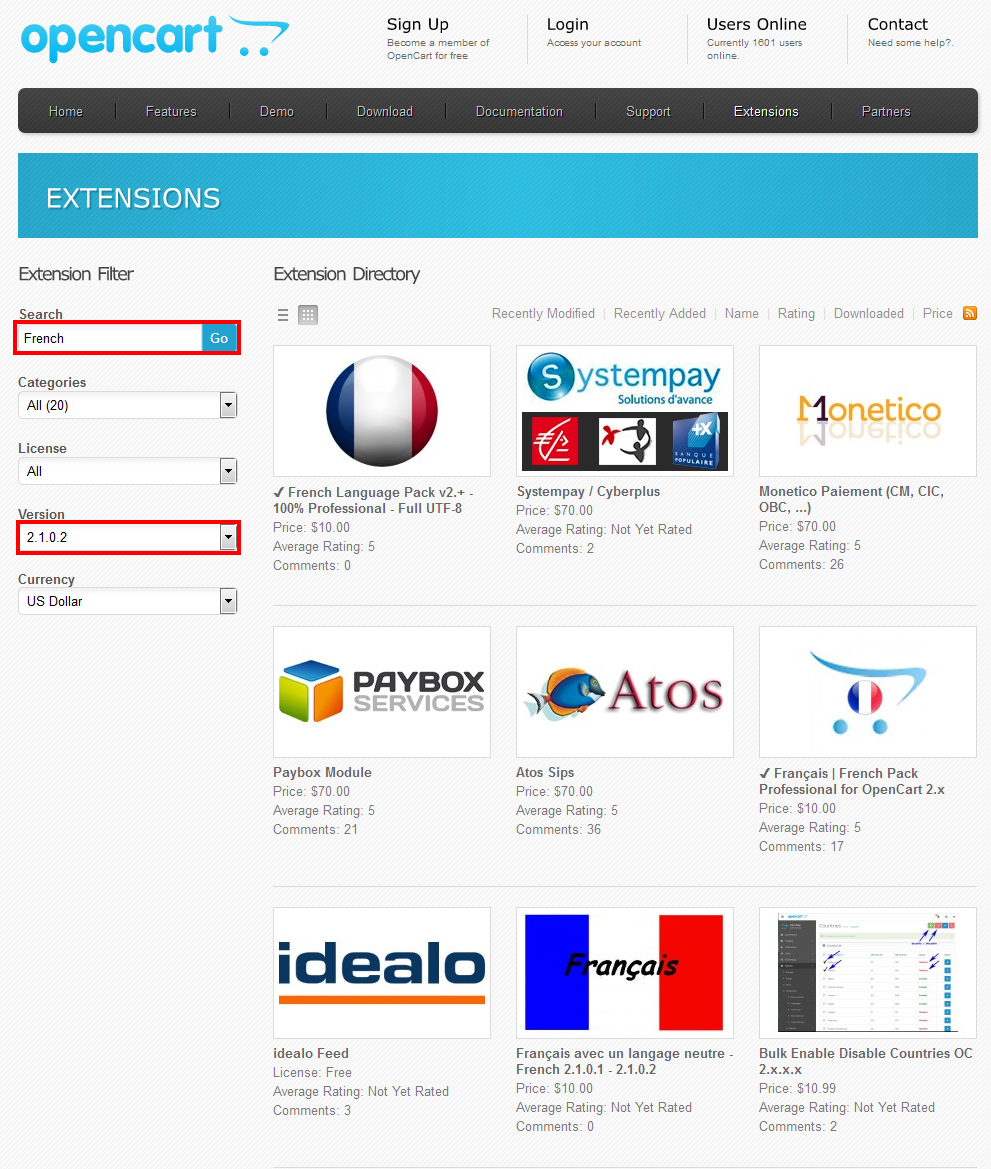
- That language pack can be downloaded through the Extension Directory .
- You can use the Extension Filter for the Quick Search on the page. Make sure to choose the language extensions that are compatible with your existing template (in our case this is OpenCart 2.x)
Step2: Extract the archive file.
- You need extract the archive file of the language pack you have downloaded into your PC
Step3: Upload the admin and catalog folders.
- You need upload the admin and catalog folders from the extracted language pack archive to the main OpenCart folder on your hosting account.
Step4: Log into your OpenCart admin panel
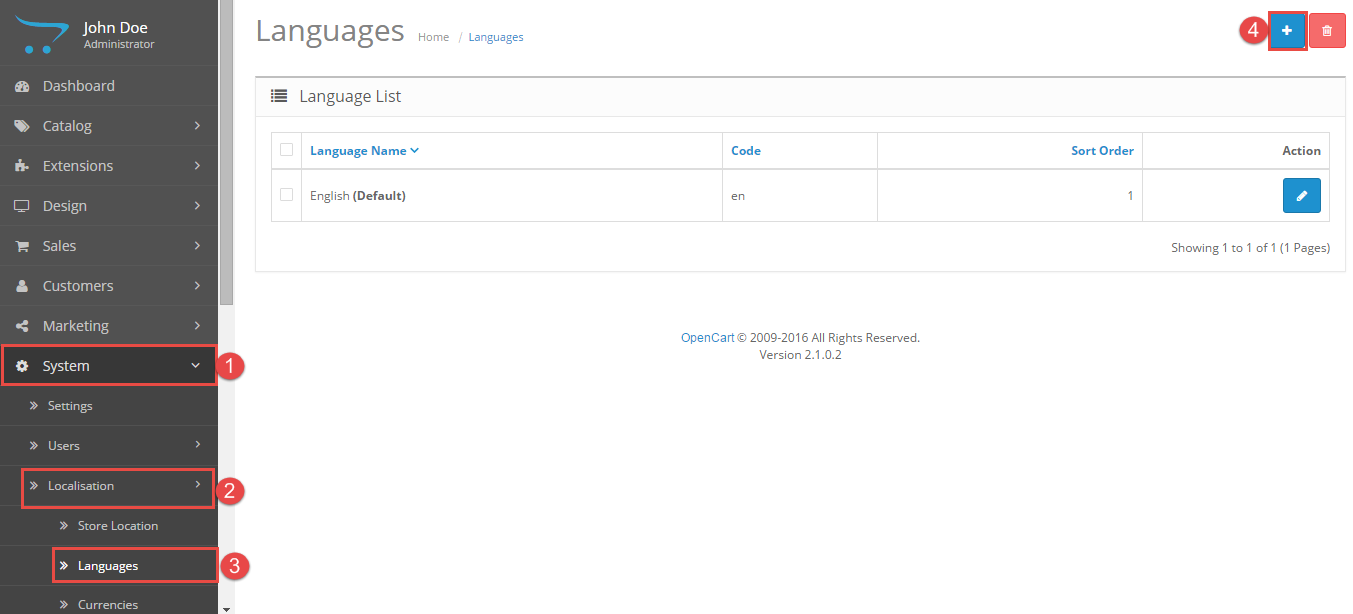
- You need Log into your OpenCart admin panel with your admin credentials, navigate to System -> Localizations -> Languages and click Add New button.
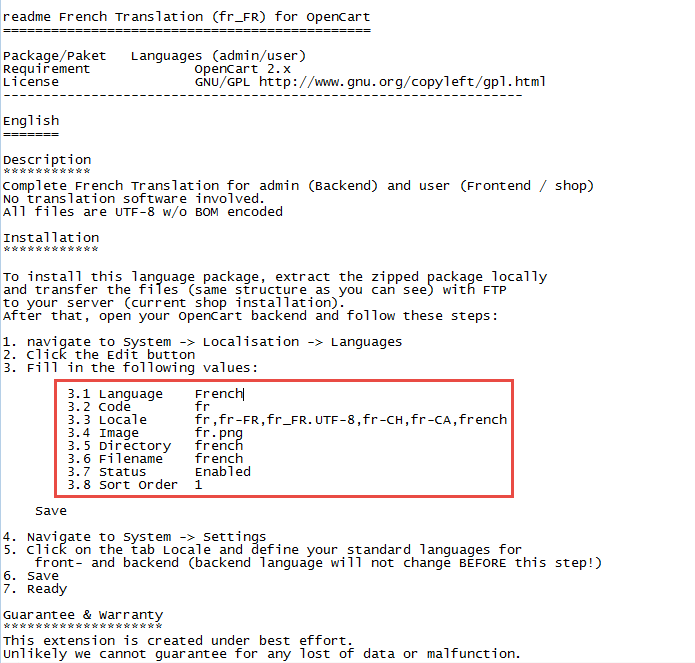
- In order to get all language pack info for filling the fields in System -> Localizations ->Languages -> Add New, please check the Documentation tab on the language package download page or check the ReadMe text file included into the language pack archive you have downloaded
- Click the Save button at the top right. The new language pack is now installed.
Step5: Change the default language
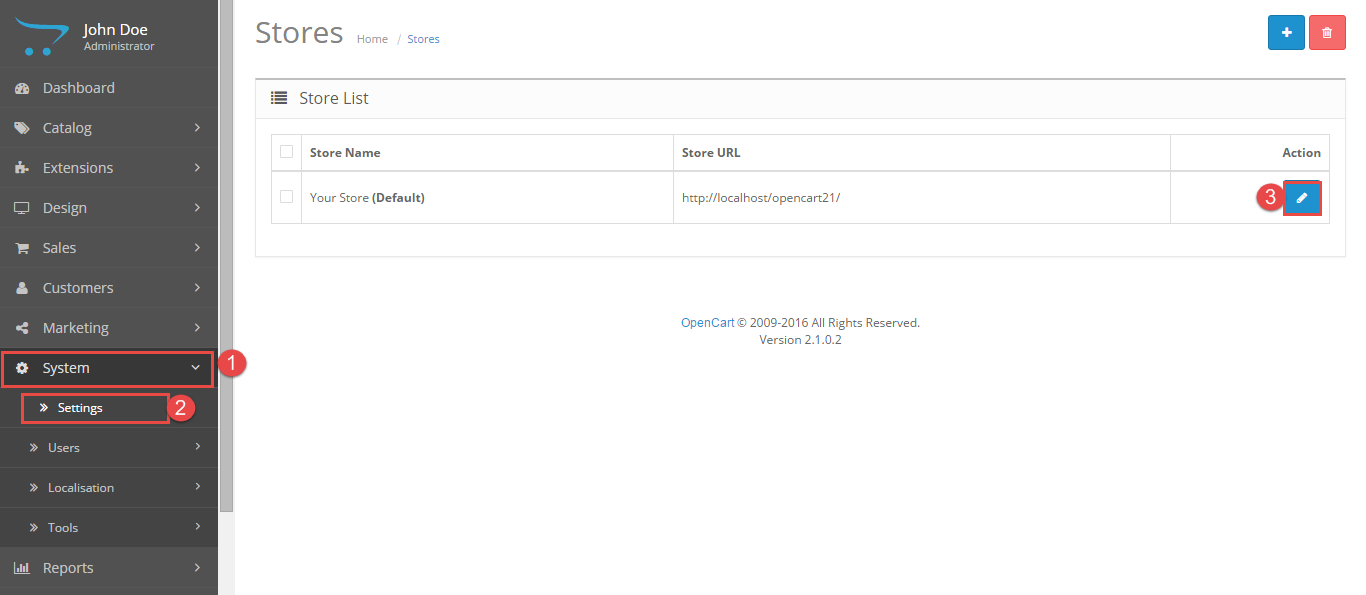
- To change the default language for your store front-end and back-end, navigate to System -> Settings –> Edit in your admin.
- Select the Local tab >> Select the new language you have installed.
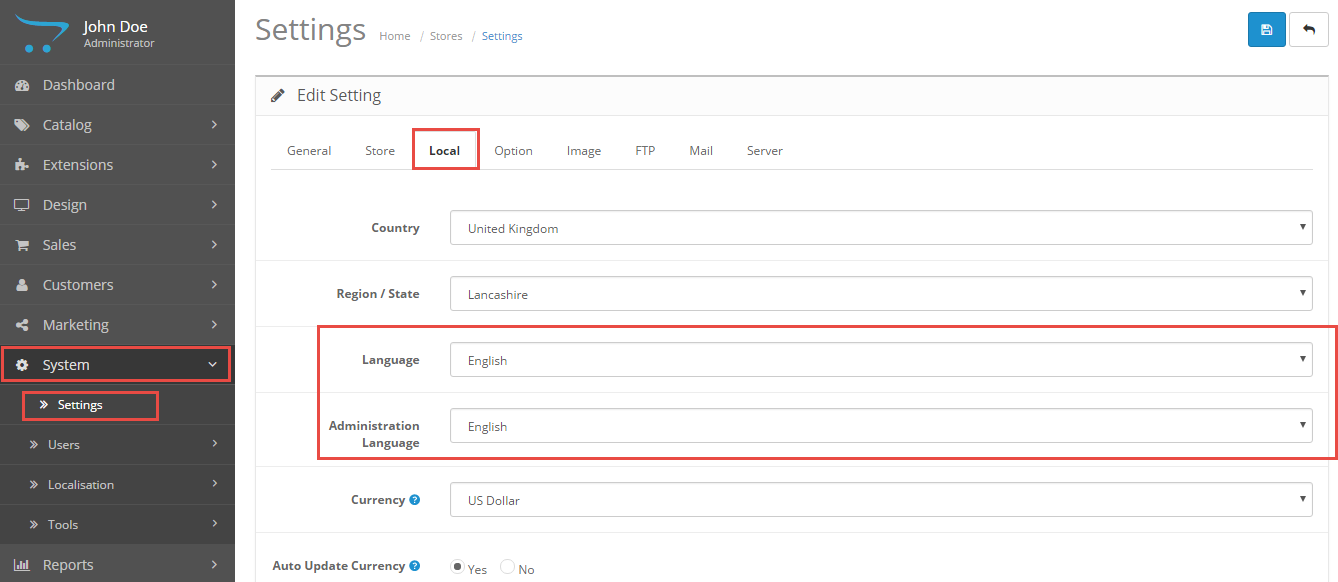
Finally, click the Save button at the top right.
