SO Social Login

This guide will help you install SO Social Login step by step.
 

1REQUIREMENT – Back to top

At the basic level, this module will require the following conditions:

  • Compatible with version OpenCart: OpenCart 2.x
  • Have responsive

2INSTALLATION – Back to top

2.1 FTP Configuration

There are two ways to configure FTP

Option 1:

Step 1: Please go to System >> Settings >> Your Store >> Click “Edit” button

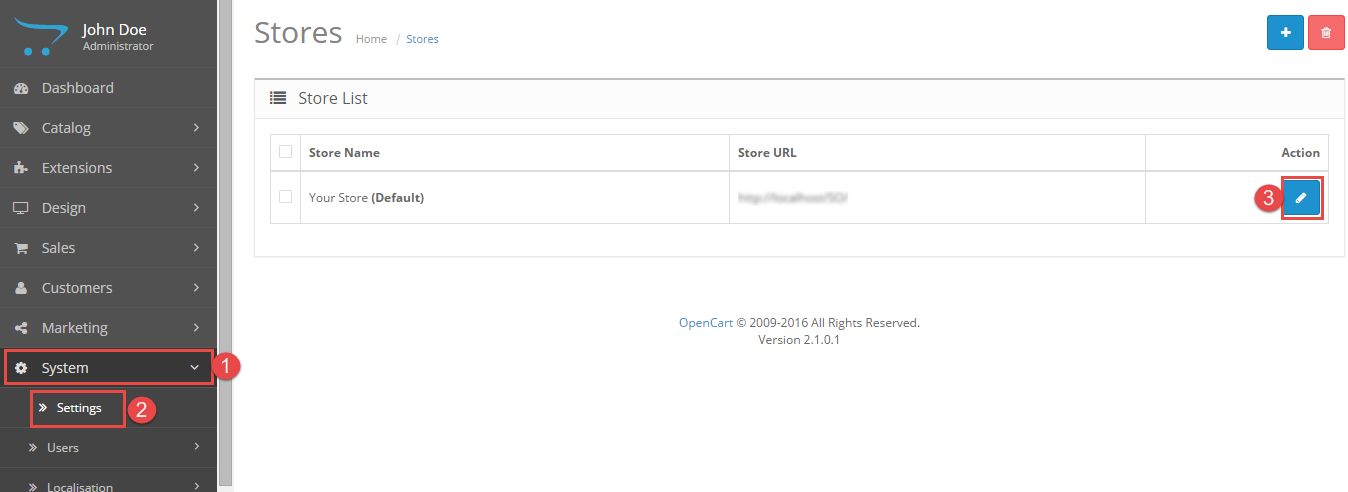
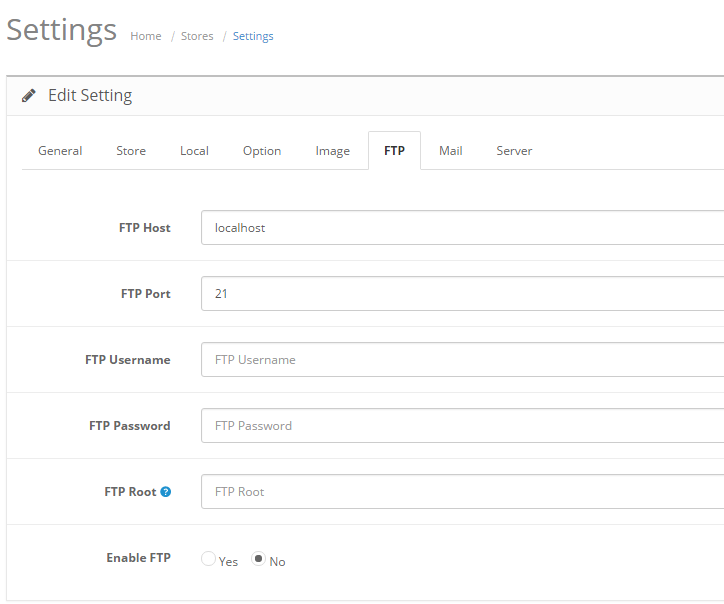
Step 2: Click FTP tab and enter the FTP username & password…

Option 2:

Step 1: Please go Here to download file XML of “Quick Fix”

Step 2: Please go to Extensions >> Extension Installer >> Click Upload and select file XML which you just dowloaded

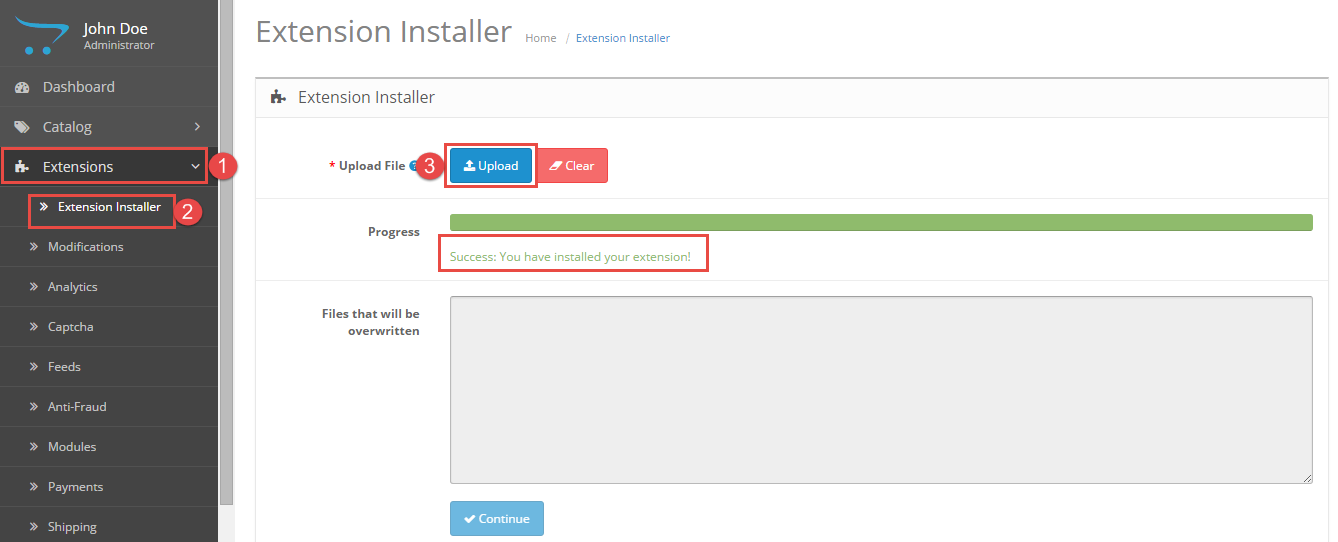
Then you should see the message Success

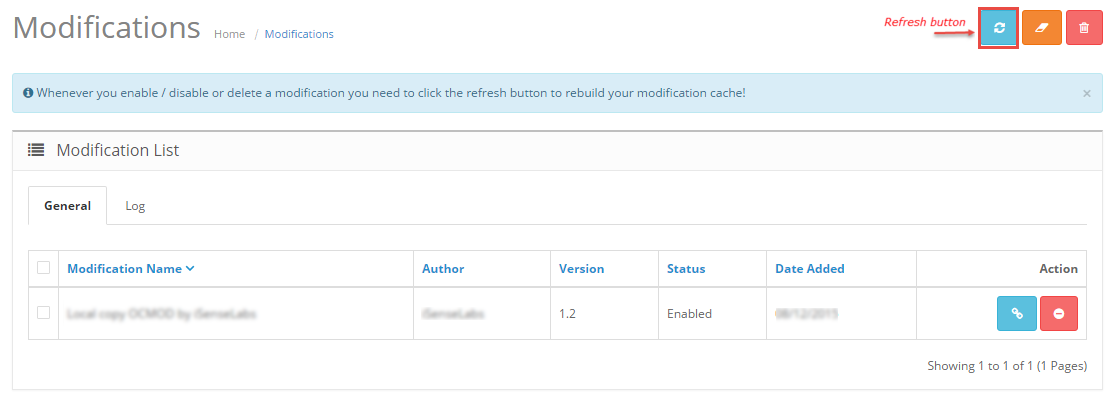
Step 3: Go to Extension >> Modifications >> Click “Refresh” button

2.2 Module Installation

Prepare your module package

  • In your Administrator page, go to Extensions >> Extension Installer >> Click Upload and select file so-social-login.ocmod.zip.

    Then You should see the message Success

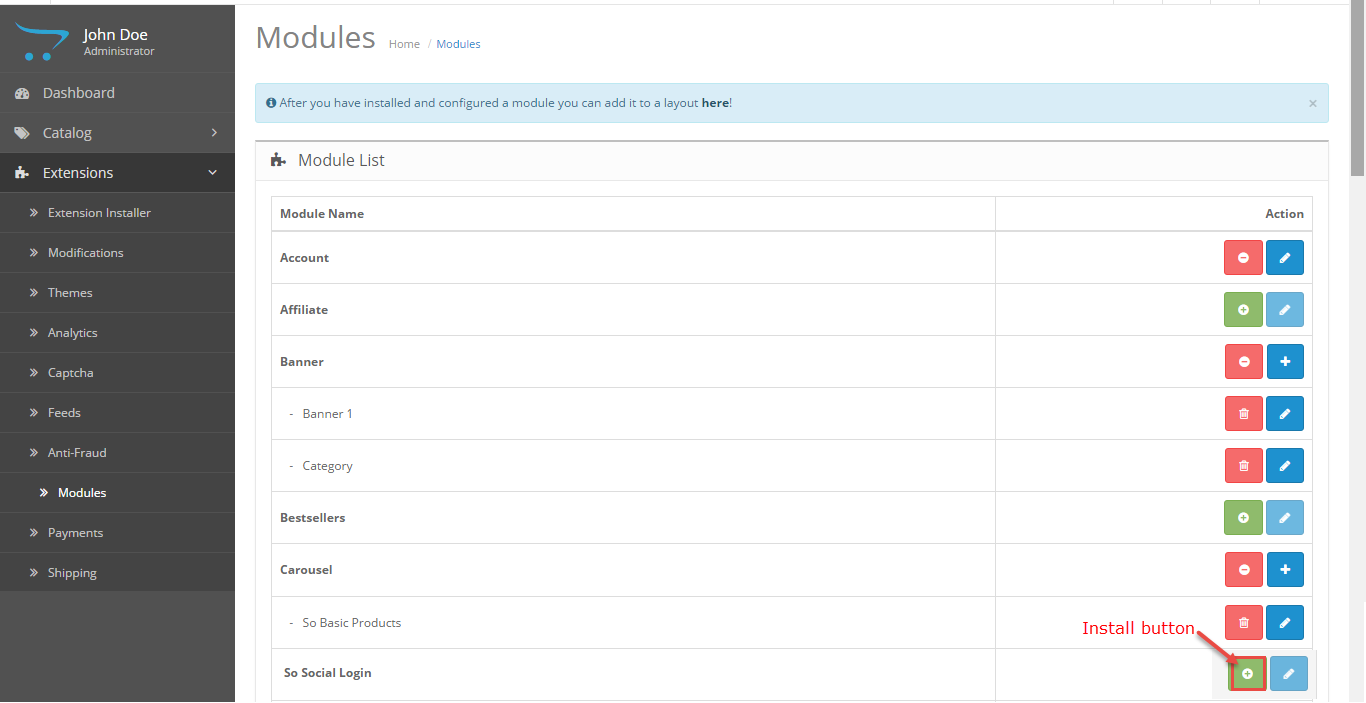
  • In this page, choose module “SO Social Login”, click Install button

  • Please wait for module being installed, usually within several seconds
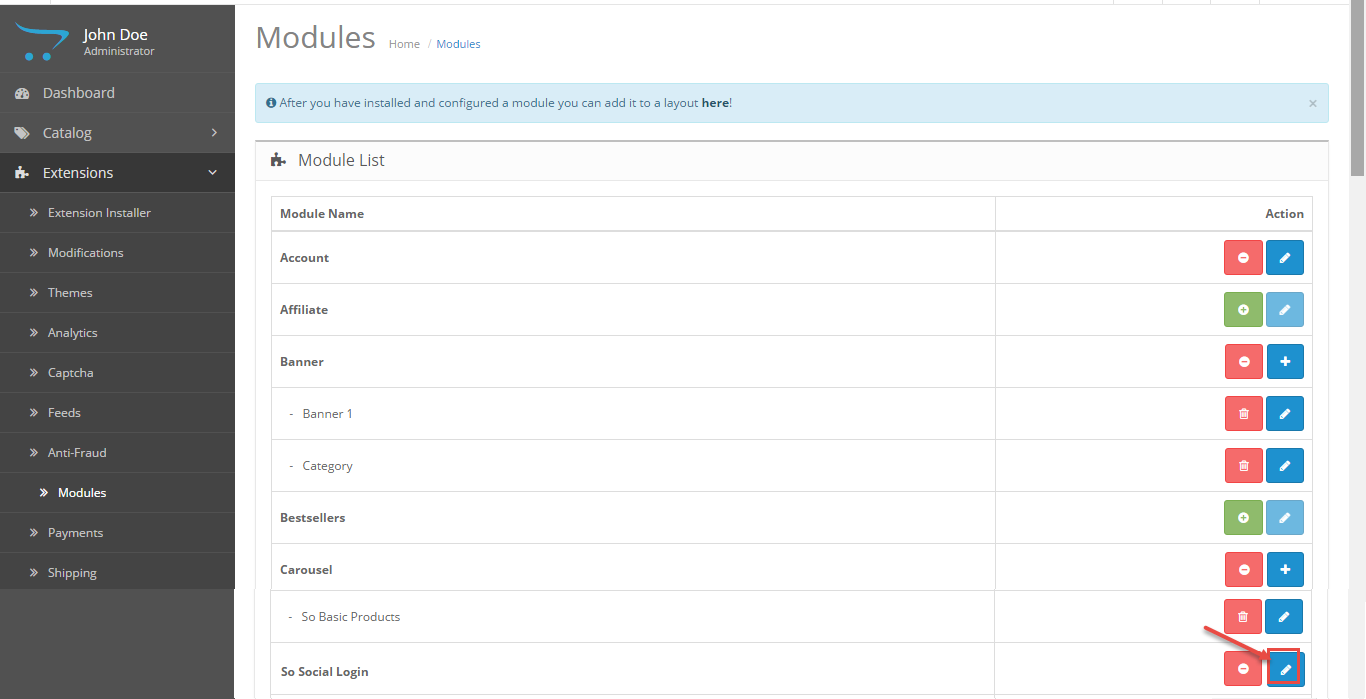
  • To Create the name of this module, please go to Extensions >> Modules >> Choose module “SO Social Login” >> Click “Edit” button

  •  

  • Enter the name of the Module and fill the fields in the tabs. Then click “Save” button
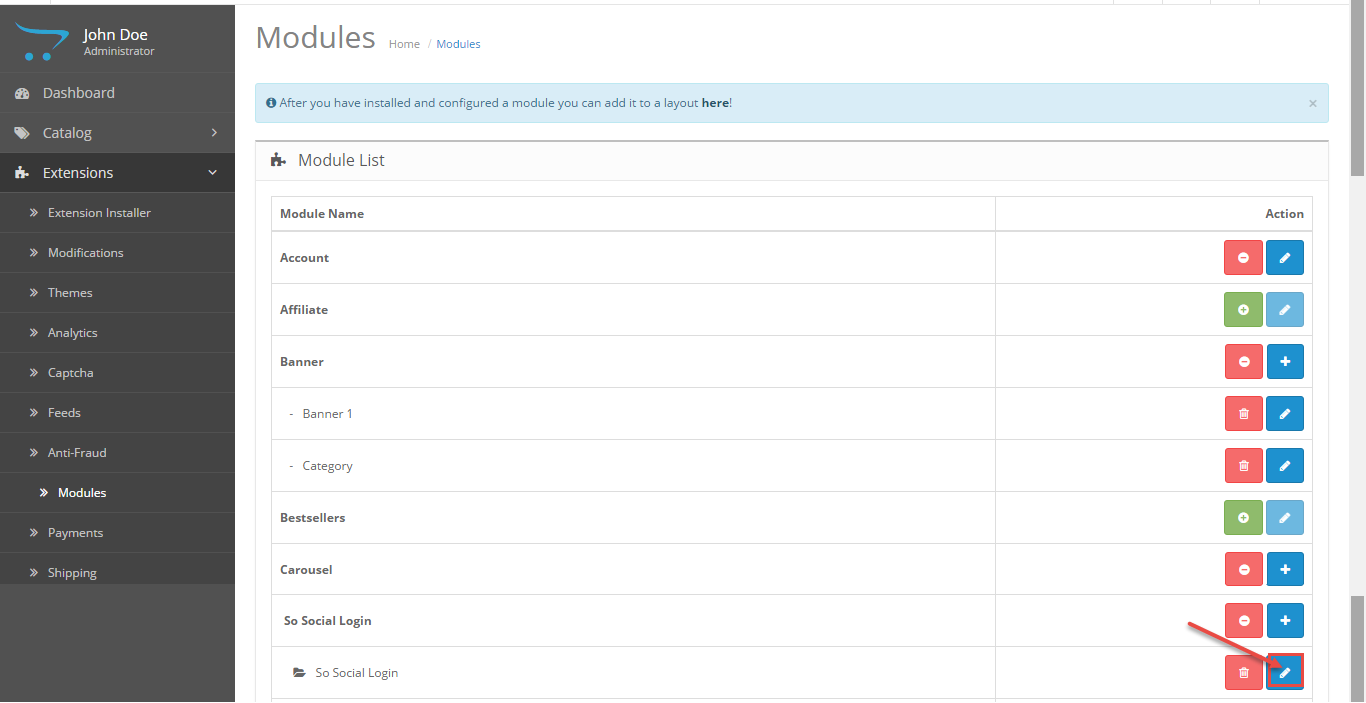
  • To Edit the module you have created, please go to Extensions >> Modules >> Choose the module you have Created >> Click “Edit” button
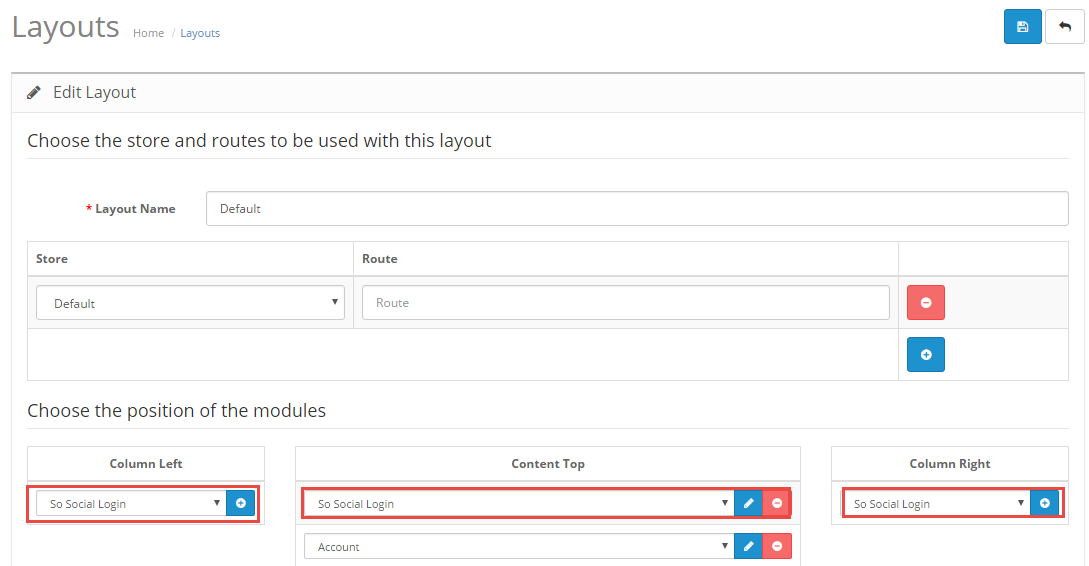
  • After you have installed and configured a module, you can add it to a layout: Please go to Design >> Layouts >> Choose the layout you want to display
  • For Example: we choose “Home” layout

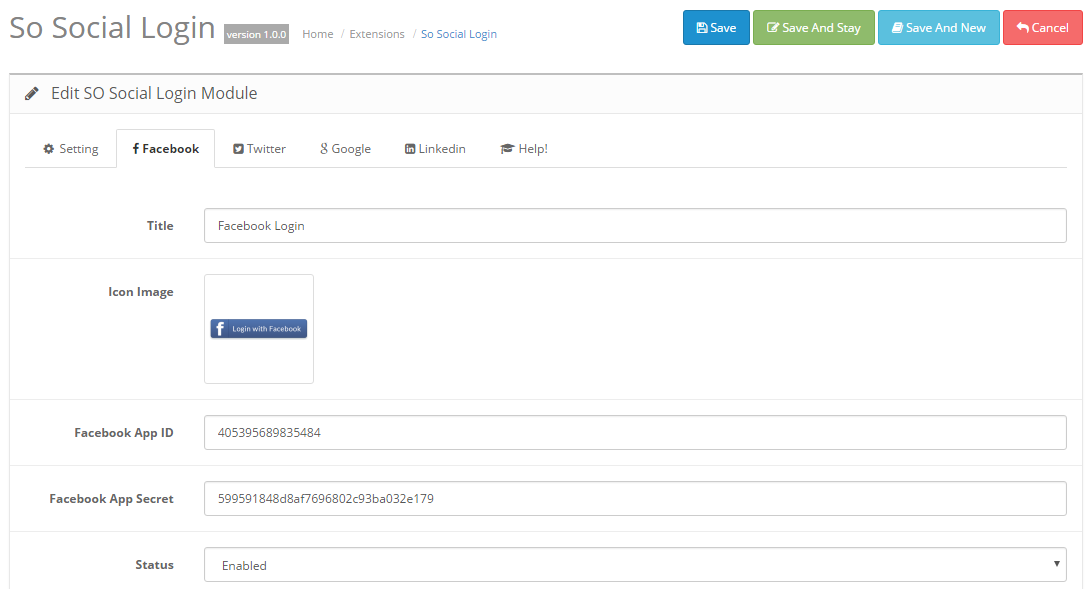
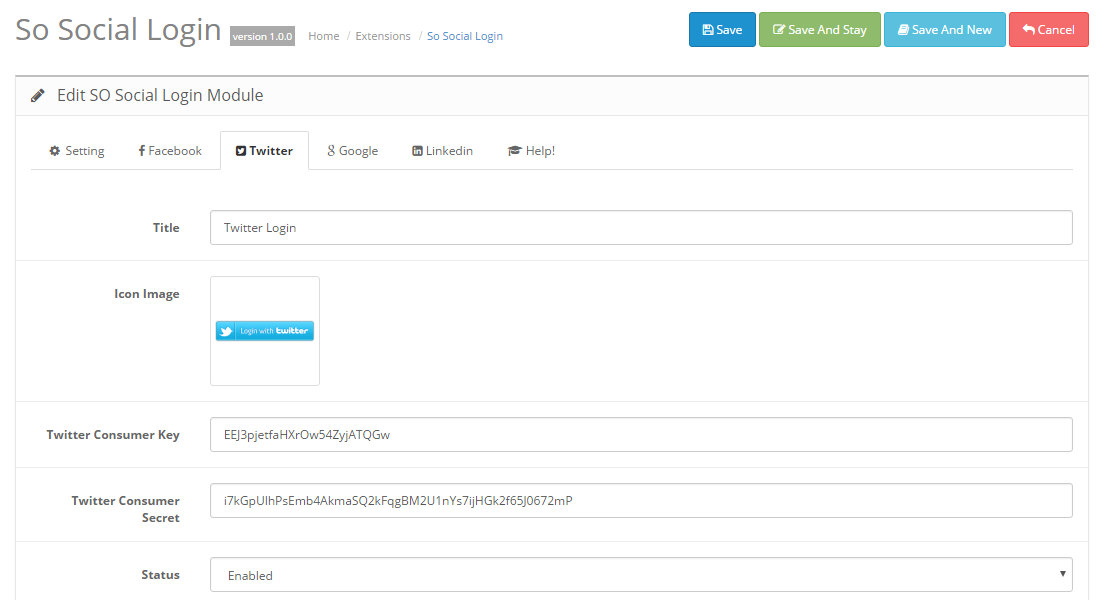
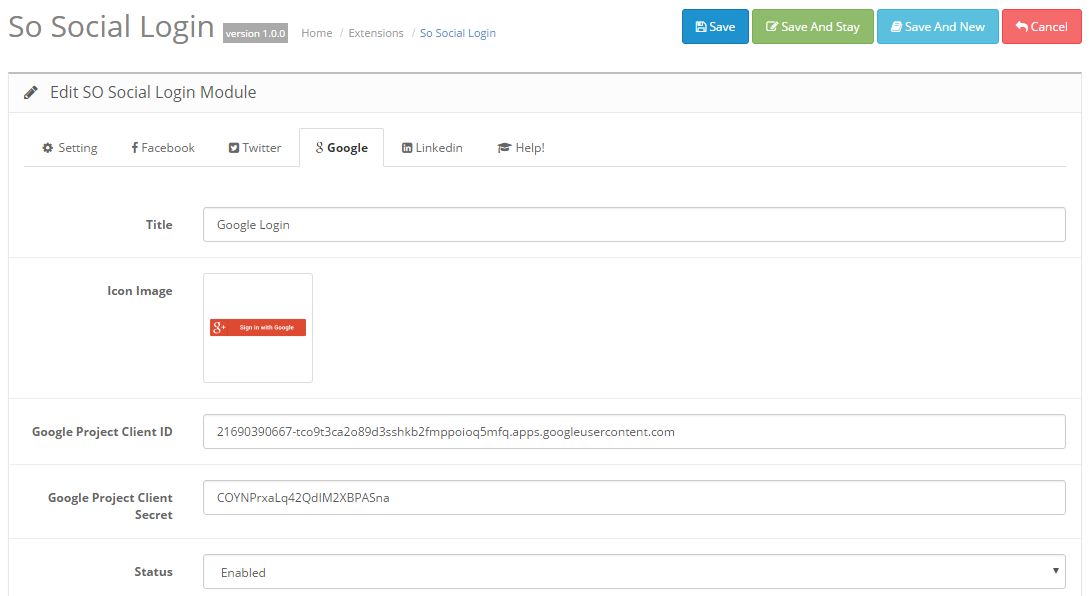
3MODULE CONFIGURATION – Back to top
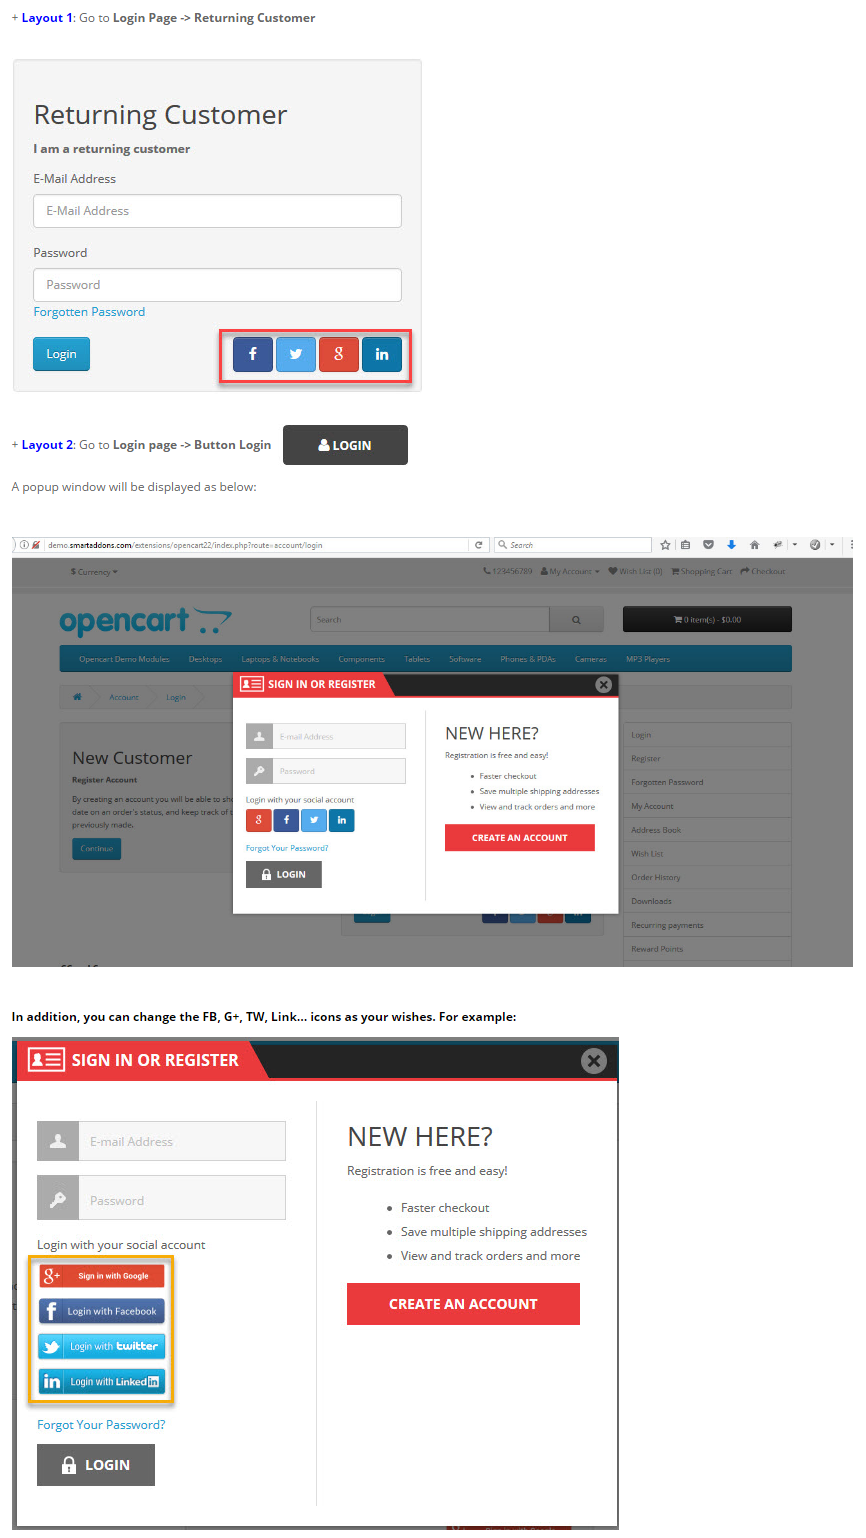
3.1 Module Demo

3.2 Module Configuration

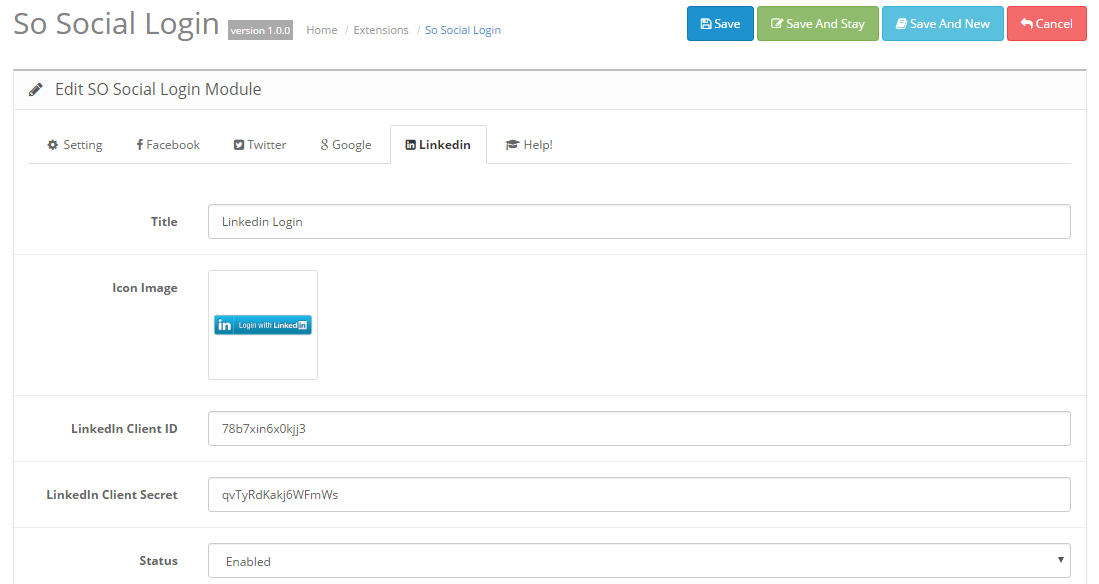
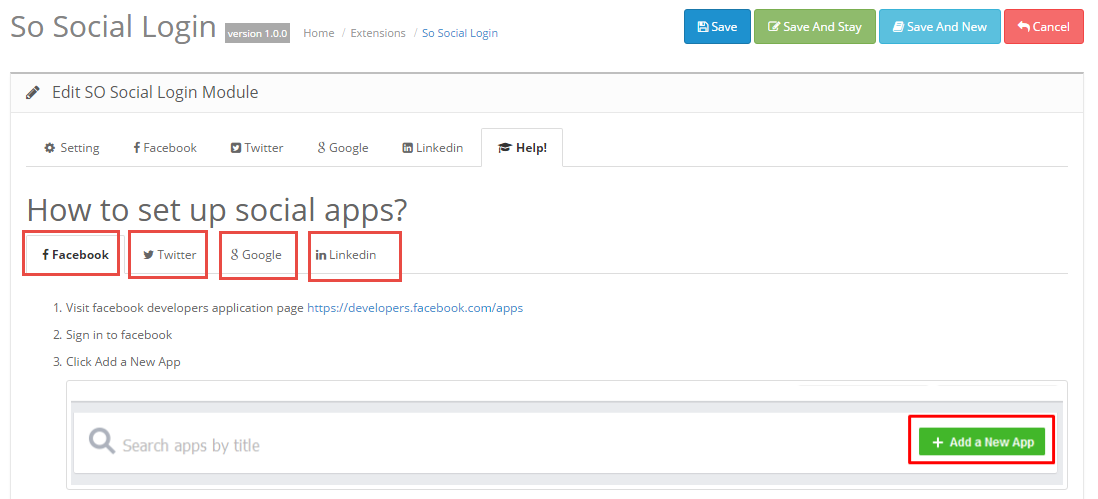
SO Social Login is configured in 5 groups of parameters as follows:

  • Setting
  • Facebook
  • Twitter
  • LinkedIn
  • Help

Setting.

  • Module Name  – Allow you to enter the name of the module
  • Icon Size – Allow you to enter the Icon size (only use for Button Social is Image)
  • Button Social – Allow you to choose Button Social: Icons/ image
  • Status – Allow you to Enabled/ Disabled Status
  • Use Popup Login – Allow you to Enabled/ Disabled Popup Login

Facebook.

  • Title  – Allow you to enter the title of the icon – Facebook
  • Icon Image  – Allow you to choose Icon Image from your PC
  • Facebook App ID – Please go to “Help” tab to read about Facebook App ID
  • Facebook App Secret – Please go to “Help” tab to read about Facebook App Secret
  • Status – Allow you to Enabled/ Disabled status

Twitter.

  • Title  – Allow you to enter the title of the icon – Facebook
  • Icon Image  – Allow you to choose Icon Image from your PC
  • Twitter Consumer Key – Please go to “Help” tab to read about Twitter Consumer Key
  • Twitter Consumer Secret – Please go to “Help” tab to read about Twitter Consumer Secret
  • Status – Allow you to Enabled/ Disabled status

Google.

  • Title  – Allow you to enter the title of the icon – Facebook
  • Icon Image  – Allow you to choose Icon Image from your PC
  • Google Project Client ID – Please go to “Help” tab to read about Google Project Client ID
  • Google Project Client Secret – Please go to “Help” tab to read about Google Project Client Secret
  • Status – Allow you to Enabled/ Disabled status

LinkedIn.

  • Title  – Allow you to enter the title of the icon – Facebook
  • Icon Image  – Allow you to choose Icon Image from your PC
  • LinkedIn Client ID – Please go to “Help” tab to read about LinkedIn Client ID
  • LinkedIn Client Secret – Please go to “Help” tab to read about LinkedIn Client Secret
  • Status – Allow you to Enabled/ Disabled status

Help.

  • Help tab contains information on Facebook, Twitter, Google, LinkedIn

4SUPPORT – Back to top

Thank you so much for purchasing this module. If you have any question that are beyond the scope of this help file, please send us via: Submit a Ticket

Thanks so much!