1SYSTEM REQUIREMENTS – Back to top
SO Megashop is compatible with Opencart 2.0.x. Please make sure your system meets the following requirements:
1.1 System Requirements
Software
- Software: PHP 5.2.4+ (5.4+ recommended)
- MySQL: 5.0.4+
Web Sever
- Apache: 2.x+
- Microsoft: IIS 7
- Nginx: 1.0 (1.1 recommended)
1.3 Browser Requirements
The requirements are the same with Opencart 2.0.x
- Firefox 4+
- IE (Internet Explorer) 9+
- Google Chrome 10+
- Opera 10+
- Safari 5+
1.4 Development Environment
The requirements are the same with Opencart 2.0.x
During the development process, Localhost is preferred. You can use the following servers on your PC to develop your site.
Windows
- WAMPSEVER
- XAMPP for Windows
Linux
- LAMP Bubdle
- XAMPP for Linux
Mac OS
- MAMP & MAMP Pro
- XAMPP for Mac OS
1.5 Note: You can read more document below
- Opencart Installation:
- OPencart Help
2INSTALLATION – Back to top
There are two ways to install a SO Theme:
- Install Quickstart: By using this package, you will set the template exactly as our Demo with sample data.
- Install Template : If you exist a opencart website you can install only template.
2.1 Install with Quickstart Package:
Step 1: Open your Browser and type : localhost/phpmyadmin or yourdomain/phpmyadmin
Step 2: Then create database
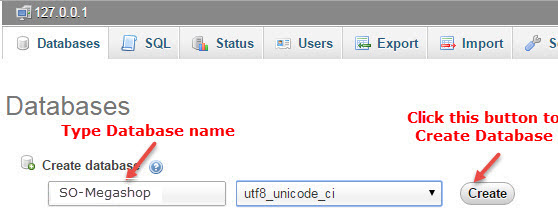
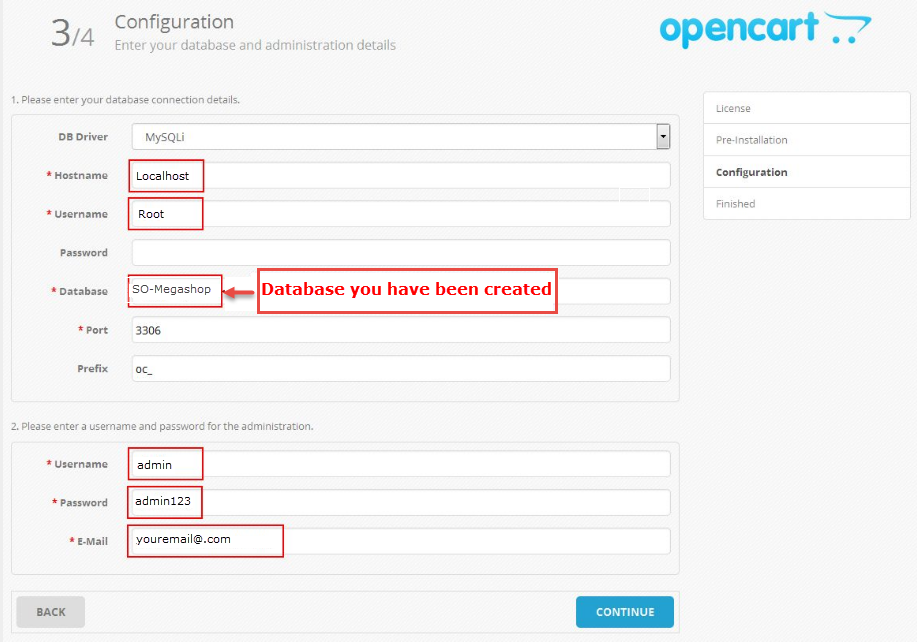
As an example, name of opencart is SO-Megashop: Https://Opencart/SO-Megashop/upload/install/index.php then click “install” button
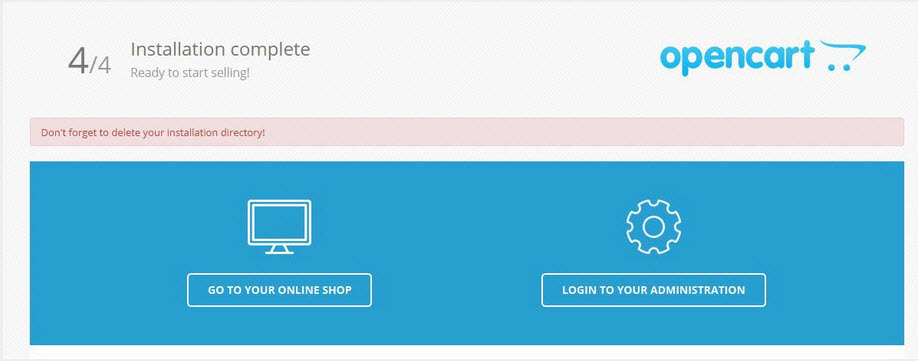
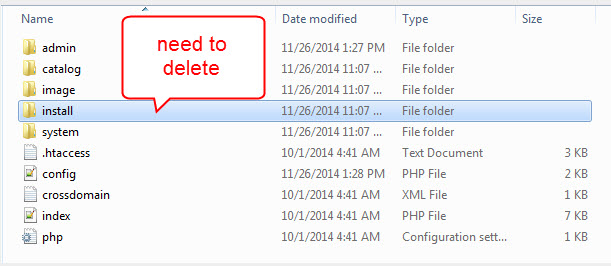
You need to delete install folder
Note:
After installing quickstart package and choosing Layout you want. To retrieve sample data for theme default, please go to Theme Control Panel >> Choose Sample Data >> Click “Install data” button

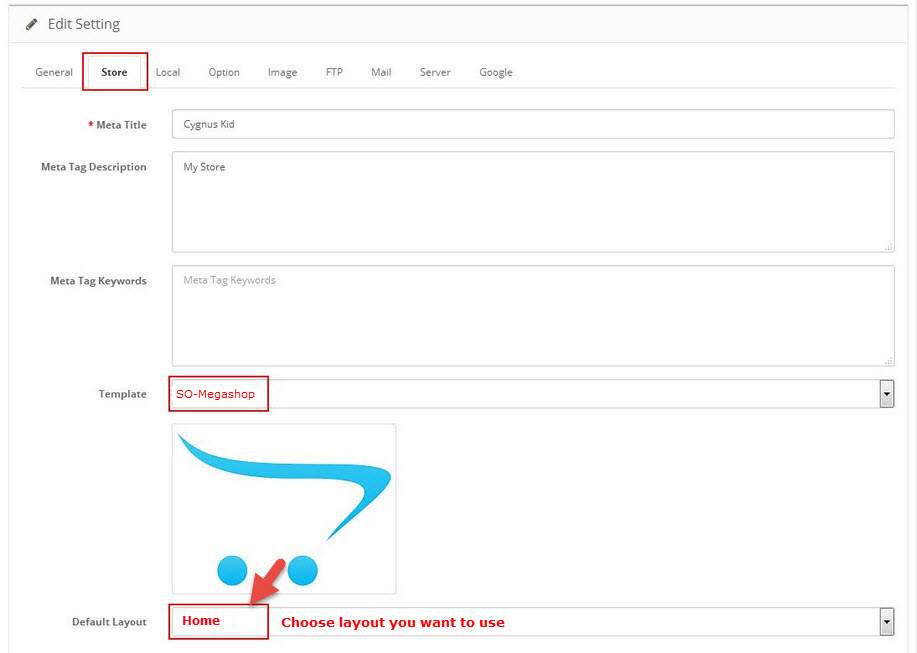
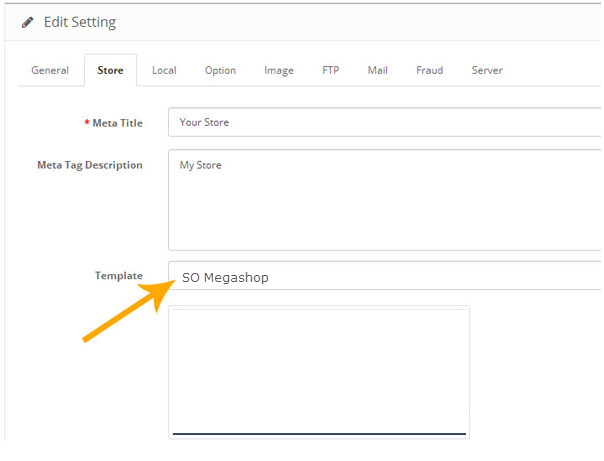
- Go to System -> Settings
- At tab Store Name , choose your default store, click Edit button
- Choose tab Store
2.2 Install Theme
You can download Opencart here.
You can install default Opencart the same as part 2.1 Install with Quickstart Package
There are two ways to install Theme
Option1: you to use the new Extension Installer featured in OpenCart 2.0
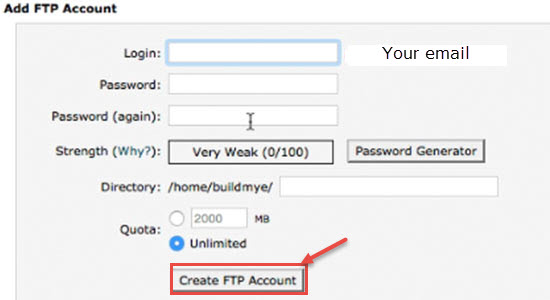
- Step 1 : Click FTP Accounts from your cPanel
- Step 2: Create username and password
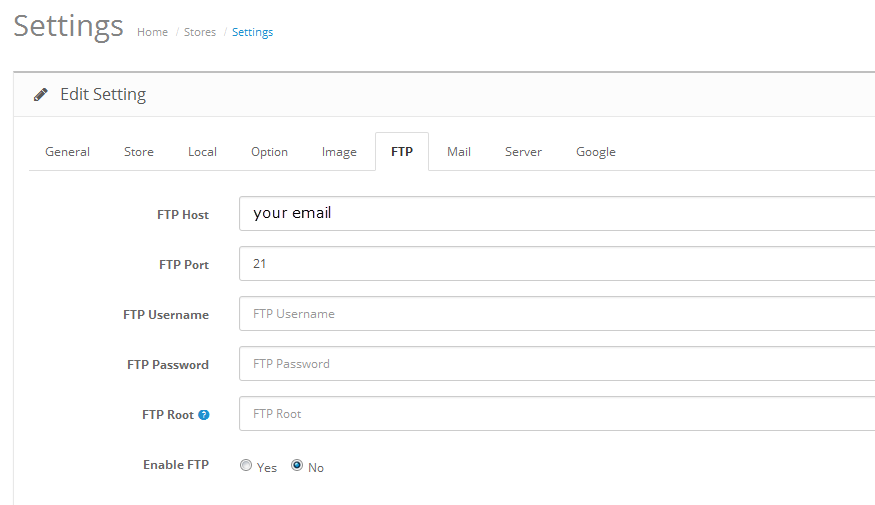
- Step 3: Enable FTP. please go to System >> Settings >> Click Edit next to your store >> Click FTP tab and enter the FTP username & password, which you just created from the cPanel
- Step 4: Go to Extensions > Extension Installer > Click Upload and select the “so_megashop_template.ocmod.zip” file to upload. Then You should see the message Success: You have installed your extension!
- Step 5: You run the vqmod on your Frontend. Please type the following link: http://www.yoursite.com/vqmod/install. Then you should see the message Success: You have installes your Vqmod !. Refresh your site
- Step 6: Go to System > Settings > Edit (your store)
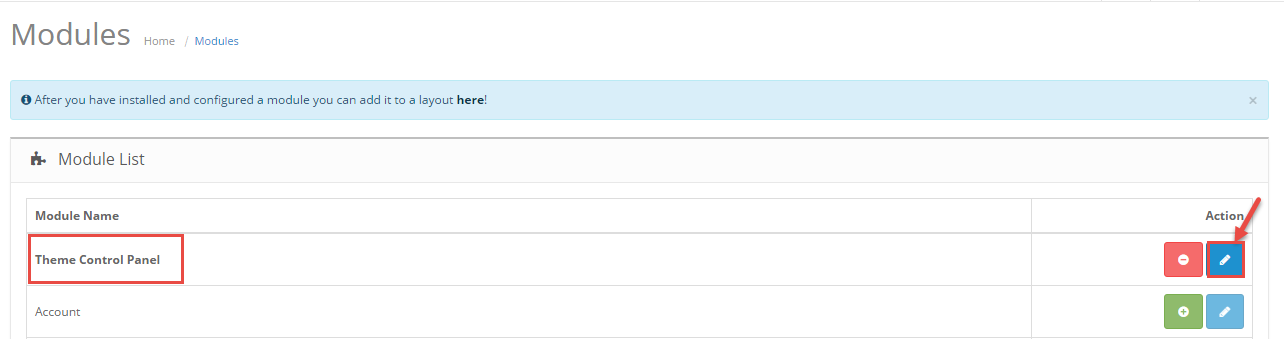
- Step 7: Go to Extension > Modules > SO Theme Control Panel and click on the ‘install’ link
- Step 8: To retrieve sample data for theme default, please go to Theme Control Panel >> Choose Sample Data >> Click “Install data” button

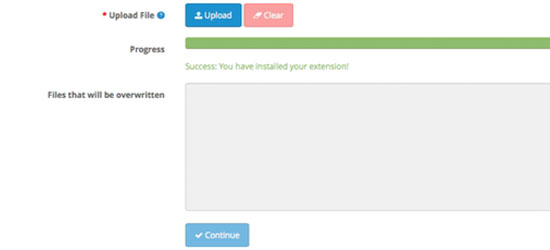
Then You should see the message Success: You have installed your extension!
Click on the Store tab. From the drop down listing of available themes select SO Megashop
Then click on the ‘edit’ button to cofigure this module.
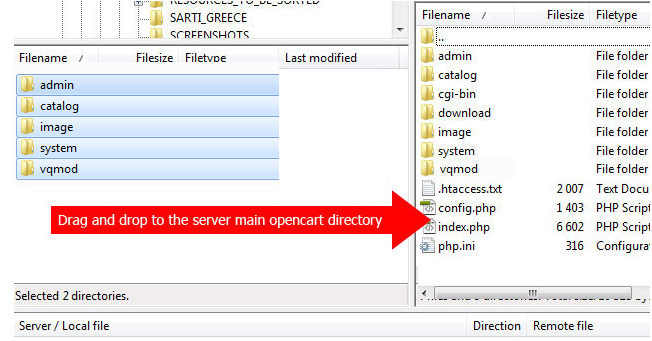
Option2: Just copy your files to your webserver
- Extract the so_megashop_template.ocmod.zip from the archive you downloaded from Themeforest.
- Open the folder that corresponds to your OpenCart version and upload all the files from “FILES_TO_UPLOAD” to the root directory you have installed OpenCart in. Drag the 5 folders (admin, catalog, image, system, ocmod) over to your OpenCart installation
- Login your opencart admin
- Go to System > Settings > Edit (your store)
- Click on the Store tab. From the drop down listing of available themes select SO Megashop
Go to Extension > Modules > SO Theme Control Panel and click on the ‘install’ link
Then click on the ‘edit’ button to cofigure this module.
2.3 Install Vqmod
SO Megashop makes use of plugins to add custom features. These plugins need Vqmod installed on your site.
Download the lastest vqmod-x.x.x-opencart.zip file: here.
Please type the following link: http://www.yoursite.com/vqmod/install. Then you should see the message Success: You have installes your Vqmod !. Refresh your site.
3CONFIGURATION – Back to top
3.1 Layout Position
3.1.1 Layout1

3.1.2 Layout2

3.1.3 Layout3
3.2 Template Configuration
3.2.1. Template Configuration
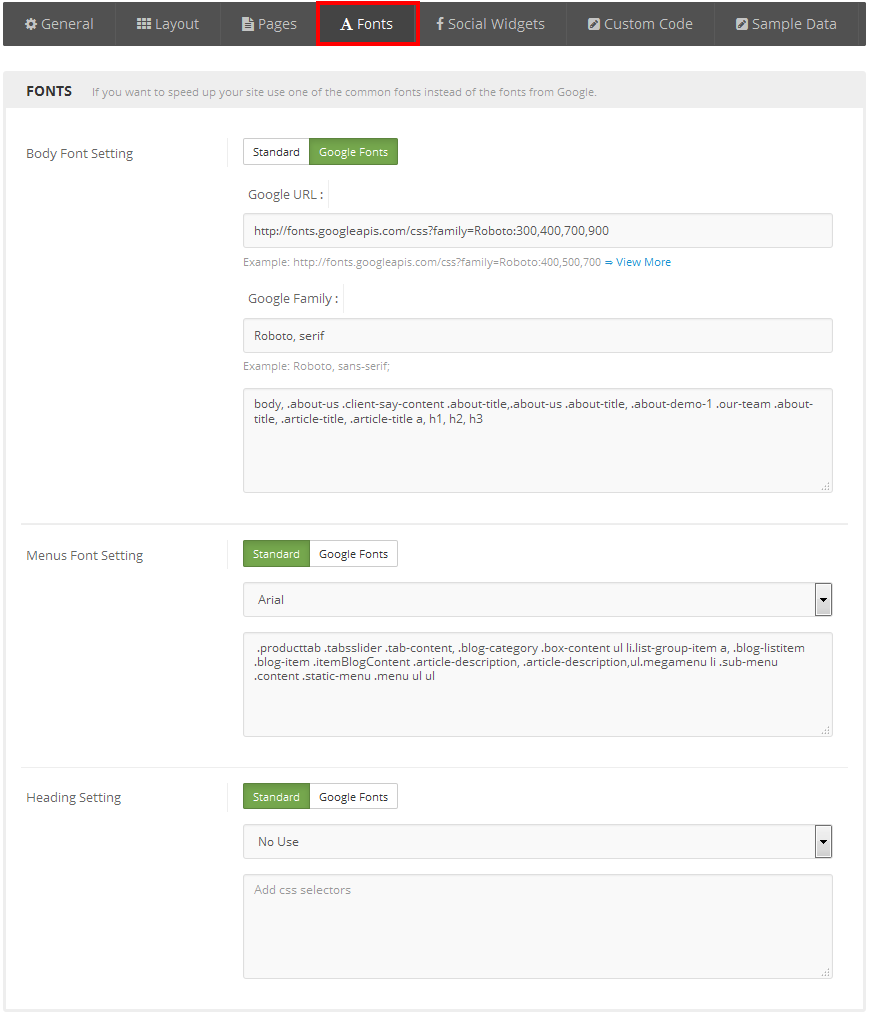
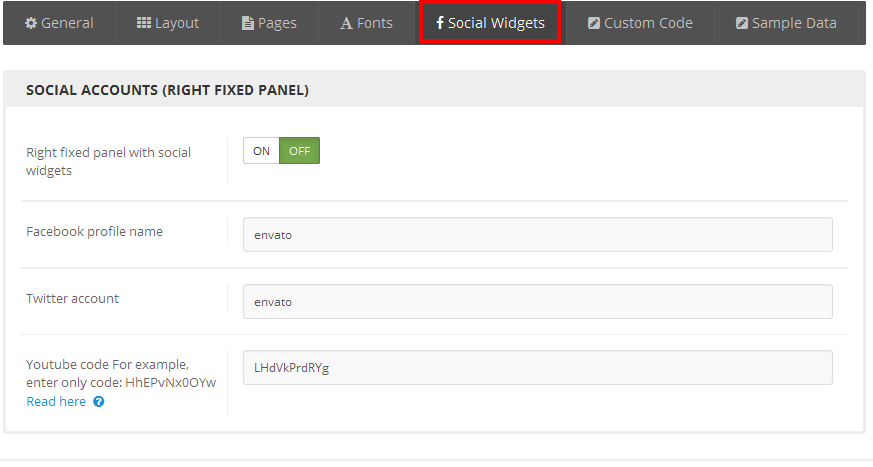
Go to Extensions > Modules > Theme Control Panel >> Click “Edit” Button. All of parameters of this theme are divided into the following groups, in which they are explained themselves:
General
Layout
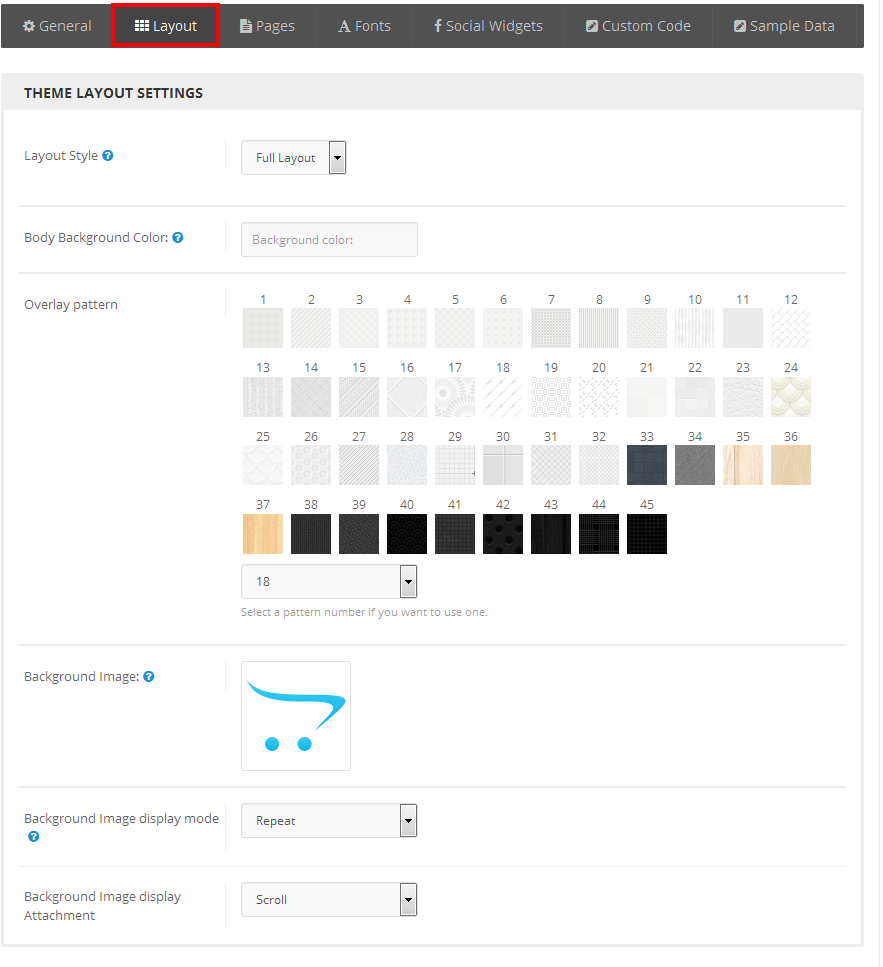
Pages
Fonts
Social Widgets Accounts
Custom Code
3.3 Menu Configuration
Frontend Appearance

3.3.1.1 Create New Megamenu
Go to Extensions >> Modules >> Find module “SO Mega Menu” >> Click “Edit” button >> Enter a menu’s name: “SO Mega Menu” >> Then Click “Save” button >> Create New Megamenu Here
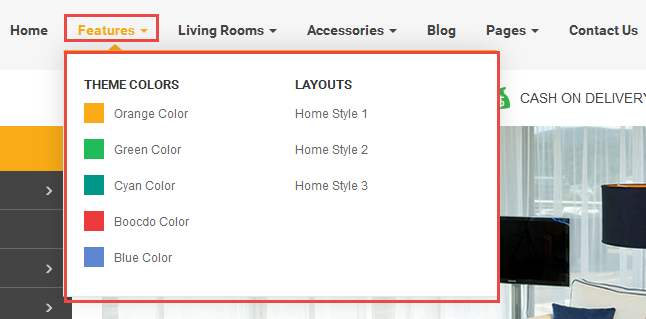
3.3.1.2 Features Menu Configuration
Frontend Appearance
To create this menu, please go to Extensions >> Modules >> ” SO Megamenu > SO Megamenu” >> Click “Edit” button >> Click “Creat new Item” >> Creat new item Here
Check the menu item in the boxes in the left column, click “Creat new Item” to add Submenus to the menu and drag/drop to arrange them.
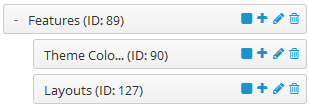
To configure Features Menu, click on “pencil” symbol to configure its backend settings
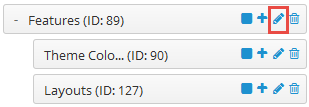
To configure Theme Colors – Submenu, click on “pencil” symbol to configure its backend settings
Copy and paste the Code into editor:
|
1 2 3 4 5 6 7 8 9 |
<div class="column layout-color"> <a>Theme Colors</a> <div> <ul class="row-list"> <li class="color orange"><a href="index.php?scheme=default">Orange Color</a></li> <li class="color green"><a href="index.php?scheme=green">Green Color</a></li> <li class="color cyan"><a href="index.php?scheme=cyan">Cyan Color</a></li> <li class="color boocdo"><a href="index.php?scheme=boocdo">Boocdo Color</a></li> <li class="color blue"><a href="index.php?scheme=blue">Blue Color</a></li> </ul> </div> </div> |
To configure Layouts – Submenu, click on “pencil” symbol to configure its backend settings
Copy and paste the Code into editor:
|
1 2 3 4 5 6 7 8 9 10 11 12 13 |
<div class="column"> <a>Layouts</a> <div> <ul class="row-list"> <li><a href="http://dev.ytcvn.com/ytc_templates/opencart/so_megashop/">Home Style 1</a></li> <li><a href="http://dev.ytcvn.com/ytc_templates/opencart/so_megashop/layout2/index.php?layoutbox=full">Home Style 2</a></li> <li><a href="http://dev.ytcvn.com/ytc_templates/opencart/so_megashop/layout3/index.php?layoutbox=full">Home Style 3</a></li> </ul> </div> </div> |
3.3.1.3 Living Rooms Menu Configuration
Frontend Appearance
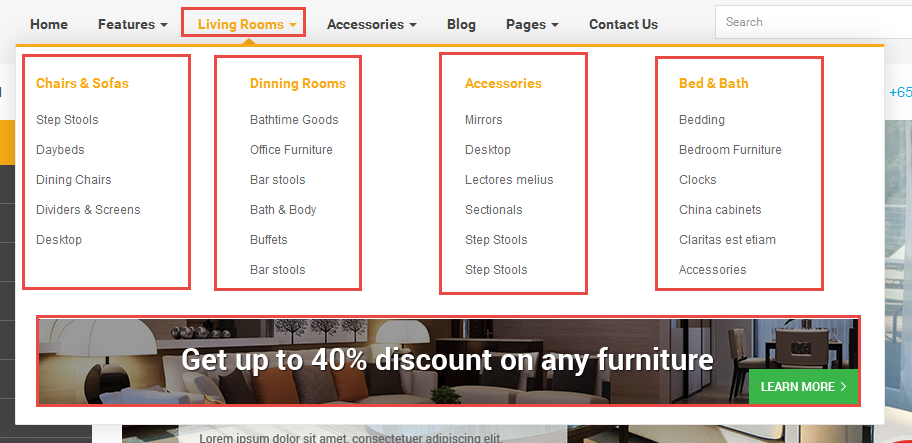
To create this menu, please go to Extensions >> Modules >> ” SO Megamenu > SO Megamenu” >> Click “Edit” button >> Click “Creat new Item” >> Creat new item Here
Check the menu item in the boxes in the left column, click “Creat new Item” to add Submenus to the menu and drag/drop to arrange them.
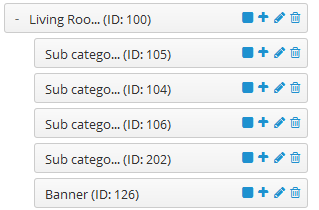
To configure Living Rooms Menu, click on “pencil” symbol to configure its backend settings
To configure Chais & Sofas – Submenu, click on “pencil” symbol to configure its backend settings
To configure Banner – Submenu, click on “pencil” symbol to configure its backend settings
Copy and paste the Code into editor:
|
1 2 3 |
<div class="col-xs-12 img-bottom"> <div class="row"><a href="#"><img src="image/catalog/cms/static-image-h-2.png" alt="banner1"></a> </div> </div> |
3.3.1.4 Accessories Menu Configuration
Frontend Appearance
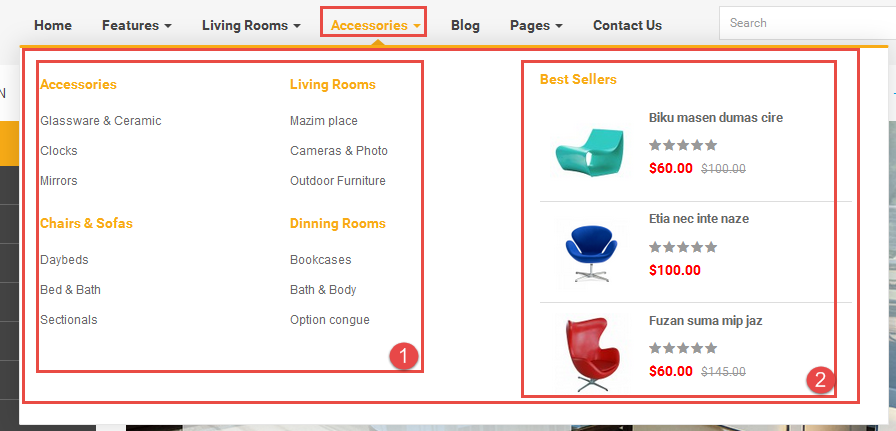
To create this menu, please go to Extensions >> Modules >> ” SO Megamenu > SO Megamenu” >> Click “Edit” button >> Click “Creat new Item” >> Creat new item Here
Check the menu item in the boxes in the left column, click “Creat new Item” to add Submenus to the menu and drag/drop to arrange them.
To configure Accessories Menu, click on “pencil” symbol to configure its backend settings
To configure Automotive – Submenu, click on “pencil” symbol to configure its backend settings
To configure Bestseller- Submenu, click on “pencil” symbol to configure its backend settings
Frontend Appearance
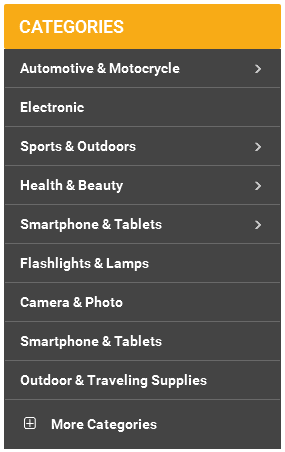
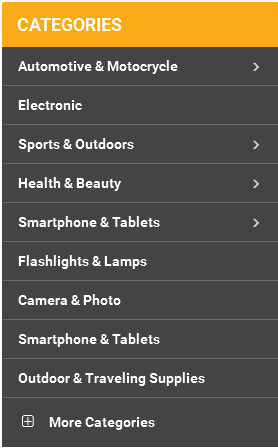
3.3.2.1 Create New Verticalmenu
Go to Extensions >> Modules >> Find module “SO Megamenu” >> Click “Edit” button >> Enter a menu’s name: “SO Verticalmenu” >> Then Click “Save” button >> Create New Verticalmenu Here
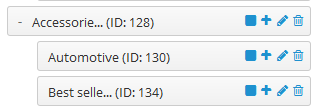
3.3.2.2 Automotive & Motocrycle Menu Configuration
Frontend Appearance
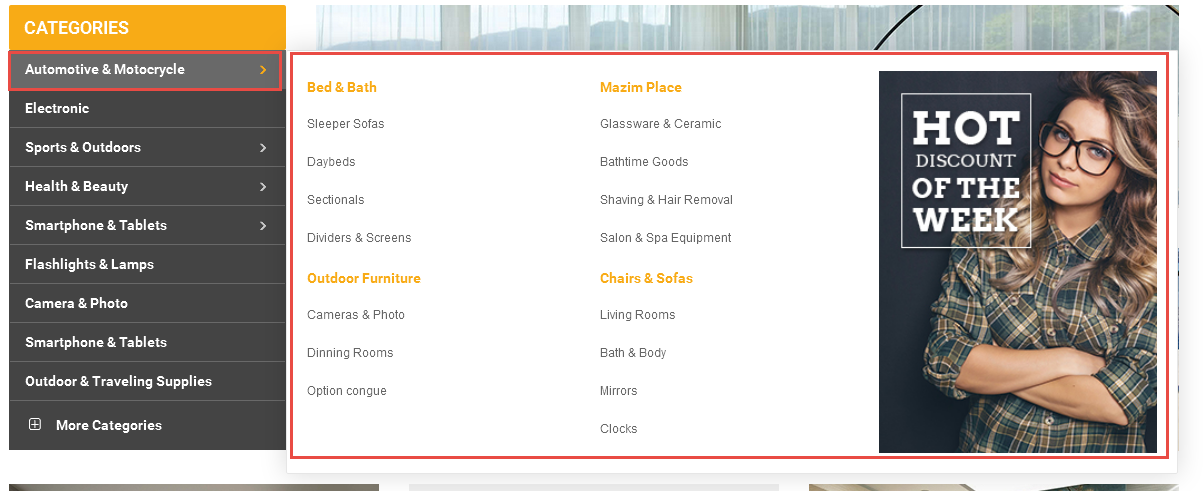
To create this menu, please go to Extensions >> Modules >> ” SO Megamenu > SO Verticalmenu” >> Click “Edit” button >> Click “Creat new Item” >> Creat new item Here
Check the menu item in the boxes in the left column, click “Creat new Item” to add Submenus to the menu and drag and drop to arrange them.
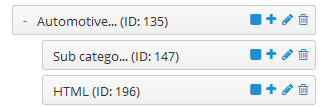
To configure Automotive & Motocrycle Menu, click on “pencil” symbol to configure its backend settings
To configure Sub category – Submenu, click on “pencil” symbol to configure its backend settings
To configure HTML – Submenu, click on “pencil” symbol to configure its backend settings
Copy and paste the Code into editor:
|
1 |
<div class="row banner"><a href="#"><img src="image/catalog/cms/menu_bg2.jpg" alt="banner1"></a></div> |
3.3.2.3 Sports & Outdoors Menu Configuration
Frontend Appearance
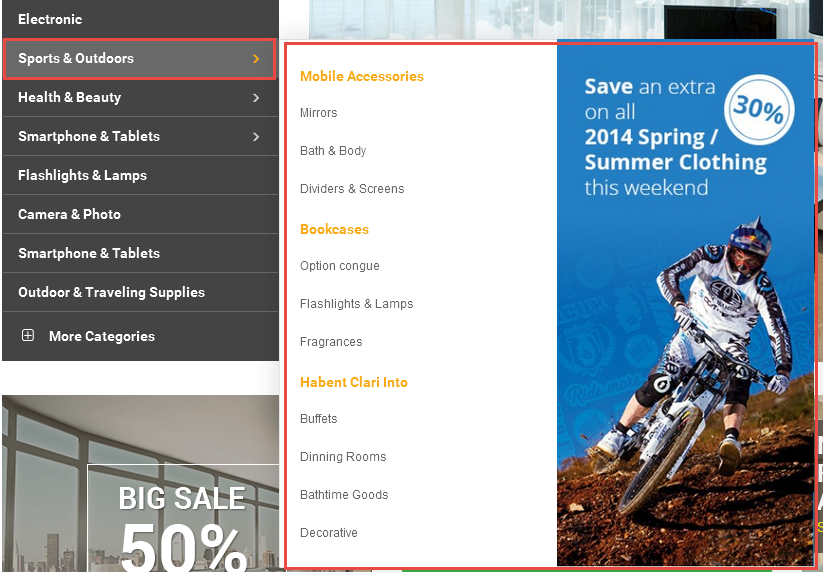
To create this menu, please go to Extensions >> Modules >> ” SO Megamenu > SO Verticalmenu” >> Click “Edit” button >> Click “Creat new Item” >> Creat new item Here
Check the menu item in the boxes in the left column, click “Creat new Item” to add Submenus to the menu and drag and drop to arrange them.
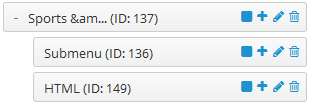
To configure Sports & Outdoors Menu, click on “pencil” symbol to configure its backend settings
To configure Submenu – Submenu, click on “pencil” symbol to configure its backend settings
To configure HTML – Submenu, click on “pencil” symbol to configure its backend settings
Copy and paste the Code into editor:
|
1 |
<div class="row banner"><a href="#"><img src="image/catalog/cms/menu_bg2.jpg" alt="banner1"></a></div> |
3.3.2.4 Health & Beauty Menu Configuration
Frontend Appearance
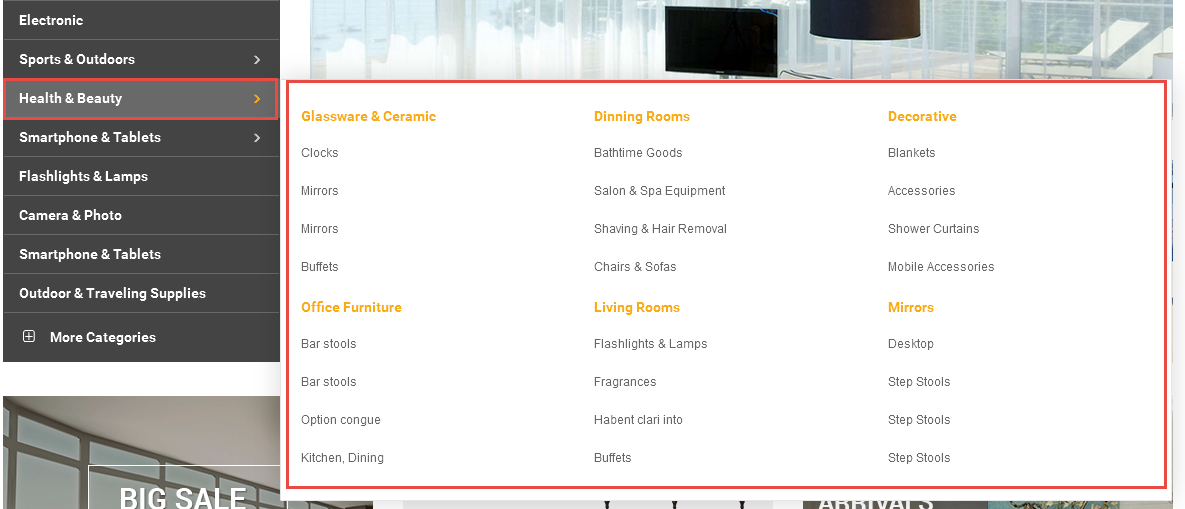
To create this menu, please go to Extensions >> Modules >> ” SO Megamenu > SO Verticalmenu” >> Click “Edit” button >> Click “Creat new Item” >> Creat new item Here
Check the menu item in the boxes in the left column, click “Creat new Item” to add Submenus to the menu and drag/drop to arrange them.
To configure Health & Beauty Menu, click on “pencil” symbol to configure its backend settings
To configure Sub menu1 – Submenu, click on “pencil” symbol to configure its backend settings
3.3.2.5 Smartphone & Tablets Menu Configuration
Frontend Appearance
To create this menu, please go to Extensions >> Modules >> ” SO Megamenu > SO Verticalmenu” >> Click “Edit” button >> Click “Creat new Item” >> Creat new item Here
Check the menu item in the boxes in the left column, click “Creat new Item” to add Submenus to the menu and drag/drop to arrange them.
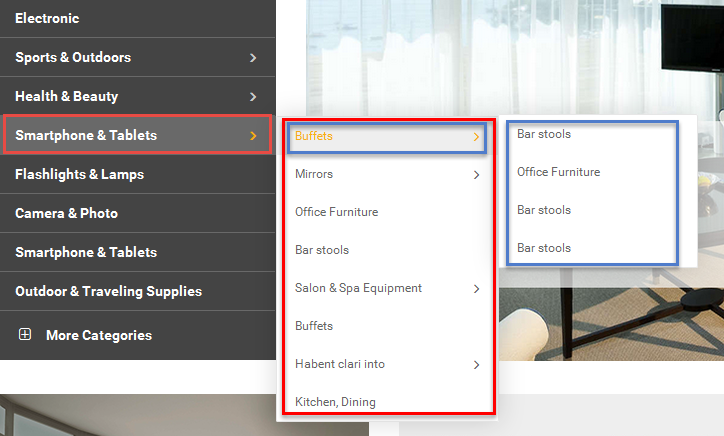
To configure Smartphone & Tablets Menu, click on “pencil” symbol to configure its backend settings
To configure Submenu – Submenu, click on “pencil” symbol to configure its backend settings
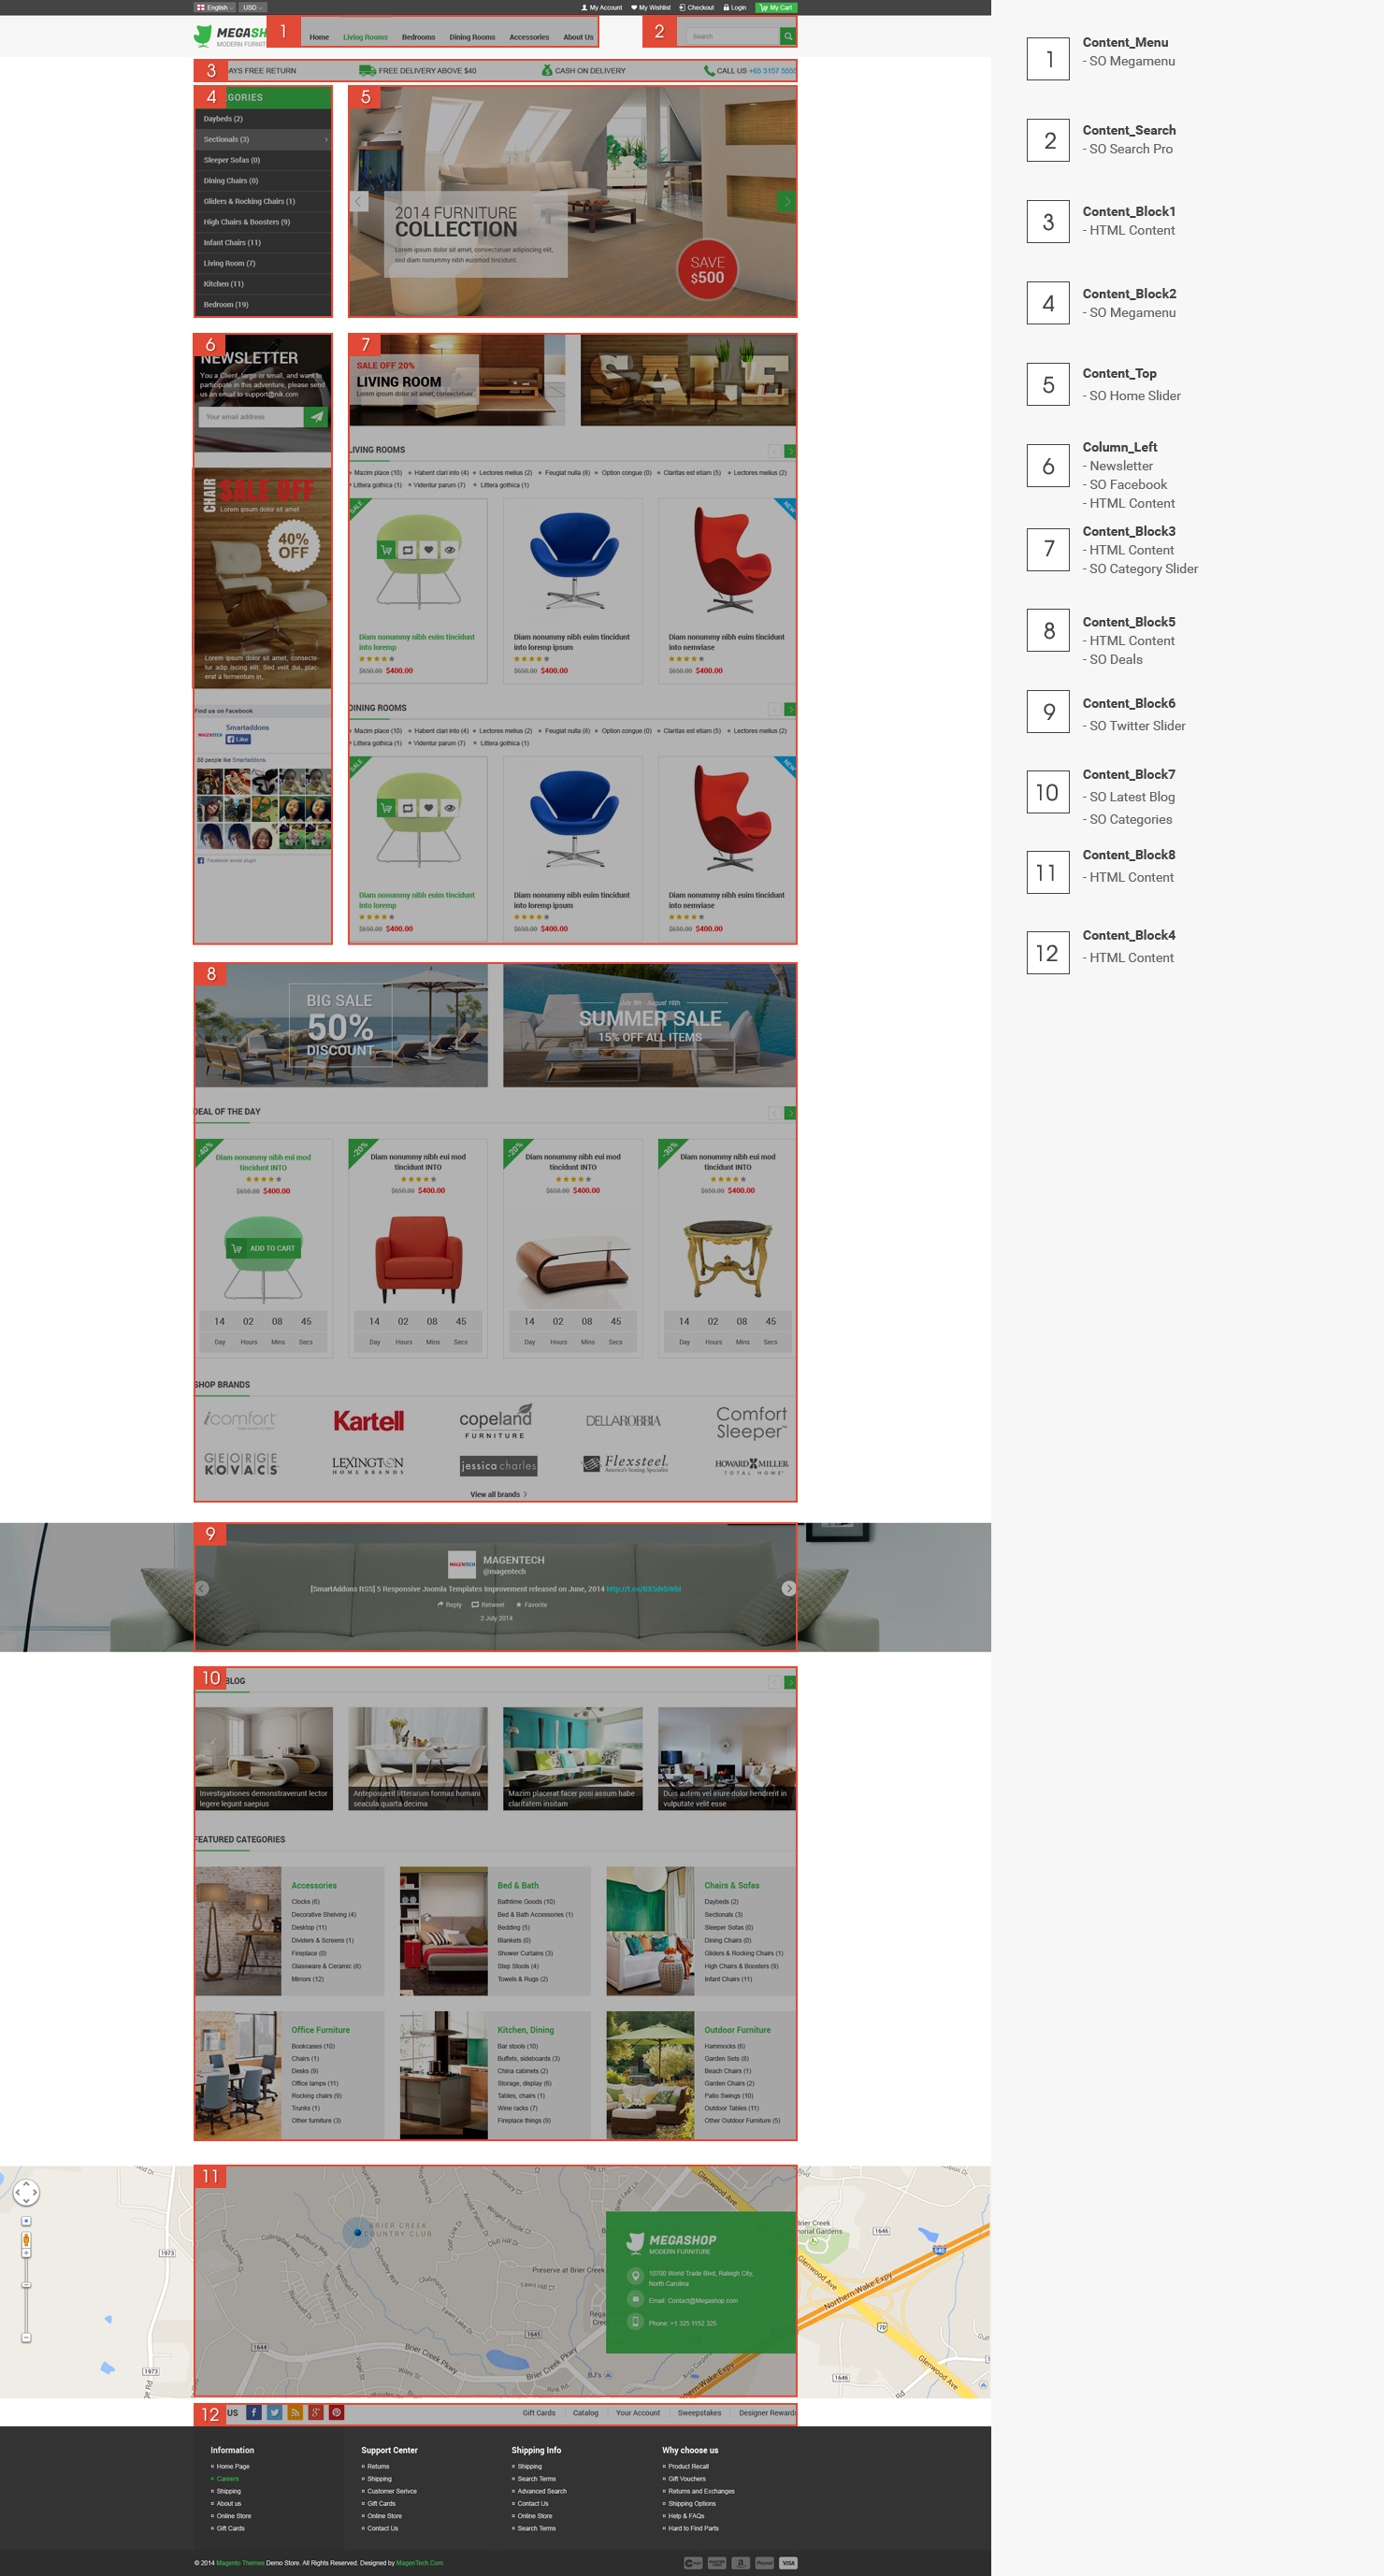
3.4 Extension Configuration – Layout1
The SO Megashop front-page has been integrated with extensions in the Theme as following list:
- Position: Content-Search
- Frontend Appearance

- Backend of SO-SearchPro: Click Here
- Position: Content-Menu
- Frontend Appearance

- Backend of SO-Mega-Menu: Click Here
- Position: Contentblock1
- Frontend Appearance

Backend of HTML-Content: Click Here
Copy and paste the Code into editor
|
1 2 3 4 5 6 7 8 9 10 |
<div class="block-services clearfix"> <div class="col-md-3 col-sm-6 hidden-xs item1"><a href="#">30 DAYS FREE RETURN</a></div> <div class="col-md-3 col-sm-6 hidden-xs item2"><a href="#">FREE DELIVERY ABOVE $40</a></div> <div class="col-md-3 col-sm-6 hidden-xs item3"><a href="#">CASH ON DELIVERY</a></div> <div class="col-md-3 col-sm-6 hidden-xs item4"><a href="#">CALL US <span>+65 3157 5555 </span></a></div> </div> |
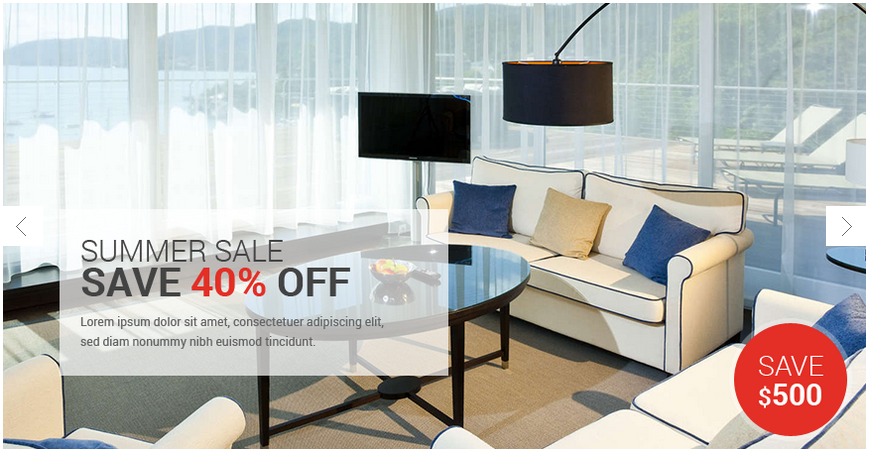
- Position: Content-top
- Frontend Appearance
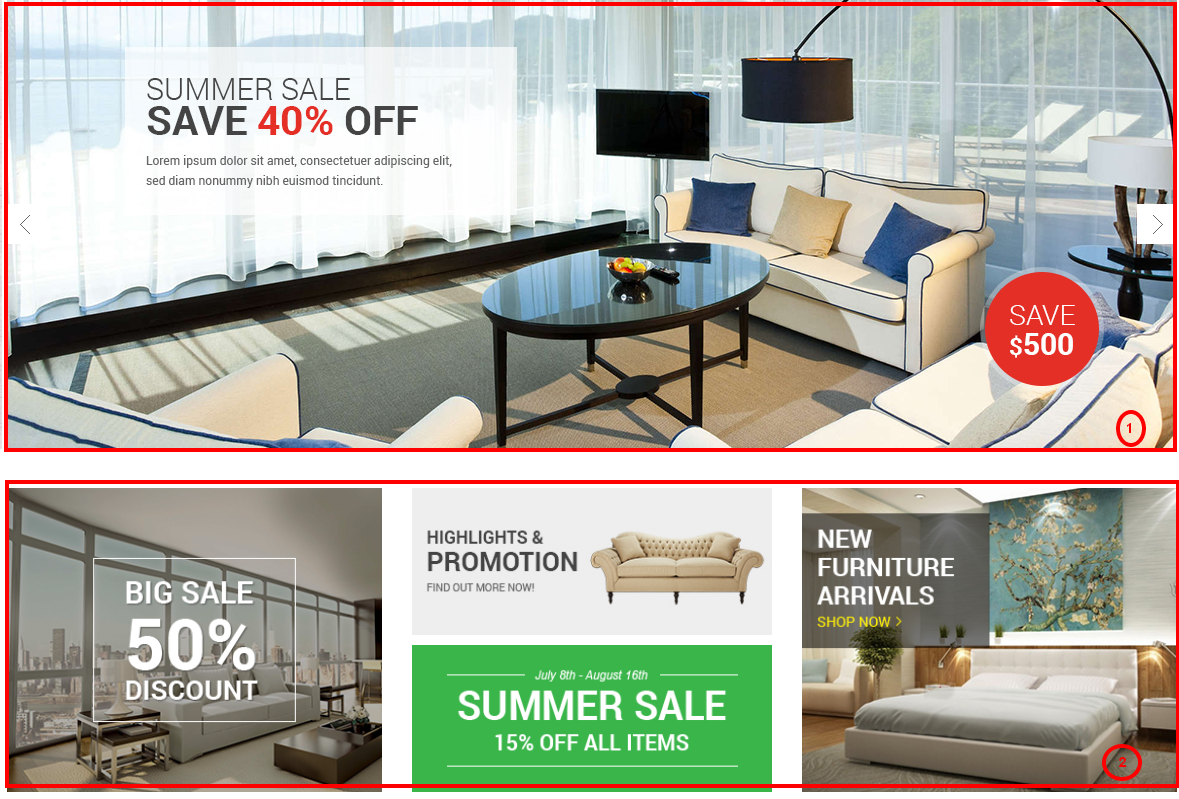
- 1. SO-Home-Slider
- 2. HTML-Content
Backend of SO-Home-Slider:
Backend of HTML-Content: Click Here
Copy and paste the Code into editor:
|
1 2 3 4 5 6 7 8 9 10 11 |
<div class="banner-wraps "> <div class="banner banner1 col-sm-4 col-xs-12"> <a href="#"> <img src="image/catalog/cms/banner1.png" alt="banner1"> </a> </div> <div class="banner2 col-sm-4 col-xs-12"> <div class="row1"> <a href="#"> <img src="image/catalog/cms/banner2.png" alt="banner2"> </a> </div> <div class="row2"> <a href="#"> <img src="image/catalog/cms/banner3.png" alt="banner3"> </a> </div> </div> <div class="banner banner3 col-sm-4 col-xs-12"> <a href="#"> <img src="image/catalog/cms/banner4.png" alt="banner4"> </a> </div> </div> |
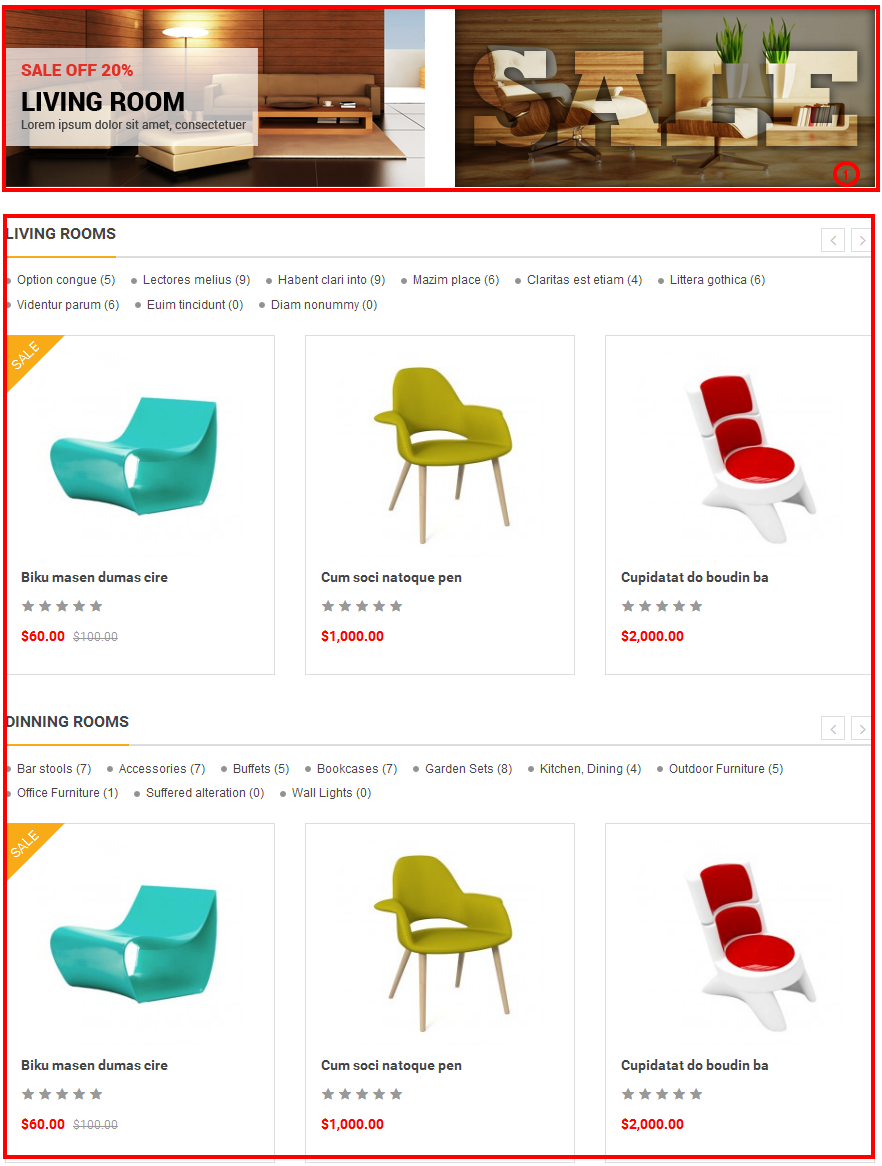
- Position: Contentblock2
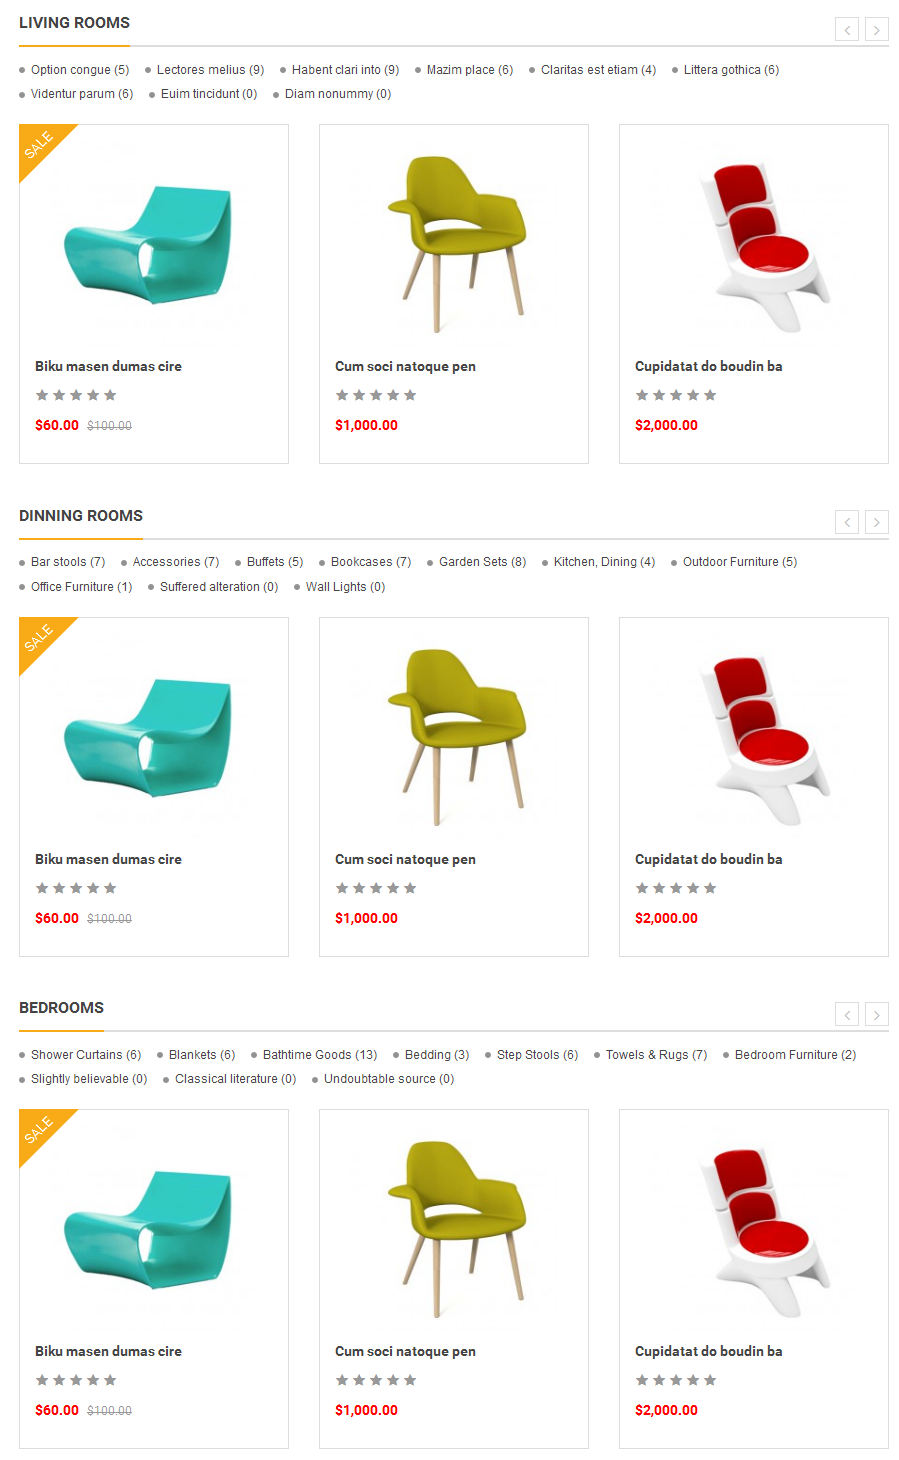
- Frontend Appearance

- 1. SO-Category-Slider – Living Rooms
- Backend of General Options: Click Here
- Backend of Source Options: Click Here
- Backend of Category Options: Click Here
- Backend of Products Options: Click Here
- Backend of Effect Options: Click Here
Backend of SO-Category-Slider – Living Rooms: Click Here
- 2. SO-Category-Slider – Bedrooms
- Backend of General Options: Click Here
- Backend of Source Options: Click Here
- Backend of Category Options: Click Here
- Backend of Products Options: Click Here
- Backend of Effect Options: Click Here
Backend of SO-Category-Slider – Bedrooms: Click Here
- 3. SO-Category-Slider – Dinning Rooms
- Backend of General Options: Click Here
- Backend of Source Options: Click Here
- Backend of Category Options: Click Here
- Backend of Products Options: Click Here
- Backend of Effect Options: Click Here
Backend of SO-Category-Slider – Dinning Rooms: Click Here
- Position: Content-block3
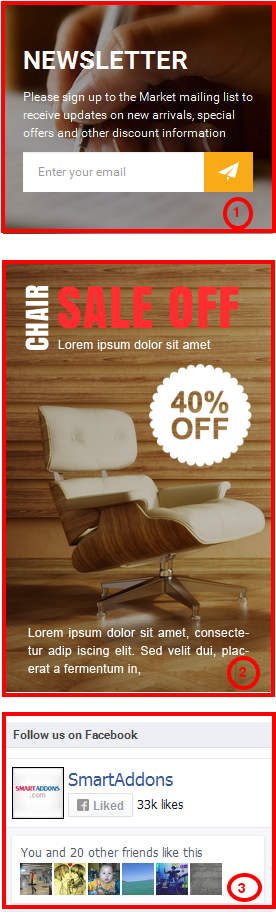
- Frontend Appearance

- Backend of Newsletter: Click Here
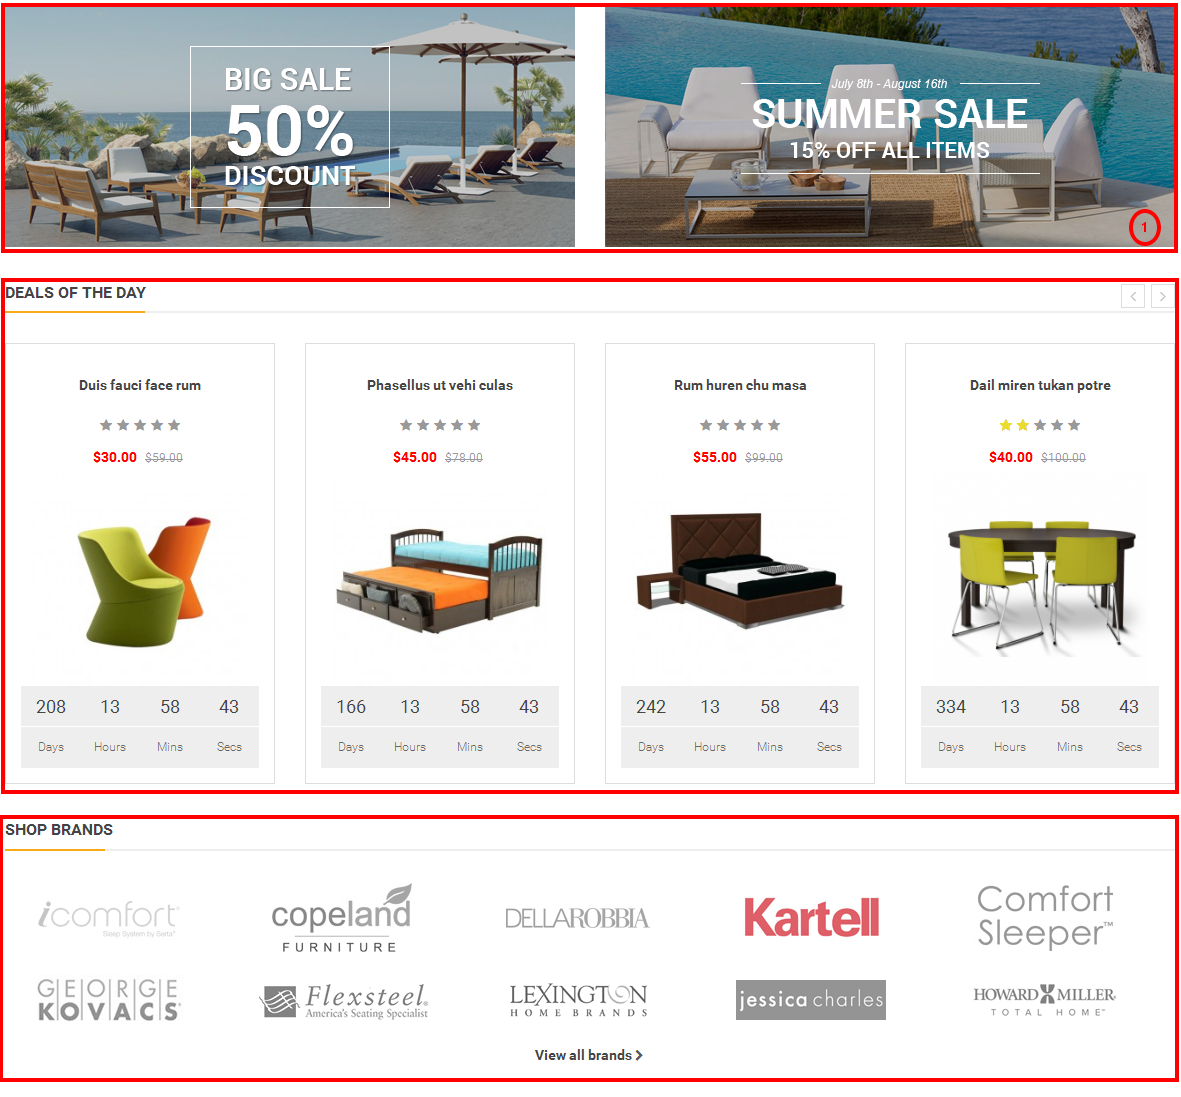
- Position: Content-block5
- Frontend Appearance

- 1. SO-Deals
- Backend of General Options: Click Here
- Backend of Source Options: Click Here
- Backend of Items Options: Click Here
- Backend of Image Options: Click Here
- Backend of Effect Options: Click Here
- 2. HTML-Content – Our Brand
Backend of SO-Deals: Click Here
Backend of HTML-Content – Our Brand: Click Here
Copy and paste the Code into editor:
|
1 2 3 4 5 6 7 8 9 10 11 12 13 14 15 16 17 |
<div class="shop-brands"> <h3><span> Shop Brands</span></h3> <div class="brand-list clearfix"><div class="col"><a href="#"><img src="image/catalog/cms/brand/brand1.png" alt="#"></a> <a href="#"><img src="image/catalog/cms/brand/brand6.png" alt="#"></a></div> <div class="col"><a href="#"><img src="image/catalog/cms/brand/brand2.png" alt="#"></a> <a href="#"><img src="image/catalog/cms/brand/brand7.png" alt="#"></a></div> <div class="col"><a href="#"><img src="image/catalog/cms/brand/brand3.png" alt="#"></a> <a href="#"><img src="image/catalog/cms/brand/brand8.png" alt="#"></a></div> <div class="col"><a href="#"><img src="image/catalog/cms/brand/brand4.png" alt="#"></a> <a href="#"><img src="image/catalog/cms/brand/brand9.png" alt="#"></a></div> <div class="col last"><a href="#"><img src="image/catalog/cms/brand/brand5.png" alt="#"></a> <a href="#"><img src="image/catalog/cms/brand/brand10.png" alt="#"></a></div> </div> <div class="view-all"><a href="#">View all brands </a></div> </div> |
- Position: Content-block6
- Frontend Appearance
- Position: Content-block7
- Frontend Appearance
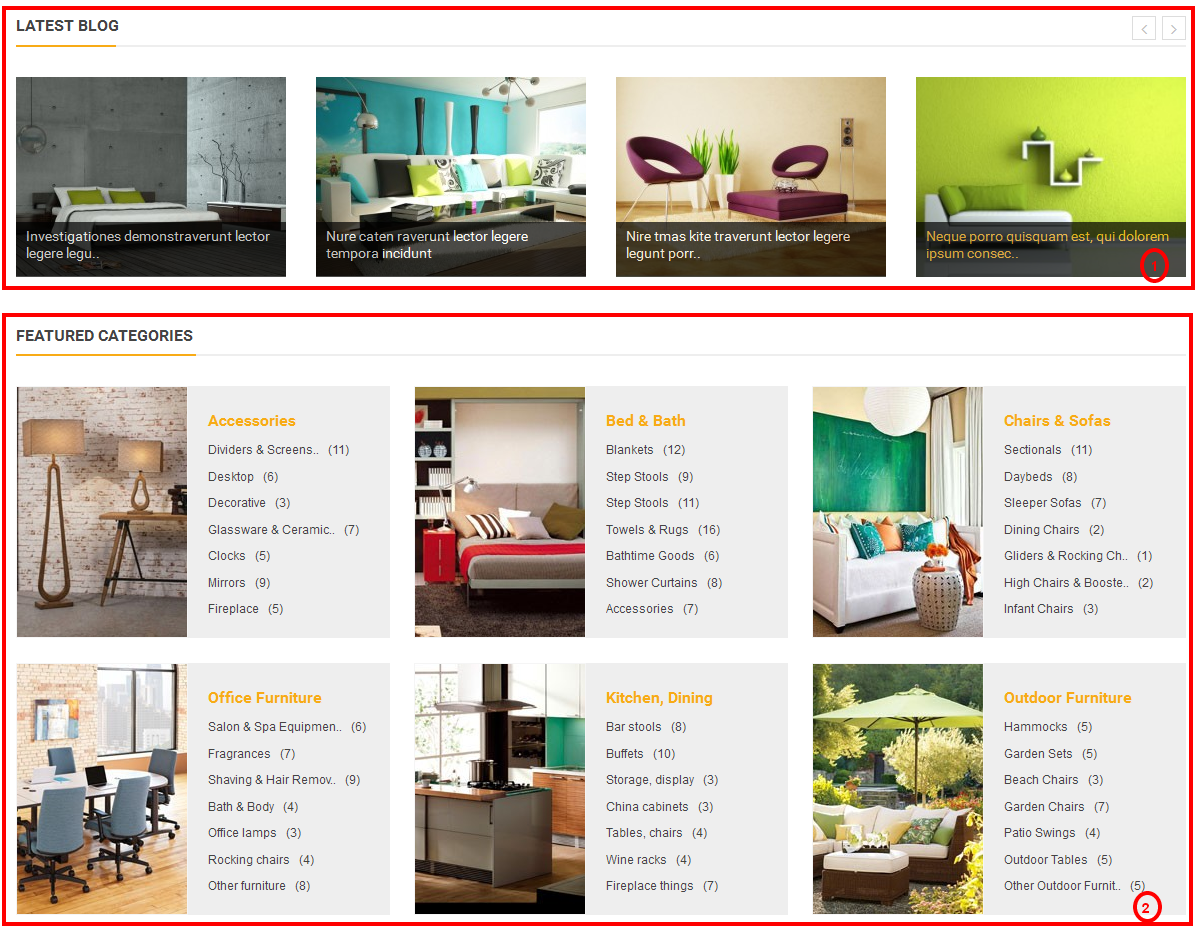
- 1. SO-Latest-Blog
- Backend of General Options: Click Here
- Backend of Blogs Options: Click Here
- Backend of Image Options: Click Here
- Backend of Effect Options: Click Here
Backend of SO-Latest-Blog: Click Here
- 2. SO-Categories – Featured Categories
- Backend of General Options: Click Here
- Backend of Source Options: Click Here
- Backend of Category Options: Click Here
- Backend of Image Options: Click Here
Backend of SO-Categories – Featured Categories: Click Here
- Position: Content-block8
- Frontend Appearance
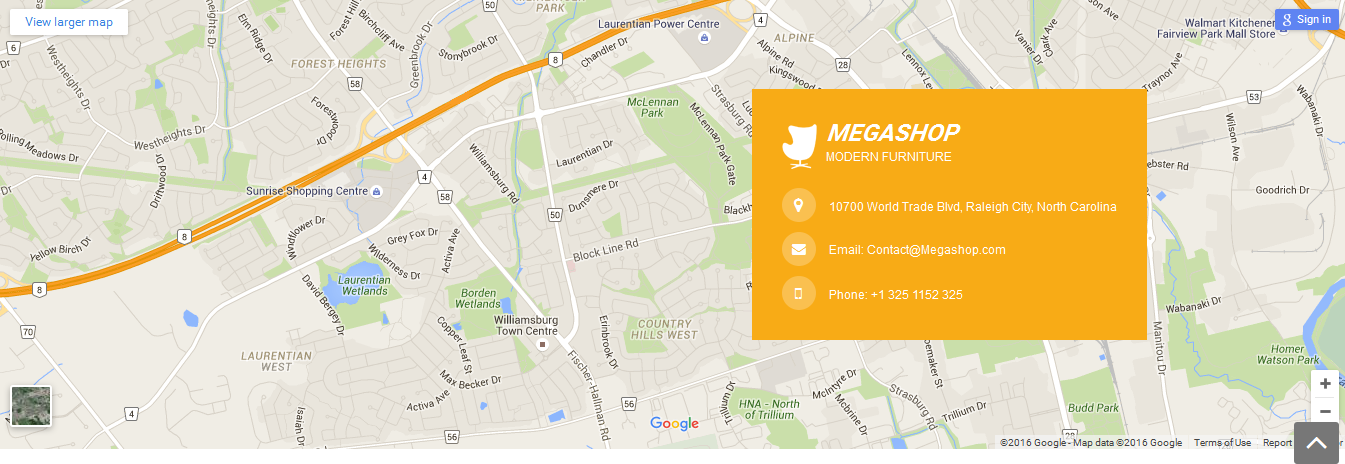
- Backend of HTML-Content – Google maps: Click Here
Copy and paste the Code into editor:
|
1 2 3 4 5 6 7 8 9 10 11 12 13 14 15 16 17 18 19 20 21 |
<div class="contact"> <iframe src="https://www.google.com/maps/embed?pb=!1m10!1m8!1m3!1d11593.01555357949!2d-80.4901947!3d43.4135219!3m2!1i1024!2i768!4f13.1!5e0!3m2!1sen!2s!4v1407212089068" height="450"></iframe> <div class="contact-info"> <div class="shop-name"> <div class="icon"> </div> <h2>Megashop</h2> <label>MODERN FURNITURE</label> </div> <div class="address"> <div class="icon"> </div> <label>10700 World Trade Blvd, Raleigh City, North Carolina</label> </div> <div class="email"> <div class="icon"> </div> <label>Email: <a href="#">Contact@Megashop.com</a></label> </div> <div class="phone"> <div class="icon"> </div> <label>Phone: +1 325 1152 325</label></div> </div> </div> |
- Position: Content-block4
- Frontend Appearance

- 1. HTML-Content-Social
- 2. HTML-Content-Footer
Backend of HTML-Content-Social: Click Here
Copy and paste the Code into editor:
|
1 2 3 4 5 6 7 8 9 10 11 12 13 14 |
<label class="follow">Follow us</label> <ul class="social-block "> <li class="facebook"><a class="_blank" href="https://www.facebook.com/magentech" target="_blank"><i class="fa fa-facebook"></i></a></li> <li class="twitter"><a class="_blank" href="https://twitter.com/magentech" target="_blank"><i class="fa fa-twitter"></i></a></li> <li class="rss"><a class="_blank" href="https://www.rss.com/" target="_blank"><i class="fa fa-rss"></i></a></li> <li class="google_plus"><a class="_blank" href="https://plus.google.com/111936609376399911024/posts" target="_blank"><i class="fa fa-google"></i></a></li> <li class="pinterest"><a class="_blank" href="https://www.pinterest.com/" target="_blank"><i class="fa fa-pinterest"></i></a></li> </ul> |
Backend of HTML-Content – HTML-Content-Footer: Click Here
Copy and paste the Code into editor:
|
1 2 3 4 5 6 7 8 9 10 11 12 13 |
<ul class="footer-link"> <li class="first"><a href="#">Gift Cards </a></li> <li><a href="#">Catalog </a></li> <li><a href="#">Your Account </a></li> <li><a href="#">Sweepstakes</a></li> <li class="last"><a href="#">Designer Rewards </a></li> </ul> |
3.5 Extension Configuration – Layout2
The SO Megashop front-page has been integrated with extensions in the Theme as following list:
- Position: Content-top
- Frontend Appearance
- Position: Content-top
- Frontend Appearance
-
Backend of SO-Home-Slider: Click Here
- Position: Content-block5
- Frontend Appearance
- Position: Column-right
- Frontend Appearance
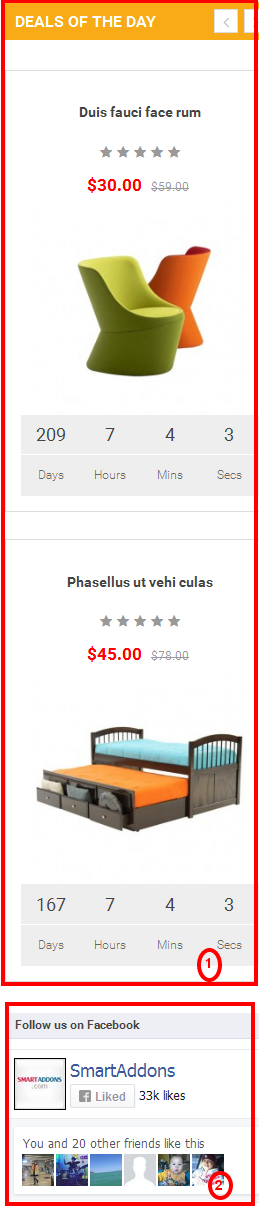
- 1. SO-Deals
- Backend of General Options: Click Here
- Backend of Source Options: Click Here
- Backend of Items Options: Click Here
- Backend of Image Options: Click Here
- Backend of Effect Options: Click Here
- 2. SO-Facebook
- Backend of Like Book Options: Click Here
Backend of SO-Deals: Click Here
Backend of SO-Facebook: Click Here
- Other extensions in Layout2 are configured the same as above extensions in Layout1.
3.6 Extension Configuration – Layout3
The SO Megashop front-page has been integrated with extensions in the Theme as following list:
- Position: Column-left
- Frontend Appearance
- 1. HTML-Content
Backend of HTML-Content: Click Here
Copy and paste the Code into editor:
|
1 |
<div><a href="#"><img src="image/catalog/cms/v3-banner5.png" alt="#"></a></div> |
- Position: Column-block3
- Frontend Appearance
- 1. HTML-Content
Backend of HTML-Content: Click Here
Copy and paste the Code into editor:
|
1 2 3 4 5 6 7 |
<ul class="wrap-banner"> <li class="item-1 col-sm-6 col-xs-12"> <a href="#" class="item-link" title=""><img src="image/catalog/cms/v3-banner1.png" class="item-img " title="" alt=""></a> </li> <li class="item-2 col-sm-6 col-xs-12"> <a href="#" class="item-link" title=""><img src="image/catalog/cms/v3-banner2.png" class="item-img " title="" alt=""></a> </li> </ul> |
- Position: Column-block5
- Frontend Appearance
- 1. HTML-Content
Backend of HTML-Content: Click Here
Copy and paste the Code into editor:
|
1 2 3 4 5 6 7 |
<ul class="wrap-banner banner-center"> <li class="item-1 col-sm-6 col-xs-12"> <a href="#" class="item-link" title=""><img src="image/catalog/cms/v3-banner3.png" class="item-img " title="" alt=""></a> </li> <li class="item-2 col-sm-6 col-xs-12"> <a href="#" class="item-link" title=""><img src="image/catalog/cms/v3-banner4.png" class="item-img " title="" alt=""></a> </li> </ul> |
- Other extensions in Layout4 are configured the same as above extension in Layout1, Layout2 and Layout3.
Note: You can read other extensions here:
4SUPPORT – Back to top
Thank you so much for purchasing this template. If you have any questions that are beyond the scope of this help file, please send us via: Submit a Ticket
Thanks so much!
