So Lookbook The module displays the product on the lookbook in a special way.
The module is easy to customize, suitable for any theme, easy to use.
1REQUIREMENT – Back to top
At the basic level, this module will require the following conditions:
- Compatible with OpenCart version : Opencart 3.x
- Responsive
2INSTALLATION – Back to top
2.1 FTP Configuration
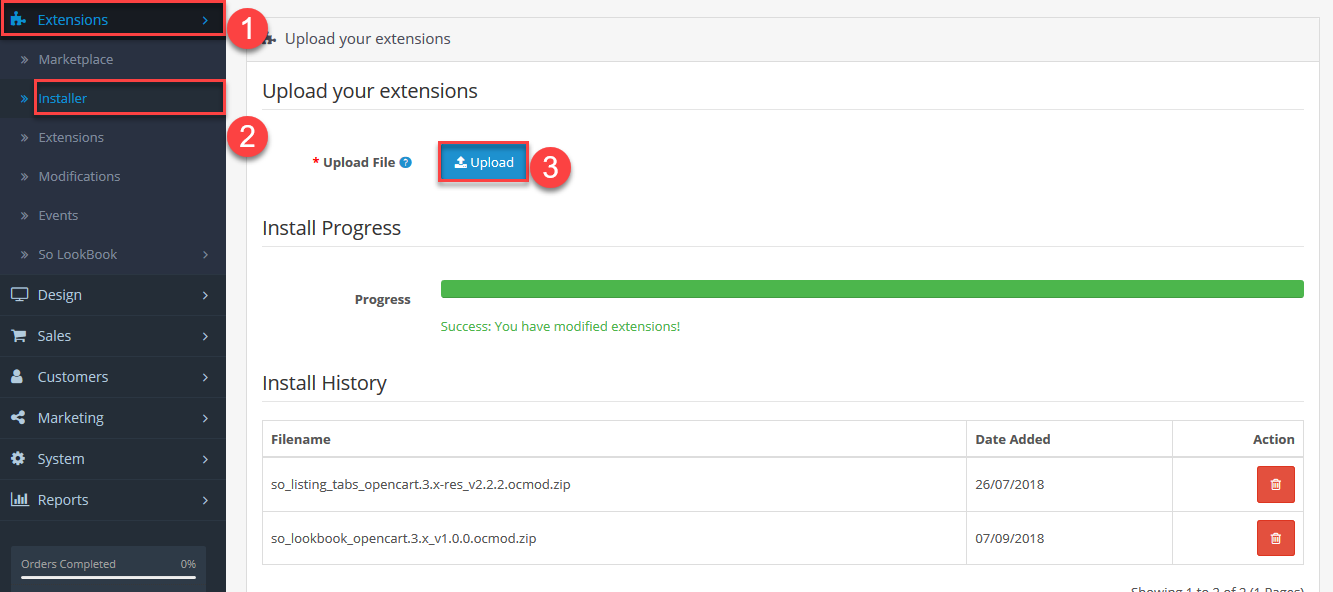
Step 1: Please go to Extensions => Installer . Click Upload button to upload the module.
Choose file so_lookbook_opencart.3.x_v1.0.0.ocmod.zip
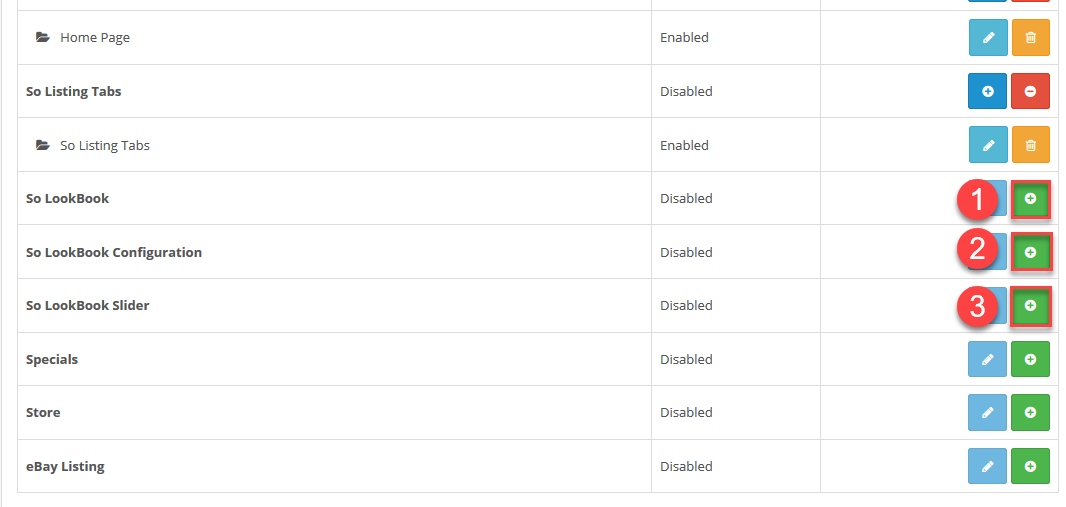
Step 2: Go to Extensions => Extensions . Choose extension type is Modules.
Click Install button to setup module.
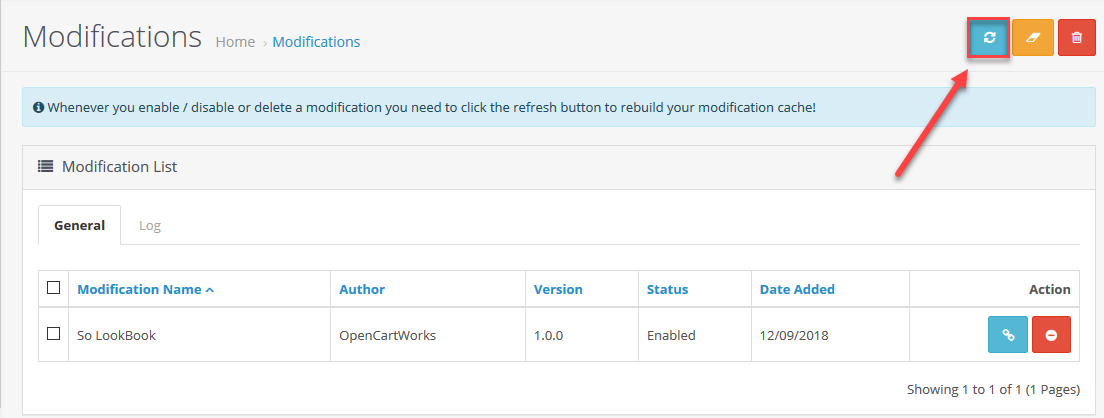
Step 3: Go to Extensions => Modifications . Click Refresh button to rebuild modification cache.
3MODULE CONFIGURATION – Back to top
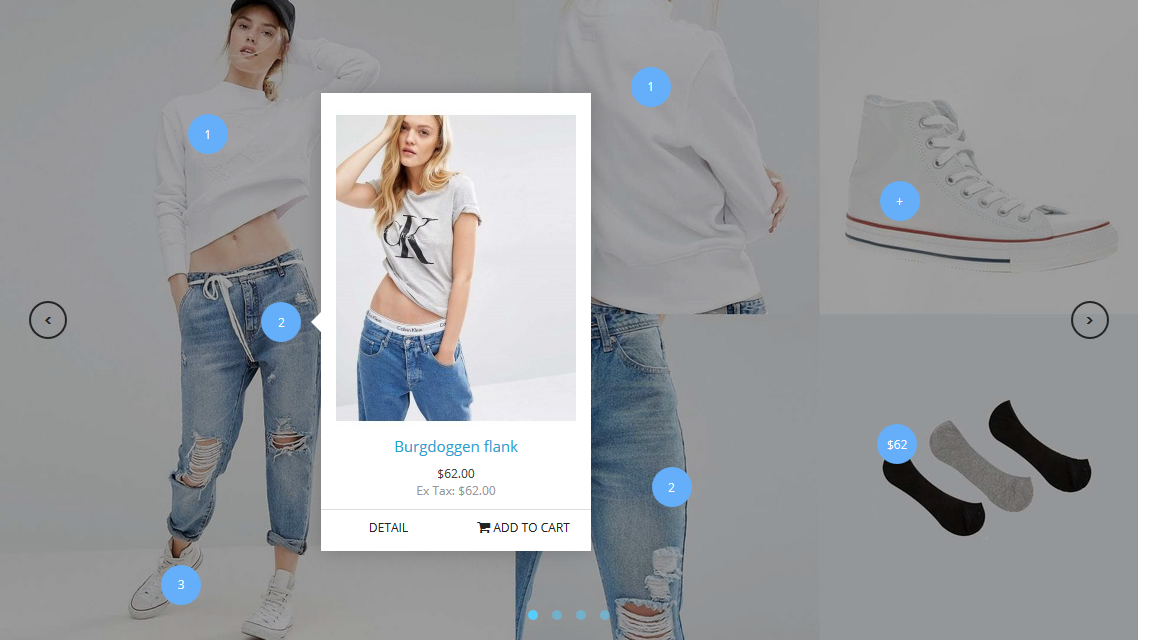
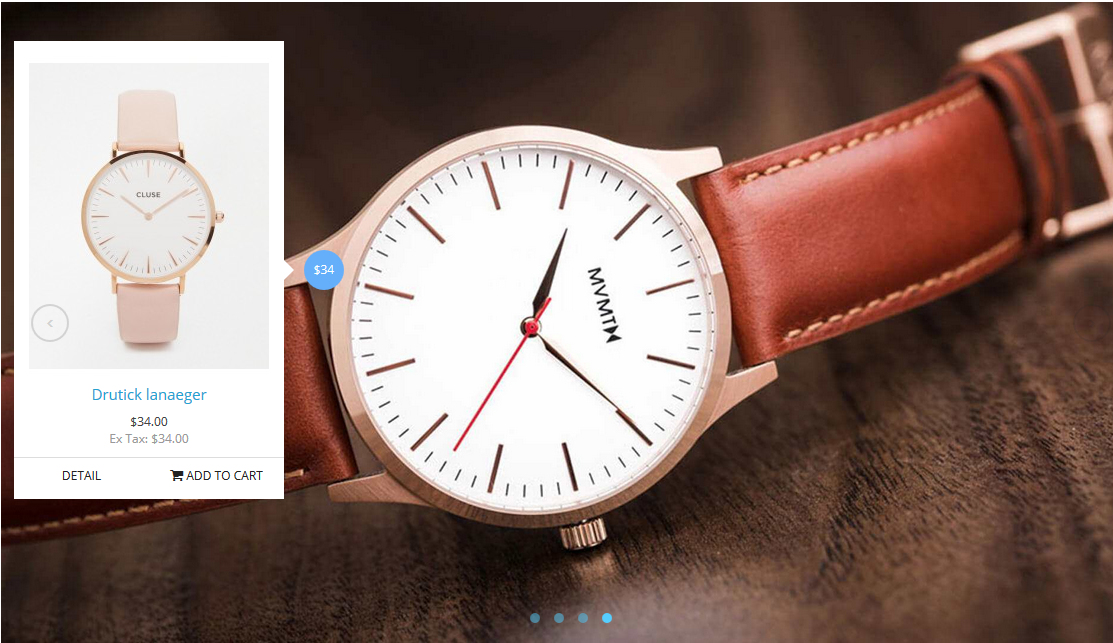
3.1 Module Demo
This is the interface of the module
3.2 LookBook Configuration
1. Go to Extensions -> So LookBook -> Configuration.
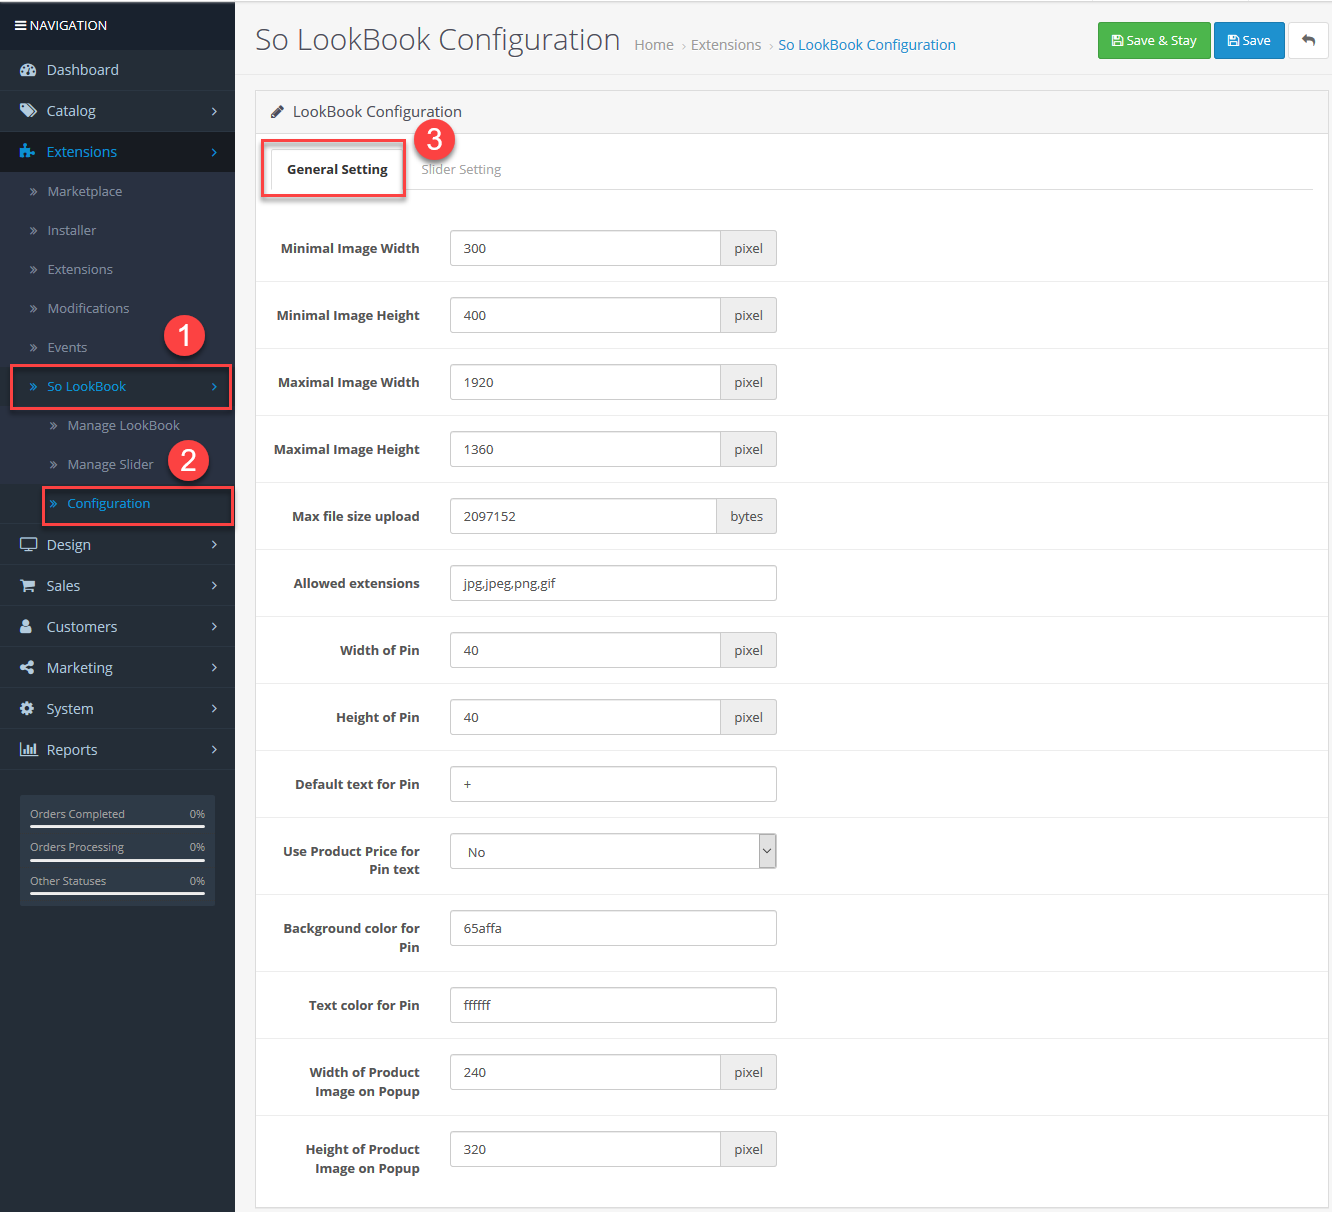
1.1 General settings Tab includes:
– Minimal Image Width: Enter Minimal Image Width, in Pixel.
– Minimal Image Height: Enter Minimal Image Height, in Pixel.
– Maximal Image Width: Enter Maximal Image Width, in Pixel.
– Maximal Image Height: Enter Maximal Image Height, in Pixel.
– Max file size upload: Enter Max file size upload, in Bytes.
– Allowed extensions: Fill the format of the image.
– Width of Pin: Enter Width of Pin, in Pixel.
– Height of Pin: Enter Height of Pin, in Pixel.
– Default text for Pin: Screenshot Pin: here
– Use Product Price for Pin text: Choose Yes if you want the price displayed instead Pin: here
– Background color for Pin: Enter the color code.
– Text color for Pin: Enter the color code. Screenshot : here
– Width of Product Image on Popup: Width of Product Image on Popup. Screenshot here
– Height of Product Image on Popup : Height of Product Image on Popup. Screenshot here
1.2 Slider settings Tab includes:
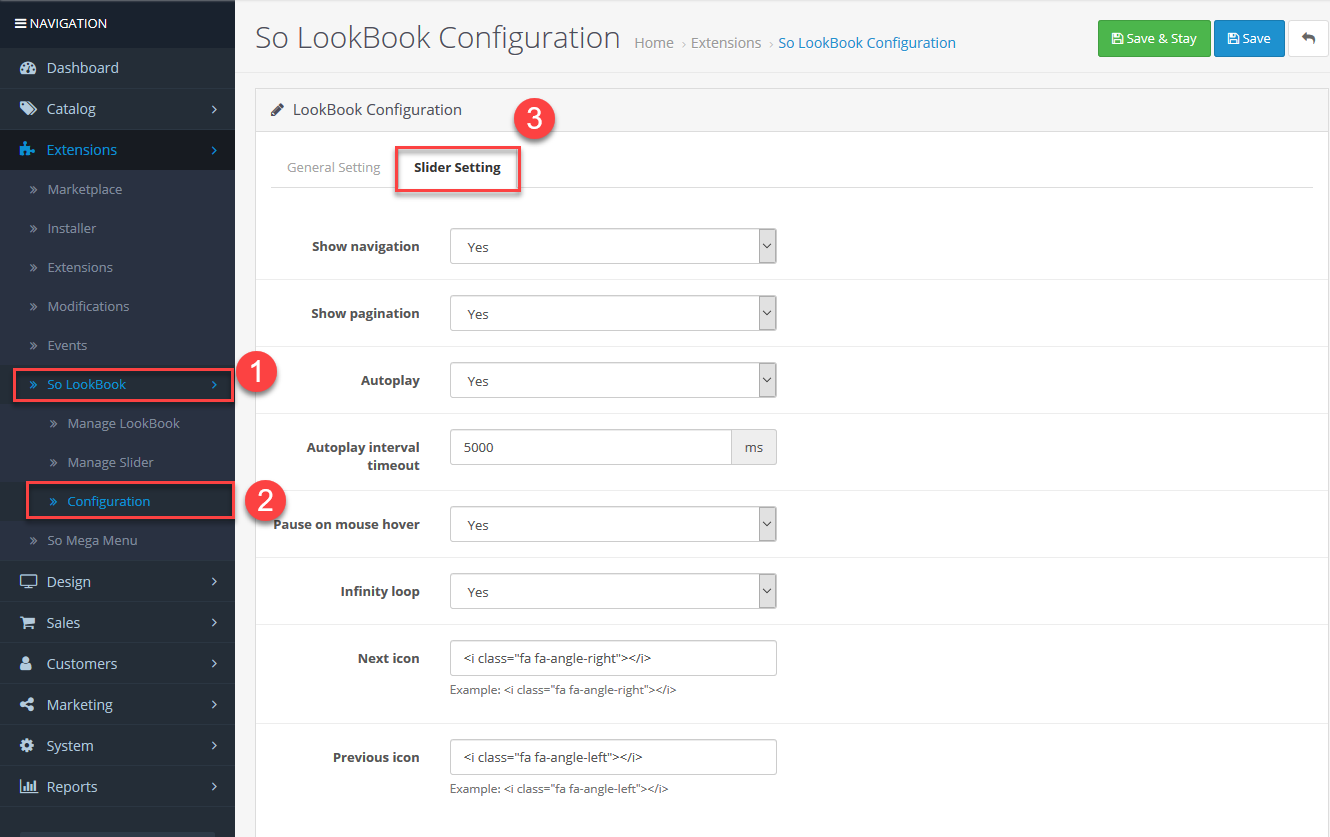
– Show navigation: Allow to select Yes/No navigation buttons.Screenshot here
– Show pagination: Allow to select Yes/No pagination buttons.Screenshot here
– Autoplay: Allow you to set autoplay for slideshow.
– Autoplay interval timeout: The time to move to next slider.
– Pause on mouse hover: Allow you to stop slide when being hovered OR not.
– Infinity loop : Allows the slider to loop or not.
– Next icon: Fill Next icon . Screenshot here
– Previous icon: Fill Previous icon. Screenshot here
3.3 Manager LookBook
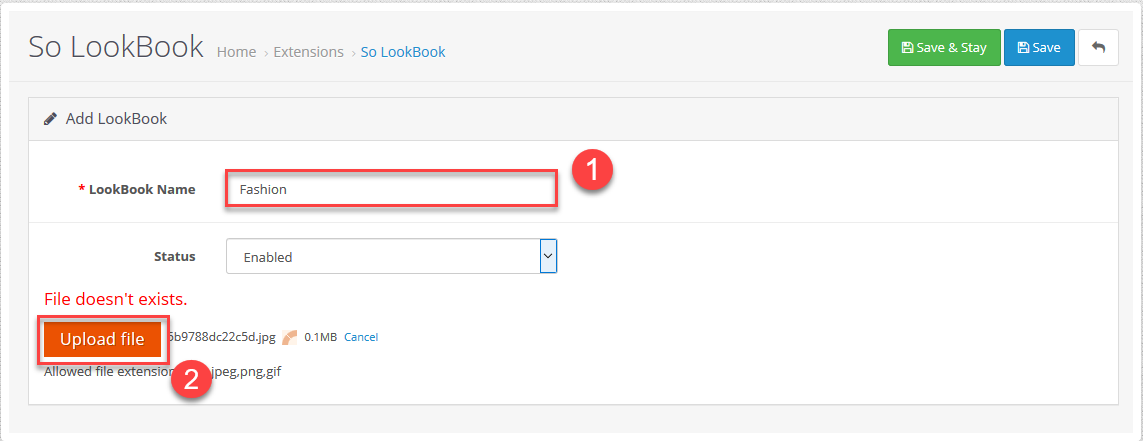
1. Go to Extensions -> So LookBook -> Manager Lookbook.
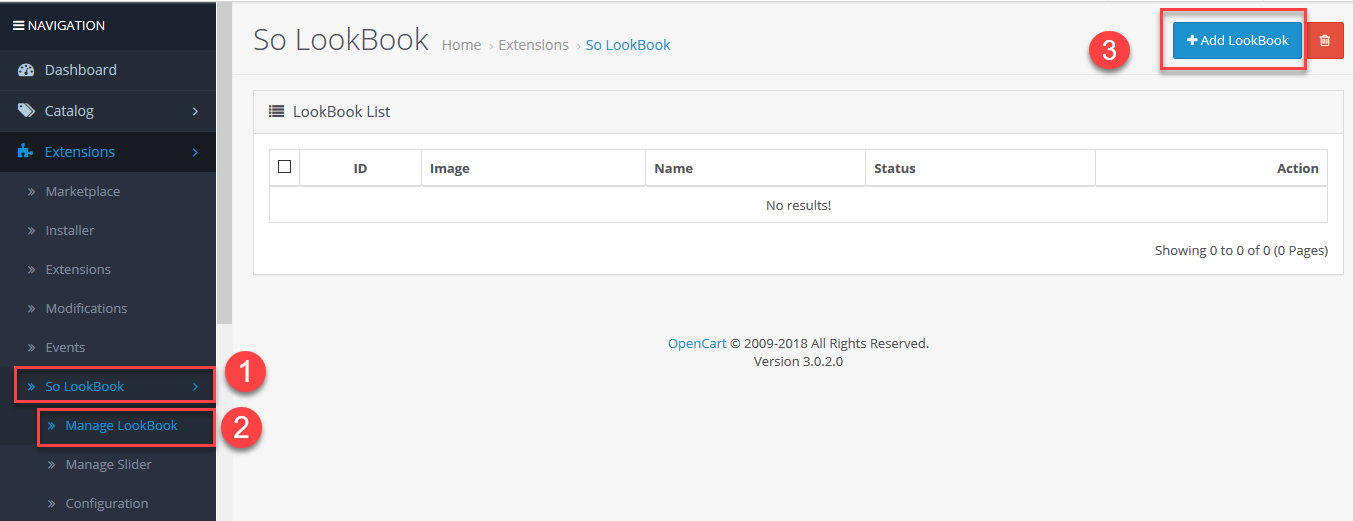
2. Fill the Lookbook name and upload the image file
3. Then, click Add Pin and drag the Pin to the desired location
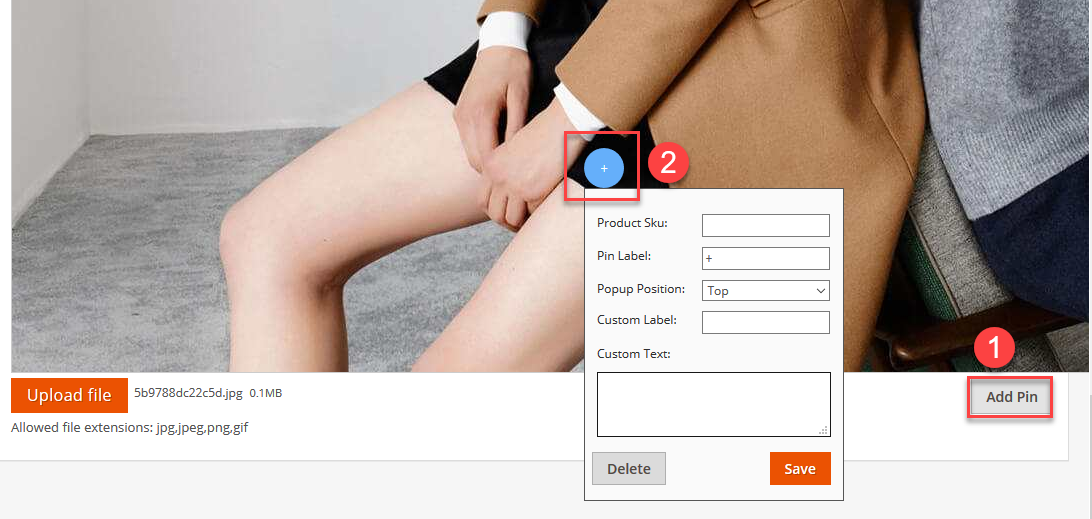
4. Fill in the information into Pin

– Product Sku: : Get data from the Product.Screenshot here
– Pin Label: can fill the price. icon +,- or anything
– Popup Position: Select the location shown for the popup.
– Custom Label: Enter the label you want custom.
– Custom Text:: Enter the Text you want custom.
Click Save .
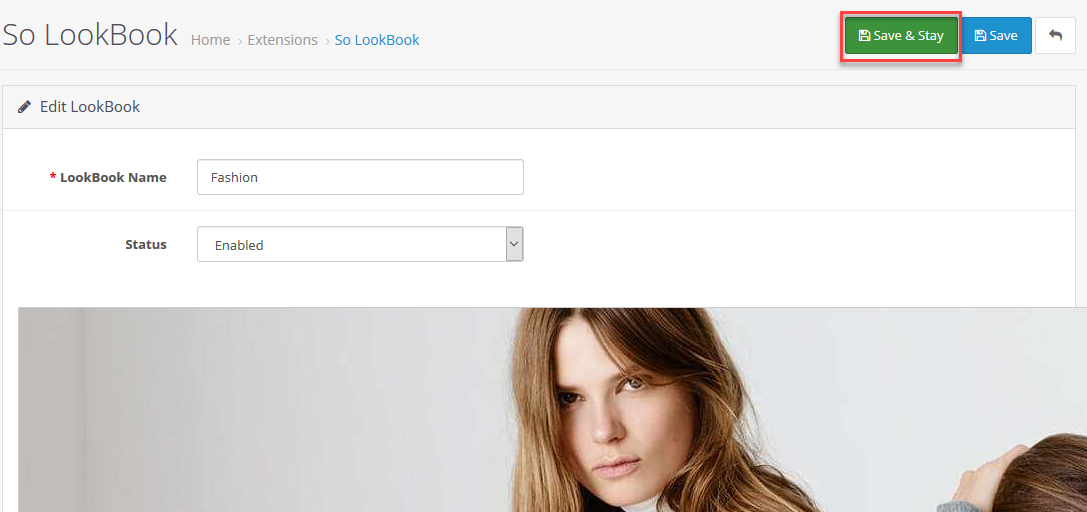
5. Add many Pin if you have multiple product. Then click Save and Stay or Save
3.4 Manager Slider
1. Go to Extensions -> So LookBook -> Manager Slider.
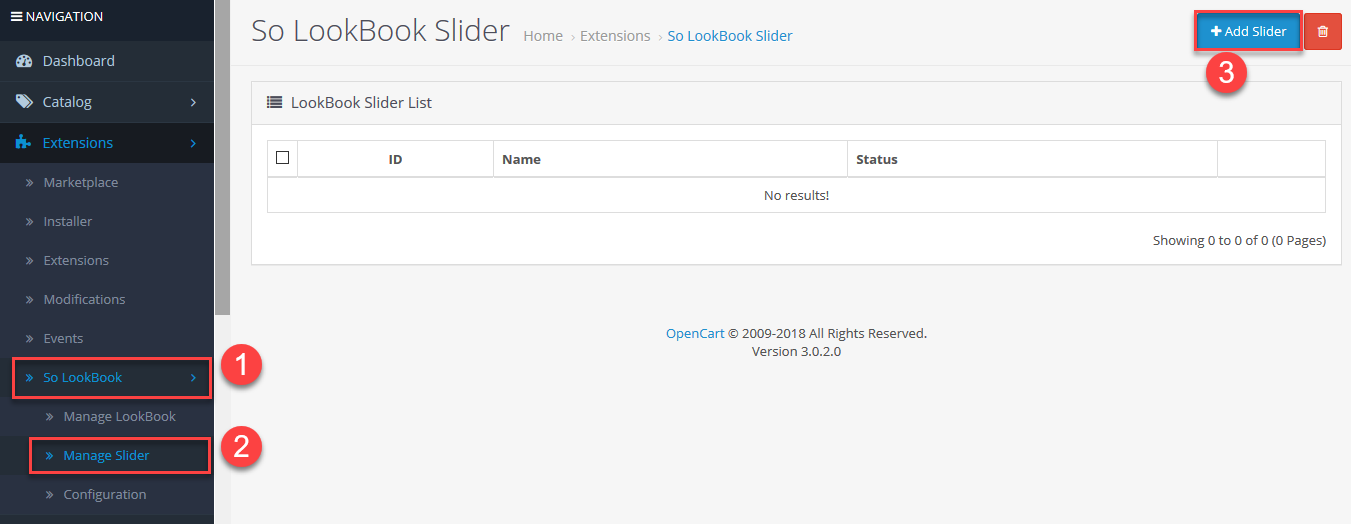
2. Fill the Slide Name and Configuration details for each item if want.
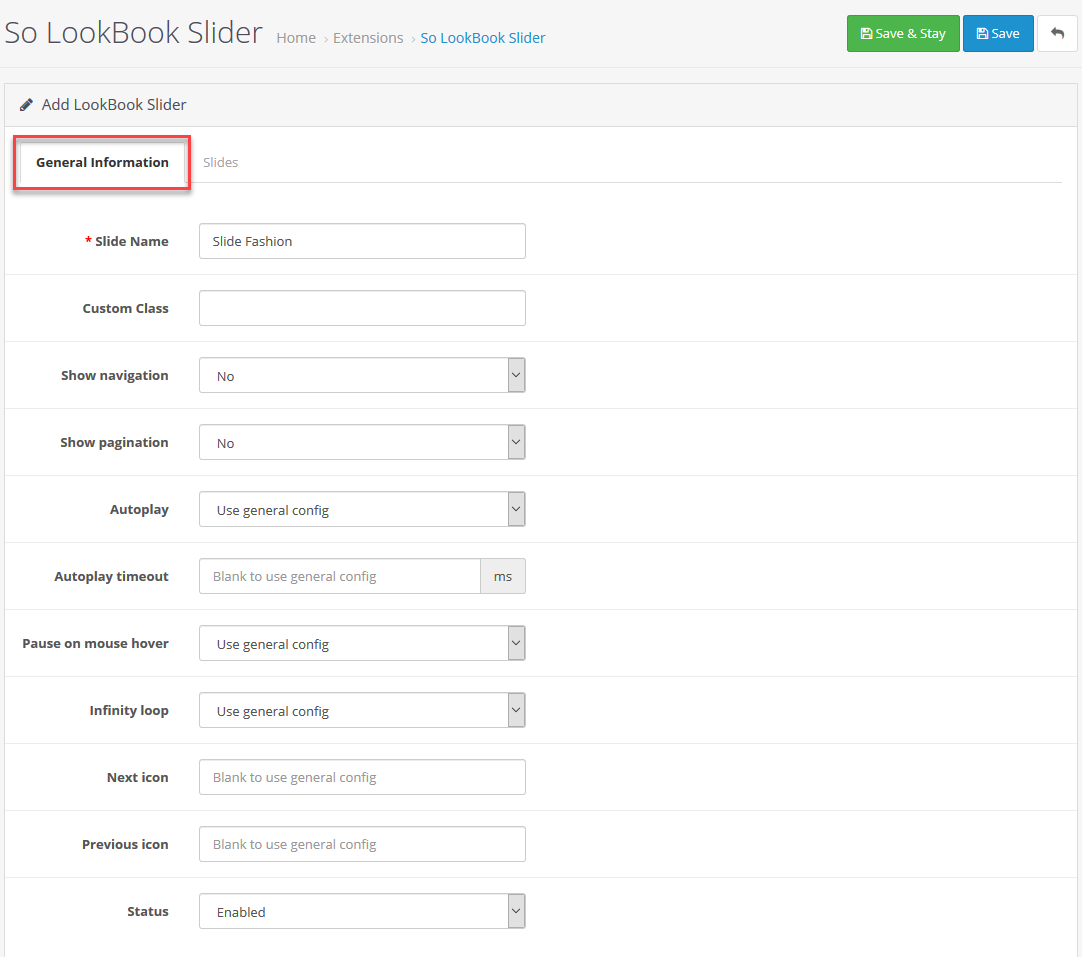
Note
Content configuration for this Slider specific.
– There are 3 value:
+ Select Use general config is retrieve the default data of the LookBook Configuration.Screenshot here
+ Yes / No: Display content or no.
3. In tabs Slider, select the sliders and fill in the order in which they appear. Save Information.
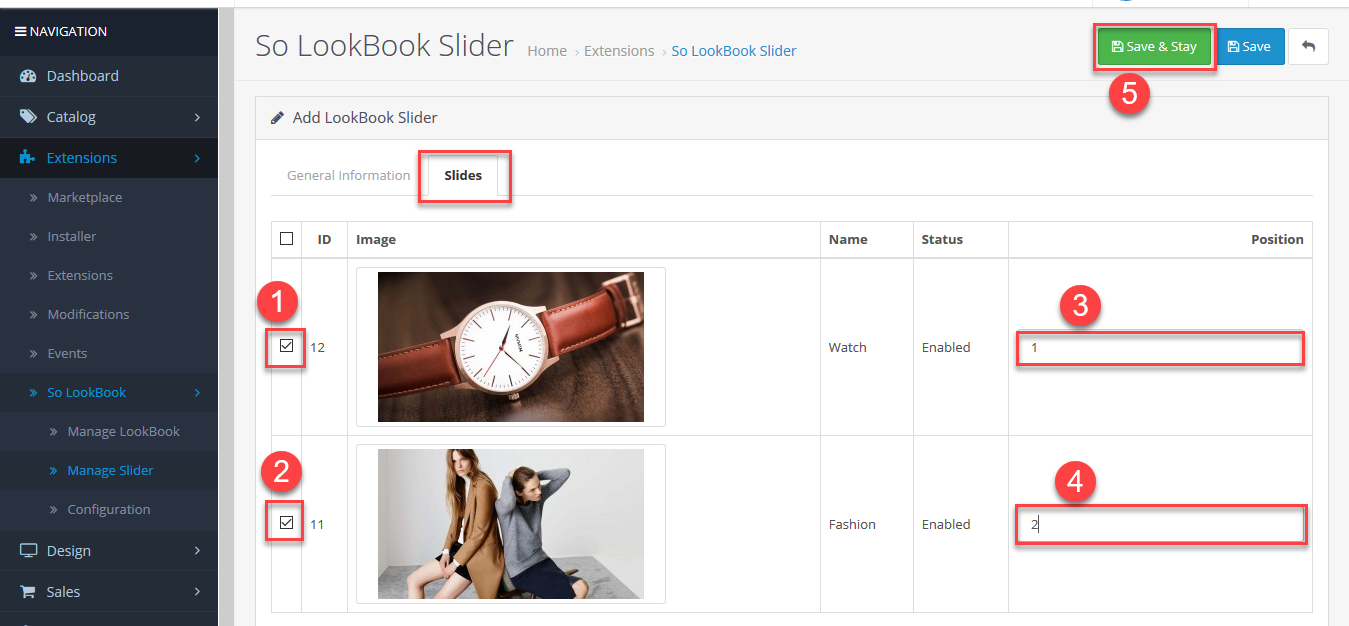
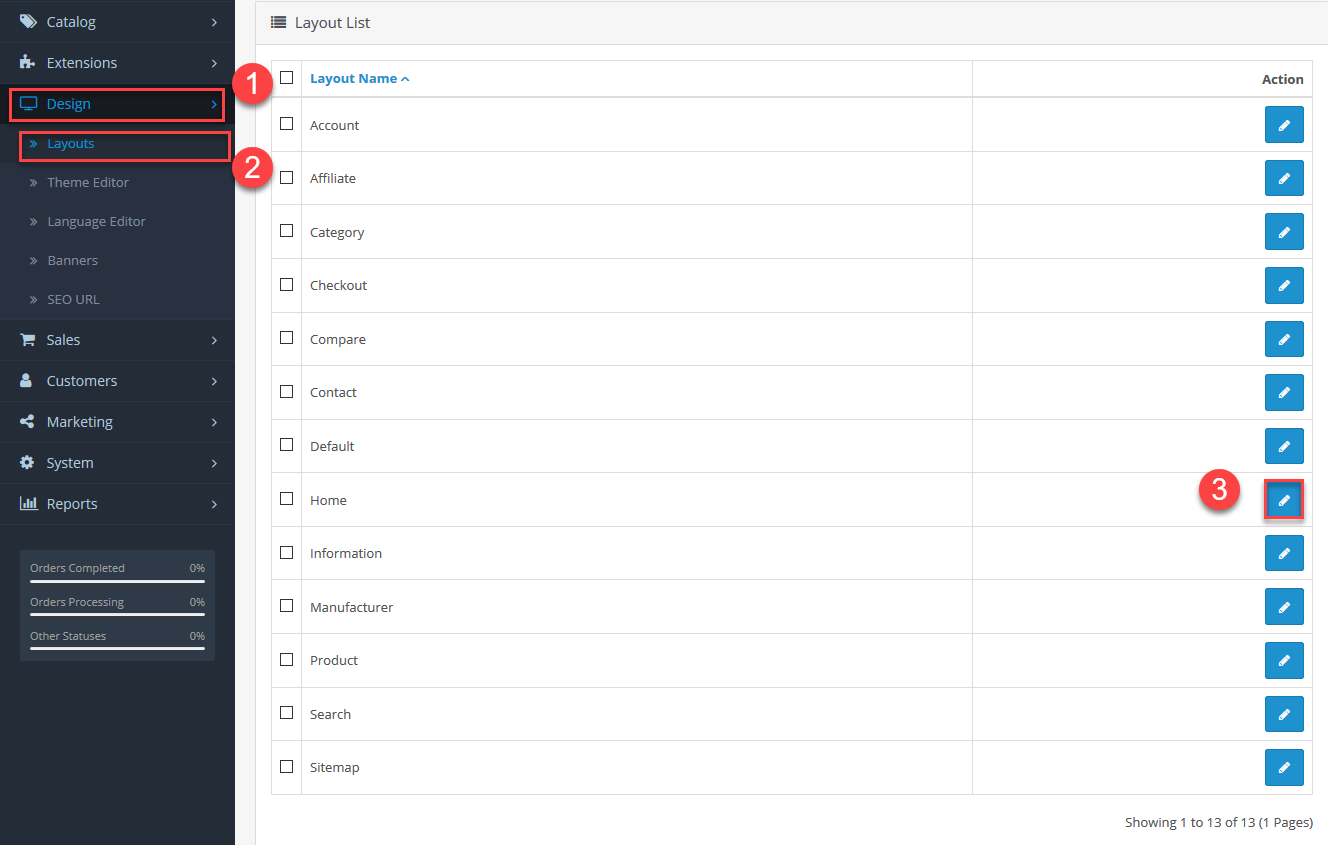
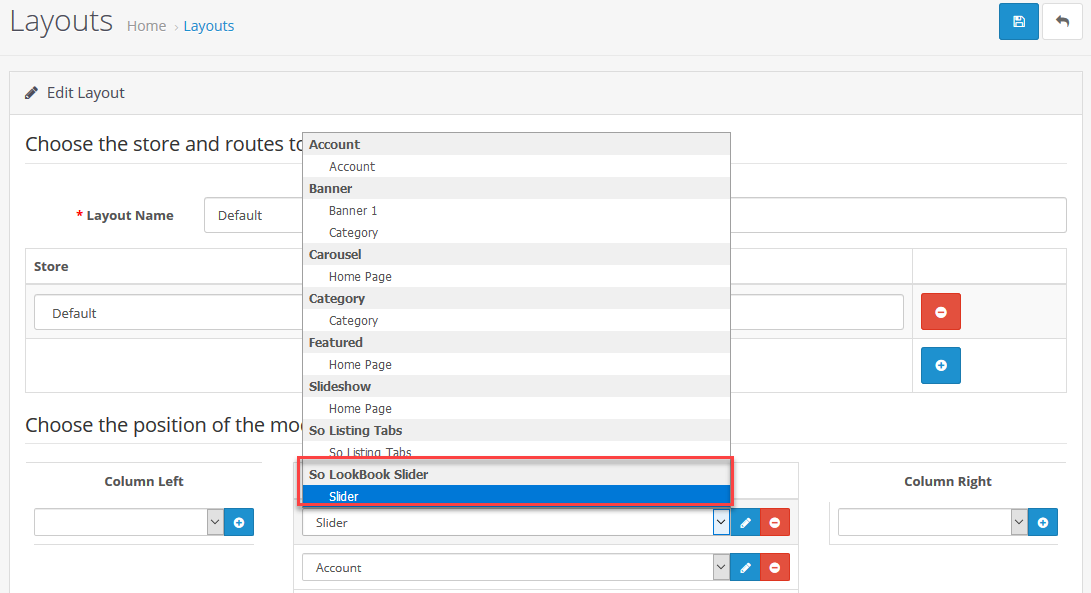
4. End, choose layout you want to display module.
***** Note *****
If Product -> Edit selects Lookbook.Screenshot here
then the page Product will display the corresponding Loobbook.Screenshot here
Open font end for results. Good luck !
4SUPPORT – Back to top
Thank you so much for purchasing this module. If you have any questions that are beyond the scope of this help file, please send us via: Submit a Ticket
Thanks so much!
