1SYSTEM REQUIREMENTS – Back to top
SO Hurama is compatible with Opencart 2.0.x and Opencart 2.1.x. Please make sure your system meets the following requirements:
1.1 System Requirements
Software
- Software: PHP 5.2.4+ (5.4+ recommended)
- MySQL: 5.0.4+
Web Sever
- Apache: 2.x+
- Microsoft: IIS 7
- Nginx: 1.0 (1.1 recommended)
1.3 Browser Requirements
The requirements are the same with Opencart 2.0.x and Opencart 2.1.x
- Firefox 4+
- IE (Internet Explorer) 9+
- Google Chrome 10+
- Opera 10+
- Safari 5+
1.4 Development Environment
The requirements are the same with Opencart 2.0.x and Opencart 2.1.x
During the development process, Localhost is preferred. You can use the following servers on your PC to develop your site.
Windows
- WAMPSEVER
- XAMPP for Windows
Linux
- LAMP Bubdle
- XAMPP for Linux
Mac OS
- MAMP & MAMP Pro
- XAMPP for Mac OS
1.5 Note: You can read more document below
- Opencart Installation:
- OPencart Help
2INSTALLATION – Back to top
There are two ways to install a SO Theme:
- Install Quickstart: By using this package, you will set the template exactly as our Demo with sample data.
- Install Template : If you exist a opencart website you can install only template.
2.1 Install with Quickstart Package:
Step 1: Open your Browser and type : localhost/phpmyadmin or yourdomain/phpmyadmin
Step 2: Then create database
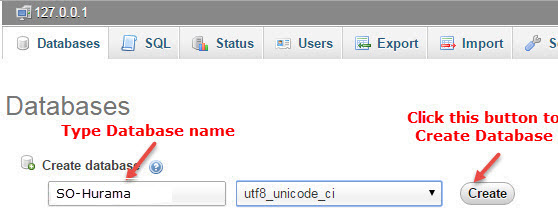
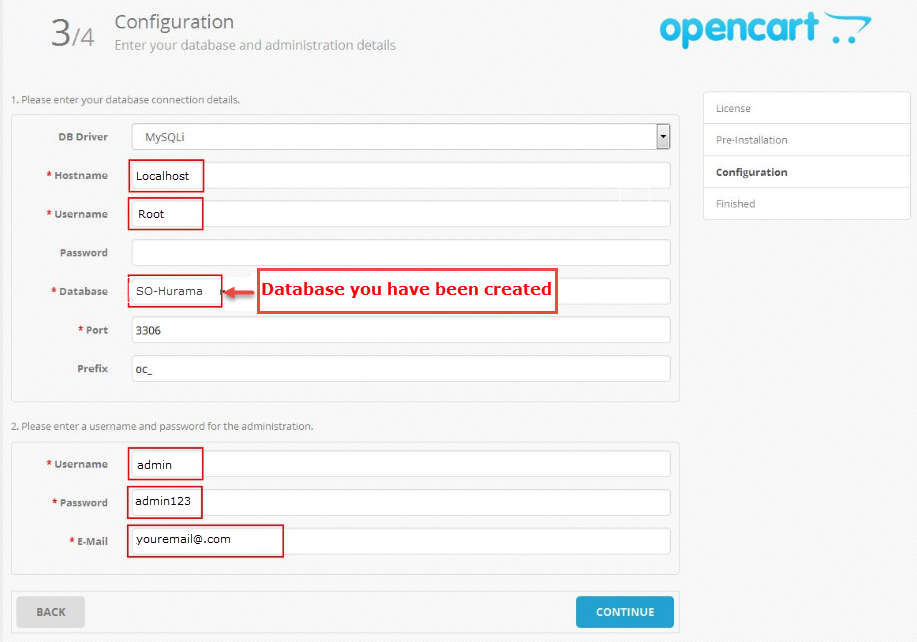
As an example, name of opencart is SO-Hurama: Https://Opencart/SO-Hurama/upload/install/index.php then click “install” button
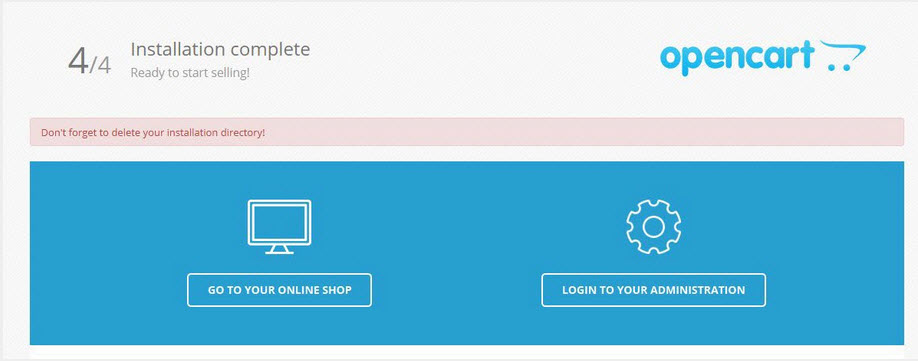
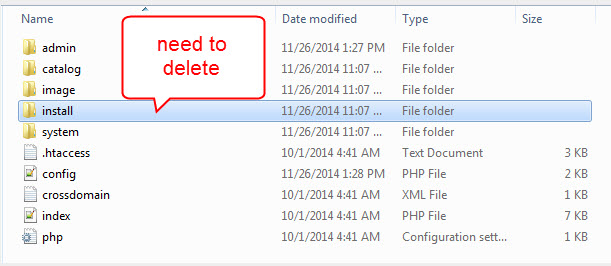
You need to delete install folder
Note:
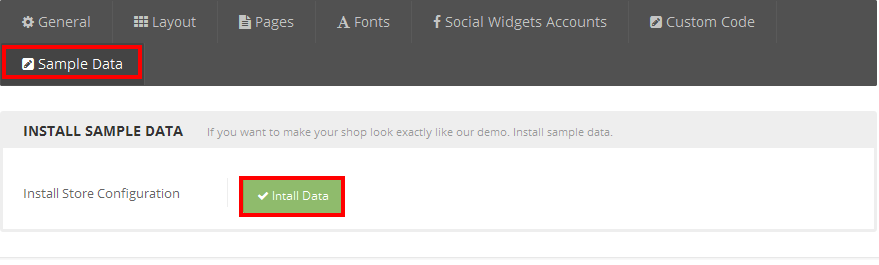
After installing quickstart package and choosing Layout you want. To retrieve sample data for theme default, please go to Theme Control Panel >> Choose Sample Data >> Click “Install data” button
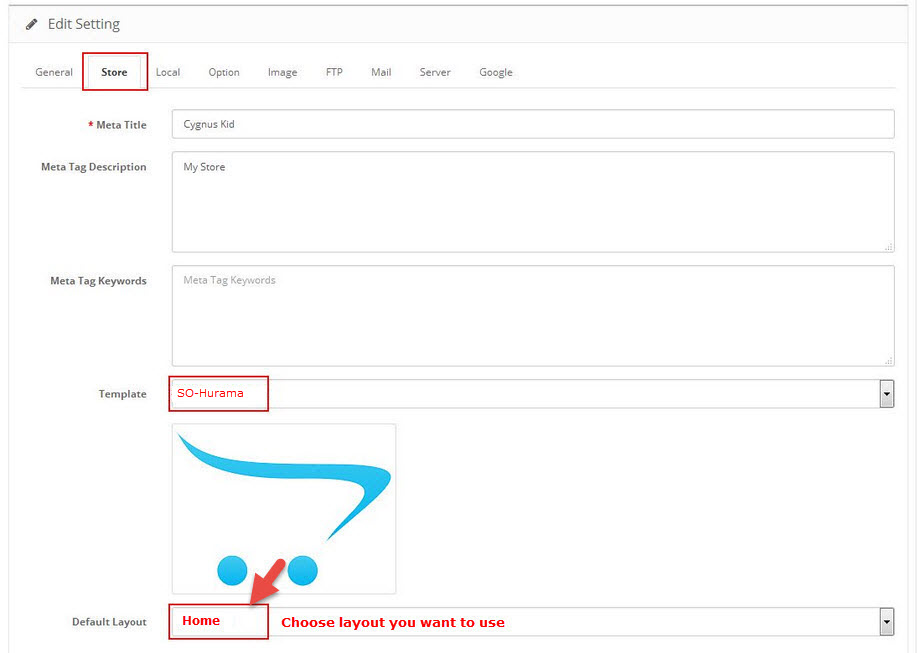
- Go to System -> Settings
- At tab Store Name , choose your default store, click Edit button
- Choose tab Store
2.2 Install Theme
You can download Opencart here.
You can install default Opencart the same as part 2.1 Install with Quickstart Package
There are two ways to install Theme
Option1: you to use the new Extension Installer featured in OpenCart 2.0
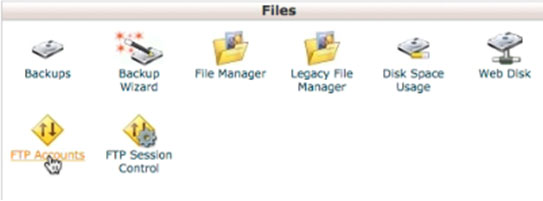
- Step 1 : Click FTP Accounts from your cPanel
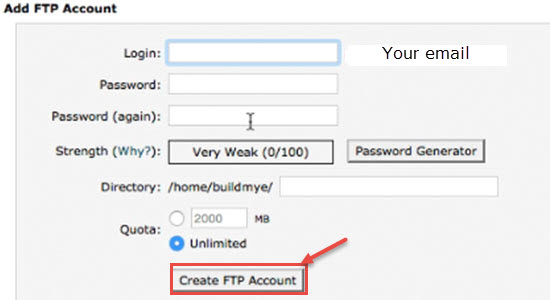
- Step 2: Create username and password
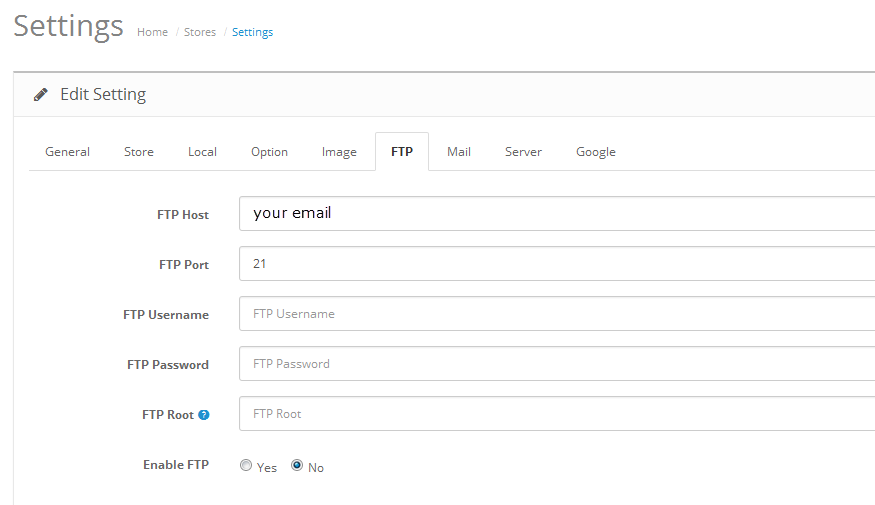
- Step 3: Enable FTP. please go to System >> Settings >> Click Edit next to your store >> Click FTP tab and enter the FTP username & password, which you just created from the cPanel
- Step 4: Go to Extensions > Extension Installer > Click Upload and select the “so_hurama_template.ocmod.zip” file to upload. Then You should see the message Success: You have installed your extension!
- Step 5: You run the vqmod on your Frontend. Please type the following link: http://www.yoursite.com/vqmod/install. Then you should see the message Success: You have installes your Vqmod !. Refresh your site
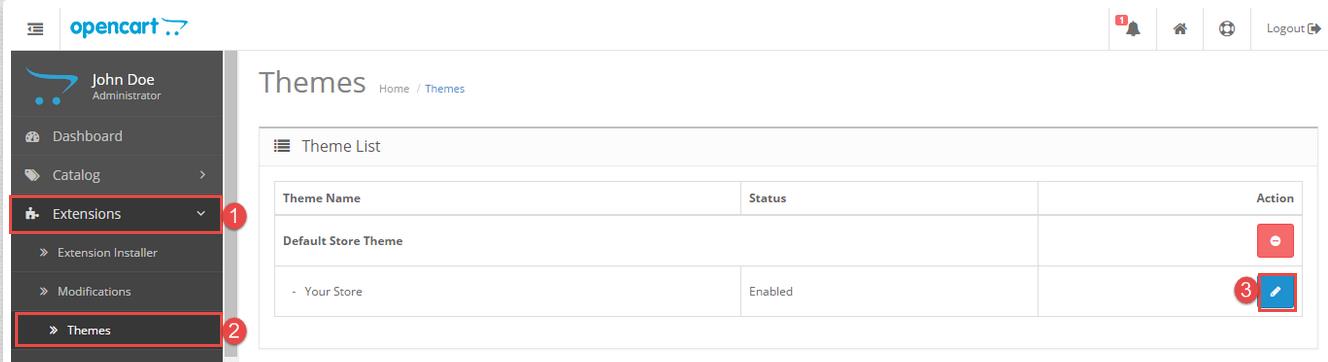
- Step 6: Go to Extensions > Themes > Click “Edit” button
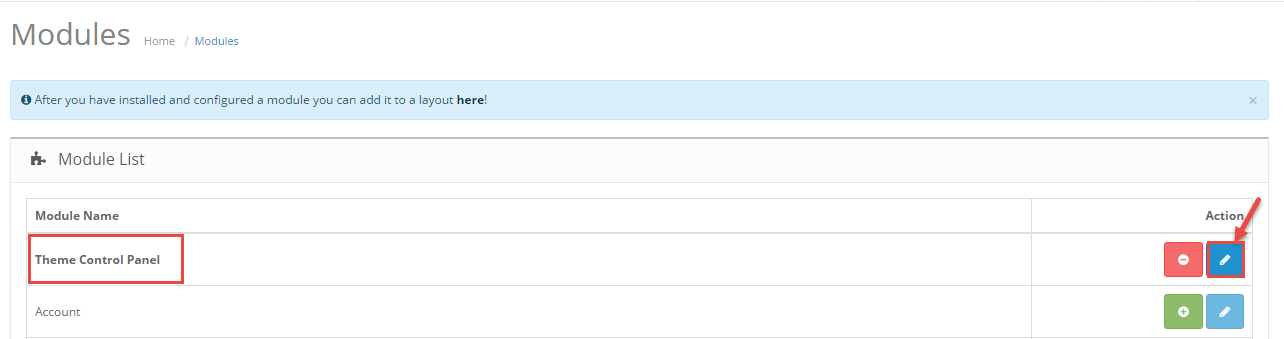
- Step 7: Go to Extension > Modules > SO Theme Control Panel and click on the ‘install’ link
- Step 8: To retrieve sample data for theme default, please go to Theme Control Panel >> Choose Sample Data >> Click “Install data” button
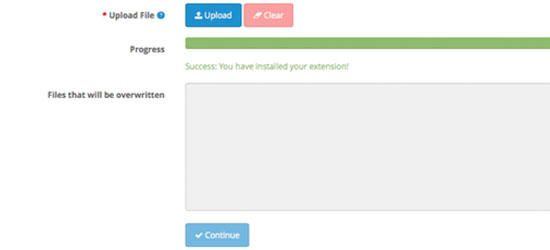
Then You should see the message Success: You have installed your extension!
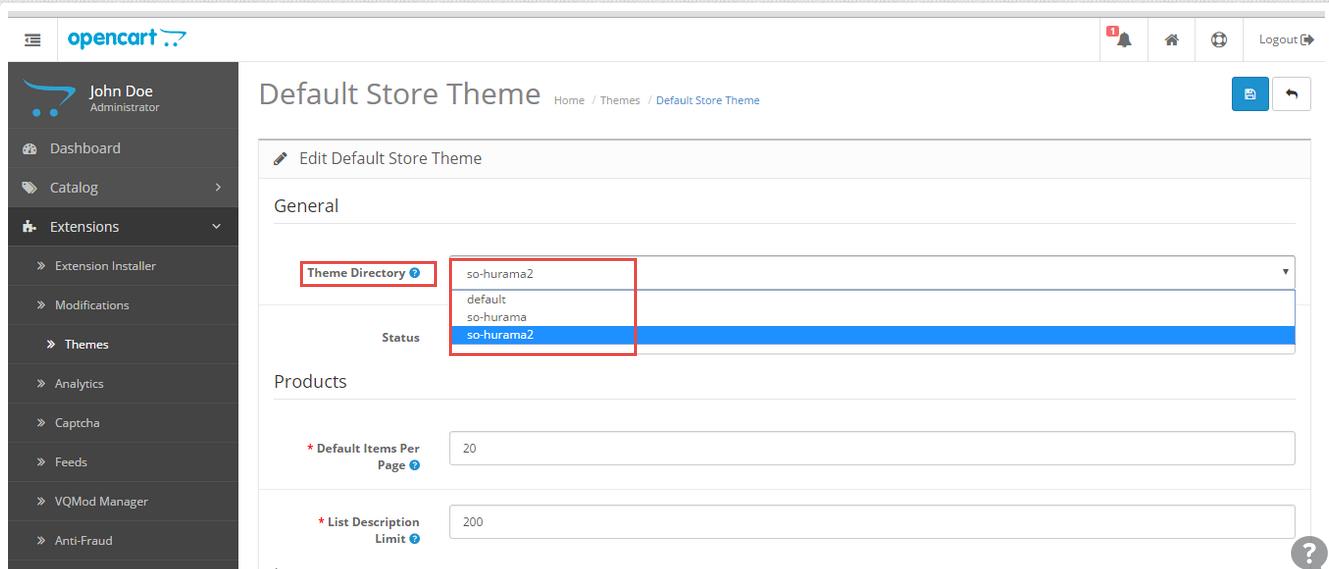
Click on the Theme Directory and choose the Layout you want
Then click on the ‘edit’ button to cofigure this module.
Option2: Just copy your files to your webserver
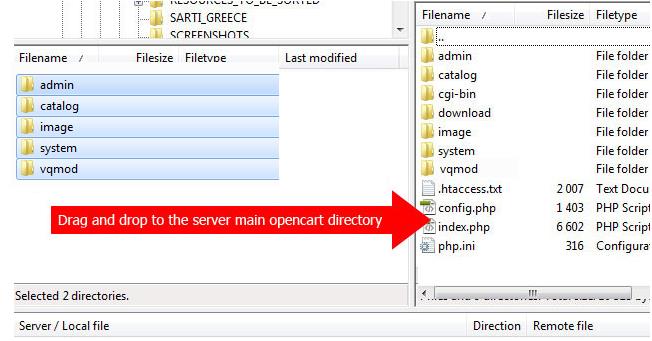
- Extract the so_hurama_template.ocmod.zip from the archive you downloaded from Themeforest.
- Open the folder that corresponds to your OpenCart version and upload all the files from “FILES_TO_UPLOAD” to the root directory you have installed OpenCart in. Drag the 5 folders (admin, catalog, image, system, ocmod) over to your OpenCart installation
- Login your opencart admin
- Go to Extensions > Themes > Click “Edit” button
Click on the Theme Directory and choose the Layout you want
Go to Extension > Modules > SO Theme Control Panel and click on the ‘install’ link
Then click on the ‘edit’ button to cofigure this module.
2.3 Install Vqmod
SO Hurama makes use of plugins to add custom features. These plugins need Vqmod installed on your site.
Download the lastest vqmod-x.x.x-opencart.zip file: here.
Please type the following link: http://www.yoursite.com/vqmod/install. Then you should see the message Success: You have installes your Vqmod !. Refresh your site.
3CONFIGURATION – Back to top
3.1 Layout Position
3.1.1 Layout1
3.1.2 Layout2

3.2 Template Configuration
3.2.1. Template Configuration
Go to Extensions > Modules > Theme Control Panel >> Click “Edit” Button. All of parameters of this theme are divided into the following groups, in which they are explained themselves:
General
Layout
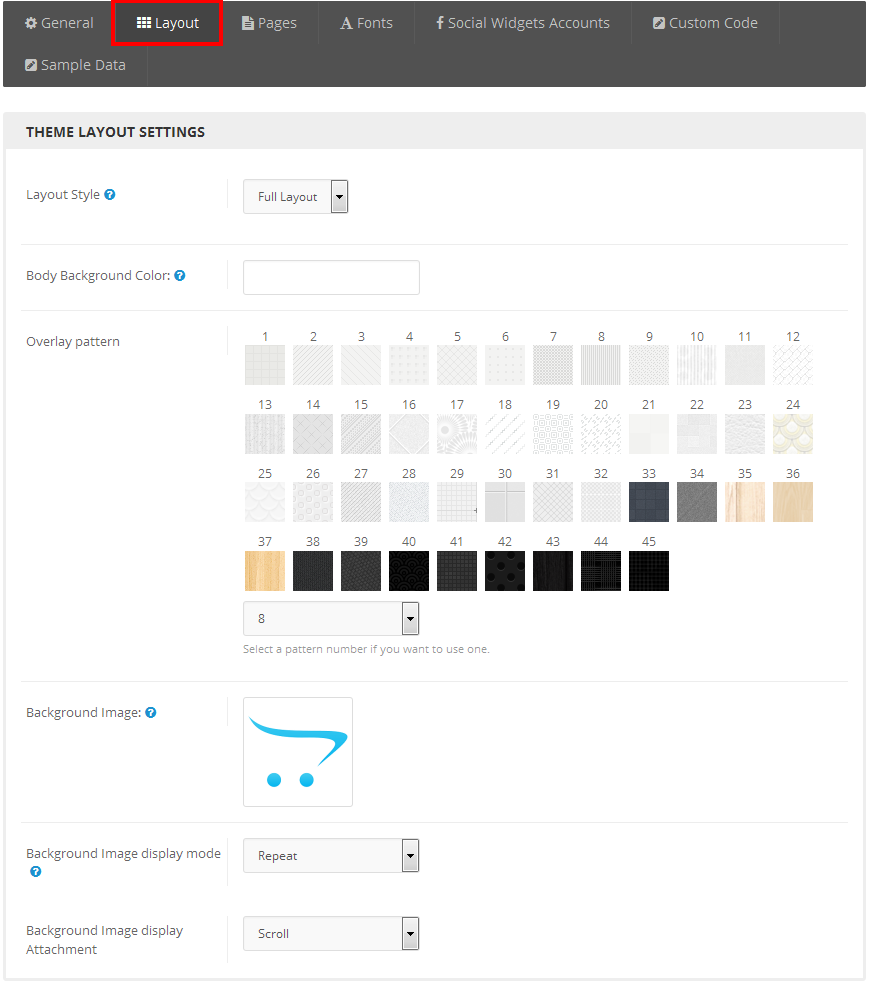
Pages
Fonts
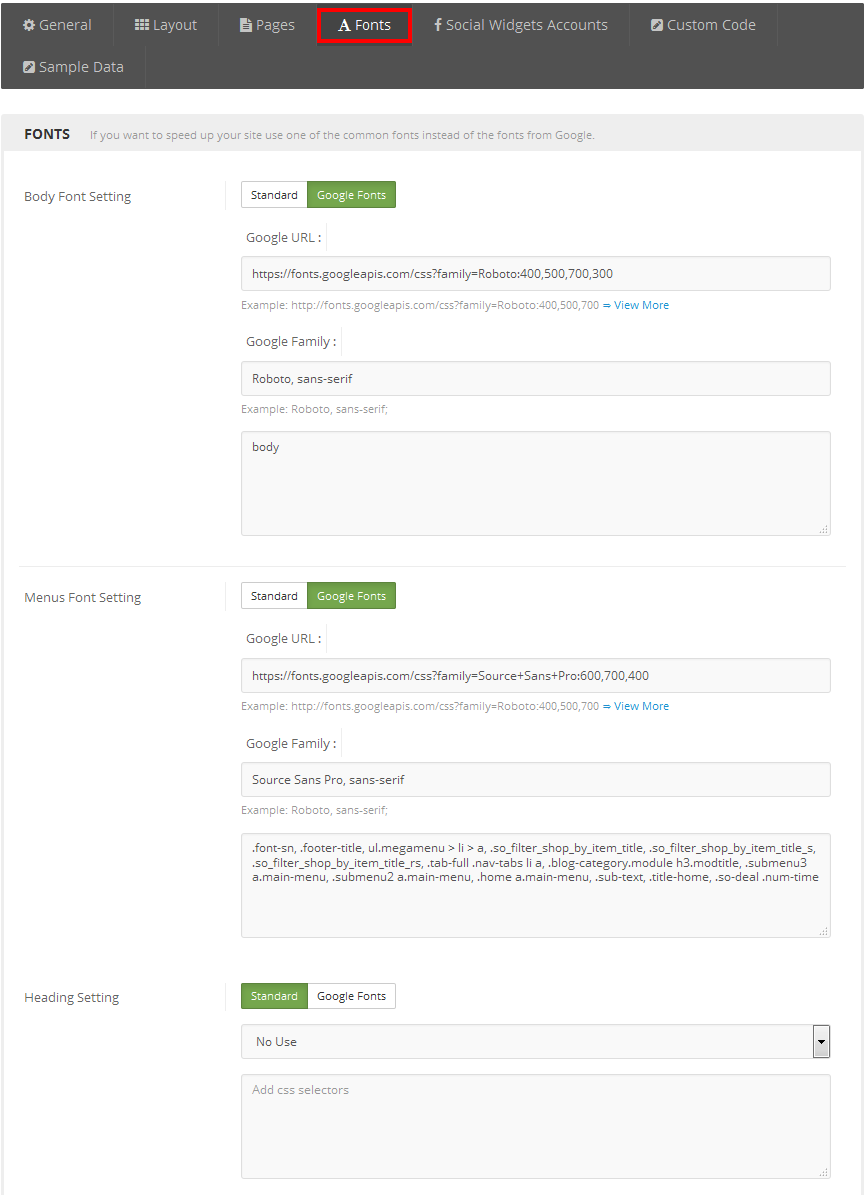
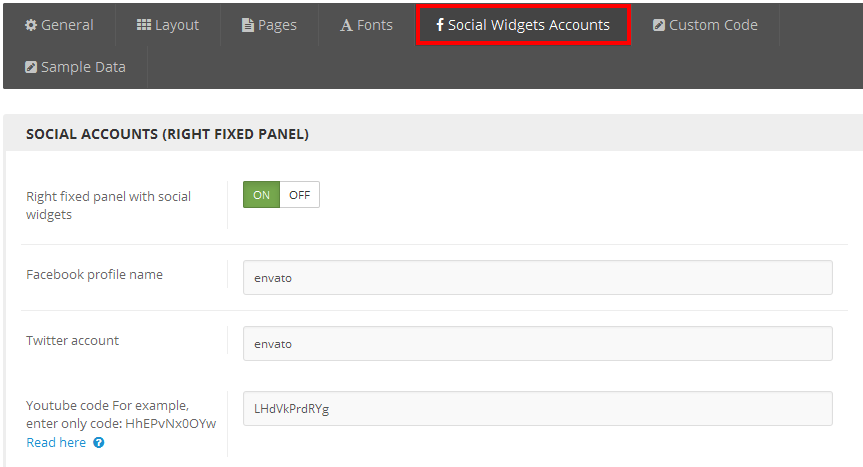
Social Widgets Accounts
Custom Code
3.3 Menu Configuration
Frontend Appearance

3.3.1.1 Create New Megamenu
Go to Extensions >> Modules >> Find module “SO Mega Menu” >> Click “Edit” button >> Enter a menu’s name: “SO Mega Menu” >> Then Click “Save” button >> Create New Megamenu Here
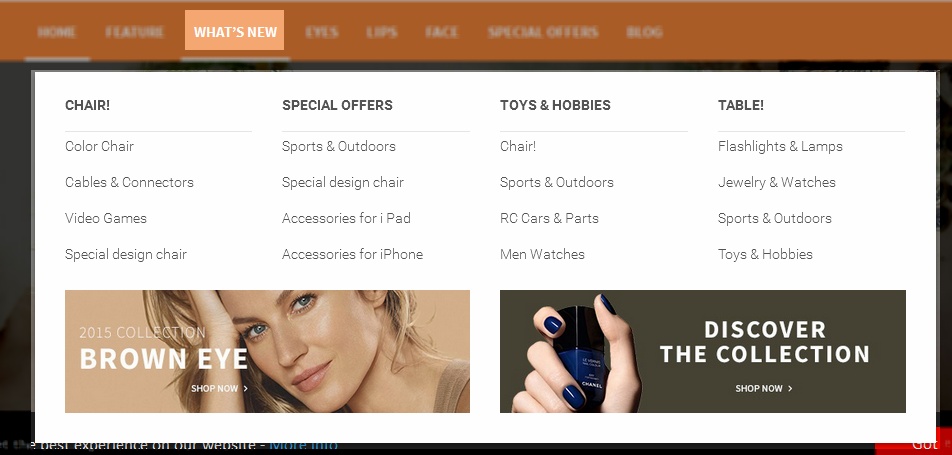
3.3.1.2 Features Menu Configuration
Frontend Appearance
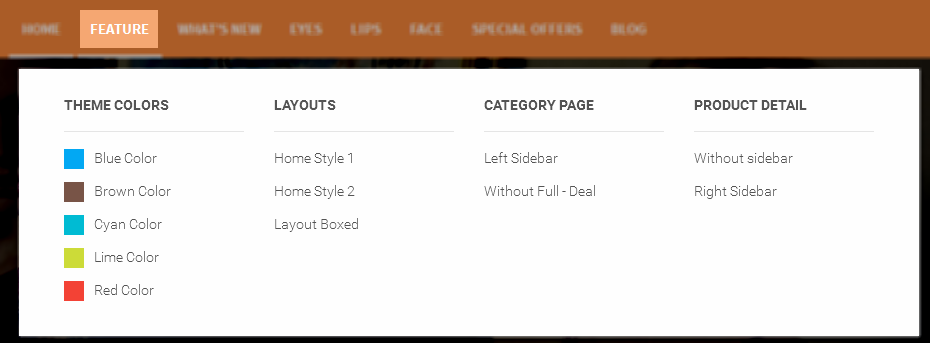
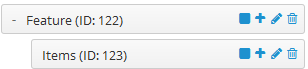
To create this menu, please go to Extensions >> Modules >> ” SO Megamenu > SO Megamenu” >> Click “Edit” button >> Click “Creat new Item” >> Creat new item Here
Check the menu item in the boxes in the left column, click “Creat new Item” to add Submenus to the menu and drag/drop to arrange them.
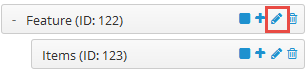
To configure Features Menu, click on “pencil” symbol to configure its backend settings
Copy and paste the Code into editor:
|
1 2 3 4 5 6 7 8 9 10 11 12 13 14 15 16 17 18 19 20 21 22 23 24 25 26 27 28 29 30 31 32 33 34 35 36 37 38 39 40 41 42 43 44 45 46 47 48 49 50 51 52 53 54 55 56 57 58 59 60 61 62 63 64 65 66 67 68 69 70 |
<div class="featured" style="width: 850px;"> <div class="column col-lg-3 col-md-3 col-sm-6"> <a>Layouts</a> <div> <ul class="row-list"> <li><a href="http://dev.ytcvn.com/ytc_templates/opencart/so_market/index.php?layoutbox=full">Home Style 1</a></li> <li><a href="http://dev.ytcvn.com/ytc_templates/opencart/so_market/layout2/index.php?layoutbox=full">Home Style 2</a></li> <li><a href="http://dev.ytcvn.com/ytc_templates/opencart/so_market/index.php?layoutbox=boxed&pattern=12">Layout Boxed</a></li> </ul> </div> </div> <div class="column col-lg-3 col-md-3 col-sm-6 layout-color"> <a>Theme Colors</a> <div> <ul class="row-list"> <li class="color brown"><a href="index.php?scheme=brown">Brown Color</a></li> <li class="color cyan"><a href="index.php?scheme=cyan">Cyan Color</a></li> <li class="color lime"><a href="index.php?scheme=lime">Lime Color</a></li> <li class="color blue"><a href="index.php?scheme=blue">Blue Color</a></li> <li class="color red"><a href="index.php?scheme=red">Red Color</a></li> </ul> </div> </div> <div class="column col-lg-3 col-md-4 col-sm-6"> <a>Category Page</a> <div> <ul class="row-list"> <li><a href="index.php?route=product/category&path=34" target="_blank">Left Sidebar - Today's Deals</a></li> <li><a href="layout2/index.php?route=product/category&path=34" target="_blank">Without sidebar - Show all element</a></li> </ul> </div> </div> <div class="column col-lg-3 col-md-2 col-sm-6"> <a>Product Detail</a> <div> <ul class="row-list"> <li><a href="index.php?route=product/product&product_id=42" target="_blank">Without sidebar</a></li> <li><a href="layout2/index.php?route=product/product&product_id=42" target="_blank">Right Sidebar</a></li> </ul> </div> </div> </div> |
To configure Items – Submenu, click on “pencil” symbol to configure its backend settings
Copy and paste the Code into editor:
|
1 2 3 4 5 6 7 8 9 10 11 12 13 14 15 16 17 18 19 20 21 22 23 24 25 26 27 28 29 30 31 32 33 34 35 36 37 38 39 40 41 42 43 44 45 46 47 48 49 50 51 52 53 54 55 56 57 58 59 60 61 62 63 64 65 66 67 68 69 70 71 72 73 74 |
<div class="featured"> <div class="column col-lg-3 col-md-3 layout-color"> <h2>Theme Colors</h2> <div> <ul class="row-list"> <li class="color blue"><a href="index.php?scheme=blue">Blue Color</a></li> <li class="color brown"><a href="index.php?scheme=brown">Brown Color</a></li> <li class="color cyan"><a href="index.php?scheme=cyan">Cyan Color</a></li> <li class="color lime"><a href="index.php?scheme=lime">Lime Color</a></li> <li class="color red"><a href="index.php?scheme=red">Red Color</a></li> </ul> </div> </div> <div class="column col-lg-3 col-md-3"> <h2>Layouts</h2> <div> <ul class="row-list"> <li><a href="http://dev.ytcvn.com/ytc_templates/opencart/so_hurama/index.php?layoutbox=full">Home Style 1</a></li> <li><a href="http://dev.ytcvn.com/ytc_templates/opencart/so_hurama/layout2/index.php?layoutbox=full">Home Style 2</a></li> <li><a href="http://dev.ytcvn.com/ytc_templates/opencart/so_hurama/index.php?layoutbox=boxed&pattern=12">Layout Boxed</a></li> </ul> </div> </div> <div class="column col-lg-3 col-md-3"> <h2>Category Page</h2> <div> <ul class="row-list"> <li><a href="index.php?route=product/category&path=35" target="_blank">Left Sidebar</a></li> <li><a href="layout2/index.php?route=product/category&path=34" target="_blank">Without Full - Deal </a></li> </ul> </div> </div> <div class="column col-lg-3 col-md-3"> <h2>Product Detail</h2> <div> <ul class="row-list"> <li><a href="index.php?route=product/product&product_id=42" target="_blank">Without sidebar</a></li> <li><a href="layout2/index.php?route=product/product&product_id=42" target="_blank">Right Sidebar</a></li> </ul> </div> </div> </div> |
3.3.1.3 what’s new Menu Configuration
Frontend Appearance
To create this menu, please go to Extensions >> Modules >> ” SO Megamenu > SO Megamenu” >> Click “Edit” button >> Click “Creat new Item” >> Creat new item Here
Check the menu item in the boxes in the left column, click “Creat new Item” to add Submenus to the menu and drag/drop to arrange them.
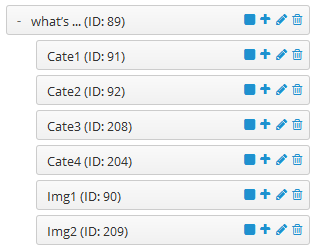
To configure what’s new Menu, click on “pencil” symbol to configure its backend settings
To configure Cate1 – Submenu, click on “pencil” symbol to configure its backend settings
Cate2, Cate3, Cate4 are configured the same as Cate1
To configure Img1 – Submenu, click on “pencil” symbol to configure its backend settings
3.3.1.4 Eyes Menu Configuration
Frontend Appearance
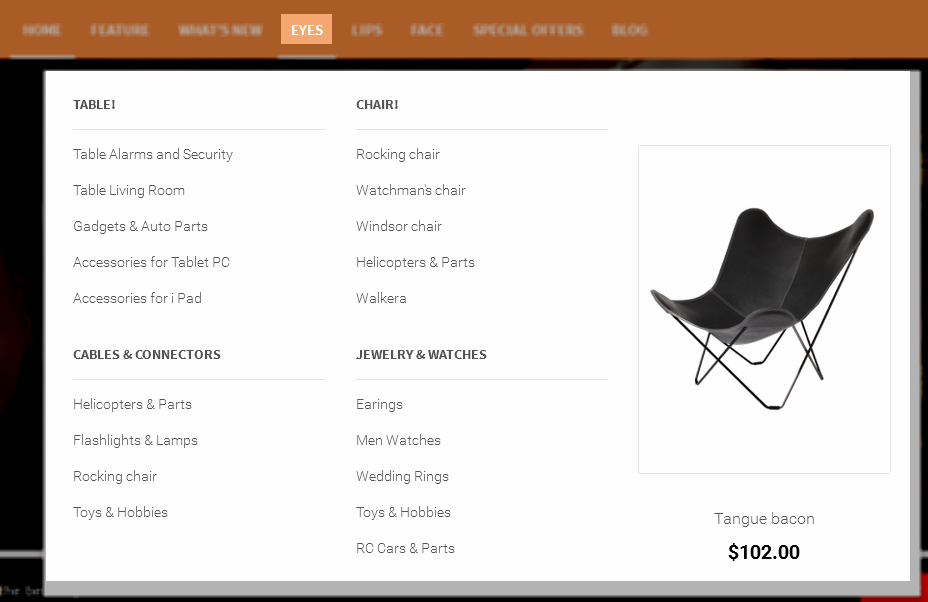
To create this menu, please go to Extensions >> Modules >> ” SO Megamenu > SO Megamenu” >> Click “Edit” button >> Click “Creat new Item” >> Creat new item Here
Check the menu item in the boxes in the left column, click “Creat new Item” to add Submenus to the menu and drag/drop to arrange them.
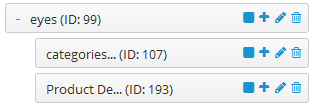
To configure Eyes Menu, click on “pencil” symbol to configure its backend settings
To configure Categories1, click on “pencil” symbol to configure its backend settings
To configure Product Demo – Submenu, click on “pencil” symbol to configure its backend settings
3.3.1.5 Lips Menu Configuration
Frontend Appearance
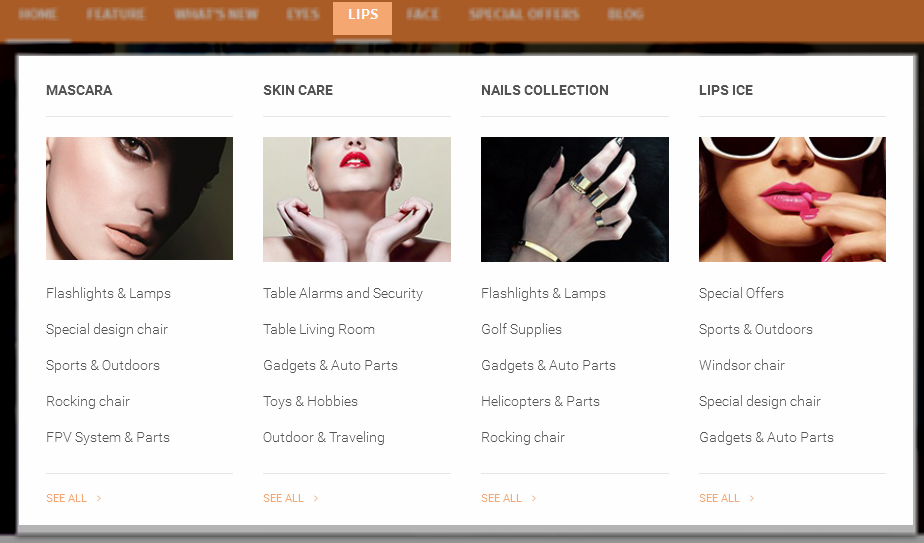
To create this menu, please go to Extensions >> Modules >> ” SO Megamenu > SO Verticalmenu” >> Click “Edit” button >> Click “Creat new Item” >> Creat new item Here
Check the menu item in the boxes in the left column, click “Creat new Item” to add Submenus to the menu and drag and drop to arrange them.
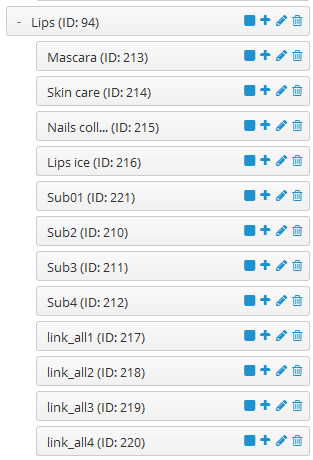
To configure Lips Menu, click on “pencil” symbol to configure its backend settings
To configure Mascara – Submenu, click on “pencil” symbol to configure its backend settings
Skin care, Nails collection, Lips ice are configured the same as Mascara
To configure Sub01 – Submenu, click on “pencil” symbol to configure its backend settings
Sub2, Sub3, Sub4 are configured the same as Sub01
To configure link_all1 – Submenu, click on “pencil” symbol to configure its backend settings
link_all2, link_all3, link_all4 are configured the same as Sub01
Copy and paste the Code into editor:
|
1 2 |
<p class="see-all"><a href="#"> SEE ALL</a><i class="fa fa-angle-right"></i> </p> |
3.4 Extension Configuration – Layout1
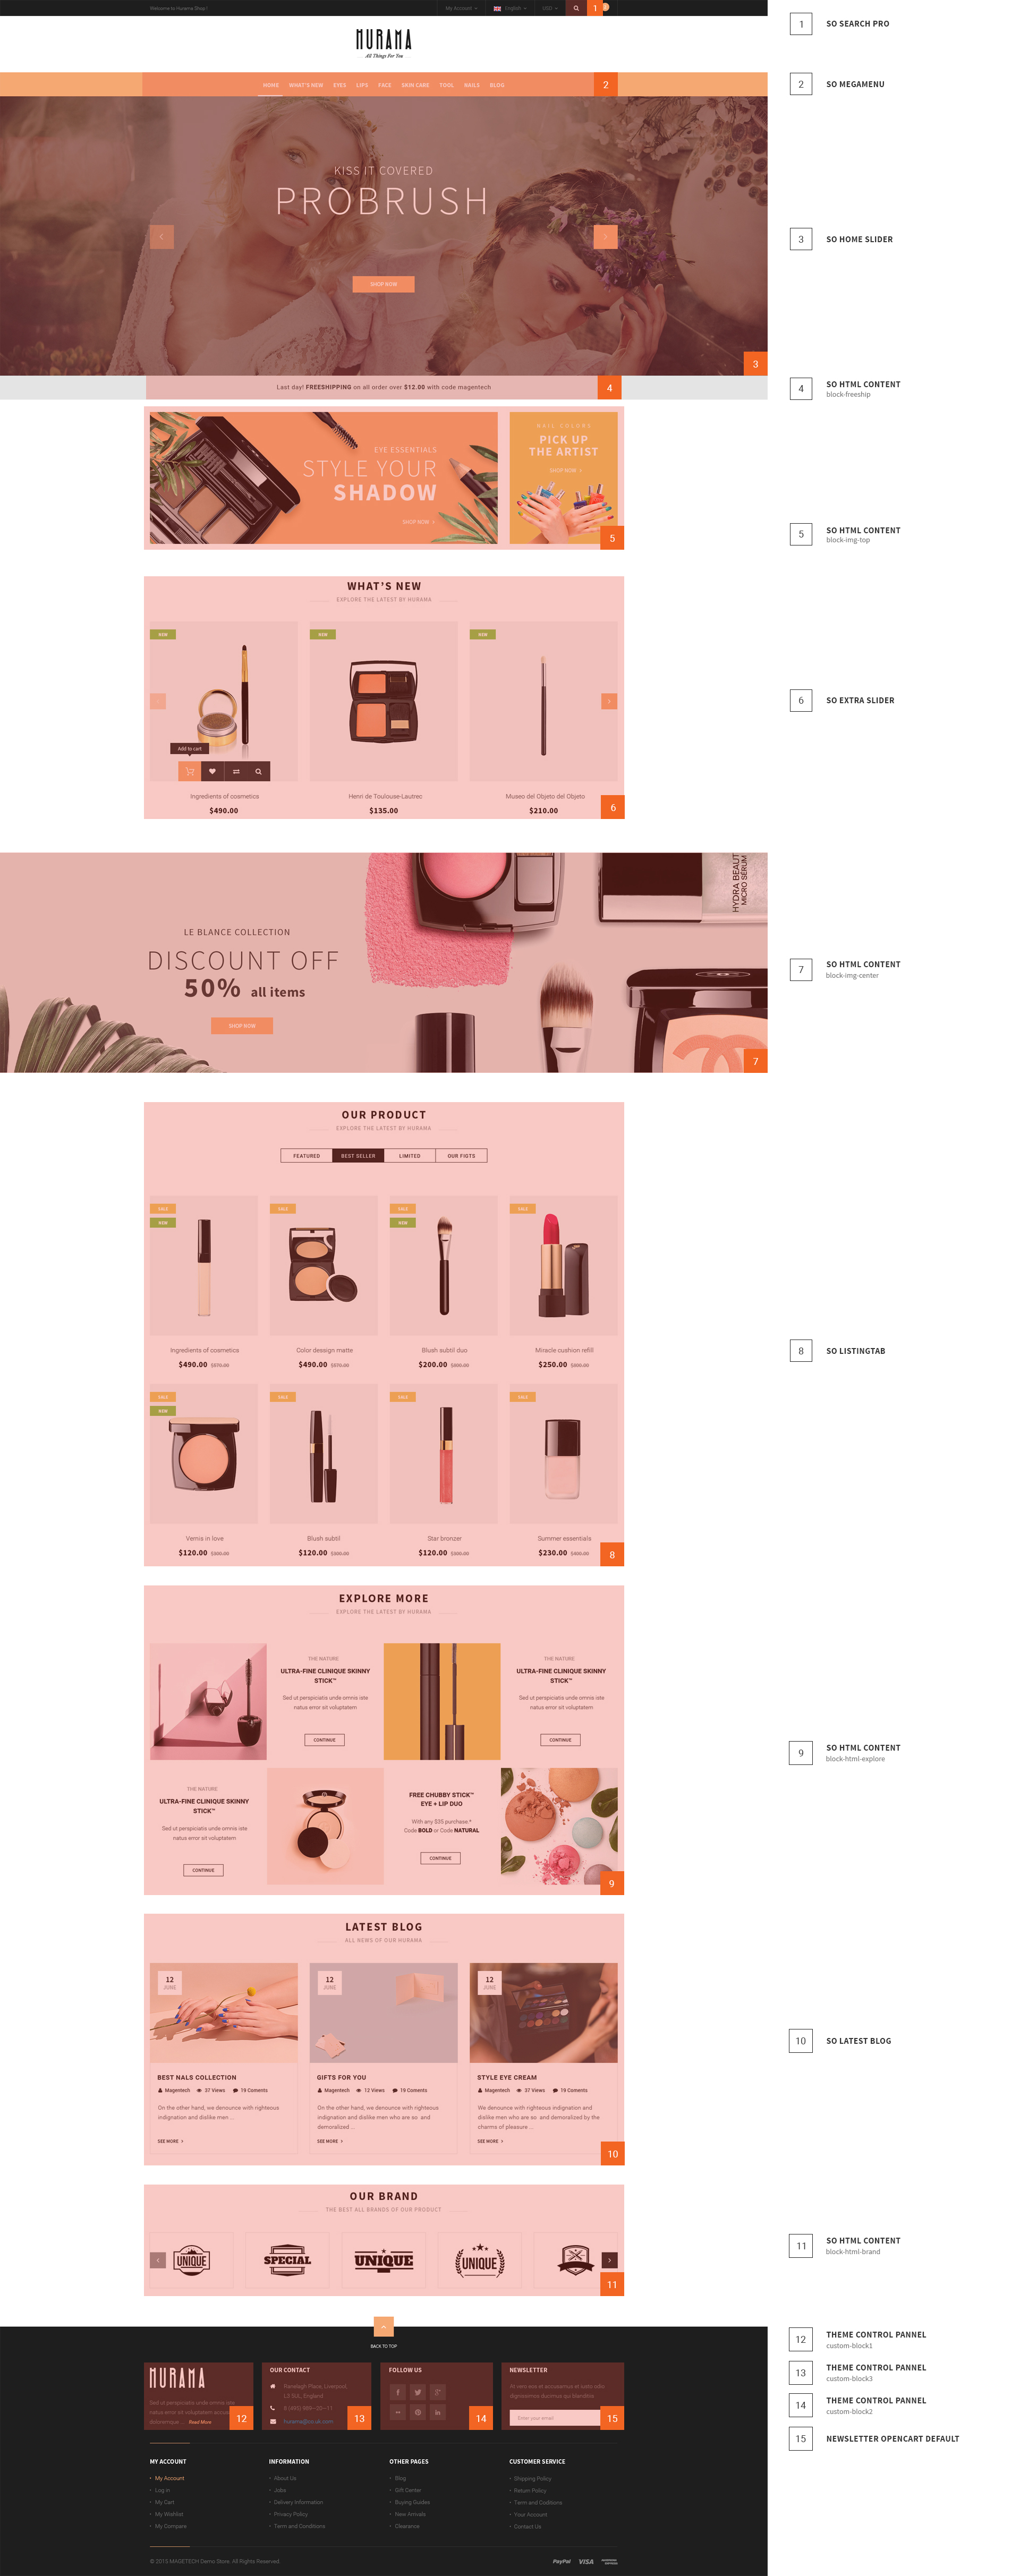
The SO Hurama front-page has been integrated with extensions in the Theme as following list:
- SO-SearchPro
- SO-Mega-Menu
- SO-Home-Slider
- SO-HTML-Content – Block Free Ship
- SO-HTML-Content – Block IMG Top
- SO-Extra-Slider
- SO-HTML-Content – Block IMG Center
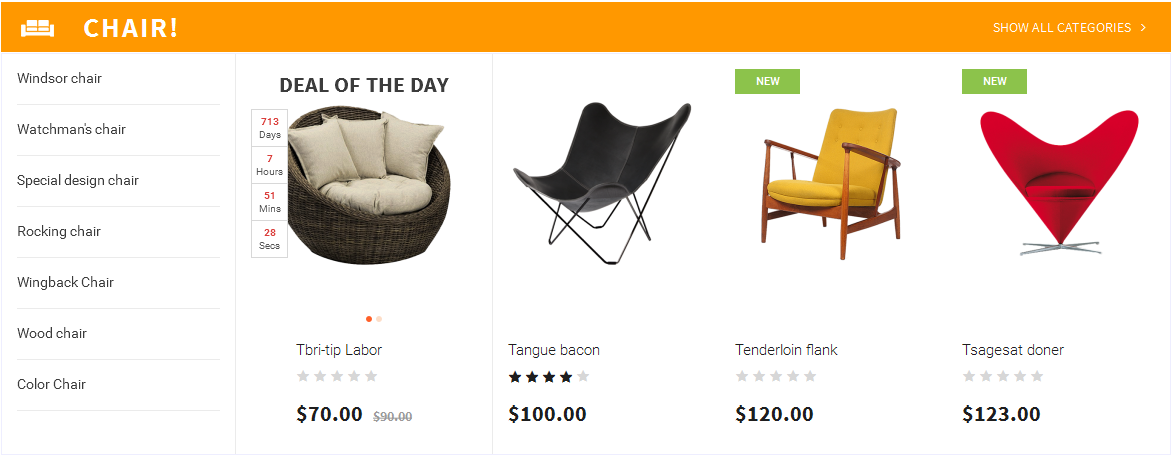
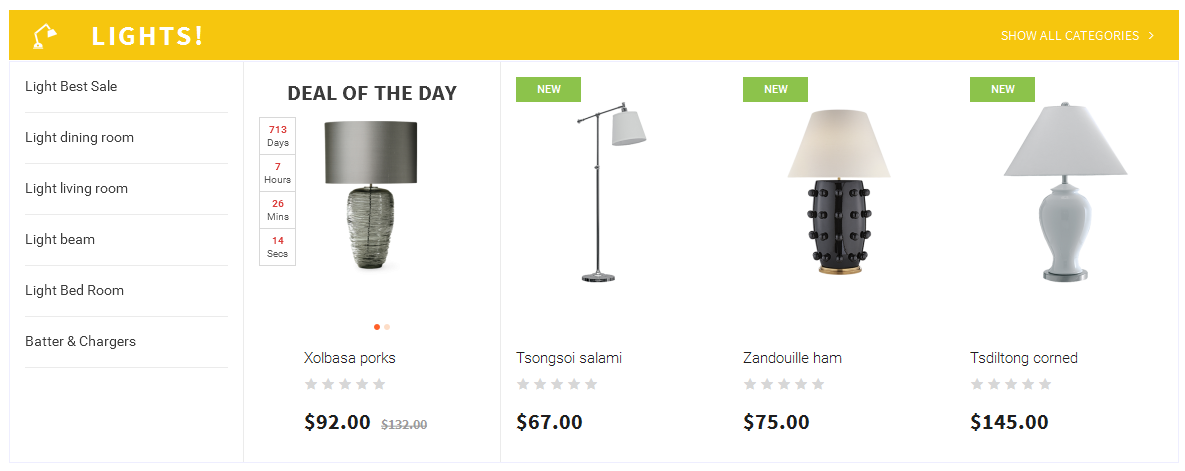
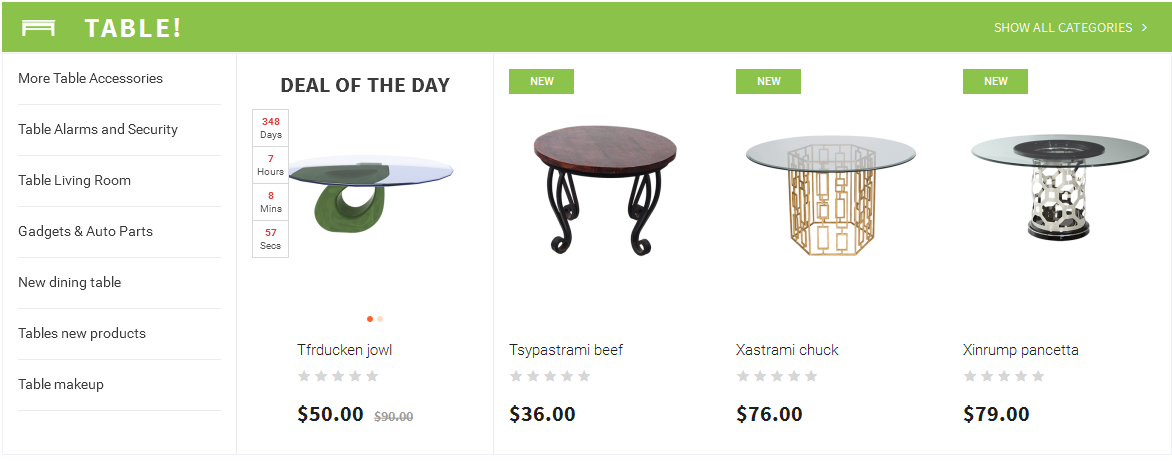
- SO-Listing-Tabs
- SO-HTML-Content – Block HTML Explore
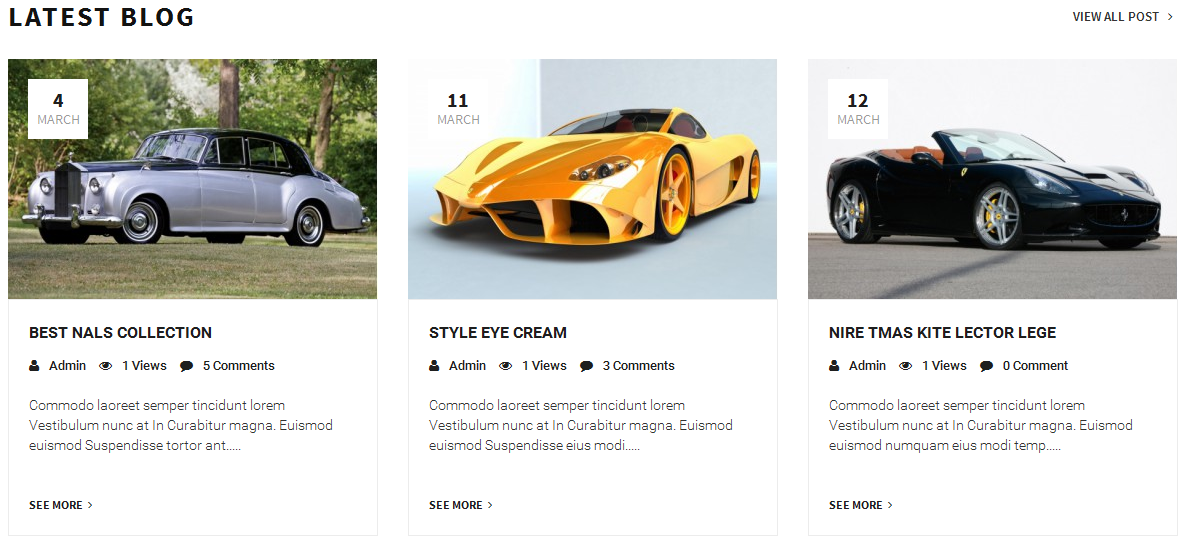
- SO-Latest-Blog
- SO-HTML-Content – Block HTML Brand
- Theme Control Panel – Custom Block1
- Theme Control Panel – Custom Block3
- Theme Control Panel – Custom Block2
- Newsletter
- Frontend Appearance

- Backend of SO-SearchPro: Click Here
- Frontend Appearance

- Backend of SO-Mega-Menu: Click Here
- Frontend Appearance
-
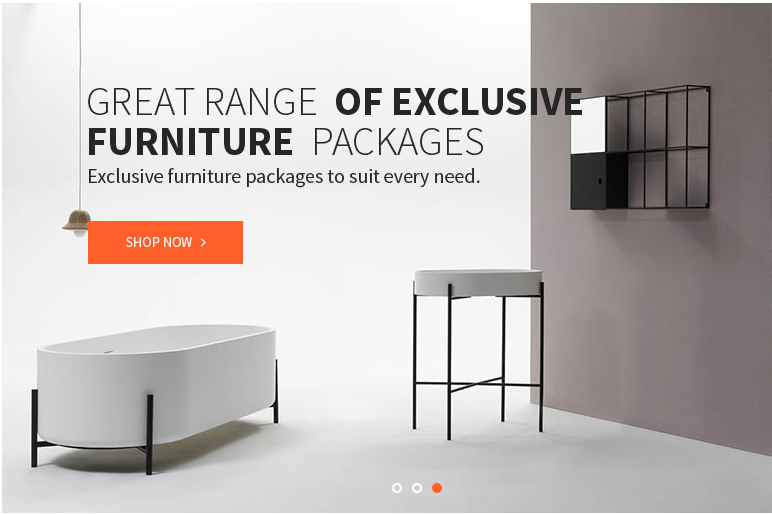
Backend of SO-Home-Slider:
- Frontend Appearance

- Backend of SO-HTML-Content – Block Free Ship: Click Here
Copy and paste the Code into editor:
|
1 |
<div class="box-freeship"> <span>Last day!</span> <a title="Freeship" href="#" class="ship">Freeshipping</a> <span>on all orders over</span> <a title="Price" href="#" class="ship">$12.00</a> <span>with Promo code</span></div> |
- Frontend Appearance

Backend of SO-HTML-Content – Block IMG Top: Click Here
Copy and paste the Code into editor:
|
1 |
<div class="box-freeship"> <span>Last day!</span> <a title="Freeship" href="#" class="ship">Freeshipping</a> <span>on all orders over</span> <a title="Price" href="#" class="ship">$12.00</a> <span>with Promo code</span></div> |
- Frontend Appearance
Backend of SO-Extra-Slider: Click Here
- Frontend Appearance
Backend of SO-HTML-Content – Block IMG Center: Click Here
Copy and paste the Code into editor:
|
1 2 3 4 5 6 7 8 9 |
<div class="block-padding"> <div class="block-image-full"> <div class="item"> <a href="#" title="img3"><img src="image/catalog/cms/home1/03.jpg" alt="Image Client"></a> </div> </div> </div> |
- Frontend Appearance
-
Backend of SO-Listing-Tabs : Click Here
- Frontend Appearance
Backend of SO-HTML-Content – Block HTML Explore: Click Here
Copy and paste the Code into editor:
|
1 2 3 4 5 6 7 8 9 10 11 12 13 14 15 16 17 18 19 20 21 22 23 24 25 26 27 28 29 30 31 32 33 34 35 36 37 38 39 40 41 42 43 44 45 46 47 48 49 50 51 52 53 54 55 56 57 58 59 60 61 62 63 64 65 66 67 68 69 70 71 72 73 74 75 76 77 78 79 80 81 82 83 84 85 86 87 88 89 90 91 92 93 94 95 96 97 98 99 100 101 102 103 104 105 106 107 108 109 110 111 112 113 114 115 116 117 118 119 120 121 122 123 |
<div class="block-padding block-explore"> <div class="box-explore"> <div class="title-home"> <h2>explore more</h2> </div> <div class="sub-text"> <span>explore THE LATEST BY hurama</span> </div> <div class="content-explore"> <div class="rows"> <div class="col-lg-3 col-md-3 col-sm-6 img-ex no-padding"> <div class="item img-ef3"> <a href="#" title="img"><img src="image/catalog/cms/explore/01.jpg" alt="Image Client"><div class="style"></div> </a> </div> </div> <div class="col-lg-3 col-md-3 col-sm-6 info-ex no-padding"> <div class="info-blog"> <span>the nature</span> <h2 class="info-title"><a href="#">Ultra-fine Clinique Skinny Stick</a></h2> <div class="info-content"> <span>Sed ut perspiciatis unde omnis iste natus error sit voluptatem</span> </div> <div class="continue-button"> <a class="btn-continue btn-border font-sn" title="continue" href="#">CONTINUE</a> </div> </div> </div> <div class="col-lg-3 col-md-3 col-sm-6 img-ex no-padding margin-more"> <div class="item img-ef3"> <a href="#" title="img"><img src="image/catalog/cms/explore/02.jpg" alt="Image Client"><div class="style"></div> </a> </div> </div> <div class="col-lg-3 col-md-3 col-sm-6 info-ex no-padding margin-more"> <div class="info-blog"> <span>the nature</span> <h2 class="info-title"><a href="#">Ultra-fine Clinique Skinny Stick</a></h2> <div class="info-content"> <span>Sed ut perspiciatis unde omnis iste natus error sit voluptatem</span> </div> <div class="continue-button"> <a class="btn-continue btn-border font-sn" title="continue" href="#">CONTINUE</a> </div> </div> </div> <div class="col-lg-3 col-md-3 col-sm-6 info-ex no-padding"> <div class="info-blog"> <span>the nature</span> <h2 class="info-title"><a href="#">Ultra-fine Clinique Skinny Stick</a></h2> <div class="info-content"> <span>Sed ut perspiciatis unde omnis iste natus error sit voluptatem</span> </div> <div class="continue-button"> <a class="btn-continue btn-border font-sn" title="continue" href="#">CONTINUE</a> </div> </div> </div> <div class="col-lg-3 col-md-3 col-sm-6 img-ex no-padding"> <div class="item img-ef3"> <a href="#" title="img"><img src="image/catalog/cms/explore/03.jpg" alt="Image Client"><div class="style"></div> </a> </div> </div> <div class="col-lg-3 col-md-3 col-sm-6 info-ex no-padding box-rb margin-more"> <div class="info-blog"> <h2 class="info-title"><a href="#">Free Chubby Stick eye + lip duo</a></h2> <div class="info-content"> <span>With any $35 purchase.<br>Code <strong>BOLD</strong> or Code <strong>NATURAL</strong></span> </div> <div class="continue-button"> <a class="btn-continue btn-border font-sn" title="continue" href="#">CONTINUE</a> </div> </div> </div> <div class="col-lg-3 col-md-3 col-sm-6 img-ex no-padding margin-more"> <div class="item img-ef3"> <a href="#" title="img"><img src="image/catalog/cms/explore/04.jpg" alt="Image Client"><div class="style"></div> </a> </div> </div> </div> </div> </div> </div> |
- Frontend Appearance
Backend of SO-Latest-Blog: Click Here
- Frontend Appearance
Backend of SO-HTML-Content – Block HTML Brand: Click Here
Copy and paste the Code into editor:
|
1 2 3 4 5 6 7 8 9 10 11 12 13 14 15 16 17 18 19 20 21 22 23 24 25 26 27 28 29 30 31 32 33 34 35 36 37 38 39 40 41 42 43 44 45 46 47 48 49 50 51 52 53 54 55 56 57 58 59 60 61 62 63 64 65 66 67 68 69 70 71 72 73 74 75 76 77 78 79 80 81 82 83 84 85 86 87 88 89 90 91 92 93 94 95 96 97 98 99 100 101 102 103 104 105 106 107 108 109 110 111 112 113 114 |
<div class=" top-brand block-slider block"> <div class="title-home"> <h2>our Brand</h2> </div> <div class="sub-text"> <span>The best brands of our product</span> </div> <div class="navslider"> <a class="prev" title="prev" href="#"></a> <a class="next" title="next" href="#"></a> </div> <div class="top-brand-slider"> <div class="item"> <div><a href="#" title="img"><img src="image/catalog/cms/brand/brand-1.jpg" alt="Image Client"></a></div> </div> <div class="item"> <div><a href="#" title="img"><img src="image/catalog/cms/brand/brand-2.jpg" alt="Image Client"></a></div> </div> <div class="item"> <div><a href="#" title="img"><img src="image/catalog/cms/brand/brand-3.jpg" alt="Image Client"></a></div> </div> <div class="item"> <div><a href="#" title="img"><img src="image/catalog/cms/brand/brand-4.jpg" alt="Image Client"></a></div> </div> <div class="item"> <div><a href="#" title="img"><img src="image/catalog/cms/brand/brand-5.jpg" alt="Image Client"></a></div> </div> <div class="item"> <div><a href="#" title="img"><img src="image/catalog/cms/brand/brand-6.jpg" alt="Image Client"></a></div> </div> <div class="item"> <div><a href="#" title="img"><img src="image/catalog/cms/brand/brand-7.jpg" alt="Image Client"></a></div> </div> <div class="item"> <div><a href="#" title="img"><img src="image/catalog/cms/brand/brand-8.jpg" alt="Image Client"></a></div> </div> </div> </div> <script> jQuery(document).ready(function($) { var owl2_topbrand = $(".top-brand-slider"); owl2_topbrand.owlCarousel2({ responsive:{ 0:{ items:2 }, 480:{ items:3 }, 768:{ items:3 }, 992:{ items:5 }, 1200:{ items:5 } }, autoplay:false, loop:false, nav : true, // Show next and prev buttons dots: false, autoplaySpeed : 500, navSpeed : 500, dotsSpeed : 500, autoplayHoverPause: true, margin:30, onInitialized: callback, navText: ["", ""], }); function callback(event) { if(this._items.length > this.options.items){ $('.block-slider .navslider').show(); }else{ $('.block-slider .navslider').hide(); } } $('.block-slider .navslider .prev').on('click', function(e){ e.preventDefault(); $('.top-brand-slider').trigger('prev.owl.carousel'); }); $('.block-slider .navslider .next').on('click', function(e){ e.preventDefault(); $('.top-brand-slider ').trigger('next.owl.carousel'); }); }); </script> |
- Frontend Appearance
To configure Theme Control Panel – Custom Block1, please go to Extension > Modules > SO Theme Control Panel > General > Footer > Custom Block1
Backend of Theme Control Panel – Custom Block1: Click Here
Copy and paste the Code into editor:
|
1 2 3 4 5 6 |
<div class="footer-about"> <div class="footer-logo"><img src="image/catalog/cms/footer/logo-footer.png" alt=""></div> <p>Sed ut perspiciatis unde omnis iste natus error sit voluptatem accusantium doloremque ... <a href="#">Read More</a></p> </div> |
- Frontend Appearance
To configure Theme Control Panel – Custom Block3, please go to Extension > Modules > SO Theme Control Panel > General > Footer > Custom Block3
Backend of Theme Control Panel – Custom Block3: Click Here
Copy and paste the Code into editor:
|
1 2 3 4 5 6 7 8 9 10 11 12 |
<div class="footer-contact"> <span class="footer-title">Our Contact</span> <div class="footer-contact-content"> <p class="address"><i class="fa fa-home"></i><span>Ranelagh Place, Liverpool, L3 5UL, England</span></p> <p class="phone"><i class="fa fa-phone"></i><span>8(459)999</span></p> <p class="email"><i class="fa fa-envelope-o"></i><a href="mailto:name@email.com" title="Mail to: hurama@co.uk"><span>Hurama@co.uk</span></a></p> </div> </div> |
- Frontend Appearance

To configure Theme Control Panel – Custom Block2, please go to Extension > Modules > SO Theme Control Panel > General > Footer > Custom Block2
Backend of Theme Control Panel – Custom Block2: Click Here
Copy and paste the Code into editor:
|
1 2 3 4 5 6 7 8 9 10 11 12 13 14 15 16 17 18 19 |
<div class="socials-wrap"> <div class="footer-title"> Follow Us </div> <ul> <li class="li-social facebook-social"> <a target="_blank" href="https://www.facebook.com/MagenTech" title="Facebook"> <span class="fa fa-facebook icon-social"></span> <span class="name-social">Facebook</span> </a> </li> <li class="li-social twitter-social"> <a target="_blank" href="https://twitter.com/smartaddons" title="Twitter"> <span class="fa fa-twitter icon-social"></span> <span class="name-social">Twitter</span> </a> </li> <li class="li-social google-social"> <a target="_blank" href="https://plus.google.com/u/0/+Smartaddons/posts" title="Google+"> <span class="fa fa-google-plus icon-social"></span> <span class="name-social">Google+</span> </a> </li> <li class="li-social linkedin-social"> <a target="_blank" href="https://www.linkedin.com/" title="Linkedin"> <span class="fa fa-linkedin icon-social"></span> <span class="name-social">Linkedin</span> </a> </li> <li class="li-social flickr-social"> <a target="_blank" href="https://www.flickr.com/" title="flickr"> <span class="fa fa-flickr icon-social"></span> <span class="name-social">flickr</span> </a> </li> <li class="li-social pinterest-social"> <a target="_blank" href="https://www.pinterest.com/" title="Pinterest"> <span class="fa fa-pinterest icon-social"></span> <span class="name-social">Pinterest</span> </a> </li> </ul> </div> |
- Frontend Appearance
Backend of Newsletter: Click Here
3.5 Extension Configuration – Layout2
The SO Hurama front-page has been integrated with extensions in the Theme as following list:
- SO-SearchPro
- SO-Mega-Menu
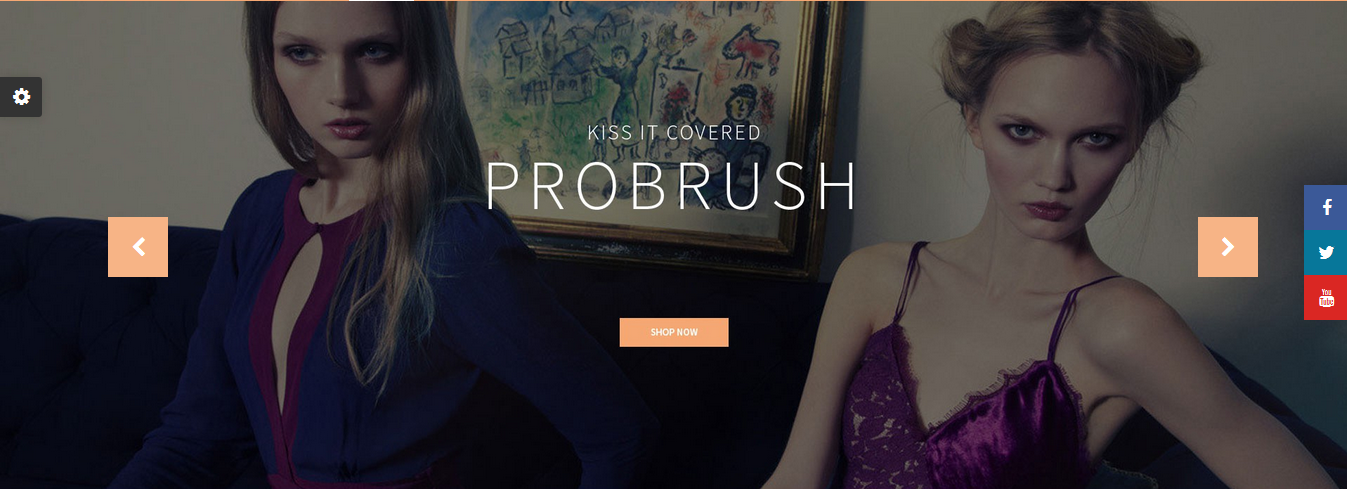
- SO-Home-Slider
- SO-HTML-Content – Block IMG Top Right
- SO-HTML-Content – Block HTML Services
- SO-Deals – Deal Home2
- SO-HTML-Content – Block IMG Content
- SO-Category-Slider – Categories Slide
- SO-Category-Slider – Categories Slide V2
- SO-Category-Slider – Categories Slide V3
- SO-Latest-Blog – Latest Blog Home2
- SO-HTML-Content – Block HTML Brand
- Theme Control Panel – Custom Block1
- Theme Control Panel – Custom Block3
- Theme Control Panel – Custom Block2
- Newsletter
- Frontend Appearance
- Frontend Appearance
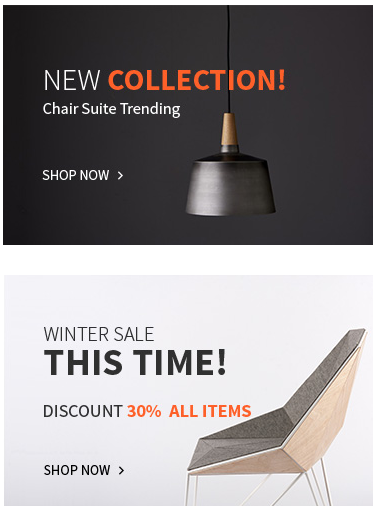
- Backend of SO-HTML-Content – Block IMG Top Right: Click Here
- Frontend Appearance
- Frontend Appearance
- Frontend Appearance
- Frontend Appearance
- Frontend Appearance
- Frontend Appearance
- Frontend Appearance
- Other extensions in Layout2 are configured the same as above extension in Layout1.
-
Backend of SO-Home-Slider:
Copy and paste the Code into editor:
|
1 2 3 4 5 6 7 8 9 10 11 12 13 |
<div class="col-lg-4 col-md-4 col-img-home"> <div class="box-image-top-right"> <div class="img-top"> <a class="item img-ef2" href="#" title="img"><img src="image/catalog/cms/home2/01.jpg" alt="Image Client"></a> </div> <div class="img-bottom"> <a class="item img-ef2" href="#" title="img"><img src="image/catalog/cms/home2/02.jpg" alt="Image Client"></a> </div> </div> </div> |

Backend of SO-HTML-Content – Block HTML Services: Click Here
Copy and paste the Code into editor:
|
1 2 3 4 5 6 7 8 9 10 11 12 13 14 15 16 17 18 19 20 21 22 23 24 25 26 27 28 29 30 31 32 33 34 35 36 37 38 39 40 41 42 43 44 |
<div class="box-sevicer"> <div class="row"> <div class="col-lg-4 col-md-4 col-sm-4 info-sevicer"> <div class="icon-sevicer"> <a href="#" title="img"><img src="image/catalog/cms/home2/01.png" alt="Image Client"></a> </div> <div class="content-sevicer font-sn"> <h2><a href="#" title="Money">100% MONEY BACK</a></h2> <span>GUARANTEE</span> </div> </div> <div class="col-lg-4 col-md-4 col-sm-4 info-sevicer"> <div class="icon-sevicer"> <a href="#" title="img"><img src="image/catalog/cms/home2/02.png" alt="Image Client"></a> </div> <div class="content-sevicer font-sn"> <h2><a href="#" title="Free Ship">free shipping</a></h2> <span>when order over $150</span> </div> </div> <div class="col-lg-4 col-md-4 col-sm-4 info-sevicer"> <div class="icon-sevicer"> <a href="#" title="img"><img src="image/catalog/cms/home2/03.png" alt="Image Client"></a> </div> <div class="content-sevicer font-sn"> <h2><a href="#" title="Hours">24-Hours</a></h2> <span>life time support</span> </div> </div> </div> </div> |
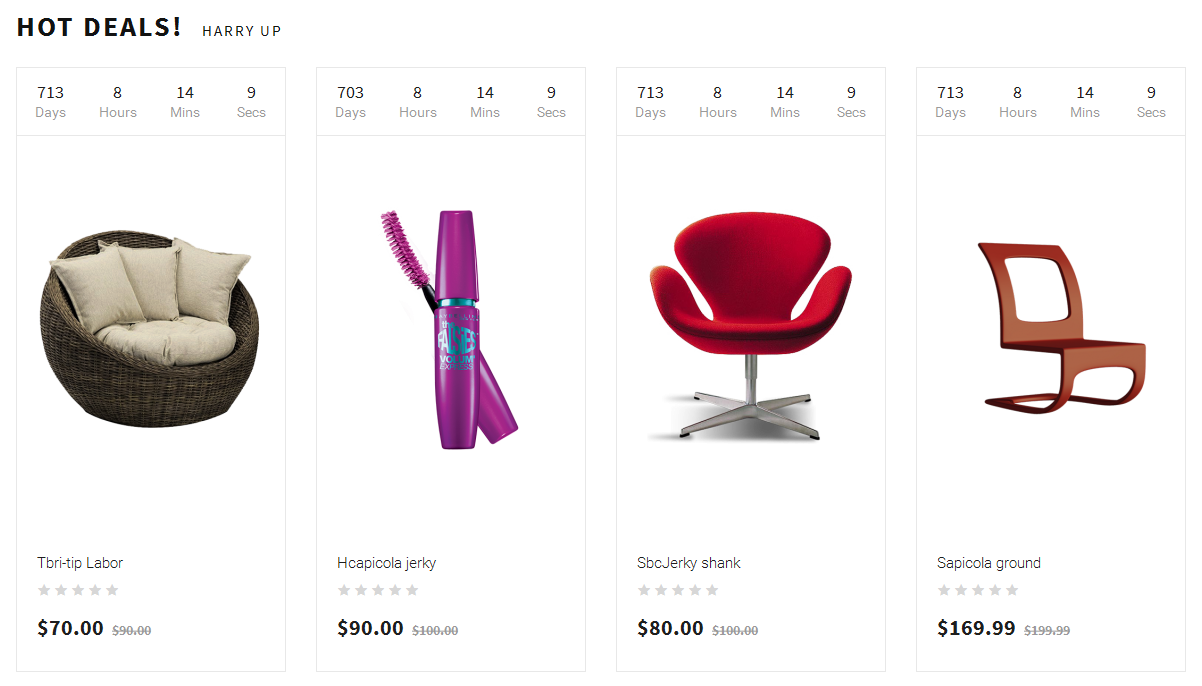
Backend of SO-Deals – Deal Home2: Click Here

-
Backend of SO-HTML-Content – Block IMG Content: Click Here
Copy and paste the Code into editor:
|
1 2 3 4 5 6 7 8 9 10 11 12 13 14 15 16 17 18 19 |
<div class="block-img-content"> <div class="row"> <div class="col-lg-6 col-md-6 col-sm-6"> <div class="banner-sns img-left"> <a href="#" title="img"><img src="image/catalog/cms/home2/04.jpg" alt="Image Client"></a> </div> </div> <div class="col-lg-6 col-md-6 col-sm-6"> <div class="banner-sns img-right"> <a href="#" title="img"><img src="image/catalog/cms/home2/05.jpg" alt="Image Client"></a> </div> </div> </div> </div> |
Backend of SO-Category-Slider – Categories Slide: Click Here
Backend of SO-Category-Slider – Categories Slide V2: Click Here
Backend of SO-Category-Slider – Categories Slide V3: Click Here
Backend of SO-Latest-Blog – Latest Blog Home2: Click Here
Note: You can read other extensions here:
4SUPPORT – Back to top
Thank you so much for purchasing this template. If you have any questions that are beyond the scope of this help file, please send us via: Submit a Ticket
Thanks so much!
